
Sleepy Owl Amigurumi Crochet Pattern
This sleepy owl amigurumi has a rounded body, soft wings,…

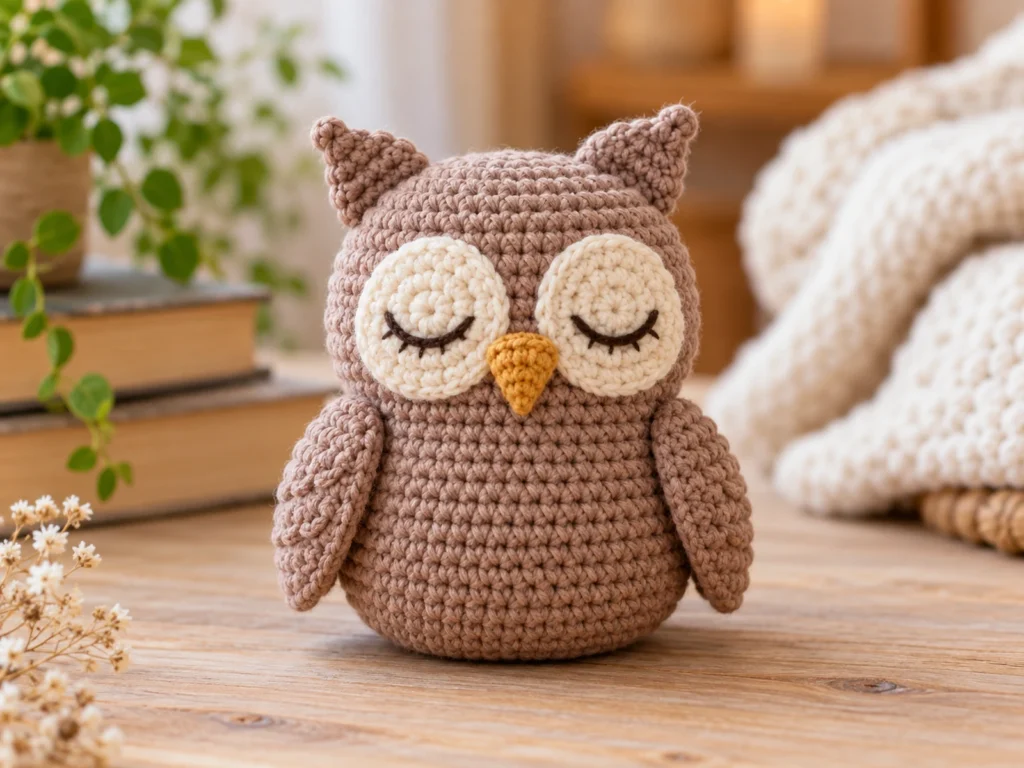
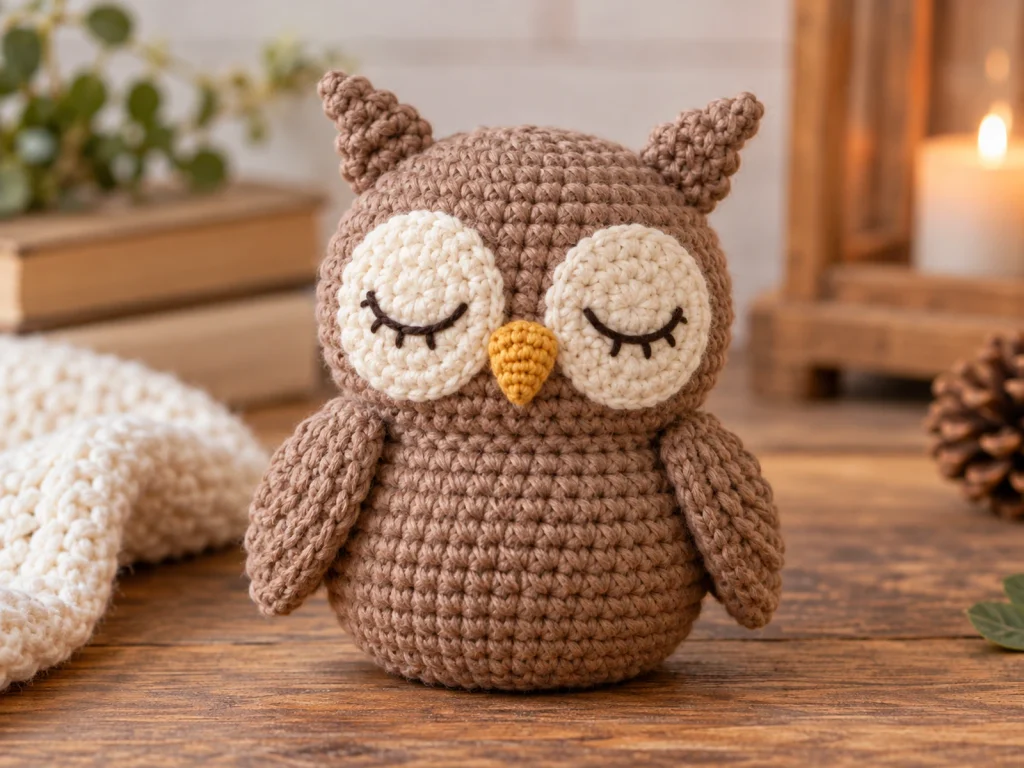
This sleepy owl amigurumi has a rounded body, soft wings, pointed ear tufts, and a calm embroidered expression that gives it a cozy nighttime feel. The body and head are worked as one continuous piece, while the eye patches, wings, ear tufts, and beak are crocheted separately and sewn on afterward.
The pattern uses standard US crochet terminology and a small set of commonly used amigurumi stitches.
Testing note: The pattern has been mathematically reviewed and constructionally checked, but it has not yet been physically crocheted and tested. The finished size is therefore approximate and may vary with yarn, hook size, tension, stuffing, and individual technique.
Project Overview
This crochet owl is designed around a compact, rounded silhouette with a slightly wider head and a sleepy facial expression.
Project Details
| Detail | Information |
|---|---|
| Project | Sleepy Owl Amigurumi |
| Finished size | Approximately 5–6 inches tall |
| Yarn | Worsted-weight / medium #4 |
| Hook | 3.5 mm crochet hook |
| Main color | Owl body, wings, and ear tufts |
| Eye patches | Cream or ivory |
| Beak | Mustard, ochre, or muted gold |
| Eyelids | Black or dark brown embroidery |
| Stuffing | Polyester fiberfill |
| Construction | One-piece body and head with separate details |
The sleepy expression comes from the cream eye patches, embroidered closed eyelids, small centered beak, and pointed ear tufts.
Materials & Tools
Yarn
Choose a worsted-weight / medium #4 yarn in:
- A main color for the body, head, wings, and ear tufts
- Cream or ivory for the eye patches
- Mustard, ochre, or muted gold for the beak
- Black or dark brown yarn or embroidery floss for the eyelids
An exact yardage amount is not specified because usage will vary with yarn, tension, and individual technique.
Crochet Hook
- 3.5 mm crochet hook
Other Supplies
- Polyester fiberfill
- Tapestry needle
- Stitch marker
- Scissors
No safety eyes are required for this design because the sleepy eyes are embroidered.
Abbreviations
The pattern uses standard US crochet terminology.
- MR — magic ring
- ch — chain
- sc — single crochet
- inc — increase; work 2 sc in the same stitch
- dec — decrease; work 2 stitches together
- FO — fasten off
Before You Start
Work in Continuous Rounds
The stuffed body, eye patches, and beak are worked in continuous spiral rounds rather than joined rounds.
Use a stitch marker to identify the beginning of each round and move it upward as you work.
Count Your Stitches
The number in parentheses at the end of each round or row is the total stitch count for that round or row.
For example:
(2 sc, inc) × 6
means to repeat the sequence six times around the round.
Stuff as You Go
Begin adding stuffing after Round 6 of the body and head. Add fiberfill gradually as the shape develops.
Aim for an evenly filled form without stretching the stitches so tightly that stuffing becomes visible.
Check Matching Pieces Before Sewing
For the eye patches, wings, and ear tufts, compare both pieces visually before sewing them permanently. This helps keep the finished owl balanced.
Sleepy Owl Crochet Pattern
Body + Head — Make 1
Yarn: Main color
The body and head are crocheted as one continuous piece, starting at the bottom and finishing at the top.
Body
Round 1: 6 sc in MR (6)
Round 2: 6 inc (12)
Round 3: (sc, inc) × 6 (18)
Round 4: (2 sc, inc) × 6 (24)
Round 5: (3 sc, inc) × 6 (30)
Round 6: 30 sc (30)
Round 7: (4 sc, inc) × 6 (36)
Round 8: 36 sc (36)
Round 9: 36 sc (36)
Round 10: 36 sc (36)
Round 11: 36 sc (36)
Shape the Transition
Round 12: (4 sc, dec) × 6 (30)
Round 13: (3 sc, dec) × 6 (24)
Round 14: (2 sc, dec) × 6 (18)
The body now narrows before the head begins to widen.
Head
Round 15: (2 sc, inc) × 6 (24)
Round 16: (3 sc, inc) × 6 (30)
Round 17: (4 sc, inc) × 6 (36)
Round 18: (5 sc, inc) × 6 (42)
Round 19: 42 sc (42)
Round 20: 42 sc (42)
Round 21: 42 sc (42)
Round 22: 42 sc (42)
Round 23: 42 sc (42)
Round 24: 42 sc (42)
Close the Head
Round 25: (5 sc, dec) × 6 (36)
Round 26: (4 sc, dec) × 6 (30)
Round 27: (3 sc, dec) × 6 (24)
Round 28: (2 sc, dec) × 6 (18)
Round 29: (sc, dec) × 6 (12)
Round 30: 6 dec (6)
Start stuffing after Round 6 and continue adding fiberfill gradually through the body and head.
As the head narrows, distribute the stuffing evenly so the shape stays smooth and rounded.
After Round 30, fasten off with a long yarn tail. Use a tapestry needle to close the remaining opening by passing through the front loops and gently pulling the opening closed. Weave in the end securely.
Eye Patch — Make 2
Yarn: Cream or ivory
Round 1
6 sc in MR (6)
Round 2
6 inc (12)
Round 3
(sc, inc) × 6 (18)
Fasten off and leave a long sewing tail.
Repeat to make the second eye patch.
Keep both patches flat and compare their placement on the head before sewing.
Wing — Make 2
Yarn: Main color
Work in rows, turning after each row.
Foundation
Chain 7.
Row 1
sc across (6)
Row 2
inc, 4 sc, inc (8)
Row 3
8 sc (8)
Row 4
inc, 6 sc, inc (10)
Row 5
10 sc (10)
Row 6
dec, 6 sc, dec (8)
Row 7
dec, 4 sc, dec (6)
Row 8
3 dec (3)
Row 9
3 sc (3)
Fasten off and leave a long sewing tail.
Make a second identical wing.
The wings are designed to remain relatively flat, so they do not need heavy stuffing.
Ear Tuft — Make 2
Yarn: Main color
Work in rows.
Foundation
Chain 2.
Row 1
sc in the 2nd chain from hook (1)
Row 2
ch 1, inc (2)
Row 3
ch 1, sc, inc (3)
Row 4
ch 1, 2 sc, inc (4)
Row 5
ch 1, 3 sc, inc (5)
Row 6
ch 1, 5 sc (5)
Fasten off and leave a sewing tail.
Repeat to make the second ear tuft.
Beak — Make 1
Yarn: Mustard, ochre, or muted gold
Round 1
4 sc in MR (4)
Round 2
(sc, inc) × 2 (6)
Round 3
6 sc (6)
Round 4
(sc, dec) × 2 (4)
Round 5
2 dec (2)
Fasten off with a long sewing tail.
Add only a small amount of stuffing before closing the final opening. Use the yarn tail to cinch the opening and secure the shape.
Create the Sleepy Face
The facial details give this owl its sleepy personality, so take a little extra time with placement.
Attach the Eye Patches
Place the two cream eye patches on the front of the head.
Before sewing, compare:
- their height;
- their distance from the center;
- their distance from the top of the head;
- their overall angle.
Once they look balanced, sew both patches securely to the head.
Use visual symmetry rather than an exact measurement, since yarn tension and stuffing can slightly change the finished shape.
Embroider the Closed Eyelids
Using black or dark brown yarn or embroidery floss, stitch a curved closed-eye line across each cream patch.
Keep both eyelids similar in shape and angle.
For a relaxed expression, let the line curve gently downward toward the center.
Attach the Beak
Place the beak visually centered between the two eye patches and slightly below them.
Check the face from the front before sewing it securely in place.
Assemble the Owl
Once all of the crochet pieces are complete, assemble them in this order.
Step 1: Attach the Eye Patches
Sew the eye patches to the front of the head and check their symmetry as you work.
Step 2: Add the Sleepy Eyes
Embroider the closed eyelids after the patches are secured.
Step 3: Attach the Beak
Center the beak between the eye patches.
Step 4: Add the Ear Tufts
Place one ear tuft on each side of the top of the head.
Compare both sides before tightening the stitches completely.
Step 5: Attach the Wings
Place one wing on each side of the body.
The wings should sit naturally along the sides of the owl and remain relatively flat.
Compare the left and right sides before sewing them permanently.
Step 6: Weave in the Ends
Secure all remaining yarn tails and trim the excess.
Finishing
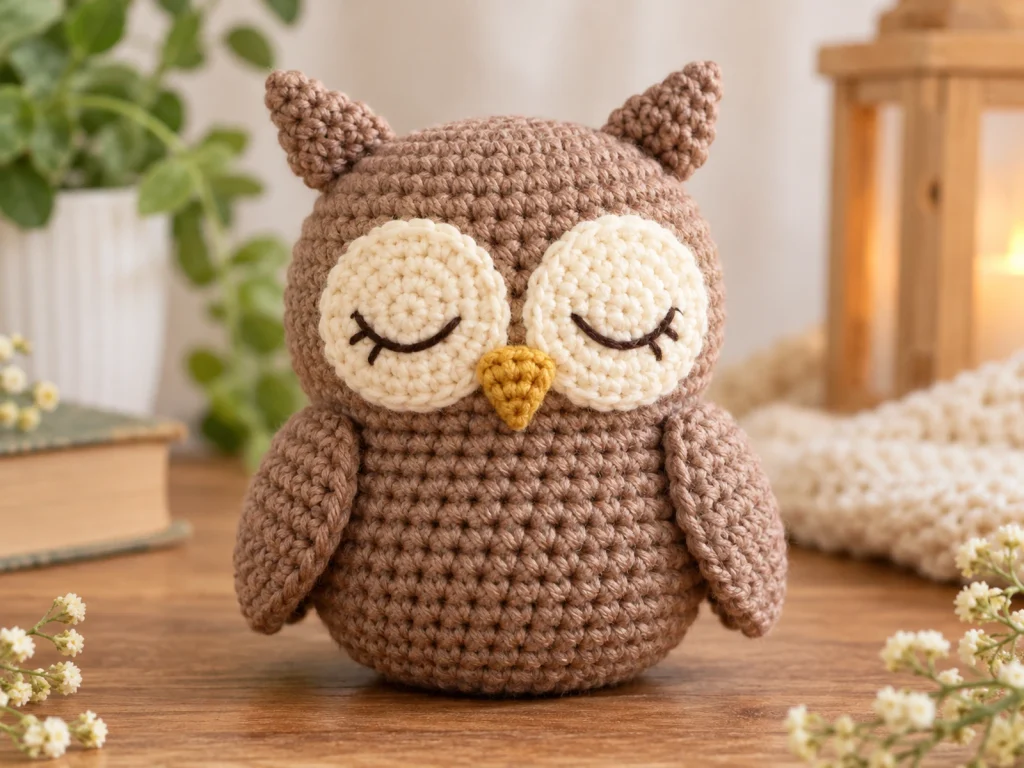
Once the main assembly is complete, gently shape the owl with your hands.
Check that:
- the head is evenly stuffed;
- the eye patches remain flat;
- the beak sits in the center;
- the ear tufts are balanced;
- the wings sit at similar heights;
- no stuffing is visible through the stitches.
The finished silhouette should feel rounded and compact, with the head slightly wider than the body.

Helpful Tips
Use a Stitch Marker
The body and head are worked in continuous rounds, so a stitch marker helps you keep track of the beginning of each round.
Stuff in Small Amounts
Adding fiberfill gradually gives you more control over the final shape.
Push the stuffing gently into the sides and upper portions of the head rather than packing it tightly into the center.
Watch Your Tension
Very loose tension can allow stuffing to show through the fabric. Very tight tension can make the fabric stiff and harder to shape.
Aim for even tension that creates a firm but flexible fabric.
Compare Matching Pieces
Before attaching the wings, eye patches, or ear tufts, place both pieces side by side.
Small differences are easier to correct before sewing.
Let the Face Guide the Final Shape
The eye patches and beak form the visual center of the design. Once they are positioned, you can make small adjustments to the stuffing and shaping to improve the overall expression.
Troubleshooting
My Stitch Count Is Off. What Should I Do?
Stop at the end of the round and recount before continuing.
Because the body and head use repeated increase and decrease groups, one missed stitch can affect the following rounds.
If the mistake happened several rounds earlier, find and correct the first incorrect round rather than compensating later.
My Owl Looks Too Narrow
Check your tension and stuffing first.
Tighter tension can make the fabric smaller, while insufficient stuffing can make the body appear flatter.
Remember that the approximate finished size varies from maker to maker.
The Stuffing Is Showing Through
This can happen with very loose tension or overstuffing.
Try using smaller amounts of fiberfill and distributing it more evenly instead of packing the shape tightly.
My Eye Patches Look Uneven
Remove them before sewing if necessary and compare their position from the front.
Check their height, angle, and distance from the center of the head.
My Wings Are Not Symmetrical
Place both wings against the body before sewing either one permanently.
Use the bottom of the body and the body/head transition as visual reference points rather than relying on a ruler.
Customization Ideas
Try Different Main Colors
Create a different look with a new main shade, such as:
- warm brown;
- soft gray;
- taupe;
- muted cream;
- dusty blue;
- gentle lavender.
Change the Eye-Patch Color
Cream creates a classic look, while a warmer or cooler neutral can change the overall mood.
Experiment With the Eyelids
The embroidered eyelids are a simple place to personalize the expression.
A flatter curve can create a calmer look, while a deeper curve can make the eyes appear more closed.
Add Wing Feather Lines
Use a darker shade of the main color or a contrasting yarn to embroider a few short feather lines across each wing.
This detail is optional and does not change the wing construction.
Experiment With Yarn Size
Changing yarn weight and hook size can change the finished dimensions, but it will also affect stitch definition, proportions, and stuffing requirements.
For the most predictable result, start with the specified yarn weight and hook.
Frequently Asked Questions
How big is the finished sleepy owl?
The intended finished size is approximately 5–6 inches tall.
This is an estimate rather than a guaranteed measurement because finished size depends on yarn, hook size, tension, stuffing, and individual technique.
What yarn is used for this owl amigurumi?
The design is written for worsted-weight / medium #4 yarn.
You need a main color, cream or ivory for the eye patches, an accent color for the beak, and a dark shade for the embroidered eyelids.
What hook size should I use?
The design uses a 3.5 mm crochet hook.
Does the owl use safety eyes?
No. This design uses embroidered closed eyelids on crocheted cream eye patches, so safety eyes are not required.
Is the sleepy owl a no-sew amigurumi?
No. The body and head are crocheted as one piece, but the wings, eye patches, ear tufts, and beak are separate components that are attached afterward.
Do I need to stuff the wings?
The wings are designed to remain relatively flat, so they do not need heavy stuffing.
When should I start stuffing the body?
Begin stuffing the main body after Round 6 and continue adding fiberfill gradually as you crochet upward.
Can I use different colors?
Yes. The design can be personalized with different main colors, eye-patch shades, beak colors, and optional embroidered wing details.
Is the pattern physically tested?
The pattern has been mathematically reviewed and constructionally checked, but it has not yet been physically crocheted and tested. Finished proportions and measurements should therefore be treated as approximate.
Final Thoughts
This sleepy owl amigurumi is built around a rounded silhouette and a soft, relaxed expression.
The one-piece body and head keep the main form streamlined, while the separate eye patches, wings, ear tufts, and beak give you plenty of room to shape the final character.
Take your time with stuffing and facial placement, especially before permanently sewing the pieces in place. Those small adjustments can make a noticeable difference in the finished expression.