
Kiwi Fruit Amigurumi Crochet Pattern – Whole & Cut Kiwi
This kiwi fruit amigurumi crochet pattern gives you two versions…

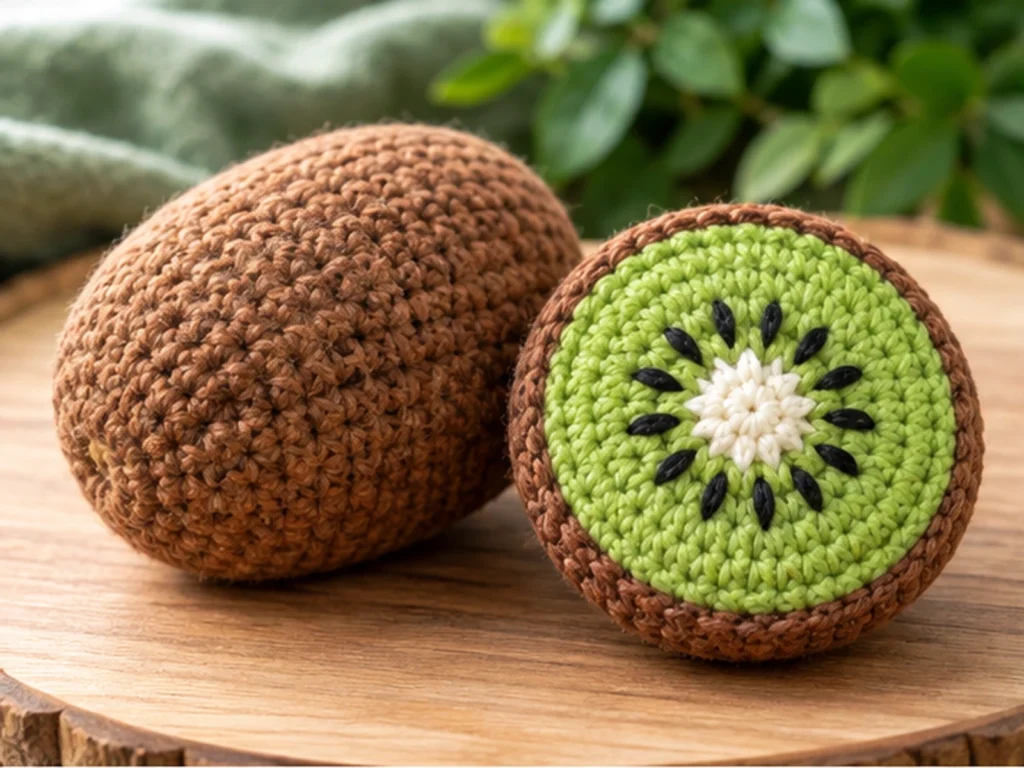
This kiwi fruit amigurumi crochet pattern gives you two versions of the same fruit: a plump whole kiwi and a flat cut kiwi slice with a brown shell, bright green flesh, a cream center, and embroidered black seeds.
The whole kiwi is worked as a single stuffed oval, while the cut kiwi is created from two flat crochet discs. The result is a simple fruit-inspired project with a realistic layered look.
Project Overview
What You’ll Make
This project includes:
- 1 whole stuffed kiwi
- 1 brown shell disc for the cut kiwi
- 1 smaller green flesh disc
- 1 cream center detail
- 16 embroidered black seed details
- A small optional stem-end detail for the whole kiwi
The finished dimensions below are approximate design targets, not physically tested measurements. Your final size will vary with yarn, hook, tension, and stuffing.
Project Details
| Detail | Information |
|---|---|
| Project type | Fruit amigurumi |
| Crochet terminology | US terms |
| Yarn | Category 4 / worsted weight |
| Hook | 3.5 mm |
| Whole kiwi target size | Approximately 3–3.5 inches |
| Cut kiwi target size | Approximately 3–3.25 inches across |
| Construction | Stuffed oval + flat discs |
| Whole kiwi | Stuffed |
| Cut kiwi | Unstuffed |
This pattern is mathematically reviewed and constructionally checked, but it has not been physically crocheted and tested yet.
Materials & Tools
Yarn
You will need:
- Dark brown worsted-weight yarn
- Kiwi-green worsted-weight yarn
- Cream yarn
- Black yarn
- Optional: a small amount of darker brown yarn for extra skin texture
No specific yarn brand or exact yardage has been established for this draft.
Tools
- 3.5 mm crochet hook
- Yarn needle
- Stitch marker
- Scissors
- Polyester fiberfill
Abbreviations
This pattern uses standard US crochet terminology:
- MR — magic ring
- sc — single crochet
- inc — increase, 2 sc in the same stitch
- dec — decrease, single crochet 2 stitches together
- FO — fasten off
Before You Start
Work in Continuous Rounds
The whole kiwi is worked in continuous rounds. Place a stitch marker in the first stitch of each round to help keep track of your position.
Count Your Stitches
Keep an eye on the stitch count at the end of every round. The stitch counts shown in parentheses make it easier to catch mistakes before they carry into the next round.
Stuff as You Go
The whole kiwi is stuffed before the final closing round. Add enough fiberfill to maintain the oval shape without stretching the crochet fabric.
The cut kiwi pieces are flat and are not stuffed.
Construction Order
Make the whole kiwi first if you want to complete the single-piece version.
For the cut kiwi:
- Crochet the brown shell.
- Crochet the green flesh.
- Center the green flesh over the brown shell.
- Sew the pieces together.
- Add the cream center.
- Embroider the black seeds.
Kiwi Fruit Amigurumi Crochet Pattern
Whole Kiwi Body — Make 1
Use dark brown yarn.
The whole kiwi is worked as one continuous stuffed oval.
Round 1
6 sc in MR. (6)
Round 2
6 inc. (12)
Round 3
(sc, inc) × 6. (18)
Round 4
(2 sc, inc) × 6. (24)
Round 5
(3 sc, inc) × 6. (30)
Round 6
30 sc. (30)
Round 7
30 sc. (30)
Round 8
30 sc. (30)
Round 9
30 sc. (30)
Round 10
30 sc. (30)
The middle of the piece should now have a smooth, gently elongated shape.
Round 11
(3 sc, dec) × 6. (24)
Round 12
24 sc. (24)
Round 13
(2 sc, dec) × 6. (18)
Round 14
18 sc. (18)
Round 15
(sc, dec) × 6. (12)
Stuff the Kiwi
Add polyester fiberfill before closing the final round.
Use moderate, even stuffing and check the silhouette as you work. The body should stay full and oval without forcing the stitches apart.
Round 16
6 dec. (6)
FO, leaving a yarn tail for closing.
Using a yarn needle, weave through the front loops of the remaining 6 stitches and gently pull to close the opening. Secure and hide the yarn end inside the body.
Whole Kiwi Finishing
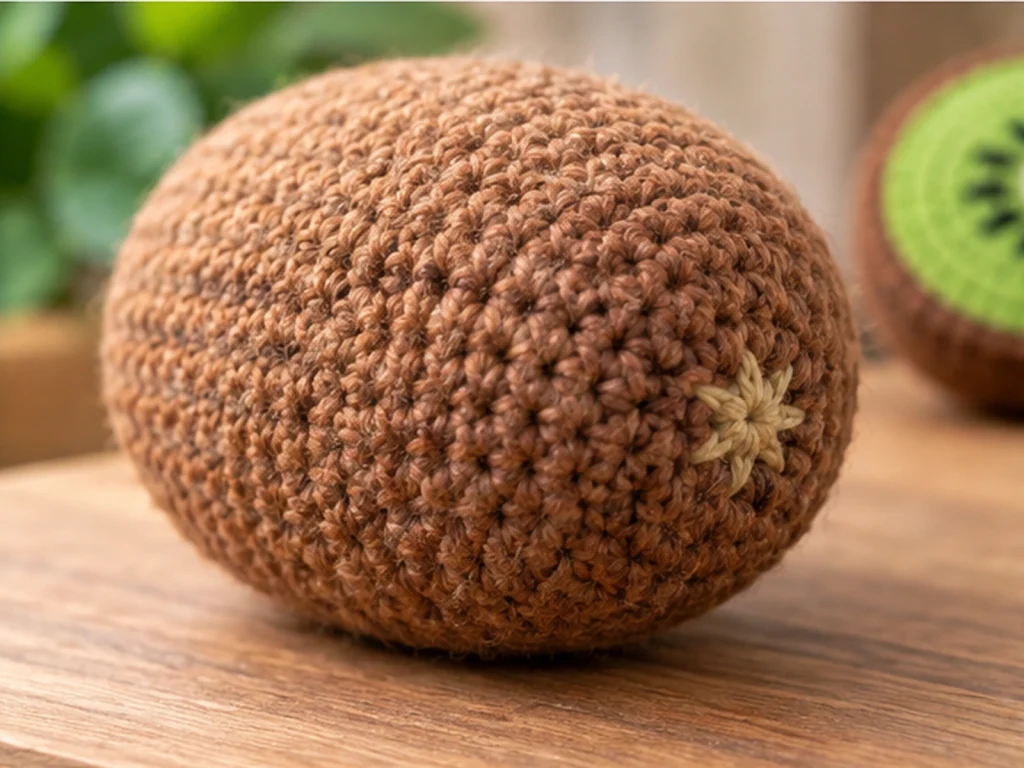
For a subtle stem-end detail, use cream yarn and a yarn needle to create a small star-like mark at the closed end.
You can also create a shallow indentation by bringing matching brown yarn through the center of the closed opening, passing through the body, and returning near the same point. Pull gently to create a small dimple and secure the yarn inside.
For extra skin texture, add a few short irregular surface stitches with darker brown yarn. Keep them sparse so the main silhouette remains smooth.
Cut Kiwi Brown Shell — Make 1
Use dark brown yarn.
The shell forms the outer layer of the sliced kiwi and stays flat.
Round 1
6 sc in MR. (6)
Round 2
6 inc. (12)
Round 3
(sc, inc) × 6. (18)
Round 4
(2 sc, inc) × 6. (24)
Round 5
(3 sc, inc) × 6. (30)
Round 6
(4 sc, inc) × 6. (36)
FO and weave in the yarn end.
Do not stuff this piece.
Kiwi Flesh Disc — Make 1
Use kiwi-green yarn.
This disc is smaller than the brown shell so that a visible brown border remains around the outside.
Round 1
6 sc in MR. (6)
Round 2
6 inc. (12)
Round 3
(sc, inc) × 6. (18)
Round 4
(2 sc, inc) × 6. (24)
Round 5
(3 sc, inc) × 6. (30)
FO and weave in the yarn end.
Do not stuff this piece.
Assemble the Cut Kiwi
Step 1: Prepare the Finished Pieces
Place the green flesh disc on top of the brown shell.
The green piece should sit centrally, leaving the brown shell visible around the entire edge.
Step 2: Check the Placement
Before sewing, rotate and reposition the green disc until the visible brown border looks balanced around the circumference.
Step 3: Sew the Flesh to the Shell
Using matching green yarn and a yarn needle, sew around the outside edge of the green disc to attach it securely to the brown shell.
Keep the sewing tension even. Pulling too tightly can cause the green disc to curl or pucker.
Kiwi Flesh Details
Add the Cream Center
Use cream yarn and a yarn needle to embroider a compact star-shaped center in the middle of the green flesh.
A slightly organic shape works well for the natural fruit look.
Add the Black Seeds
Use black yarn to embroider 16 small seed-shaped stitches around the cream center.
Distribute them around the middle area rather than placing them directly against the outside edge. Small variations in angle and spacing can create a more natural appearance.
Keep the embroidery tension light enough that the green disc stays flat.

Finishing
Whole Kiwi
Check that:
- the stuffing is even;
- the oval shape is maintained;
- the closing point is secure;
- all yarn tails are hidden.
Cut Kiwi
Check that:
- the green flesh is centered;
- the brown border remains visible;
- the cream center is secure;
- the black seeds are distributed around the center;
- all embroidery ends are securely hidden.
Helpful Tips
Keep the Whole Kiwi Firm but Evenly Stuffed
Too little stuffing can make the fruit lose its shape, while too much can stretch the crochet fabric. Add fiberfill gradually and check the silhouette as you go.
Check the Brown Border Before Sewing
For the cut kiwi, take a moment to look around the entire edge before sewing the green disc in place. Adjust the position until the brown shell border looks balanced.
Keep Embroidery Tension Light
The center and seed details should decorate the surface without pulling the crochet fabric out of shape.
Troubleshooting
My Whole Kiwi Looks Too Round
The design is intended to have an elongated oval silhouette. Check the amount and distribution of stuffing before closing the body.
My Stitches Look Loose
A dense amigurumi fabric helps the stuffing stay contained and keeps the surface smooth. Check your tension if the fabric looks noticeably open.
My Cut Kiwi Is Puckering
Check the sewing tension around the green flesh disc. Pulling the joining yarn too tightly can draw the edge inward.
My Green Flesh Does Not Look Centered
Position the green disc before sewing and compare the visible brown border around the whole circumference. Make adjustments first, then attach it permanently.
My Seeds Look Uneven
The seeds do not need to be perfectly symmetrical. Focus on an overall balanced distribution around the cream center.
Customization Ideas
Try Different Brown Shades
A deep brown can create a darker outer skin, while a warmer or lighter brown can give the fruit a softer handmade look.
Adjust the Green
A brighter green creates a vivid fruit interior, while a more muted shade can give the slice a softer natural appearance.
Experiment With Seed Placement
You can vary the angle and spacing of the embroidered seeds while keeping them generally distributed around the center.
Change the Yarn and Hook
Different yarn and hook combinations can produce different finished sizes and fabric densities. Alternate sizes have not been physically tested as part of this pattern.
Frequently Asked Questions
What size is the finished kiwi?
The design target is approximately 3–3.5 inches tall for the whole kiwi and approximately 3–3.25 inches across for the cut kiwi.
These are approximate targets rather than physically tested measurements. Finished size can vary with yarn, hook size, tension, and stuffing.
Is the cut kiwi stuffed?
No. The cut kiwi is made from two flat crochet discs and remains flat rather than becoming a stuffed piece.
How is the cut kiwi assembled?
The smaller green flesh disc is centered over the larger brown shell disc and sewn around its edge.
Can I use different yarn colors?
Yes. The design uses brown, green, cream, and black, but you can experiment with similar shades while keeping the same basic construction.
Can I make a smaller or larger kiwi?
You can experiment with different yarn and hook combinations, but changing them will affect the finished dimensions and fabric. Those alternate versions have not been physically tested.
Does this design use safety eyes?
No. This kiwi project does not have facial features or safety eyes.
Final Thoughts
This kiwi fruit amigurumi crochet pattern is built around the recognizable contrast between the brown exterior and bright green interior of the fruit.
The whole kiwi uses a single stuffed oval, while the cut version layers a smaller green flesh disc over a larger brown shell. The cream center and embroidered black seeds complete the sliced-fruit look.
The listed dimensions are approximate design targets, and the pattern has not yet been physically crocheted and tested. Your final result may vary with yarn, tension, hook size, and stuffing.
