
Crochet Sloth Amigurumi Pattern
This crochet sloth amigurumi features a rounded body and head,…

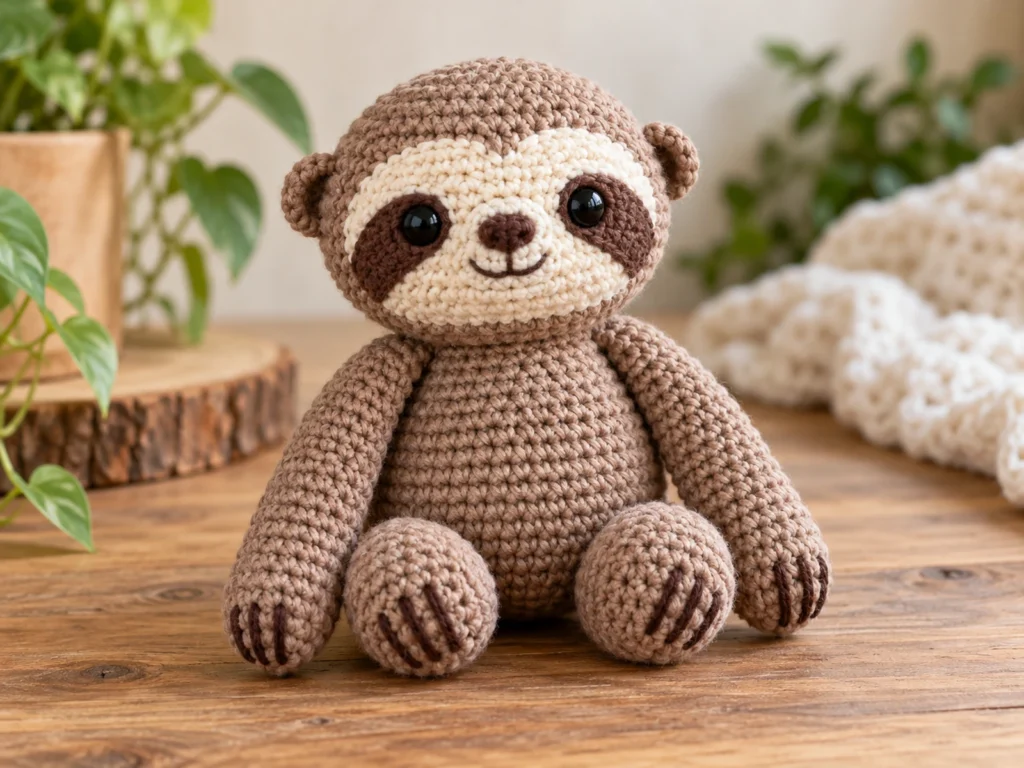
This crochet sloth amigurumi features a rounded body and head, long hanging arms, compact legs, and a soft cream-colored face. The body and head are worked as one continuous piece, while the ears, arms, legs, muzzle, and eye patches are crocheted separately and sewn into place.
The finished sloth is approximately 7–8 inches (18–20 cm) tall when seated. Your final size may vary depending on your yarn, hook, tension, stuffing, and individual crochet technique.
Project Overview
This sloth is designed with a rounded silhouette and a simple expressive face. Its long arms are intentionally slimmer than the legs, giving the finished amigurumi a recognizable sloth-like shape.
What You’ll Make
You’ll crochet:
- One continuous body and head
- Two long arms
- Two compact legs
- Two flat ears
- One cream muzzle
- Two cream eye patches
- Embroidered facial and claw details
Project Details
- Approximate finished size: 7–8 inches (18–20 cm) seated
- Yarn: Medium/worsted weight (#4)
- Hook: 3.5 mm crochet hook
- Main color: Taupe, warm brown, or another sloth-inspired brown
- Face color: Cream or oatmeal
- Detail color: Dark brown or black
- Eyes: 10 mm safety eyes
- Stuffing: Polyester fiberfill
- Construction: Body and head worked continuously; remaining components crocheted separately
- Terminology: US crochet terms
The finished size is approximate rather than physically verified. Yarn choice, tension, stuffing, and individual technique can all affect the final dimensions.
Materials & Tools
- Medium/worsted weight (#4) yarn in the main color
- Cream or oatmeal yarn
- Dark brown or black yarn for embroidery
- 3.5 mm crochet hook
- 10 mm safety eyes
- Polyester fiberfill
- Tapestry or yarn needle
- Scissors
- Stitch marker
Safety Note
Safety eyes can present a choking hazard and are not appropriate for children under 3 years old. Install them according to the manufacturer’s instructions.
This pattern does not establish the finished project as baby-safe or child-safe.
Abbreviations
The pattern uses standard US crochet terminology.
- MR — magic ring
- sc — single crochet
- inc — increase; work 2 sc in the same stitch
- dec — invisible decrease over 2 stitches
- FO — fasten off
Before You Start
This pattern is worked primarily in continuous rounds.
Use a stitch marker to identify the first stitch of each round and move it as you work.
Work in Continuous Rounds
Do not join at the end of each round unless specifically instructed. The stitch count at the end of every round is shown in parentheses.
Count Your Stitches
Check your stitch count regularly, especially after increase and decrease rounds. Catching an error early is much easier than trying to correct the shape later.
Stuff as You Go
Add stuffing gradually as the body and head take shape. Avoid overstuffing, since too much fiberfill can stretch the stitches and make the stuffing visible.
The arms and legs should receive lighter stuffing so they retain some flexibility.
Compare Paired Pieces
Before permanently sewing the arms, legs, ears, or eye patches into place, compare both sides of the project. This helps maintain a balanced final silhouette.
Crochet Sloth Pattern
Body and Head — Make 1
Work in the main color.
The body and head are crocheted as one continuous piece.
Round 1: 6 sc in MR. (6)
Round 2: 6 inc. (12)
Round 3: (sc, inc) × 6. (18)
Round 4: (2 sc, inc) × 6. (24)
Round 5: (3 sc, inc) × 6. (30)
Round 6: (4 sc, inc) × 6. (36)
Round 7: (5 sc, inc) × 6. (42)
Round 8: sc around. (42)
Round 9: sc around. (42)
Round 10: sc around. (42)
Round 11: sc around. (42)
Round 12: sc around. (42)
Round 13: sc around. (42)
Round 14: (6 sc, inc) × 6. (48)
Round 15: sc around. (48)
Round 16: sc around. (48)
Round 17: sc around. (48)
Round 18: sc around. (48)
Round 19: sc around. (48)
Round 20: sc around. (48)
At this point, orient the front of the piece and install the two 10 mm safety eyes. Keep them symmetrical and use the eye patches as a visual guide.
Begin stuffing the head gradually.
Round 21: (6 sc, dec) × 6. (42)
Round 22: (5 sc, dec) × 6. (36)
Round 23: (4 sc, dec) × 6. (30)
Round 24: (3 sc, dec) × 6. (24)
Round 25: (2 sc, dec) × 6. (18)
Round 26: (sc, dec) × 6. (12)
Round 27: 6 dec. (6)
Add the final amount of stuffing before the opening becomes too small to reach comfortably.
Cut the yarn, leaving a sewing tail. Fasten off, close the remaining opening, and weave in the end securely.
Arms — Make 2
Work in the main color.
Round 1: 6 sc in MR. (6)
Round 2: 6 inc. (12)
Round 3: (sc, inc) × 6. (18)
Round 4: sc around. (18)
Round 5: sc around. (18)
Round 6: sc around. (18)
Round 7: (sc, dec) × 6. (12)
Round 8: sc around. (12)
Round 9: sc around. (12)
Round 10: sc around. (12)
Round 11: sc around. (12)
Round 12: sc around. (12)
Round 13: sc around. (12)
Round 14: sc around. (12)
Round 15: sc around. (12)
Round 16: sc around. (12)
Round 17: 6 dec. (6)
Add light stuffing, especially toward the upper section, while keeping the lower part relatively flexible.
Cut the yarn, leaving a long sewing tail. Fasten off and close the opening.
Repeat for the second arm.
Legs — Make 2
Work in the main color.
Round 1: 6 sc in MR. (6)
Round 2: 6 inc. (12)
Round 3: (sc, inc) × 6. (18)
Round 4: sc around. (18)
Round 5: sc around. (18)
Round 6: sc around. (18)
Round 7: (sc, dec) × 6. (12)
Round 8: sc around. (12)
Round 9: sc around. (12)
Round 10: sc around. (12)
Round 11: sc around. (12)
Round 12: 6 dec. (6)
Stuff lightly and shape the piece into a compact rounded leg.
Cut the yarn, leaving a long sewing tail. Fasten off and close the opening.
Repeat for the second leg.
Ears — Make 2
Work in the main color.
These ears are flat and do not need to be stuffed.
Round 1: 6 sc in MR. (6)
Round 2: 6 inc. (12)
Round 3: (sc, inc) × 6. (18)
Round 4: sc around. (18)
Round 5: (sc, dec) × 6. (12)
Fasten off, leaving a long sewing tail.
Gently flatten the ear.
Repeat for the second ear.
Muzzle — Make 1
Work in the cream or oatmeal color.
Round 1: 6 sc in MR. (6)
Round 2: 6 inc. (12)
Round 3: (sc, inc) × 6. (18)
Round 4: sc around. (18)
Fasten off, leaving a long sewing tail.
A small amount of stuffing can be added during assembly to create a subtle raised shape.
Eye Patches — Make 2
Work in the cream or oatmeal color.
Round 1: 6 sc in MR. (6)
Round 2: 6 inc. (12)
Round 3: (sc, inc) × 6. (18)
Fasten off, leaving a sewing tail.
Repeat for the second eye patch.
Facial Details
Eye Patches
Place one cream eye patch around each safety eye.
Use the eye position as your guide and compare both sides before sewing them permanently.
Sew around the outside edge of each patch.
Nose
Using dark brown or black yarn, embroider a small rounded nose near the center of the muzzle.
Mouth
Add a short mouth line beneath the nose if desired.
Keep the embroidery light so it does not distort the muzzle.

Assembly
Step 1: Attach the Ears
Place one ear on each upper side of the head.
Compare both sides before sewing so the ears sit at similar heights and angles.
Sew around the lower section of each ear, keeping the ears gently flattened.
Step 2: Attach the Eye Patches
Position the cream eye patches around the safety eyes.
Check both sides carefully before sewing.
Step 3: Attach the Muzzle
Center the cream muzzle beneath the eyes.
The muzzle should sit close enough to the eye patches to create one cohesive facial area.
Sew around the outer edge, using only a small amount of stuffing if needed for a subtle raised effect.
Step 4: Attach the Arms
Position one arm on each side of the body.
The arms should hang naturally downward rather than pointing sharply away from the body.
Compare both sides before sewing.
Sew the arms securely to the body.
Step 5: Attach the Legs
Place the legs near the lower body to create the seated silhouette.
Compare both sides before sewing permanently.
Check that the legs sit at compatible heights and that the feet face in balanced directions.
Sew the legs securely to the lower body.
Step 6: Add the Claw Details
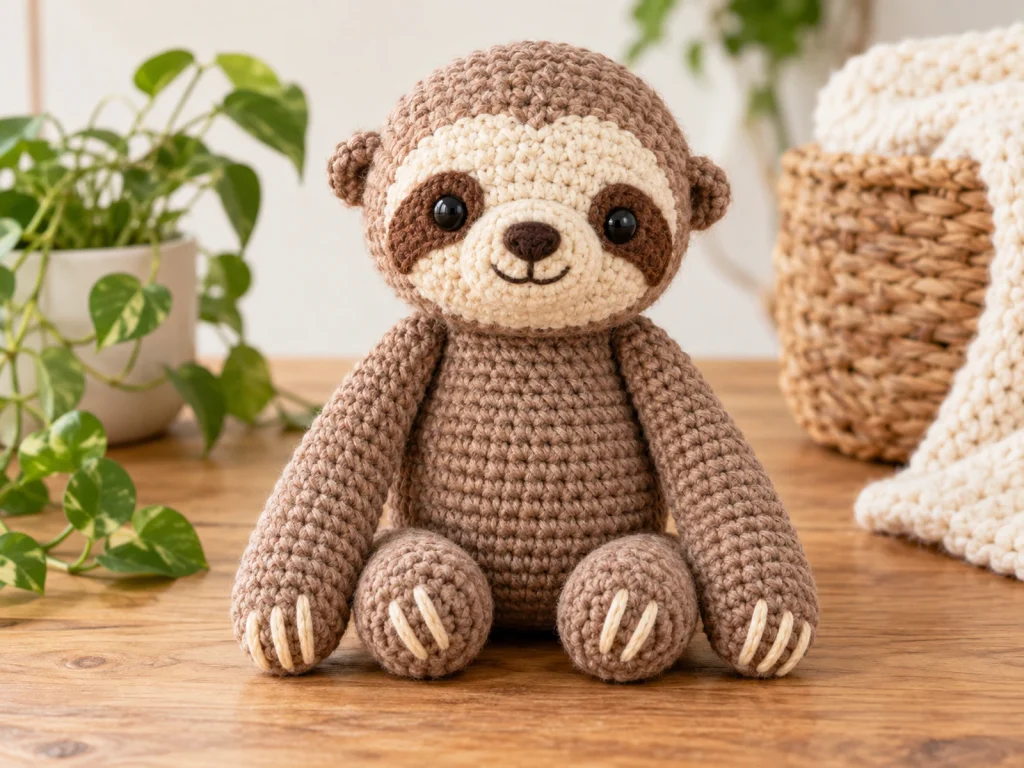
Using dark brown or black yarn, embroider three short claw lines on each hand.
Repeat with three short claw lines on each foot.
Keep the markings visually balanced from side to side.
Finishing
Once all components are attached, gently massage the stuffing from the outside to even out the shape.
Check that:
- The head is rounded.
- The face is centered.
- The eye patches are balanced.
- The muzzle sits centrally.
- The arms hang naturally.
- The legs create a stable seated silhouette.
- No stuffing is visibly pushing through the stitches.
Weave in and trim any remaining yarn ends.

Helpful Tips
Keep Your Tension Consistent
Consistent tension helps maintain the intended shape throughout the increases, straight rounds, and decreases.
Correct Stitch-Count Mistakes Early
If your count is wrong, stop and recount the round rather than trying to compensate later.
Look for a missed increase, decrease, or stitch before continuing.
Avoid Overstuffing
Too much stuffing can stretch the fabric and make the stitches look uneven.
Add small amounts gradually until the piece feels firm but remains smooth.
Check Symmetry Before Sewing
For paired components, place both pieces first and compare them visually before making the attachment permanent.
Small placement adjustments can make a noticeable difference to the finished expression and silhouette.
Troubleshooting
Why is my stuffing showing through?
The piece may be overstuffed or your tension may be too loose.
Remove a little stuffing and check whether the stitches relax back into place.
Why do my eye patches look uneven?
Wait to sew the patches permanently until you are satisfied with their position.
Use the safety eyes as the center reference and compare both sides from the front.
Why are my arms too stiff?
Use less stuffing, particularly in the lower portion of the arms.
The arms are designed to remain relatively flexible.
Why does my muzzle look too bulky?
The muzzle should have a subtle raised profile.
Use only a small amount of stuffing and avoid packing it firmly.
Why does my finished sloth look uneven?
Check the distribution of the stuffing first, then gently reshape the body and head.
After that, reassess the placement of the limbs and facial pieces.
Customization Ideas
Change the Main Color
Try warm taupe, medium brown, or deeper chocolate shades while keeping the lighter face for contrast.
Customize the Face
Small changes to the embroidered mouth can give the sloth a slightly different expression.
Try Different Face Colors
A warmer or cooler cream can subtly change the contrast between the face and the body.
Create Different Personalities
You can give each sloth its own character through color choices and small embroidery variations while keeping the underlying crochet structure unchanged.
Frequently Asked Questions
What yarn is used for this crochet sloth?
The pattern is designed for medium/worsted weight (#4) yarn.
What crochet hook size is used?
Use a 3.5 mm crochet hook for the design.
How big is the finished sloth?
The finished sloth is approximately 7–8 inches (18–20 cm) tall when seated. This is an approximate size and can vary with yarn, hook, tension, stuffing, and individual technique.
Does this pattern use US crochet terms?
Yes. The pattern uses standard US crochet terminology.
Does the sloth require sewing?
The body and head are crocheted as one piece, while the ears, arms, legs, eye patches, and muzzle are separate components that are attached during assembly.
Can I change the colors?
Yes. Different yarn colors can be used while keeping the same construction. The intended design uses a brown or taupe body with a lighter face.
Can I use a different yarn?
Yes, but changing yarn weight or hook size can alter the finished size, proportions, and fabric density.
Are the safety eyes suitable for children under 3?
No. Safety eyes can present a choking hazard and are not appropriate for children under 3 years old.
Is this pattern physically tested?
Not yet. The stitch mathematics and construction have been reviewed, but a physical prototype has not been crocheted and evaluated.
More Animal Amigurumi
Explore more animal-inspired crochet projects from Tiny Yarn Tales and continue building your handmade collection.
This crochet sloth is designed to be customizable through color choices and facial embroidery while keeping the original rounded silhouette and long-arm design.