
Mushroom Bunny Amigurumi Crochet Pattern
Meet a sweet woodland-inspired bunny wearing a playful spotted mushroom…
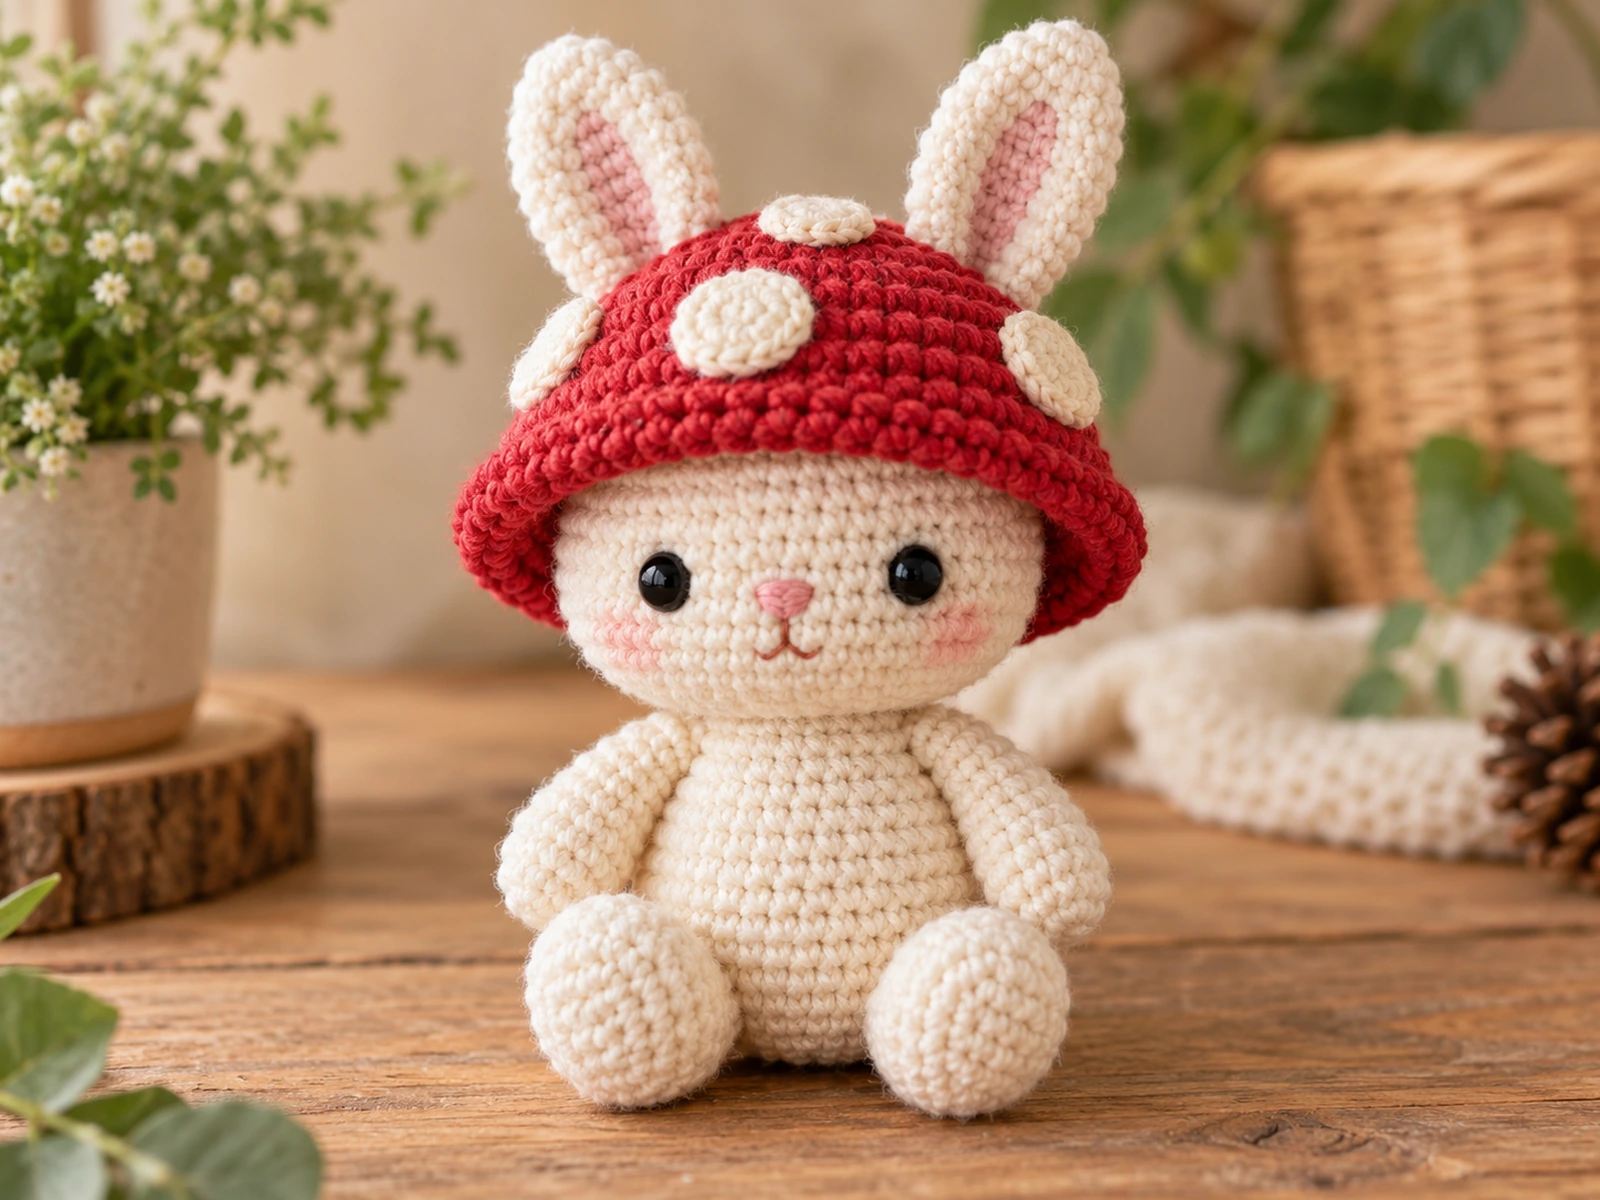
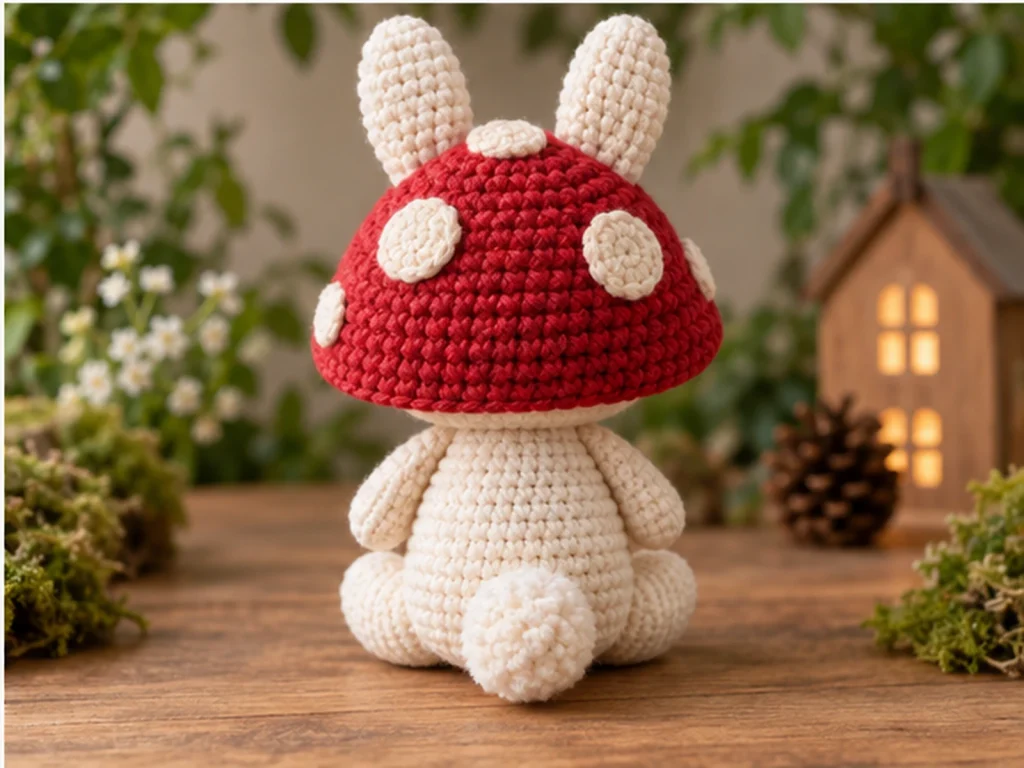
Meet a sweet woodland-inspired bunny wearing a playful spotted mushroom cap. This mushroom bunny amigurumi crochet pattern combines a rounded bunny shape with a separate mushroom hat, giving the finished character a whimsical forest-inspired look.
The project is crocheted in separate pieces and finished with simple sewn assembly and embroidered facial details. The finished bunny is approximately 7–8 inches tall, including the mushroom cap. Final size can vary with yarn, hook, tension, stuffing, and individual crochet technique.
Project Overview
What You’ll Make
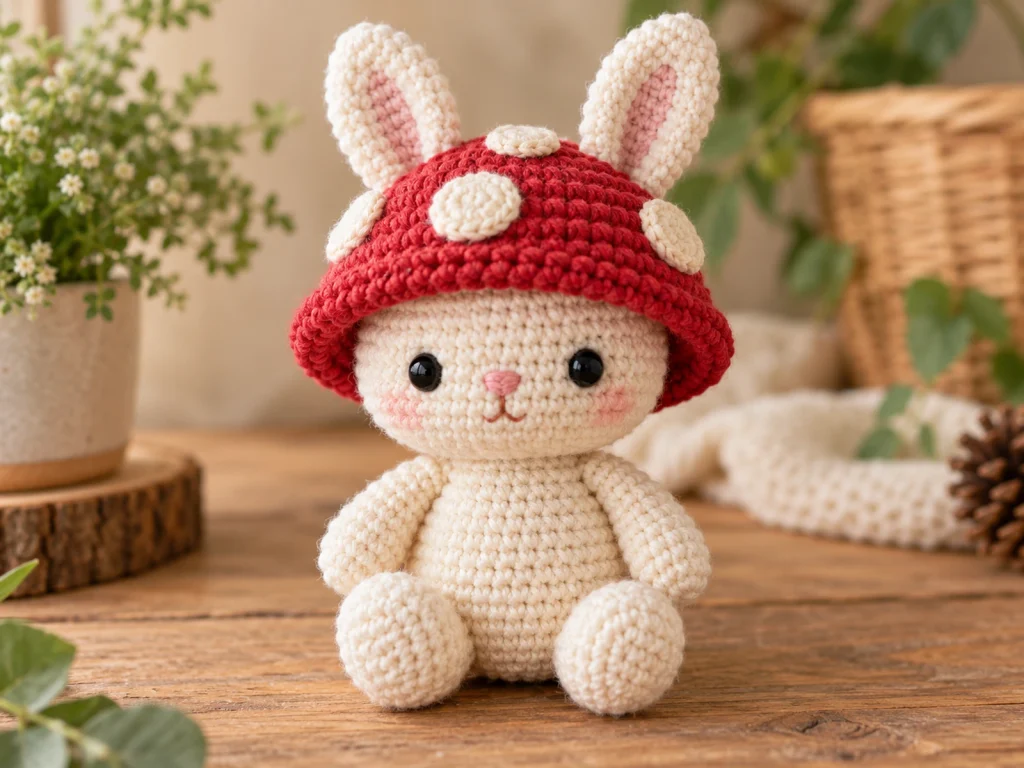
This mushroom bunny is made from:
- A rounded head
- Two tapered bunny ears
- A compact body
- Two arms
- Two legs
- A small rounded tail
- A separate mushroom cap
- Five cream-colored mushroom spots
- Embroidered facial details
The mushroom cap is made separately and placed over the bunny’s head rather than permanently sewn on.
Project Details
- Technique: Amigurumi crochet
- Yarn weight: Medium/worsted weight
- Hook: 3.25 mm crochet hook
- Main bunny color: Soft ivory or cream
- Mushroom cap: Berry red
- Mushroom spots: Cream
- Facial accent: Blush pink
- Eyes: 8 mm safety eyes
- Filling: Polyester fiberfill
- Approximate finished size: 7–8 inches tall, including the mushroom cap
The pattern has been mathematically reviewed and constructionally checked, but it has not been physically crocheted and tested yet.
Materials & Tools
Yarn
Use medium/worsted-weight yarn in the following colors:
- Soft ivory or cream
- Blush pink
- Berry red
- Cream
- Dark brown or another dark shade for facial embroidery
Other Supplies
- 3.25 mm crochet hook
- 8 mm safety eyes
- Polyester fiberfill
- Tapestry needle
- Stitch marker
- Scissors
The amount of yarn required will vary according to tension and individual technique.
Safety Note
Safety eyes can present a choking hazard and are not appropriate for children under 3. The finished project should not be considered baby-safe or child-safe simply because safety eyes are used.
Abbreviations
This pattern uses standard US crochet terminology.
- MR — magic ring
- sc — single crochet
- inc — increase; work 2 sc in the same stitch
- dec — decrease; single crochet 2 stitches together
- FO — fasten off
Before You Start
Work in Continuous Rounds
Unless otherwise stated, work the amigurumi pieces in continuous rounds rather than joining at the end of every round.
A stitch marker is useful for identifying the beginning of each round.
Count Your Stitches
Keep track of your stitch count at the end of every round. This is especially important after increase and decrease rounds.
Stuff as You Go
Add fiberfill gradually while working the stuffed pieces. The head and body should be firm enough to maintain their rounded shapes without becoming overstuffed.
The ears can be lightly stuffed or left mostly unstuffed. Arms and the tail need only light stuffing, while the legs can be moderately stuffed.
Shape Before Sewing
Before closing or attaching a piece, gently shape it with your fingers so the stuffing is evenly distributed.
For paired components such as ears, arms, and legs, compare both pieces before permanently sewing them into place.
Construction Order
The bunny is made from separate crocheted components. Complete the individual pieces first, then assemble the body, head, limbs, facial details, and mushroom cap.
Original Mushroom Bunny Crochet Pattern
Head
Color: Ivory
Work in continuous rounds.
Round 1: 6 sc in MR. (6)
Round 2: 6 inc. (12)
Round 3: (sc, inc) × 6. (18)
Round 4: (2 sc, inc) × 6. (24)
Round 5: (3 sc, inc) × 6. (30)
Round 6: (4 sc, inc) × 6. (36)
Round 7: 36 sc. (36)
Round 8: 36 sc. (36)
Round 9: 36 sc. (36)
Round 10: 36 sc. (36)
Round 11: (4 sc, dec) × 6. (30)
Round 12: (3 sc, dec) × 6. (24)
Round 13: (2 sc, dec) × 6. (18)
Round 14: (sc, dec) × 6. (12)
Round 15: 6 dec. (6)
Stuff the head firmly enough to maintain its shape without overfilling it.
Fasten off and close the remaining opening.
Ears — Make 2
Color: Ivory
Round 1: 6 sc in MR. (6)
Round 2: 6 inc. (12)
Round 3: 12 sc. (12)
Round 4: 12 sc. (12)
Round 5: 12 sc. (12)
Round 6: 12 sc. (12)
Round 7: 12 sc. (12)
Round 8: (2 sc, dec) × 3. (9)
Round 9: 9 sc. (9)
Round 10: 9 sc. (9)
Round 11: 9 sc. (9)
Round 12: (sc, dec) × 3. (6)
Round 13: 6 sc. (6)
Add a small amount of stuffing if you want the ears to hold a softly rounded shape.
Fasten off and leave a sewing tail.
Make the second ear the same way.
Body
Color: Ivory
Round 1: 6 sc in MR. (6)
Round 2: 6 inc. (12)
Round 3: (sc, inc) × 6. (18)
Round 4: (2 sc, inc) × 6. (24)
Round 5: (3 sc, inc) × 6. (30)
Round 6: 30 sc. (30)
Round 7: 30 sc. (30)
Round 8: 30 sc. (30)
Round 9: 30 sc. (30)
Round 10: (3 sc, dec) × 6. (24)
Round 11: 24 sc. (24)
Round 12: (2 sc, dec) × 6. (18)
Round 13: 18 sc. (18)
Round 14: (sc, dec) × 6. (12)
Round 15: 12 sc. (12)
Round 16: 6 dec. (6)
Stuff firmly enough to maintain a rounded torso.
Fasten off and close the opening.
Arms — Make 2
Color: Ivory
Round 1: 6 sc in MR. (6)
Round 2: 6 inc. (12)
Round 3: 12 sc. (12)
Round 4: 12 sc. (12)
Round 5: 12 sc. (12)
Round 6: (2 sc, dec) × 3. (9)
Round 7: 9 sc. (9)
Round 8: 9 sc. (9)
Round 9: 9 sc. (9)
Lightly stuff the lower section of each arm.
Fasten off and leave a sewing tail.
Make the second arm the same way.
Legs — Make 2
Color: Ivory
Round 1: 6 sc in MR. (6)
Round 2: 6 inc. (12)
Round 3: 12 sc. (12)
Round 4: 12 sc. (12)
Round 5: (3 sc, inc) × 3. (15)
Round 6: 15 sc. (15)
Round 7: 15 sc. (15)
Round 8: (3 sc, dec) × 3. (12)
Round 9: 12 sc. (12)
Round 10: 12 sc. (12)
Round 11: 6 dec. (6)
Stuff moderately so the legs retain their rounded shape.
Fasten off and close.
Make the second leg the same way.
Tail
Color: Ivory
Round 1: 6 sc in MR. (6)
Round 2: 6 inc. (12)
Round 3: 12 sc. (12)
Round 4: 12 sc. (12)
Round 5: (2 sc, dec) × 3. (9)
Round 6: 9 sc. (9)
Round 7: (sc, dec) × 3. (6)
Lightly stuff the tail.
Fasten off and close.
Make the Mushroom Cap
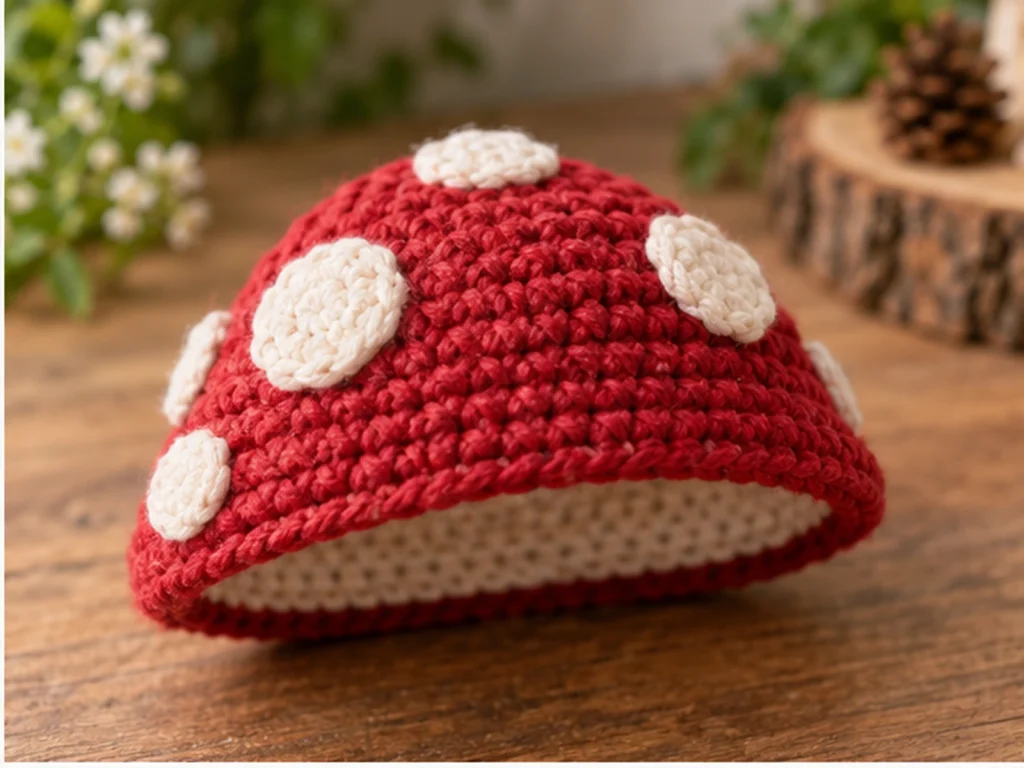
Mushroom Cap
Color: Berry red
Work the mushroom cap separately.
Round 1: 6 sc in MR. (6)
Round 2: 6 inc. (12)
Round 3: (sc, inc) × 6. (18)
Round 4: (2 sc, inc) × 6. (24)
Round 5: (3 sc, inc) × 6. (30)
Round 6: (4 sc, inc) × 6. (36)
Round 7: 36 sc. (36)
Round 8: 36 sc. (36)
Round 9: (5 sc, inc) × 6. (42)
Round 10: 42 sc. (42)
Fasten off and weave in the end.
Do not stuff the mushroom cap.
Mushroom Spots — Make 5
Color: Cream
For each spot:
Round 1: 6 sc in MR. (6)
Round 2: 6 inc. (12)
Fasten off, leaving a sewing tail.
Flatten each spot gently and sew the five spots onto the mushroom cap in a naturally varied arrangement.
Facial Details
Eye Placement
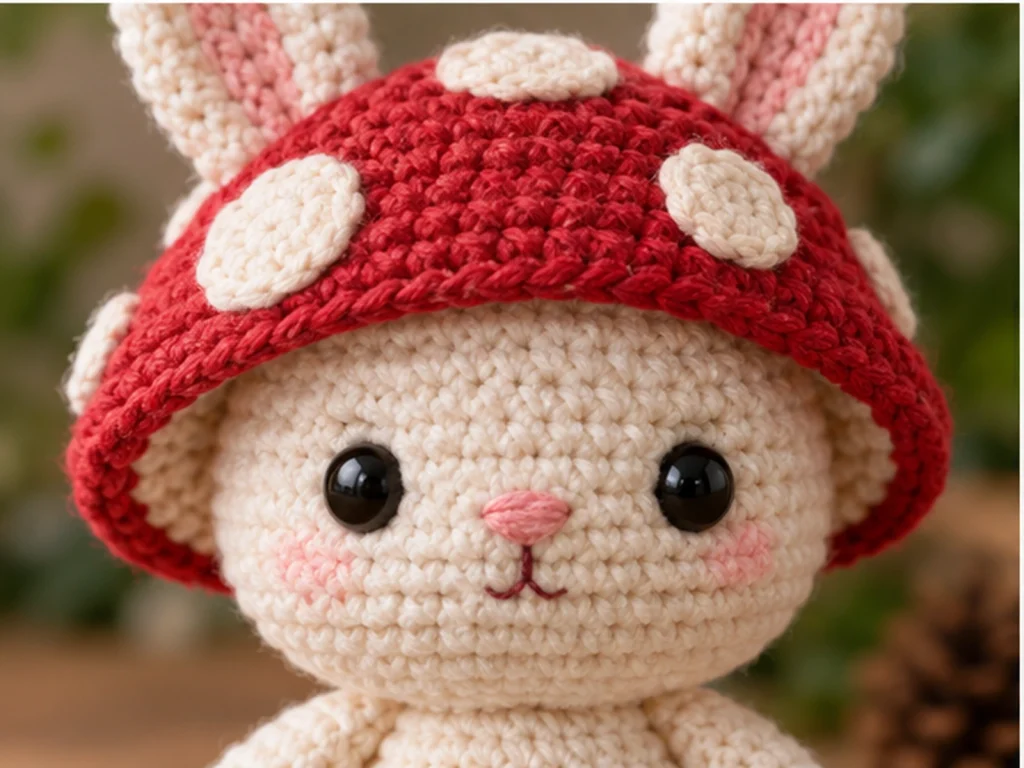
Use two 8 mm safety eyes.
Place them on the head and compare both sides from the front before permanently securing them. Use visual symmetry rather than relying on an untested exact spacing measurement.
Nose
Embroider a small rounded nose with blush-pink yarn.
Mouth
Add a short vertical stitch below the nose, followed by two small curved stitches for a simple bunny expression.
Inner-Ear Detail
For an optional touch of color, embroider a small blush-pink accent inside each ear.
Assembly
Step 1: Prepare the Finished Pieces
Make sure all crocheted components are completed, stuffed as appropriate, and have their sewing tails ready.
Step 2: Attach the Legs
Position the two legs on the lower portion of the body.
Compare both sides from the front before sewing them securely.
Step 3: Attach the Arms
Sew one arm onto each side of the body.
Check the placement from the front and back before finishing the attachment.
Step 4: Attach the Tail
Center the tail on the lower back of the body and sew it securely.
Step 5: Attach the Head
Center the head over the top of the body and sew around the connection point until it is secure.
Step 6: Attach the Ears
Position the two ears symmetrically on the upper portion of the head.
Compare their orientation and height before completing the sewing.
Step 7: Add the Facial Features
Secure the safety eyes and embroider the nose, mouth, and optional inner-ear details.
Step 8: Finish the Mushroom Cap
Sew the five cream spots onto the berry-red mushroom cap and weave in the ends.
Step 9: Place the Mushroom Cap
Set the completed cap over the bunny’s head and adjust it visually until it is centered.
Finishing
After all components are attached, check the overall silhouette from the front, back, and sides.
Make sure:
- The ears look balanced.
- The arms and legs are positioned evenly.
- The face is centered.
- The stuffing is distributed smoothly.
- No yarn tails are visible.
- The mushroom cap sits evenly over the head.
Weave in remaining ends and trim excess yarn.
Helpful Tips
Keep Your Tension Consistent
Consistent tension helps the crocheted fabric maintain its intended shape and reduces gaps that could expose the stuffing.
Stuff Gradually
Add small amounts of fiberfill as you work instead of packing a piece all at once. This makes it easier to control the final shape.
Compare Paired Pieces
Before sewing both ears, arms, or legs into place, hold the matching pieces together and compare their size and orientation.
Check the Face Before Securing the Eyes
Look directly at the face before permanently securing the eyes. Small adjustments are easier before the pieces are finalized.
Shape During Assembly
Gently adjust the stuffing and crocheted fabric as you assemble the bunny. This helps maintain a smooth, rounded silhouette.
Troubleshooting
My Stitches Look Uneven
Check your tension and make sure you are not unintentionally tightening the yarn after increase or decrease rounds.
I Can See the Stuffing
Reduce the amount of stuffing slightly and check your tension. Overfilling can stretch the stitches.
My Ears Look Uneven
Place the two ears side by side and compare their height, width, and taper before attaching them to the head.
The Face Looks Off-Center
View the head straight on and compare the position of both eyes relative to the center of the face.
The Mushroom Cap Looks Crooked
Place the cap on the head without sewing anything further. Rotate it gently until the brim and spots look balanced from the front.
Customization Ideas
Change the Bunny Color
Try a soft gray, warm tan, light brown, or another neutral yarn color instead of ivory.
Change the Mushroom Cap Color
A muted orange, dusty pink, deep red, or another woodland-inspired shade can create a different look.
Change the Facial Expression
Small changes in the embroidered mouth can give the bunny a different expression.
Rearrange the Mushroom Spots
The five mushroom spots can be spaced more evenly or arranged more randomly for a different visual effect.
Changing yarn weight or hook size for a substantial size variation may also change the relationship between the bunny’s head and mushroom cap.
Frequently Asked Questions
What makes this a mushroom bunny crochet pattern?
The defining feature is the separate mushroom cap worn over the bunny’s head, decorated with five cream-colored spots.
Is the mushroom cap attached to the bunny?
No. The mushroom cap is crocheted separately and placed over the bunny’s head.
How should I stuff the bunny?
Stuff the head and body firmly enough to hold their shape. Smaller components such as the ears, arms, and tail need much less stuffing.
How can I keep the bunny symmetrical?
Compare paired pieces before sewing them permanently. This is particularly helpful for the ears, arms, legs, and facial features.
Can I use different colors?
Yes. The bunny and mushroom cap can be worked in different colors while maintaining the same basic construction. Keep in mind that changing yarn weight or hook size can change the finished proportions.
Why is my finished bunny a different size?
Amigurumi size varies with yarn, hook size, tension, stuffing, and individual crochet technique. The finished size given for this pattern is approximate.
Are safety eyes suitable for young children?
Safety eyes can present a choking hazard and are not appropriate for children under 3. The finished project should not be considered child-safe simply because safety eyes are used.
More Animal Amigurumi
Explore more whimsical animal-inspired crochet projects from Tiny Yarn Tales and continue building your handmade amigurumi collection.