
Crochet Cactus Pattern: Two Potted Cactus Designs
Add a handmade touch of greenery to your space with…
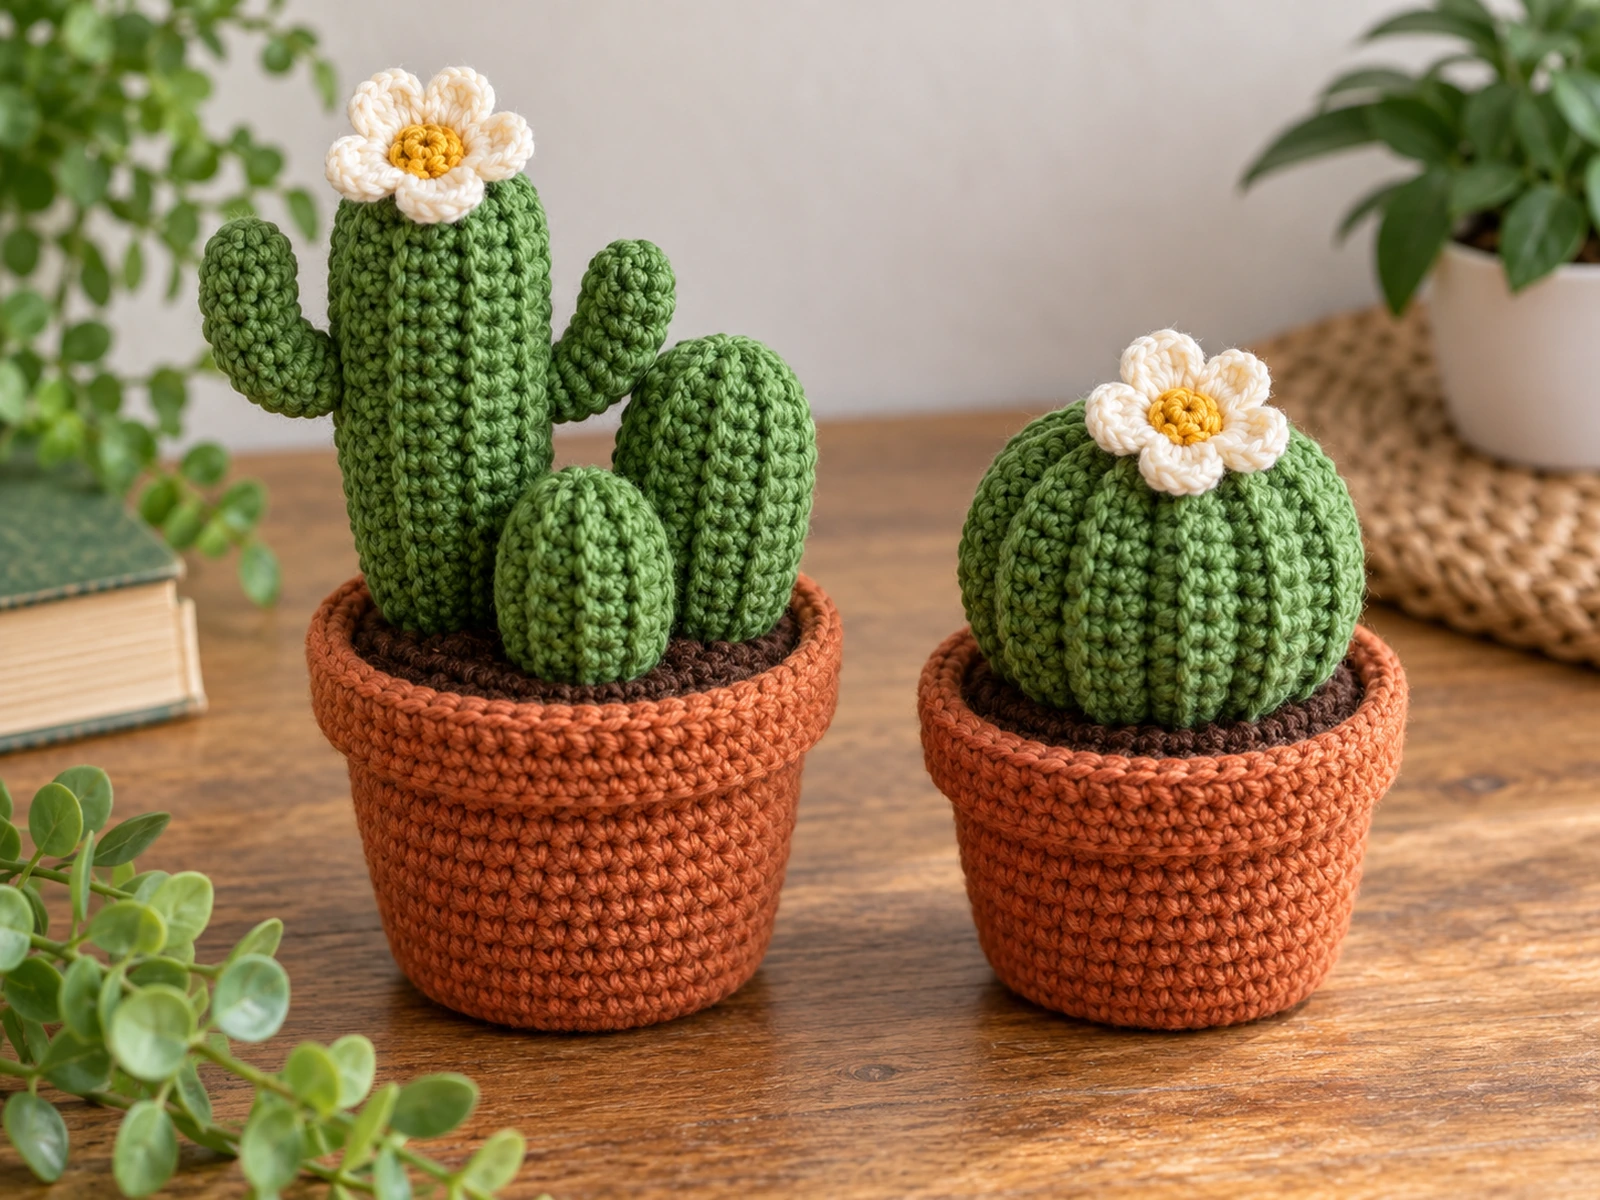
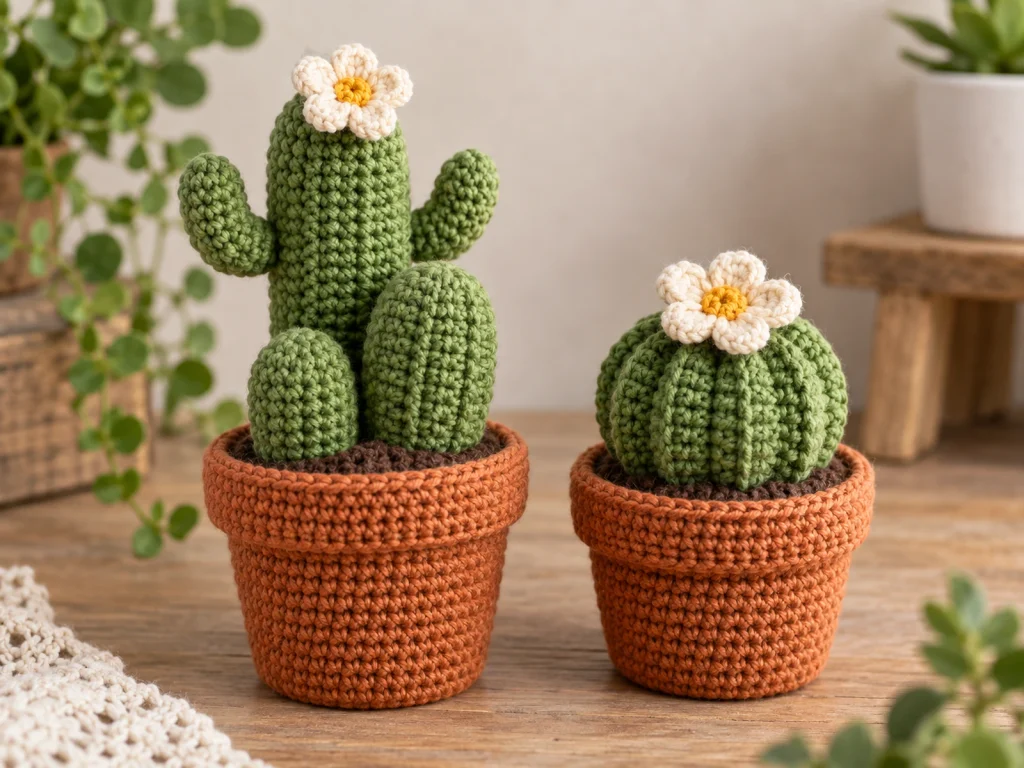
Add a handmade touch of greenery to your space with this crochet cactus pattern featuring two different potted cactus designs. You’ll make the pot and soil first, then crochet the cactus pieces and flowers before assembling everything into a finished decorative plant.
The first design creates a clustered arrangement with three cactus sizes, while the second uses a rounded ball cactus with a flower accent.
Project Overview
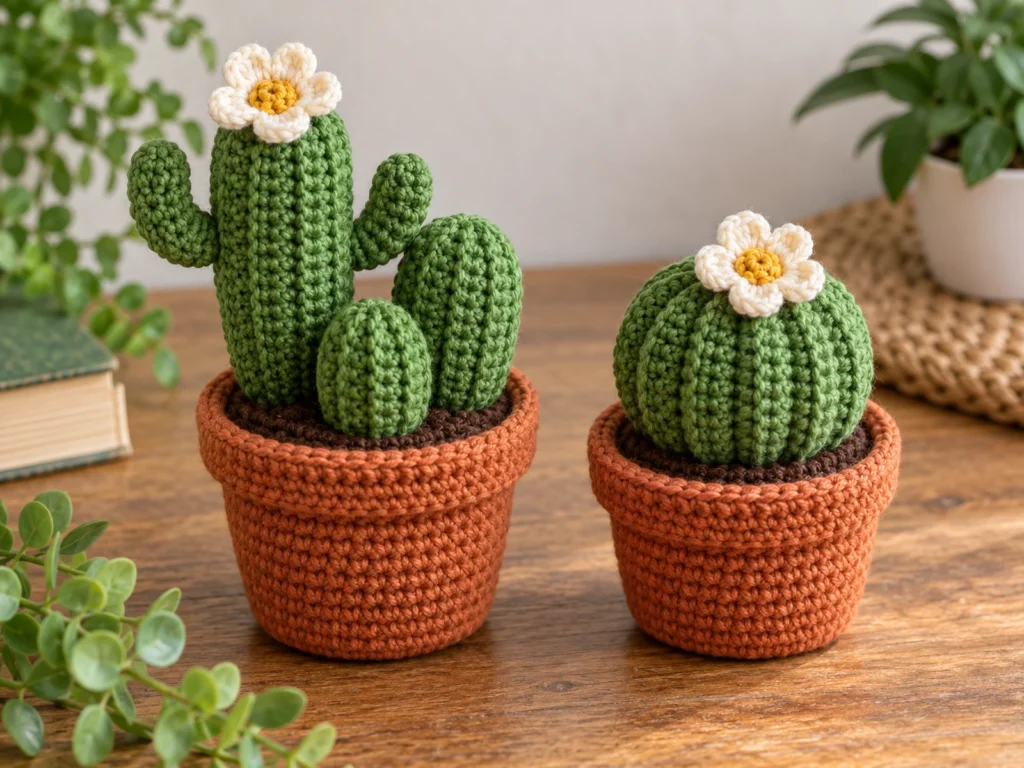
What You’ll Make
This crochet cactus project includes:
- 1 flower pot
- 1 soil surface
- Cactus A with a big, middle, and small cactus
- 2 arms for the big cactus
- A cream flower for Cactus A
- Cactus B with a rounded ball-shaped body
- A cream flower for Cactus B
The approximate finished height is 5–7 inches, although the final size can vary depending on yarn, hook size, tension, stuffing, and individual crochet technique.
Project Details
- Technique: Crochet
- Yarn: Worsted-weight, category #4 cotton yarn
- Hook: 3.5 mm crochet hook
- Main color: Green
- Pot color: Terracotta
- Soil color: Dark brown
- Flower color: Cream
- Flower center: Golden yellow
- Filling: Polyester fiberfill
- Finished size: Approximately 5–7 inches
The pattern has been mathematically reviewed and constructionally reasoned, but it has not been physically crocheted and tested yet.
Materials & Tools
Yarn
You’ll need worsted-weight, category #4 cotton yarn in:
- Green
- Terracotta
- Dark brown
- Cream
- Golden yellow
Exact yardage has not been established through physical testing, so no specific yarn quantity is given.
Tools
- 3.5 mm crochet hook
- Polyester fiberfill
- Tapestry needle
- Stitch marker
- Scissors
Abbreviations
This pattern uses standard US crochet terminology:
- MR — magic ring
- ch — chain
- sc — single crochet
- inc — increase
- dec — decrease
- sl st — slip stitch
- dc — double crochet
- BLO — back loop only
- FO — fasten off
Before You Start
Work in Continuous Rounds
Use a stitch marker to identify the first stitch of each round when working in continuous rounds.
Count Your Stitches
The number in parentheses at the end of each round is the expected stitch count. Check your count before moving on to the next round.
Stuff as You Go
Add fiberfill gradually to the cactus bodies. Fill them enough to hold their shape without forcing the stuffing through the stitches.
Construction Order
Complete the individual crochet pieces before beginning final assembly.
For Cactus A, place the three cactus bodies together on the soil first so you can check their overall arrangement before sewing them permanently.
Original Crochet Cactus Pattern
Flower Pot
Color: Terracotta
Make 1
Round 1: 6 sc in MR. (6)
Round 2: 6 inc. (12)
Round 3: (sc, inc) × 6. (18)
Round 4: (2 sc, inc) × 6. (24)
Round 5: (3 sc, inc) × 6. (30)
Round 6: 30 sc BLO. (30)
Round 7: 30 sc. (30)
Round 8: 30 sc. (30)
Round 9: 30 sc. (30)
Round 10: 30 sc. (30)
Round 11: 30 sc. (30)
Round 12: (4 sc, inc) × 6. (36)
Round 13: 36 sc. (36)
Round 14: 36 sc BLO. (36)
Round 15: 36 sc. (36)
FO, leaving a long tail if you plan to sew the soil into the pot.
Keep the top of the pot open.
Soil Surface
Color: Dark brown
Make 1
Round 1: 6 sc in MR. (6)
Round 2: 6 inc. (12)
Round 3: (sc, inc) × 6. (18)
Round 4: (2 sc, inc) × 6. (24)
Round 5: (4 sc, inc) × 6. (30)
FO, leaving a sewing tail.
The completed soil piece sits inside the pot beneath the upper rim.
Cactus A
Cactus A uses three cactus bodies of different heights.
Big Cactus
Color: Green
Make 1
Round 1: 6 sc in MR. (6)
Round 2: 6 inc. (12)
Round 3: (sc, inc) × 6. (18)
Round 4: 18 sc. (18)
Round 5: 18 sc. (18)
Round 6: 18 sc. (18)
Round 7: 18 sc. (18)
Round 8: (4 sc, dec) × 3. (15)
Round 9: 15 sc. (15)
Round 10: (3 sc, dec) × 3. (12)
Round 11: 12 sc. (12)
Round 12: (2 sc, dec) × 3. (9)
Round 13: (sc, dec) × 3. (6)
Begin adding stuffing around Round 5 and continue gradually.
FO and close the remaining opening.
Big Cactus Arms
Color: Green
Make 2
Make both arms using the same pattern.
Round 1: 6 sc in MR. (6)
Round 2: 6 sc. (6)
Round 3: 6 sc. (6)
Round 4: 6 sc. (6)
Round 5: 3 dec. (3)
Stuff lightly before closing.
FO, leaving a sewing tail.
Middle Cactus
Color: Green
Make 1
Round 1: 6 sc in MR. (6)
Round 2: 6 inc. (12)
Round 3: 12 sc. (12)
Round 4: 12 sc. (12)
Round 5: 12 sc. (12)
Round 6: 12 sc. (12)
Round 7: (4 sc, dec) × 2. (10)
Round 8: 10 sc. (10)
Round 9: (3 sc, dec) × 2. (8)
Round 10: 8 sc. (8)
Round 11: 4 sc, 2 dec. (6)
Round 12: 3 dec. (3)
Begin stuffing around Round 4 and continue gradually.
FO and close.
Small Cactus
Color: Green
Make 1
Round 1: 6 sc in MR. (6)
Round 2: 6 inc. (12)
Round 3: 12 sc. (12)
Round 4: 12 sc. (12)
Round 5: 12 sc. (12)
Round 6: (5 sc, dec) × 2. (10)
Round 7: 10 sc. (10)
Round 8: (3 sc, dec) × 2. (8)
Round 9: 8 sc. (8)
Round 10: 4 sc, 2 dec. (6)
Round 11: 6 sc. (6)
Round 12: 3 dec. (3)
Begin stuffing around Round 4 and continue gradually.
FO and close.
Make the Cactus Flower
Each cactus flower uses a golden center with six cream petals.
Flower Center
Color: Golden yellow
Make 1
Round 1: 6 sc in MR. (6)
FO, leaving a sewing tail.
Cream Flower
Color: Cream
Make 1
Attach the cream yarn with a sl st to any stitch of the completed golden flower center.
For each of the 6 center stitches:
Petal: ch 2, 2 dc, ch 2, sl st, all in the same center stitch.
Repeat the petal sequence around all 6 stitches to create 6 petals.
FO and weave in the end.
The golden flower center is the foundation for the petals, so it is not sewn separately onto the completed flower.
Attach the Flower to Cactus A
Shape the six petals evenly and sew the completed flower to the top portion of the big cactus.
Cactus B — Ball Cactus
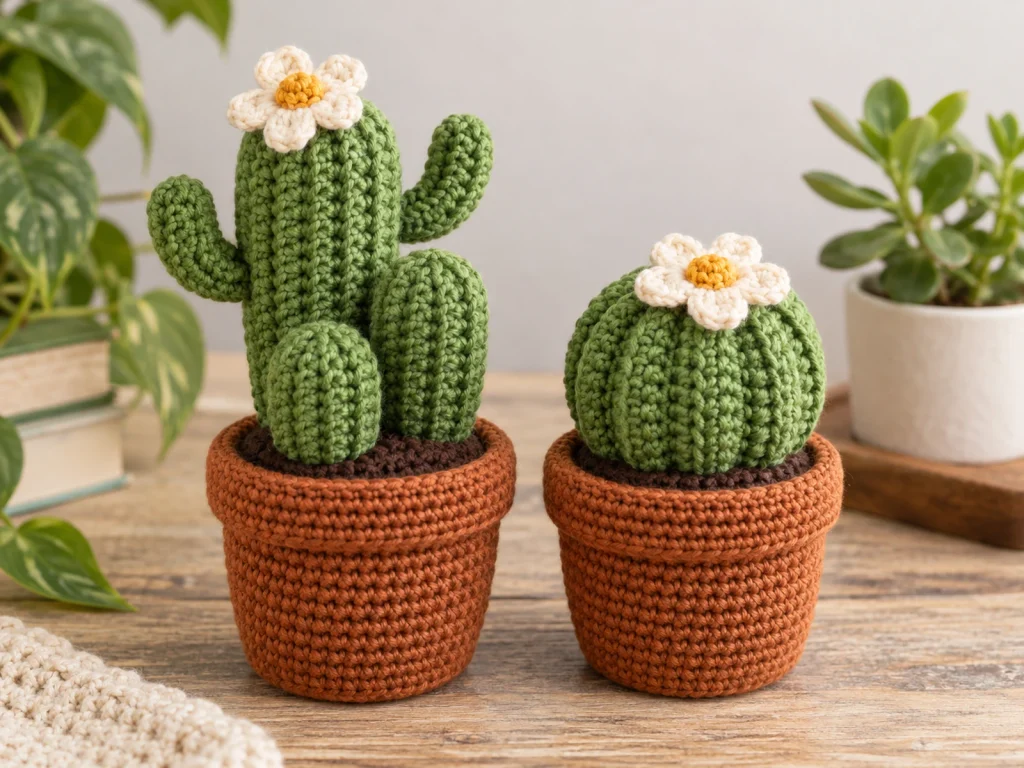
Cactus B uses one rounded cactus body with its own flower.
Main Part
Color: Green
Make 1
Round 1: 6 sc in MR. (6)
Round 2: 6 inc. (12)
Round 3: (sc, inc) × 6. (18)
Round 4: (2 sc, inc) × 6. (24)
Round 5: 24 sc. (24)
Round 6: 24 sc. (24)
Round 7: 24 sc. (24)
Round 8: 24 sc. (24)
Round 9: (2 sc, dec) × 6. (18)
Round 10: 18 sc. (18)
Round 11: (sc, dec) × 6. (12)
Round 12: 6 dec. (6)
Begin stuffing around Round 5 and continue gradually.
FO and close.
Flower
Make one golden center and one cream six-petal flower using the corrected flower construction above.
Attach the completed flower to the upper center area of the ball cactus.
Assembly
Step 1: Prepare the Pot and Soil
Place the completed soil surface inside the flower pot.
Step 2: Position Cactus A
Arrange the big, middle, and small cactus bodies on the soil surface before sewing.
Place the big cactus toward the back or center, then position the middle and small cactus pieces beside it to create a balanced cluster.
Step 3: Attach the Cactus Pieces
Sew each cactus body securely to the soil.
Step 4: Attach the Big Cactus Arms
Attach one arm to each side of the big cactus.
Compare both sides before permanently sewing the arms so the arrangement stays balanced.
Step 5: Finish Cactus A
Attach the completed cream flower to the big cactus and weave in the remaining yarn ends.
Step 6: Assemble Cactus B
Center the ball cactus on the soil surface and check that it sits upright.
Sew it securely to the soil, then attach its completed flower.
Finishing
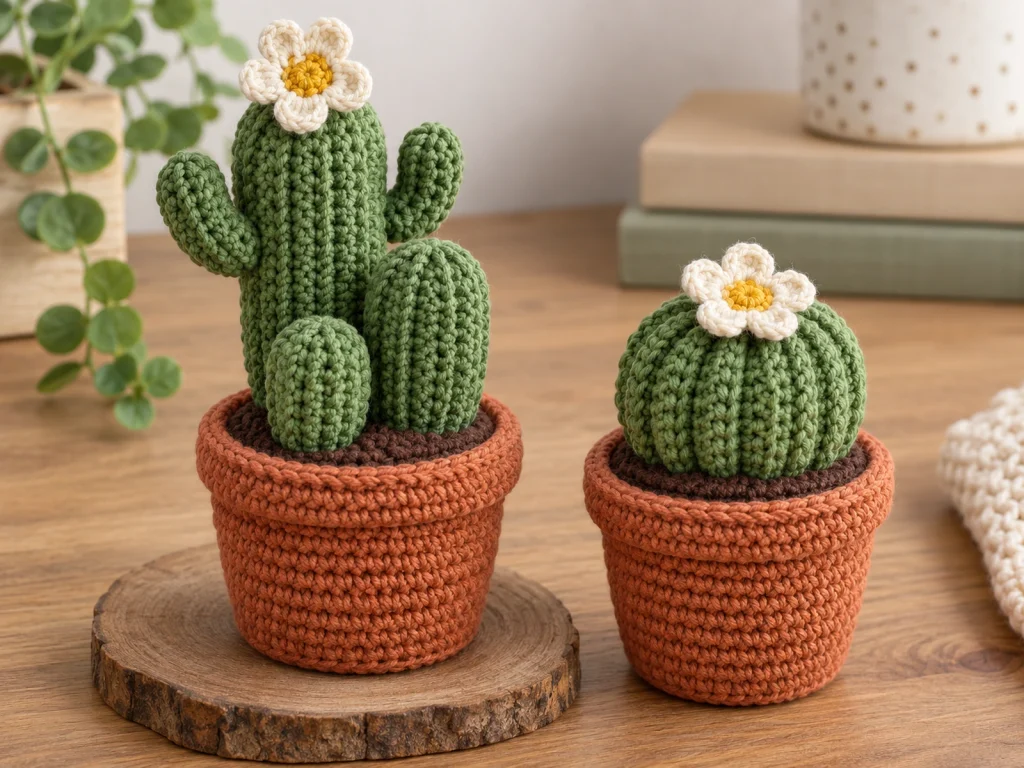
Take a final look at the finished cactus from the front and sides.
For Cactus A, check that:
- The three cactus pieces form a balanced cluster.
- The two arms are positioned securely.
- The flower is attached firmly.
- The cactus pieces are secure on the soil.
For Cactus B, check that:
- The ball cactus is centered.
- The cactus sits upright.
- The flower is secure.
- All loose yarn ends are woven in and trimmed.
Helpful Tips
Keep stuffing controlled
Add fiberfill gradually so you can shape each cactus as you work. Avoid overstuffing.
Check your stitch count
If a cactus begins to look different from the intended shape, check the stitch count from the previous round before continuing.
Test placement before sewing
For Cactus A especially, arrange all three bodies before sewing them to the soil. This makes it easier to adjust the silhouette.
Keep sewing tails long enough
Leave useful tails on components that need to be attached later. You can trim excess yarn once the assembly is complete.
Troubleshooting
Why does my cactus look taller or wider than expected?
Final dimensions can vary with yarn, hook size, tension, stuffing, and individual crochet technique.
Why does my cactus look lumpy?
Try redistributing the fiberfill and shaping the piece gradually from the outside.
My cactus is leaning. What should I do?
Reposition it before sewing it permanently to the soil and check the base from several angles.
My two arms do not look even.
Place both arms on the cactus before sewing and compare their height and angle. Adjust their positions before securing them.
My flower looks uneven.
Hold the flower in place and arrange the petals evenly before sewing it to the cactus.
Customization Ideas
Change the cactus colors
Use different shades of green for individual cactus pieces to create more visual variety.
Change the flower color
The cream flower can be made in another color while keeping the same six-petal construction.
Make a coordinated collection
Create both cactus designs using matching pot and flower colors for a coordinated crochet plant display.
Rearrange Cactus A
The three cactus bodies can be positioned differently within the pot to create a slightly different silhouette.
Care
Keep the finished crochet cactus away from moisture and excessive handling that could distort the crocheted pieces.
Store it in a clean, dry place when not on display.
Frequently Asked Questions
What yarn is used for this crochet cactus pattern?
The design uses worsted-weight, category #4 cotton yarn in green, terracotta, dark brown, cream, and golden yellow.
How many cactus designs are included?
There are two designs. Cactus A uses three cactus bodies in one arrangement, while Cactus B uses one rounded ball cactus.
How large is the finished crochet cactus?
The approximate finished height is 5–7 inches. Final dimensions can vary with yarn, hook size, tension, stuffing, and individual technique.
Can I make only Cactus B?
Yes. Cactus B is a complete standalone cactus design with its own rounded body and flower.
Does Cactus A use more than one cactus body?
Yes. It includes a big cactus, middle cactus, and small cactus, plus two arms on the big cactus and a flower.
Has this crochet cactus pattern been physically tested?
No. The pattern has been mathematically reviewed and constructionally reasoned, but it has not been physically crocheted and tested yet.
More Crochet Plant Patterns
Explore more crochet plant projects when you’re ready to build a handmade collection of potted greenery.