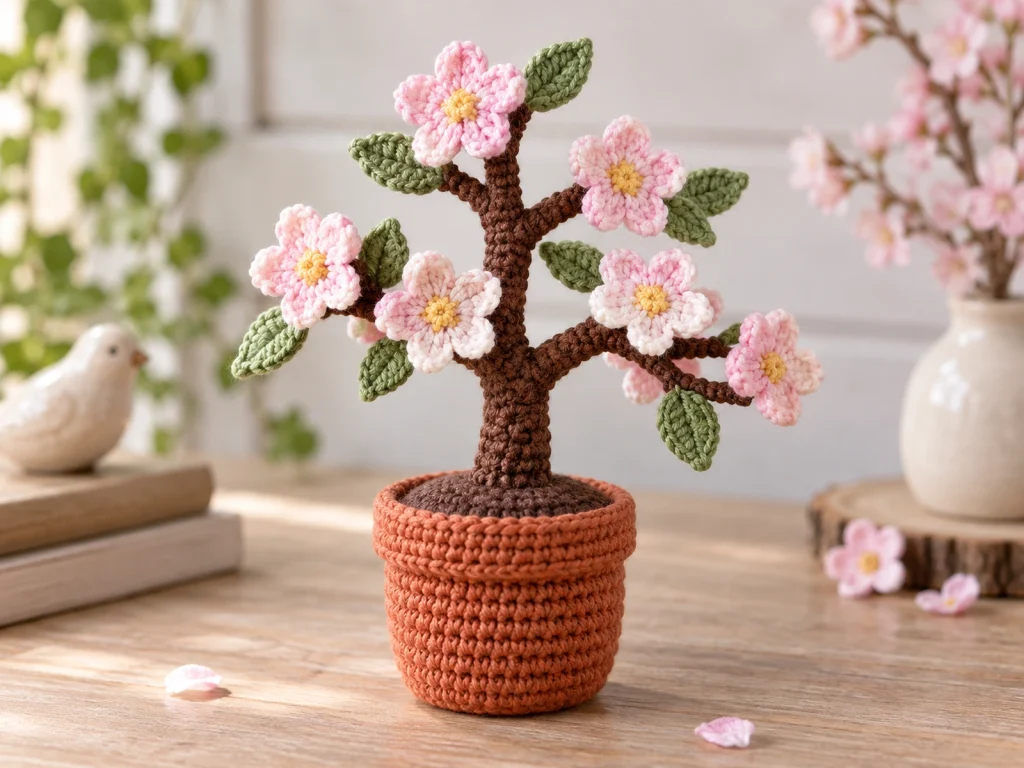
Crochet Cherry Blossom Tree – Mini Handmade Decor
Add a touch of handmade botanical charm to your space…
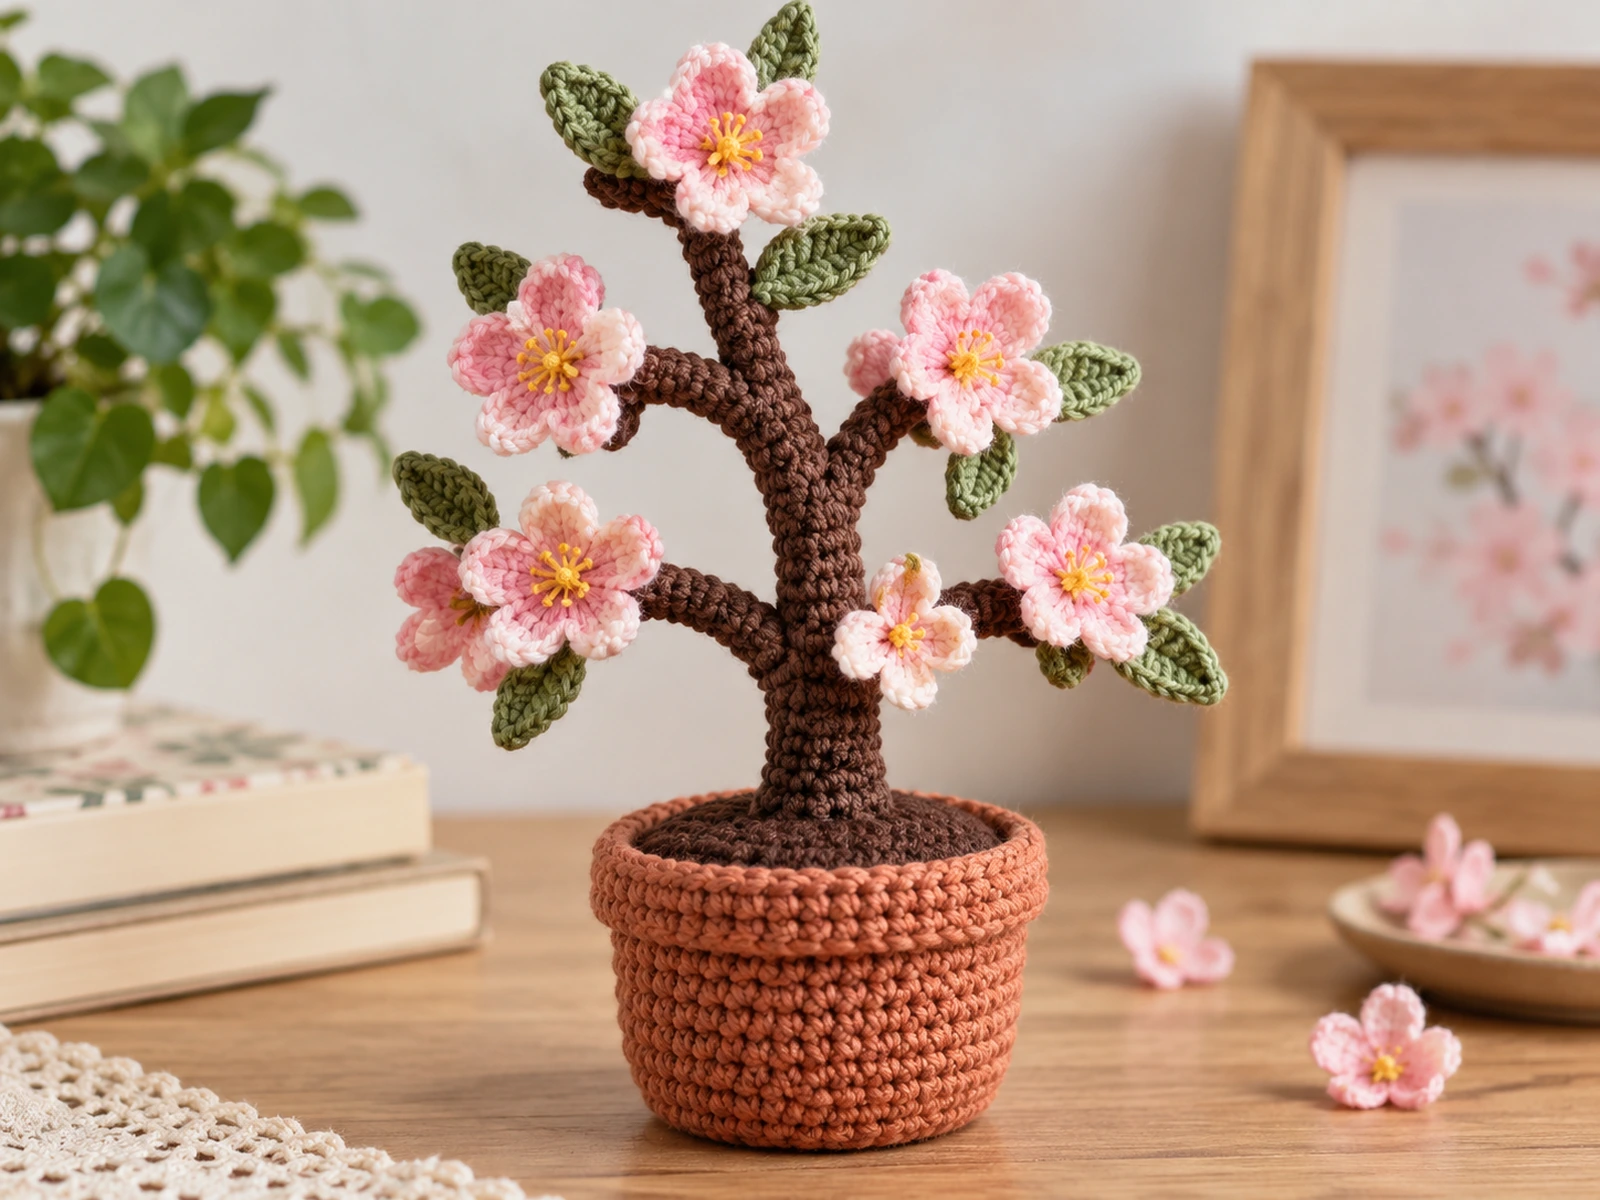
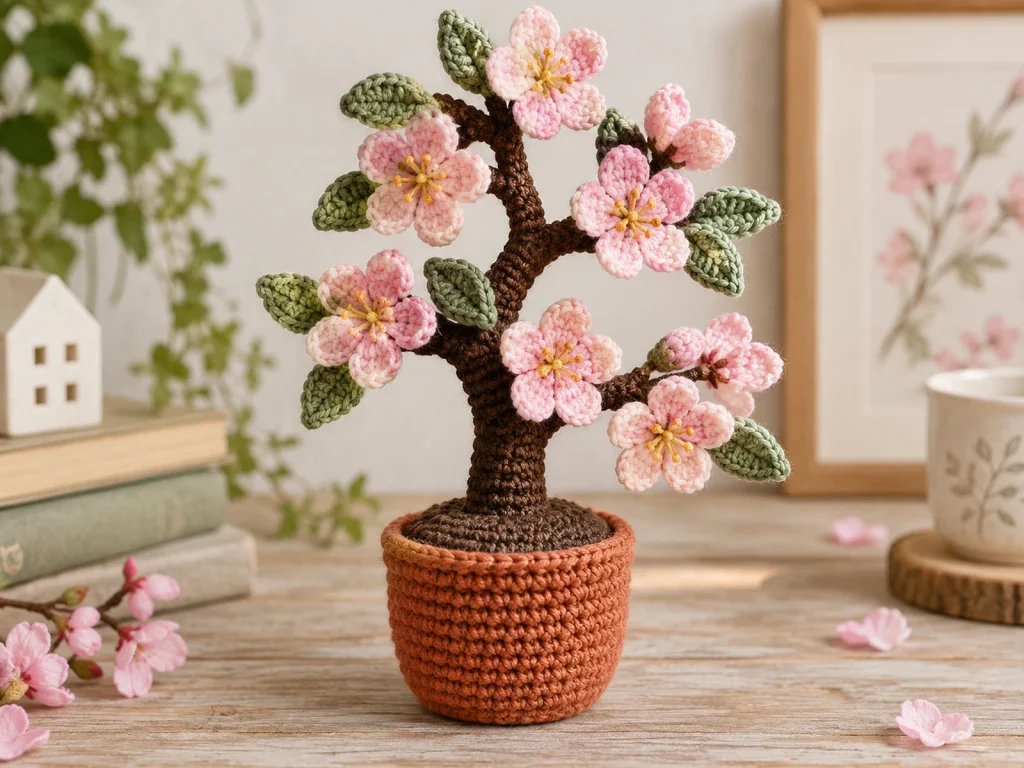
Add a touch of handmade botanical charm to your space with this crochet cherry blossom tree. This miniature tree combines a crocheted pot, soil base, shaped trunk, tapered branches, delicate five-petal blossoms, and soft green leaves.
The project is made in separate pieces and assembled at the end, giving you room to adjust the branch and flower placement for a natural, slightly asymmetrical tree silhouette.
Project Overview
What You’ll Make
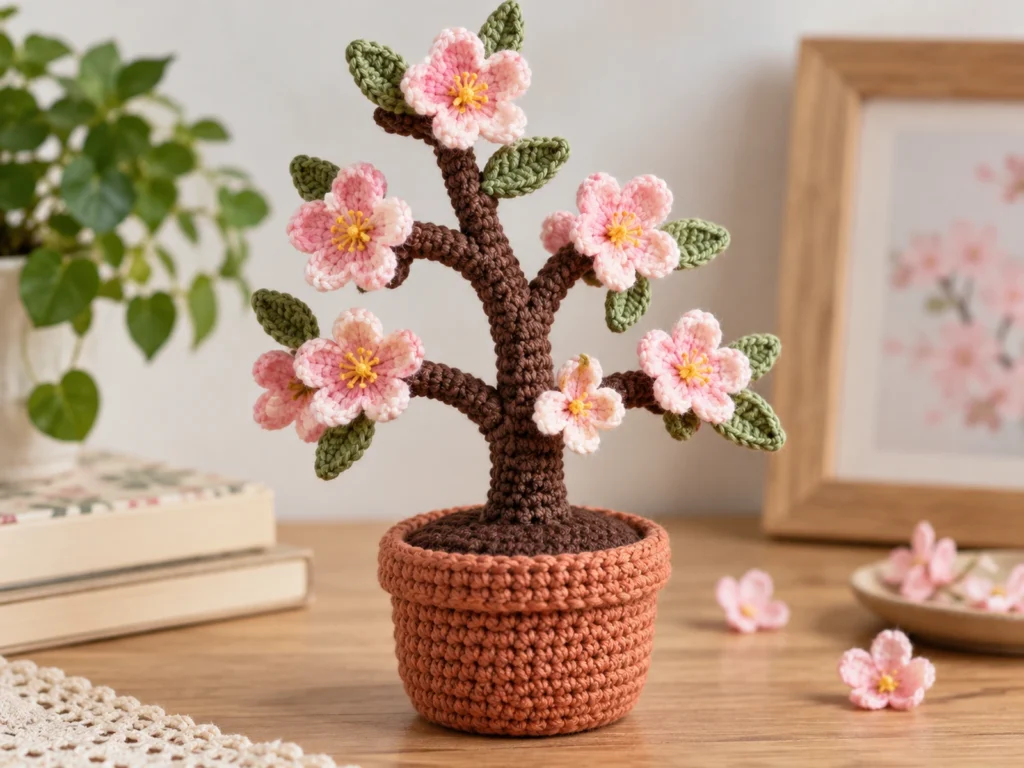
This original crochet cherry blossom tree includes:
- 1 crocheted pot
- 1 crocheted soil disk
- 1 trunk
- 3 branches in different lengths
- 8 five-petal blossoms
- 6 leaves
- Embroidered blossom centers
The planned finished tree is approximately 8–10 inches (20–25 cm) tall. This is an approximate size, since the final dimensions can vary with yarn, hook size, tension, stuffing, and individual crochet technique.
Project Details
- Project: Mini Crochet Cherry Blossom Tree
- Technique: Crochet and sewn assembly
- Yarn: Medium/worsted-weight yarn
- Hook: 3.5 mm
- Main colors: Terracotta, dark brown, blush pink, sage green, and warm yellow
- Filling: Polyester fiberfill
- Construction: Separate crocheted components assembled after crocheting
The pattern has been mathematically reviewed and constructionally checked, but it has not been physically crocheted and tested yet.
Materials & Tools
Yarn
You’ll need medium/worsted-weight yarn in the following colors:
- Terracotta for the pot
- Dark brown for the trunk, branches, and soil
- Blush pink for the blossoms
- Sage green for the leaves
- Warm yellow for the blossom centers
A small amount of deeper pink can be used as an optional floral accent.
Tools
- 3.5 mm crochet hook
- Polyester fiberfill
- Tapestry needle
- Stitch marker
- Scissors
A small internal weight may be added to the finished pot if additional stability is desired.
Abbreviations
This pattern uses standard US crochet terminology.
| Abbreviation | Meaning |
|---|---|
| MR | Magic ring |
| ch | Chain |
| sc | Single crochet |
| inc | Increase — 2 sc in the same stitch |
| dec | Single crochet decrease |
| sl st | Slip stitch |
| dc | Double crochet |
| hdc | Half double crochet |
| BLO | Back loop only |
| FO | Fasten off |
Before You Start
Work in Continuous Rounds
The pot, soil disk, trunk, and branches are worked in continuous rounds unless otherwise noted. Use a stitch marker to identify the beginning of each round.
Count Your Stitches
Check your stitch count carefully after every increase or decrease round. This is especially important when shaping the pot, trunk, and branches.
Stuff as You Go
The trunk should be moderately stuffed, while the branches should be stuffed lightly. Avoid overstuffing, which can distort the crocheted fabric.
The blossoms and leaves are flat and do not require stuffing.
Shape Before Sewing
For the final assembly, position the branches, flowers, and leaves before sewing them permanently. Rotate the tree and view it from several angles to create a balanced silhouette.
Construction Order
The finished tree is assembled in this order:
- Pot
- Soil disk
- Trunk
- Branches
- Blossoms
- Leaves
- Final shaping
Original Crochet Cherry Blossom Tree Pattern
Pot
Make 1 in terracotta.
Round 1: 6 sc in MR. (6)
Round 2: 6 inc. (12)
Round 3: (sc, inc) × 6. (18)
Round 4: (2 sc, inc) × 6. (24)
Round 5: (3 sc, inc) × 6. (30)
Round 6: (4 sc, inc) × 6. (36)
Round 7: 36 sc. (36)
Round 8: 36 sc. (36)
Round 9: 36 sc. (36)
Round 10: 36 sc. (36)
Round 11: 36 sc. (36)
Round 12: 36 sc in BLO. (36)
Round 13: 36 sc. (36)
Round 14: 36 sc. (36)
Fasten off and leave a long tail for sewing.
Soil Disk
Make 1 in dark brown.
Round 1: 6 sc in MR. (6)
Round 2: 6 inc. (12)
Round 3: (sc, inc) × 6. (18)
Round 4: (2 sc, inc) × 6. (24)
Round 5: (3 sc, inc) × 6. (30)
Round 6: (4 sc, inc) × 6. (36)
Fasten off and leave a long tail for sewing.
The soil disk finishes with 36 stitches, matching the 36-stitch opening of the pot.
Trunk
Make 1 in dark brown.
Round 1: 6 sc in MR. (6)
Round 2: 6 inc. (12)
Rounds 3–10: 12 sc. (12)
Begin adding moderate stuffing as the trunk develops.
Round 11: (sc, dec) × 4. (8)
Round 12: 8 sc. (8)
Add the final stuffing, then fasten off and close the 8-stitch opening.
Leave a long tail for attaching the trunk to the soil surface.
Long Branch
Make 1 in dark brown.
Round 1: 6 sc in MR. (6)
Rounds 2–7: 6 sc. (6)
Round 8: (sc, dec) × 2. (4)
Rounds 9–11: 4 sc. (4)
Stuff lightly as you work.
Fasten off and close the opening, leaving a sewing tail.
Medium Branch
Make 1 in dark brown.
Round 1: 6 sc in MR. (6)
Rounds 2–5: 6 sc. (6)
Round 6: (sc, dec) × 2. (4)
Rounds 7–9: 4 sc. (4)
Stuff lightly.
Fasten off and close the opening, leaving a sewing tail.
Short Branch
Make 1 in dark brown.
Round 1: 6 sc in MR. (6)
Rounds 2–3: 6 sc. (6)
Round 4: (sc, dec) × 2. (4)
Rounds 5–7: 4 sc. (4)
Stuff lightly.
Fasten off and close the opening, leaving a sewing tail.
Cherry Blossoms
Make 8 in blush pink.
Round 1
10 sc in MR. Join with a sl st to the first sc. (10)
Round 2 — Five Petals
Repeat the following sequence 5 times:
- sl st in the next stitch
- in the following stitch: ch 3, 3 dc, ch 3, sl st in the same stitch
Fasten off and leave a sewing tail.
Each flower uses all 10 stitches of the center ring.
Embroider a small warm-yellow center on each blossom.
Leaves
Make 6 in sage green.
Chain 7.
Starting in the second chain from the hook, work:
sc, hdc, dc, dc, hdc, sc
Rotate to the unused loops on the opposite side of the foundation chain and work:
sc, hdc, dc, dc, hdc, sc
Finish with a sl st at the base.
Fasten off and leave a sewing tail.
Make the Mini Tree
Assemble the Pot
Lightly stuff the pot so it keeps its cylindrical shape. Avoid packing the upper portion too firmly because the soil disk needs to sit across the opening.
Add the Soil Disk
Place the dark-brown soil disk over the top of the pot.
Sew evenly around the circumference, matching the 36-stitch disk to the 36-stitch pot opening.
Attach the Trunk
Position the trunk near the center of the soil surface and sew the base securely into place.
A slight natural tilt can be used rather than keeping the trunk perfectly vertical.
Attach the Branches
Use the three branch lengths to create a tiered tree shape.
- Place the long branch toward the lower-middle section.
- Place the medium branch somewhat higher and toward the opposite side.
- Place the short branch toward the upper section.
Rotate the tree and check the arrangement from several angles before sewing the branches permanently.
Add the Blossoms
Attach the 8 blossoms around the branches using this suggested distribution:
- 3 blossoms on the long branch
- 2 blossoms on the medium branch
- 2 blossoms on the short branch
- 1 blossom near the upper trunk area
Vary the direction of the flowers so they do not all face the same plane.
Add the Leaves
Attach the 6 leaves around the blossom clusters:
- 2 leaves on the long branch
- 2 leaves on the medium branch
- 2 leaves on the short branch
Compare the tree from several angles before permanently sewing the leaves.
Final Shaping
Gently adjust the:
- branch angles
- flower positions
- leaf directions
- trunk angle
- overall silhouette
The finished tree is intended to have a natural, slightly asymmetrical flowering-tree appearance.
Finishing
Weave in and trim the remaining yarn tails after all of the pieces are securely attached.
Check that no stuffing is visible and that the branches, blossoms, and leaves are firmly sewn.
Take a final look at the tree from the front, side, and back and make any small positioning adjustments before completing the project.
Helpful Tips
- Check stitch counts at the end of increase and decrease rounds.
- Use moderate stuffing for the trunk and lighter stuffing for the branches.
- Keep the blossoms and leaves flat.
- Place components before sewing them permanently.
- Rotate the finished tree while arranging the branches and flowers.
- Avoid overstuffing the smaller pieces.
- Leave long sewing tails on components that need to be attached later.
Troubleshooting
My stitch count is off.
Stop at the round where the count first changes and check the increase or decrease sequence before continuing.
The pot should progress through:
6 → 12 → 18 → 24 → 30 → 36
The following pot rounds remain at 36 stitches.
My trunk or branches look too soft.
Check the stuffing before closing the component. The trunk is designed for moderate stuffing, while the branches should be stuffed more lightly.
The tree looks too flat.
Reposition the branches and flowers before sewing them down. Slightly changing their direction can create more depth.
The soil disk does not fit the pot.
Verify that the soil disk finishes with 36 stitches and that the pot opening has been worked according to the 36-stitch construction.
The blossoms all point in the same direction.
Rotate some blossoms before sewing them permanently. Varying their direction helps create a more natural flowering-tree appearance.
Customization Ideas
Change the Blossom Colors
The blush-pink blossoms can be replaced with another soft floral shade while keeping the rest of the construction the same.
A second flower color can also be used for selected blossoms.
Customize the Pot
Terracotta creates a warm botanical look, but you can use another color to change the overall style of the finished piece.
Change the Tree’s Visual Shape
The final appearance can be changed through branch and blossom placement. A denser arrangement creates a fuller canopy, while wider spacing produces a lighter look.
Care
Keep the finished crochet tree in a clean, dry area and handle the blossoms and leaves gently when moving it.
Because the tree contains individually sewn decorative pieces, avoid pulling on the branches, blossoms, or leaves.
Frequently Asked Questions
How big is the finished crochet cherry blossom tree?
The planned finished size is approximately 8–10 inches (20–25 cm). Actual size may vary with yarn, hook size, tension, stuffing, and individual crochet technique.
How many blossoms are used?
The pattern includes 8 crocheted cherry blossoms.
How many leaves does the tree have?
The pattern includes 6 crocheted leaves.
Does the project require stuffing?
Yes. The pot and trunk use stuffing, and the branches are lightly stuffed. The blossoms and leaves remain flat.
Can I change the blossom color?
Yes. You can substitute another color for the blossoms without changing the flower construction.
Can I change the pot color?
Yes. The pot can be crocheted in another color while keeping the rest of the tree design unchanged.
How are the branches attached?
The three branches are sewn to the trunk at different heights and angles to create a layered flowering-tree silhouette.
How can I make the tree look more natural?
Vary the direction of the branches, blossoms, and leaves instead of arranging every component on the same plane. Check the project from several angles before finishing the sewing.
Final Thoughts
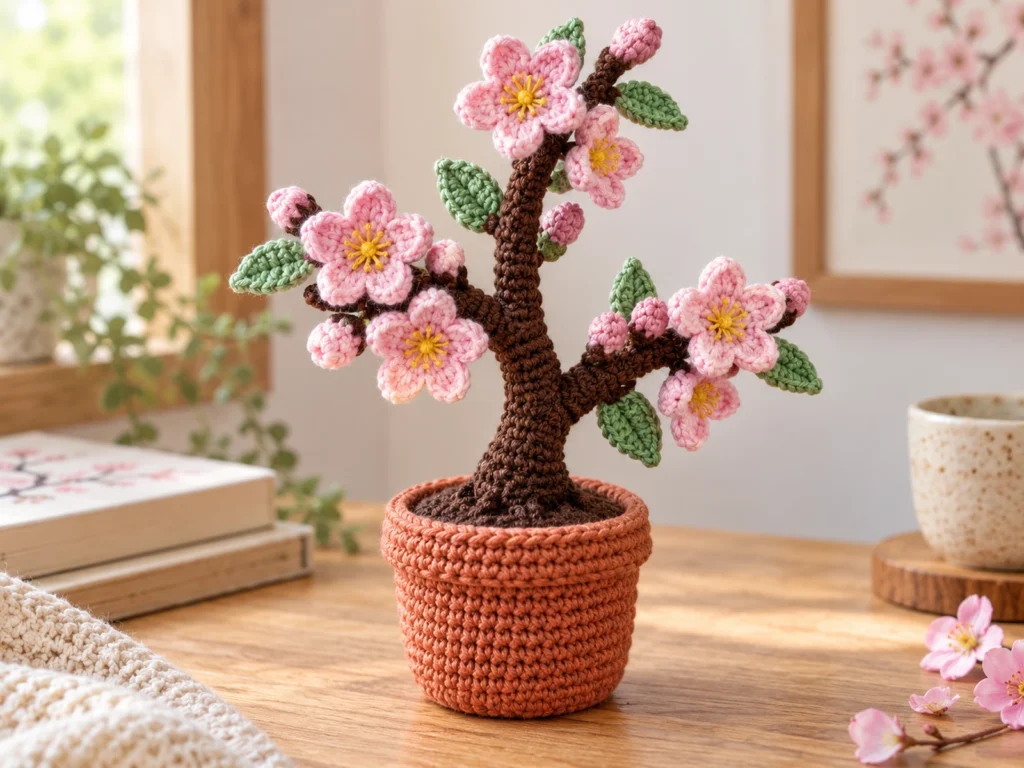
This crochet cherry blossom tree combines a shaped pot, a central trunk, three tapered branches, delicate blossoms, and small leaves into one decorative handmade project.
The final character of the tree comes from the assembly. Small changes in branch angle, flower direction, and leaf placement can create a different silhouette while keeping the original crochet components unchanged.
The pattern has been mathematically reviewed and constructionally checked, but it has not been physically crocheted and tested yet.