
Crochet Hedgehog Pattern: A Step-by-Step Amigurumi Tutorial
This crochet hedgehog pattern creates a compact woodland-inspired amigurumi with…
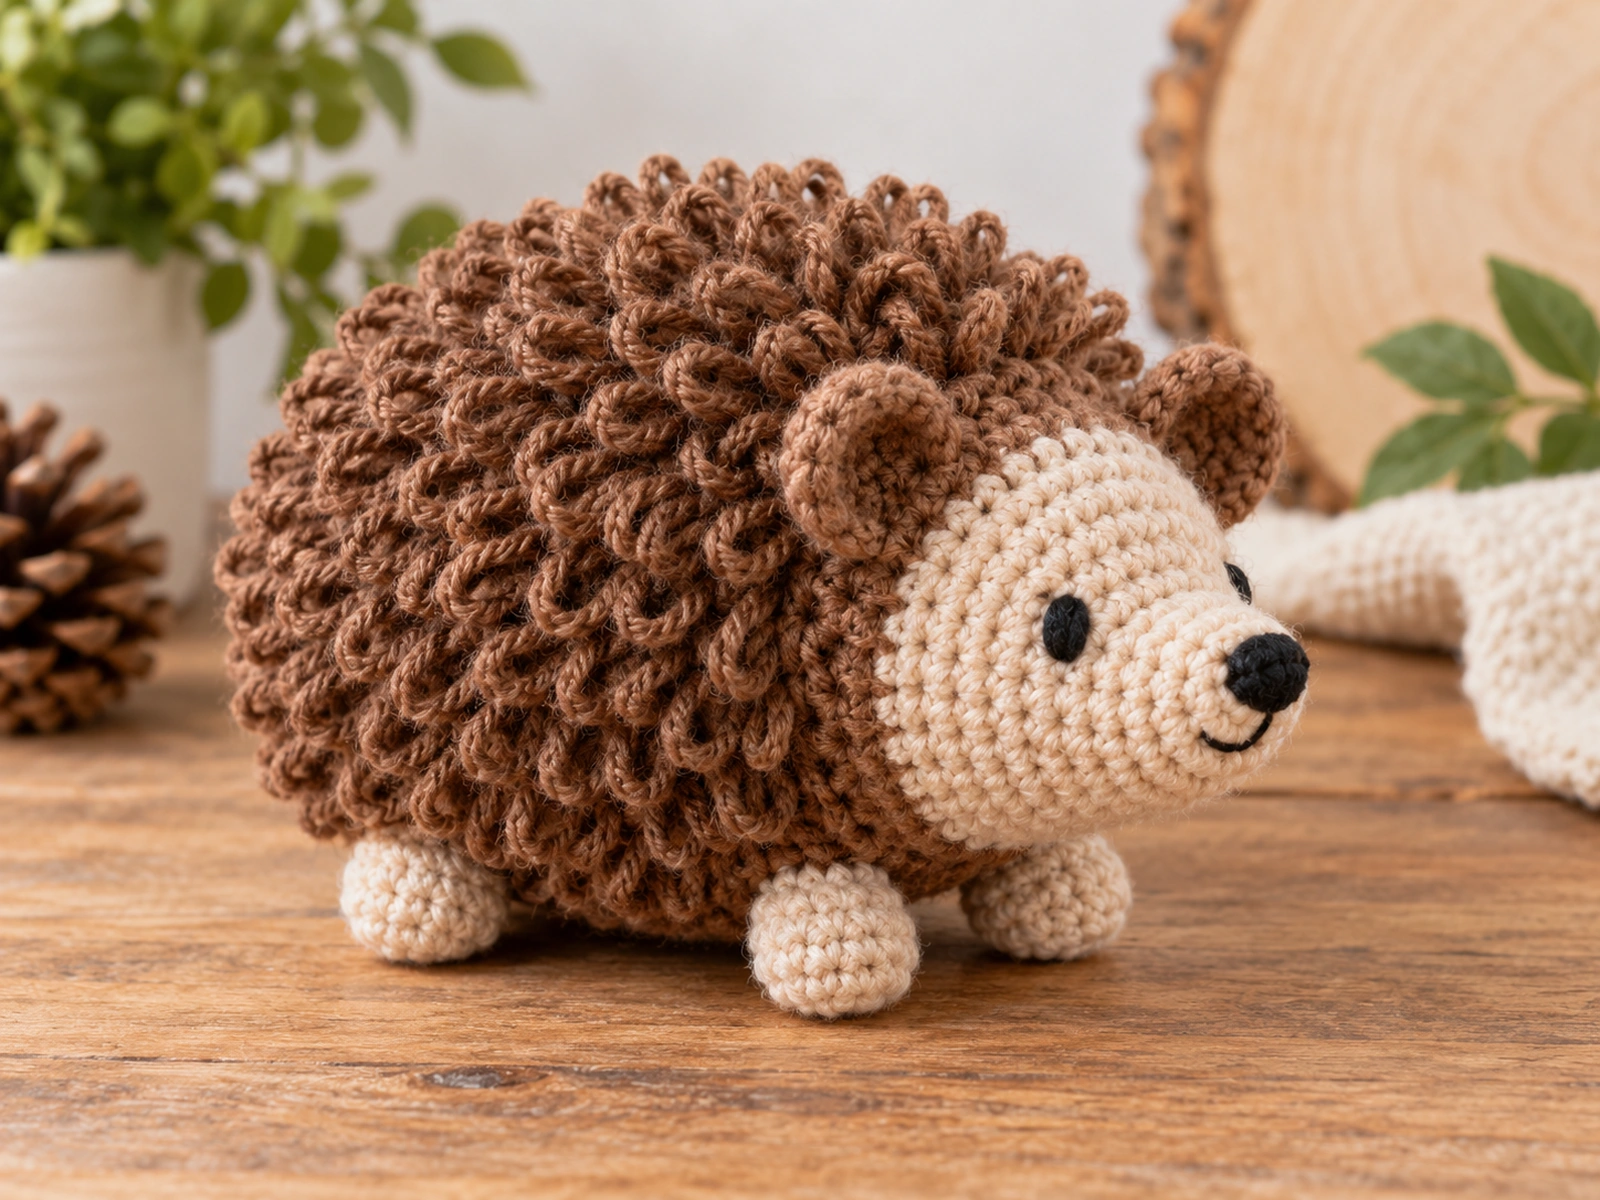
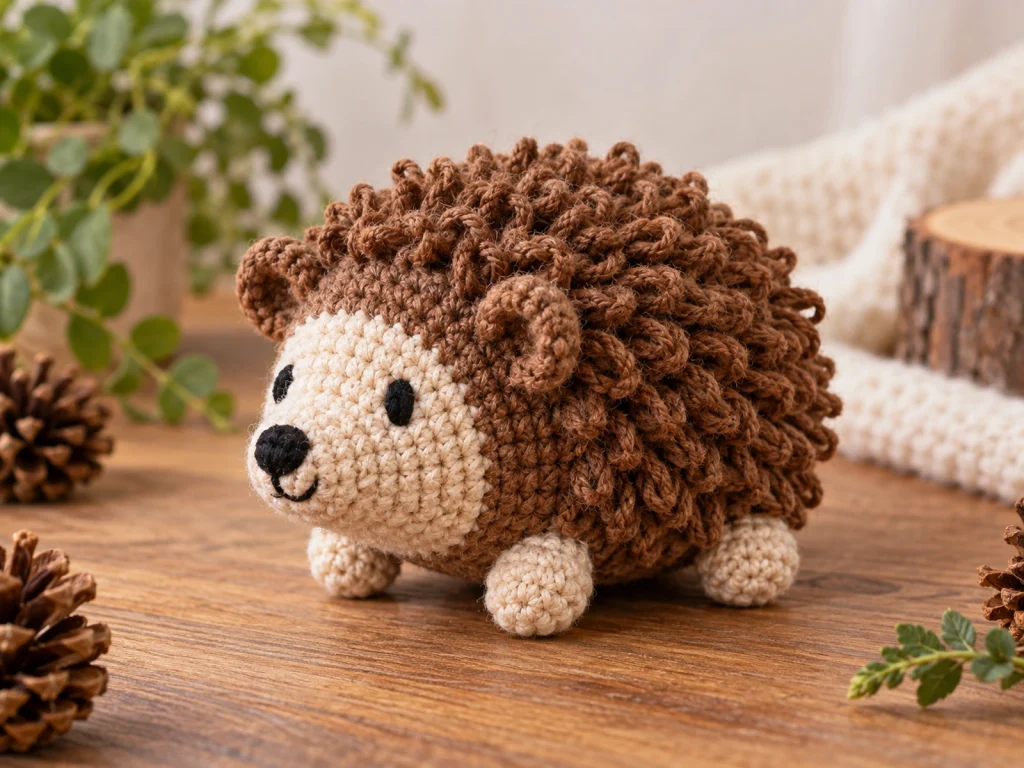
This crochet hedgehog pattern creates a compact woodland-inspired amigurumi with a smooth face, rounded ears, four little feet, and a raised loop-stitch back. The body is worked as one continuous piece, while the muzzle, ears, and feet are crocheted separately and attached during assembly.
The finished hedgehog is designed to be approximately 4.5–5.5 inches (11.5–14 cm) long. Final size can vary depending on yarn, hook size, tension, stuffing, and individual crochet technique.
The pattern has been mathematically reviewed and constructionally checked, but it has not been physically crocheted and tested yet.
Project Overview
What You’ll Make
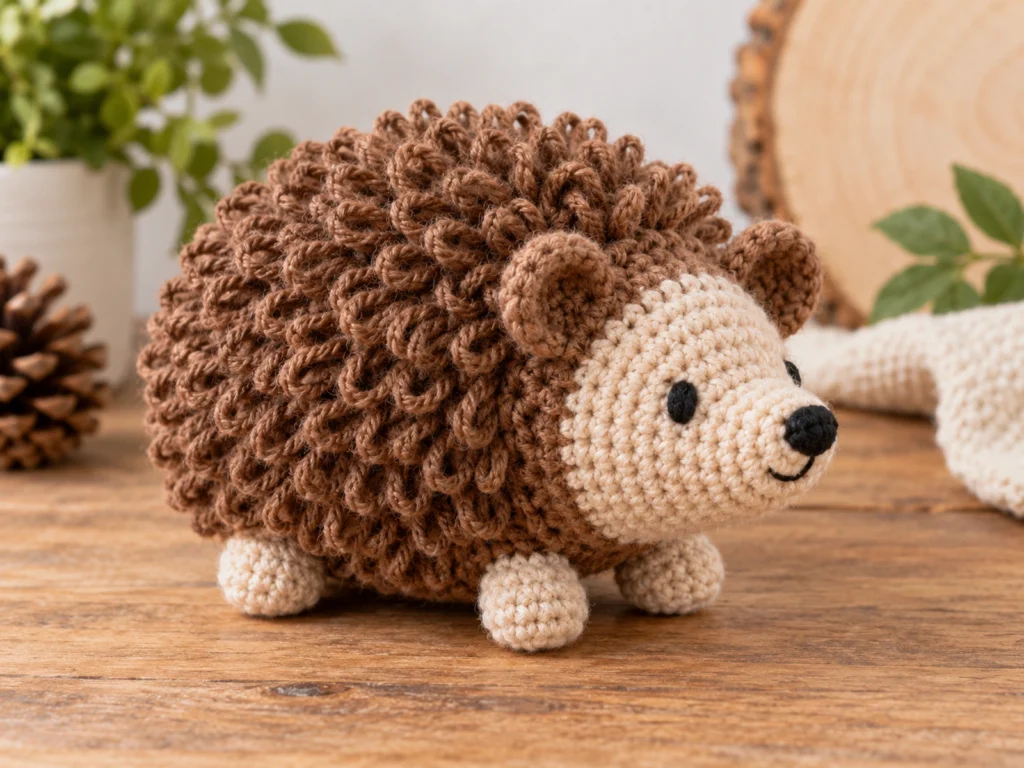
This crochet hedgehog is built from a rounded main body with a smooth front and a textured back.
The project includes:
- 1 main body
- 1 muzzle
- 2 ears
- 4 feet
- Embroidered eyes
- An embroidered nose
- An optional embroidered mouth
- A loop-stitch textured back
The textured section is worked directly into the body rather than being added as a separate piece.
Project Details
- Project: Crochet Hedgehog Amigurumi
- Finished size: Approximately 4.5–5.5 inches (11.5–14 cm)
- Yarn: Worsted-weight (#4)
- Hook: 3.5 mm
- Body and ears: Chestnut brown
- Muzzle and feet: Warm oatmeal
- Facial details: Black yarn
- Stuffing: Polyester fiberfill
- Eyes: Embroidered
- Construction: Continuous-round body with separately crocheted muzzle, ears, and feet
Materials & Tools
Yarn
- Worsted-weight (#4) yarn in chestnut brown
- Worsted-weight (#4) yarn in warm oatmeal
- Black yarn for embroidered facial details
Tools
- 3.5 mm crochet hook
- Polyester fiberfill
- Tapestry needle
- Scissors
- Stitch marker
- Optional row counter
Abbreviations
This pattern uses standard US crochet terminology.
- MR — magic ring
- sc — single crochet
- inc — increase; 2 sc in the same stitch
- dec — decrease; single crochet 2 stitches together
- LS — loop stitch
- FO — fasten off
Before You Start
Work in Continuous Rounds
The body, muzzle, ears, and feet are worked in continuous rounds unless otherwise noted. Use a stitch marker to keep track of the beginning of each round.
Count Your Stitches
Keep the stitch count consistent at the end of every round. This is especially important during the increase and decrease sections.
Stuff as You Go
The body begins receiving stuffing after Round 14. Add it gradually as the body decreases so you can maintain an even rounded shape.
The muzzle and feet need lighter stuffing, while the ears remain unstuffed.
Understanding the Textured Back
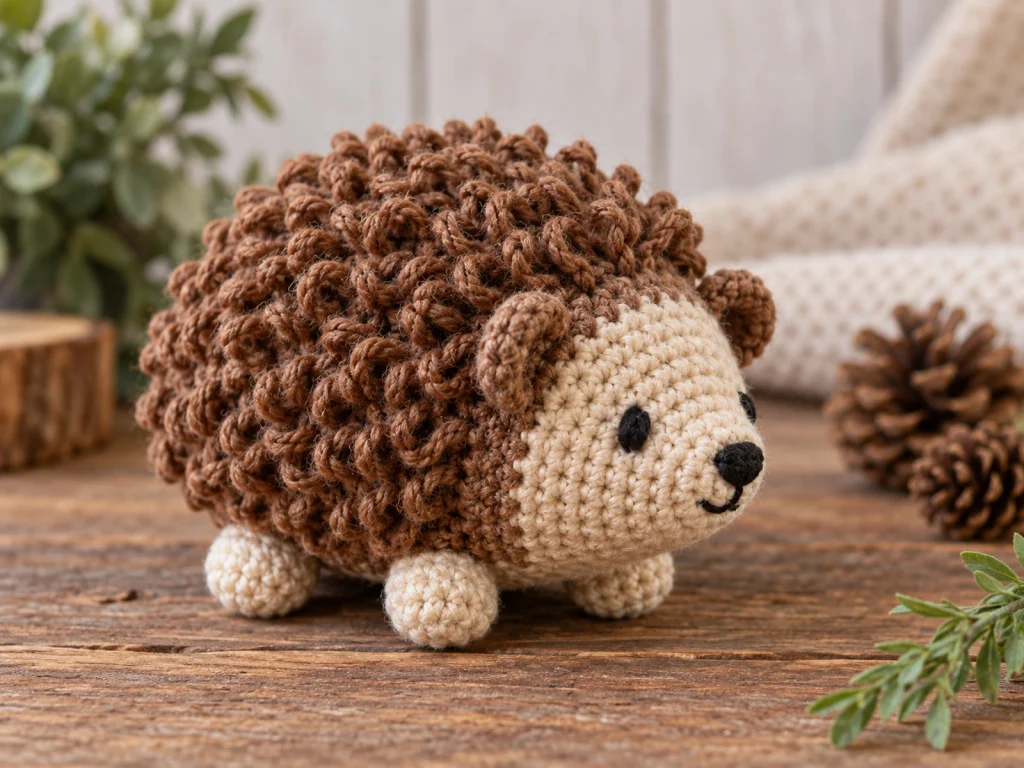
The textured section uses loop stitches across the first 18 stitches of Rounds 7–12.
Each loop stitch counts as one stitch, so the body remains at 36 stitches throughout the textured section.
Construction Order
A practical assembly sequence is:
- Finish the body.
- Crochet and close the muzzle.
- Crochet both ears.
- Crochet all four feet.
- Attach the muzzle.
- Add the embroidered facial details.
- Attach the ears.
- Attach the feet.
- Shape and finish the project.
Original Crochet Hedgehog Pattern
Body — Make 1
Work in chestnut brown.
Round 1
6 sc in MR. (6)
Round 2
6 inc. (12)
Round 3
(sc, inc) × 6. (18)
Round 4
(2 sc, inc) × 6. (24)
Round 5
(3 sc, inc) × 6. (30)
Round 6
(4 sc, inc) × 6. (36)
The body now has a 36-stitch circumference. The first 18 stitches of the next rounds form the textured back, while the remaining 18 stitches stay smooth for the front and belly.
Round 7
(LS, sc) × 9, sc 18. (36)
Round 8
(sc, LS) × 9, sc 18. (36)
Round 9
(LS, sc) × 9, sc 18. (36)
Round 10
(sc, LS) × 9, sc 18. (36)
Round 11
(LS, sc) × 9, sc 18. (36)
Round 12
(sc, LS) × 9, sc 18. (36)
The alternating loop placement staggers the texture while keeping the body at 36 stitches.
Round 13
sc around. (36)
Round 14
sc around. (36)
Begin adding stuffing gradually after Round 14.
Round 15
(4 sc, dec) × 6. (30)
Round 16
sc around. (30)
Round 17
(3 sc, dec) × 6. (24)
Round 18
(2 sc, dec) × 6. (18)
Add the remaining stuffing and shape the body evenly.
Round 19
(sc, dec) × 6. (12)
Add a small amount of additional stuffing only if needed to maintain the shape.
Round 20
6 dec. (6)
Fasten off, leaving a long tail.
Weave the tail through the remaining front loops, cinch the opening closed, secure the yarn, and hide the end.
Muzzle — Make 1
Work in warm oatmeal.
Round 1
6 sc in MR. (6)
Round 2
6 inc. (12)
Round 3
(sc, inc) × 6. (18)
Round 4
sc around. (18)
Round 5
sc around. (18)
Lightly stuff the muzzle.
Round 6
(sc, dec) × 6. (12)
Add a small amount of additional stuffing if needed.
Round 7
6 dec. (6)
Fasten off, leaving a long sewing tail.
Cinch the opening closed and keep the yarn tail for sewing the muzzle to the body.
Ears — Make 2
Work in chestnut brown.
Round 1
6 sc in MR. (6)
Round 2
6 inc. (12)
Round 3
sc around. (12)
Fasten off, leaving a sewing tail.
Do not stuff.
Flatten each ear gently into a small rounded shape.
Repeat for the second ear.
Feet — Make 4
Work in warm oatmeal.
Round 1
6 sc in MR. (6)
Round 2
6 inc. (12)
Round 3
sc around. (12)
Round 4
(2 sc, dec) × 3. (9)
Add a small amount of stuffing.
Round 5
(sc, dec) × 3. (6)
Fasten off, leaving a sewing tail.
Close the opening neatly and keep the tail for attachment.
Repeat until you have four feet.
Create the Hedgehog’s Textured Back
The raised texture is created with loop stitches worked directly into the body.
Rounds 7–12 contain the special textured section. The first 18 stitches of each round form the back, while the remaining 18 stitches stay smooth.
For the loop stitch, work a single crochet while deliberately pulling up an elongated loop before completing the stitch. The loop counts as one stitch.
Try to keep the loops reasonably consistent in length throughout the textured area.
Facial Details
Eyes
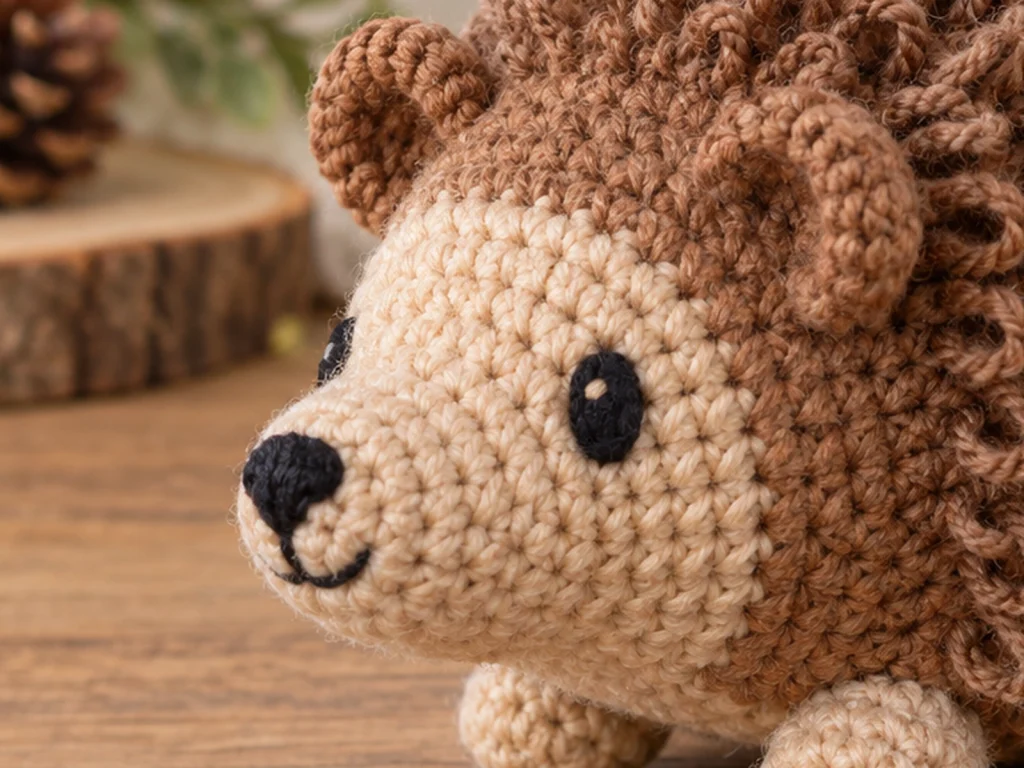
Using black yarn, embroider two small oval eyes on the smooth front section of the body.
Place them above the muzzle and compare both sides visually before permanently securing the second eye.
Nose
Embroider a small rounded triangular nose near the front-center of the muzzle.
Build the shape gradually with several passes of black yarn.
Mouth
A small embroidered curve can be added beneath the nose.
Keep the mouth subtle so the muzzle remains the main facial feature.
Assembly
Step 1: Attach the Muzzle
Place the muzzle on the smooth front of the body.
Check the position from the front and both sides before sewing it permanently.
Sew around the full attachment edge.
Step 2: Add the Facial Features
Embroider the eyes after the muzzle is positioned.
Add the nose near the front-center of the muzzle, followed by the optional mouth.
Step 3: Attach the Ears
Position the two flattened ears near the upper sides of the smooth facial area.
Compare both sides from the front before sewing them permanently.
Secure each ear with its sewing tail.
Step 4: Attach the Feet
Place four feet underneath the body:
- Two toward the front
- Two toward the rear
Position all four temporarily before sewing.
Check the overall silhouette and make sure the body remains balanced.
Sew each foot securely and weave in the yarn ends.
Finishing
Once all of the pieces are attached, check the finished hedgehog from several angles.
Make sure:
- The muzzle is centered.
- The ears look balanced.
- The feet sit evenly.
- The smooth front remains clearly visible.
- The loop-stitch texture stays concentrated on the back.
- No stuffing is visible.
- Loose yarn ends are secured and hidden.
Shape the body gently with your hands and arrange the loop stitches if any have become flattened during assembly.
Helpful Tips
Keep the loop stitches consistent
The textured back will look more even when the loops are kept at similar lengths.
Check paired pieces together
Before permanently sewing the ears or feet, position both sides first. This makes it easier to compare symmetry.
Avoid overstuffing
Too much stuffing can stretch the crochet fabric and affect the shape of the textured section.
Correct stitch-count mistakes early
If your count is wrong at the end of a round, stop and find the mistake before continuing. Correcting an error immediately is easier than compensating for it several rounds later.
Troubleshooting
My stitch count is off.
Count the entire round again and compare it with the required stitch count before moving forward.
My loop stitches look uneven.
Work with consistent tension and try to keep the loops close to the same length.
My body looks too firm.
Remove a small amount of stuffing and reshape the body gradually.
The muzzle looks off-center.
Reposition it before sewing permanently. Check the front and both sides to make sure the muzzle sits naturally on the smooth section.
My ears don’t look symmetrical.
Place both ears first without sewing. Compare their height, angle, and distance from the face before securing either one.
My hedgehog doesn’t sit evenly.
Check all four feet before sewing. Small changes in their placement can affect the final balance.
Customization Ideas
Change the body color
Try another yarn color for the body and ears while keeping the same construction.
Adjust the facial expression
The embroidered eyes and mouth can be varied to give the finished hedgehog a different expression.
Experiment with ear placement
Moving the ears slightly higher, lower, or outward can change the character of the face.
Explore the texture
The appearance of the loop-stitch back can change with yarn, tension, and loop length. Keep the stitch count unchanged when experimenting with the texture.
For significant size changes, recalculate the stitch architecture rather than simply enlarging the finished pieces.
Frequently Asked Questions
What yarn is used for this crochet hedgehog?
The pattern uses worsted-weight (#4) yarn in chestnut brown, warm oatmeal, and black for the embroidered facial details.
What crochet hook size is used?
A 3.5 mm crochet hook is used for the pattern.
How is the hedgehog’s textured back made?
The raised back is created with loop stitches worked directly into the body during Rounds 7–12.
Does this pattern use safety eyes?
No. The eyes are embroidered with black yarn.
Is the head crocheted separately?
No. The main body is worked as one continuous rounded form. The muzzle is crocheted separately and attached to the front.
How many feet are included?
The pattern includes four separate feet.
Can I change the colors?
Yes. The color choices can be changed while keeping the same basic construction.
Is the pattern physically tested?
No. The pattern has been mathematically reviewed and constructionally checked, but it has not been physically crocheted and tested yet.
Conclusion
This crochet hedgehog pattern combines a rounded amigurumi body with a textured loop-stitch back for a recognizable woodland-inspired look. The smooth front, embroidered face, rounded ears, and four small feet complete the character.
The key to the finished look is maintaining a clear contrast between the smooth front and the raised back texture while keeping the body evenly shaped and stuffed.