Crochet Boba Tea Keychain Pattern: A Cute Amigurumi Drink Project
This crochet boba tea keychain turns a tiny crocheted cup…
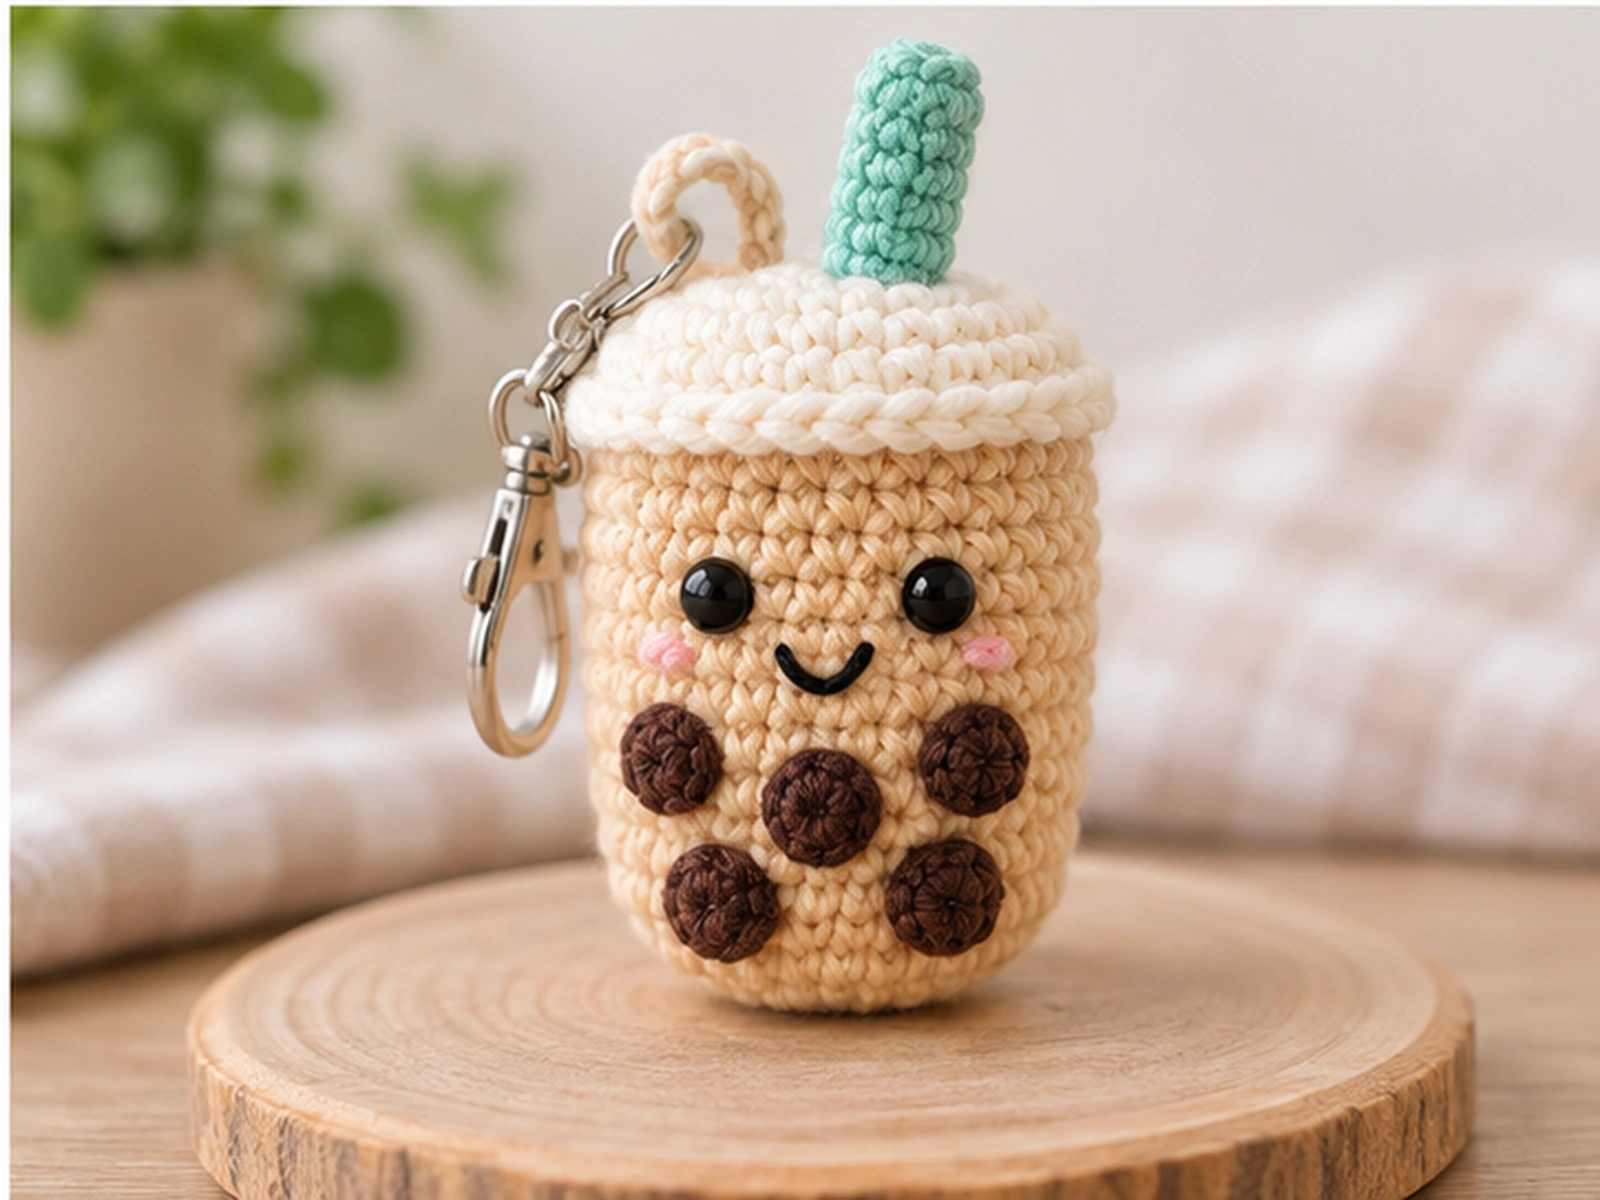
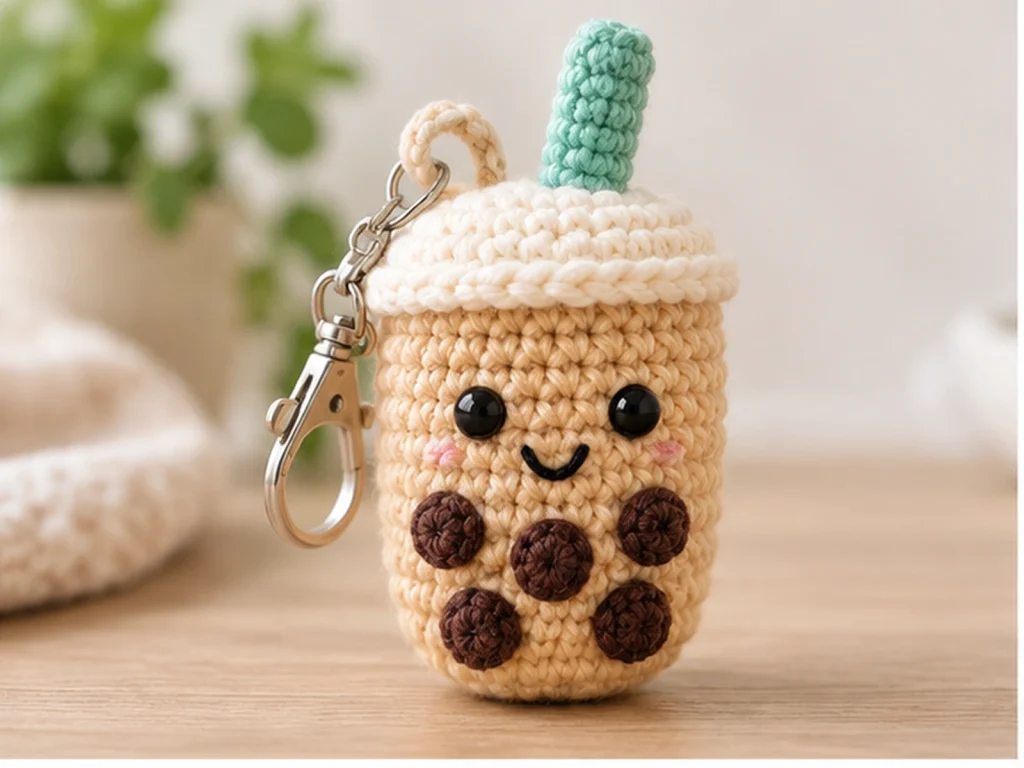
This crochet boba tea keychain turns a tiny crocheted cup into a fun amigurumi accessory with a separate lid, straw, six boba pearls, and a simple face. The project is worked in several small components and then assembled into a compact drink-inspired keychain or bag charm.
The finished piece is approximately 3–4 inches tall, including the straw and attachment loop. Final size can vary with yarn, hook size, tension, stuffing, and individual crochet technique.
Project Overview
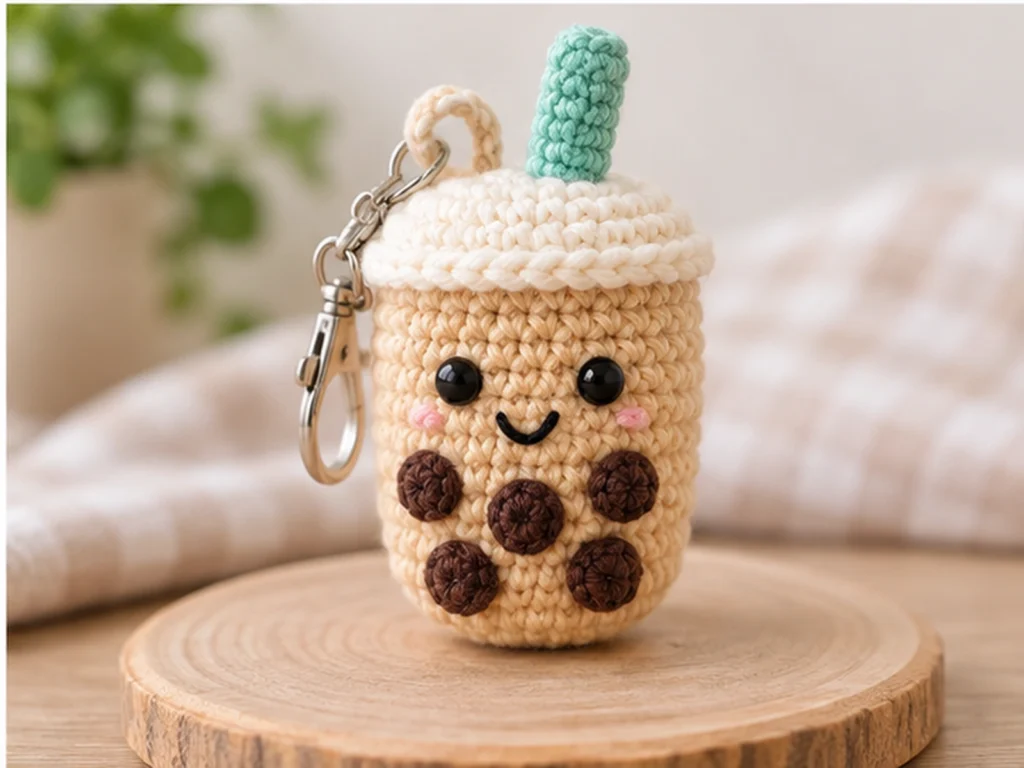
What You’ll Make
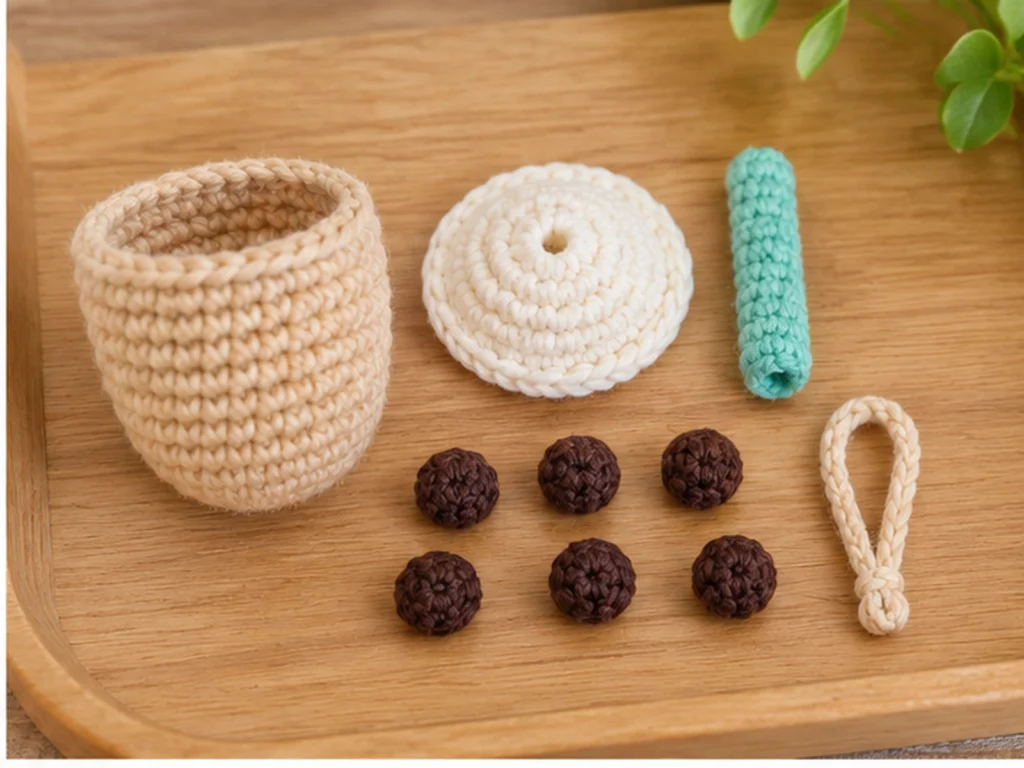
You’ll crochet a miniature boba tea cup from separate components:
- 1 cup body
- 1 lid
- 1 straw
- 6 boba pearls
- 1 crochet attachment loop
- 2 optional safety eyes
- 1 embroidered mouth
The cup is worked in continuous rounds, while the smaller pieces are crocheted separately and sewn into place during assembly.
Project Details
- Project: Crochet Boba Tea Keychain
- Technique: Amigurumi crochet
- Yarn: DK/light worsted cotton, approximately #3 to light #4
- Hook: 3.0 mm crochet hook
- Main colors: Drink/cup color, cream or off-white, dark brown, accent color, and black
- Eyes: Optional 6 mm safety eyes
- Filling: Polyester fiberfill
- Approximate finished size: 3–4 inches tall
The size is approximate rather than a guaranteed finished measurement.
Pattern note: The stitch counts and construction have been mathematically reviewed and constructionally checked, but this pattern has not yet been physically crocheted and tested. Final proportions, fit, and keychain durability should therefore be considered approximate.
Materials & Tools
Yarn
Choose cotton yarn in the following color groups:
- Main drink/cup color
- Cream or off-white for the lid
- Dark brown for the boba pearls
- Accent color for the straw
- Black for facial embroidery
An exact yarn quantity has not been established for this pattern.
Hook
- 3.0 mm crochet hook
Other Supplies
- Polyester fiberfill
- Yarn needle
- Scissors
- 6 mm safety eyes, optional
- Black embroidery thread
- Keychain hardware, if desired
Safety Note
Safety eyes can present a choking hazard and are not appropriate for children under 3. The finished project should not be considered baby-safe, toddler-safe, or child-safe.
Abbreviations
This pattern uses standard US crochet terminology.
- MR — magic ring
- ch — chain
- sc — single crochet
- inc — increase, 2 sc in the same stitch
- dec — decrease, single crochet two stitches together
- sl st — slip stitch
- BLO — back loop only
- FO — fasten off
Before You Start
Work in Continuous Rounds
The cup body, straw, and boba pearls are worked in continuous rounds. A stitch marker can help you keep track of the beginning of each round.
Count Your Stitches
The shaping depends on precise increases and decreases. If your stitch count is off, correct it before continuing to the next round.
Stuff as You Go
Add stuffing gradually during the closing rounds of the cup and boba pearls. Avoid overstuffing, which can stretch the stitches and distort the shape.
Shape Before Sewing
Take a moment to adjust the shape of each stuffed component before closing it completely or sewing it to another piece.
Construction Order
The main pieces are crocheted separately before assembly:
- Cup
- Lid
- Straw
- Six boba pearls
- Facial details
- Keychain attachment loop
Original Crochet Boba Tea Keychain Pattern
Cup Body
Make 1 in the main drink/cup color.
Work in continuous rounds.
Round 1
6 sc in MR. (6)
Round 2
6 inc. (12)
Round 3
(sc, inc) × 6. (18)
Round 4
(2 sc, inc) × 6. (24)
Round 5
(3 sc, inc) × 6. (30)
Round 6
sc around. (30)
Round 7
sc around. (30)
Round 8
sc around. (30)
Round 9
sc around. (30)
Round 10
sc around. (30)
Round 11
sc around. (30)
Round 12
sc around. (30)
Round 13
(4 sc, inc) × 6. (36)
Round 14
sc around. (36)
Round 15
sc around. (36)
Round 16
(4 sc, dec) × 6. (30)
Round 17
(3 sc, dec) × 6. (24)
Round 18
(2 sc, dec) × 6. (18)
Begin stuffing the cup gradually. Shape the body as you work.
Round 19
(sc, dec) × 6. (12)
Add the final amount of stuffing and check the shape.
Round 20
6 dec. (6)
FO, leaving a yarn tail. Use the tail to close the opening securely and weave in the end.
Lid
Make 1 in cream or off-white.
Round 1
6 sc in MR. (6)
Round 2
6 inc. (12)
Round 3
(sc, inc) × 6. (18)
Round 4
(2 sc, inc) × 6. (24)
Round 5
(3 sc, inc) × 6. (30)
Round 6
(4 sc, inc) × 6. (36)
Round 7
BLO, sc around. (36)
FO, leaving a long yarn tail for sewing.
Straw
Make 1 in an accent color.
Round 1
5 sc in MR. (5)
Round 2
sc around. (5)
Round 3
sc around. (5)
Round 4
sc around. (5)
Round 5
sc around. (5)
Round 6
sc around. (5)
Round 7
sc around. (5)
Round 8
sc around. (5)
FO, leaving a sewing tail.
Lightly flatten the lower end before attaching the straw to the lid.
Boba Pearls
Make 6 in dark brown.
Make each pearl separately in continuous rounds.
Round 1
6 sc in MR. (6)
Round 2
6 inc. (12)
Round 3
sc around. (12)
Add a small amount of stuffing.
Round 4
6 dec. (6)
FO and close the opening securely.
Repeat until you have six completed boba pearls.
Facial Details
Eyes
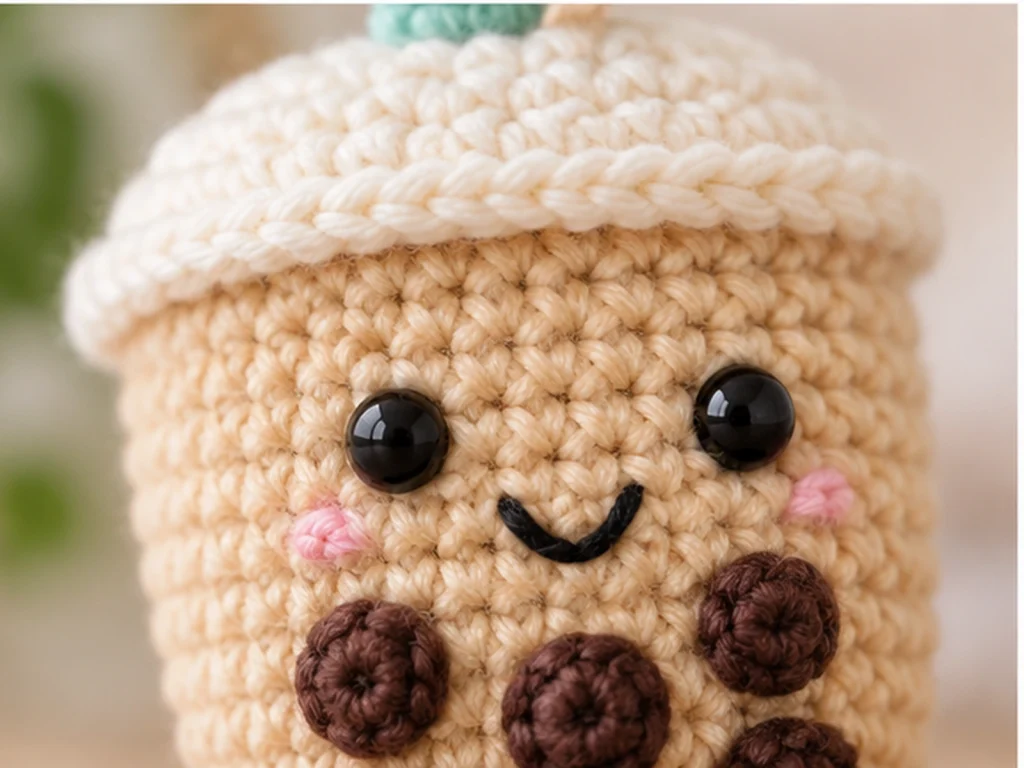
Use two 6 mm safety eyes or embroider the eyes with black thread.
Place the eyes symmetrically on the front of the cup, above the main group of boba pearls. Because exact eye spacing has not been physically tested, use visual symmetry and the available front surface as your guide.
Mouth
Using black embroidery thread, add a small smile centered below the eyes and above the main boba area.
Assembly
Step 1: Attach the Lid
Center the finished lid over the top of the cup.
Use the lid’s long sewing tail to attach the edge securely around the upper portion of the cup. Check that the lid sits evenly before completing the seam.
Step 2: Add the Boba Pearls
Arrange the six boba pearls across the front of the cup.
A balanced arrangement can use:
- Three pearls across the lower front
- Two pearls above them
- One pearl slightly offset near the center
Adjust the arrangement visually before sewing the pearls permanently into place.
Step 3: Add the Facial Features
Once the boba pearls are positioned, add the eyes to the open area above them.
Compare both sides before permanently securing the facial details.
Embroider the mouth below the eyes.
Step 4: Attach the Straw
Position the straw toward the rear portion of the lid so it remains visible without covering the face.
Sew the flattened lower end securely to the lid.
Step 5: Add the Keychain Loop
Chain 8 in the lid or main cup color.
Slip stitch into the starting point to form a small loop.
FO, leaving a long sewing tail.
Place the loop at the rear center of the lid/top area.
For additional reinforcement, sew the loop through both the lid and the upper portion of the cup rather than attaching it to the lid alone.
Make several reinforcing passes through the attachment point.
Finishing
Before attaching keychain hardware, inspect the finished piece carefully.
Check that:
- The cup holds its shape.
- The lid is securely attached.
- The straw is firmly sewn.
- All six boba pearls are secure.
- The face looks balanced.
- No stuffing is visible.
- Loose yarn ends are woven in.
- The attachment loop is reinforced.
The attachment loop has been designed to provide a reinforced connection point, but its long-term durability has not been physically tested.
Helpful Tips
Keep Your Tension Consistent
Consistent tension helps the cup maintain a smooth shape and keeps the stitches compact.
Stuff Gradually
Small amounts of stuffing are easier to control than adding a large amount at once. Shape the cup as you go.
Count Before Moving On
The shaping rounds depend on the stated stitch counts. If your count is different, stop and identify the mistake before continuing.
Compare Symmetrical Details
For the eyes and other paired details, compare both sides before making the placement permanent.
Reinforce the Attachment Point
Because the keychain loop will experience handling, use multiple sewing passes through the loop, lid, and upper cup area.
Troubleshooting
My Cup Looks Too Loose
Check your crochet tension. Looser stitches may make the stuffing more visible and can create a softer, less defined shape.
My Cup Looks Lumpy
Try redistributing the stuffing instead of adding more. Uneven filling can change the silhouette.
My Lid Does Not Sit Evenly
Before completing the seam, reposition the lid around the top of the cup so the edge is distributed evenly.
My Face Looks Off-Center
Use the cup’s front surface as your guide and compare the two eyes visually before sewing them permanently.
My Boba Pearls Look Uneven
Arrange all six pearls before attaching them. Move them around until the overall composition looks balanced.
My Keychain Loop Feels Loose
Reinforce the loop through the lid and upper cup area with several sewing passes. Since the pattern has not been physically tested, inspect the attachment carefully before regular use.
Customization Ideas
Change the Drink Color
Swap the main cup color for pink, lavender, green, cream, or another drink-inspired shade.
Changing the main color does not require changing the cup’s stitch structure.
Change the Face
Keep the face simple with safety eyes and an embroidered smile, or embroider the eyes instead.
Use It as a Bag Charm
The finished crochet drink can also be adapted for use as a bag charm by connecting suitable hardware to the reinforced crochet loop.
Care
Care should follow the instructions appropriate for the yarn used.
For a handmade piece with crocheted details and attached hardware, gentle handling is preferable to aggressive cleaning or pulling.
Frequently Asked Questions
How long does this project take?
A tested completion time has not been established. The actual time will vary depending on crochet speed, tension, experience with amigurumi, and the amount of sewing and finishing involved.
Can I use different yarn colors?
Yes. The cup and straw colors can be changed without altering the stitch structure. Different yarn weights can affect the finished size and proportions.
Can I make the face without safety eyes?
Yes. The eyes can be embroidered with black thread instead of using safety eyes.
Is it sturdy enough for keys?
The pattern includes a reinforced attachment loop sewn through the lid and upper cup area. However, the finished keychain has not been physically tested for load or long-term durability, so its durability should not be guaranteed.
Can children help with this project?
Children may be able to participate in age-appropriate crochet or supervised crafting activities. Safety eyes are small parts and can present a choking hazard, especially for children under 3.
How should I clean the finished keychain?
Follow the care recommendations for the yarn used. Gentle cleaning and handling are preferable for a handmade piece with attached details and hardware.
Can I change the size?
Changing yarn weight or hook size may change the finished size, but the resulting proportions have not been physically tested with this pattern.
More Crochet Projects to Try
Explore more small crochet and amigurumi projects from Tiny Yarn Tales to find another compact project to make next.