
Crochet Jellyfish Amigurumi Pattern: A No-Sew Design
This crochet jellyfish amigurumi features a rounded bell, two simple…
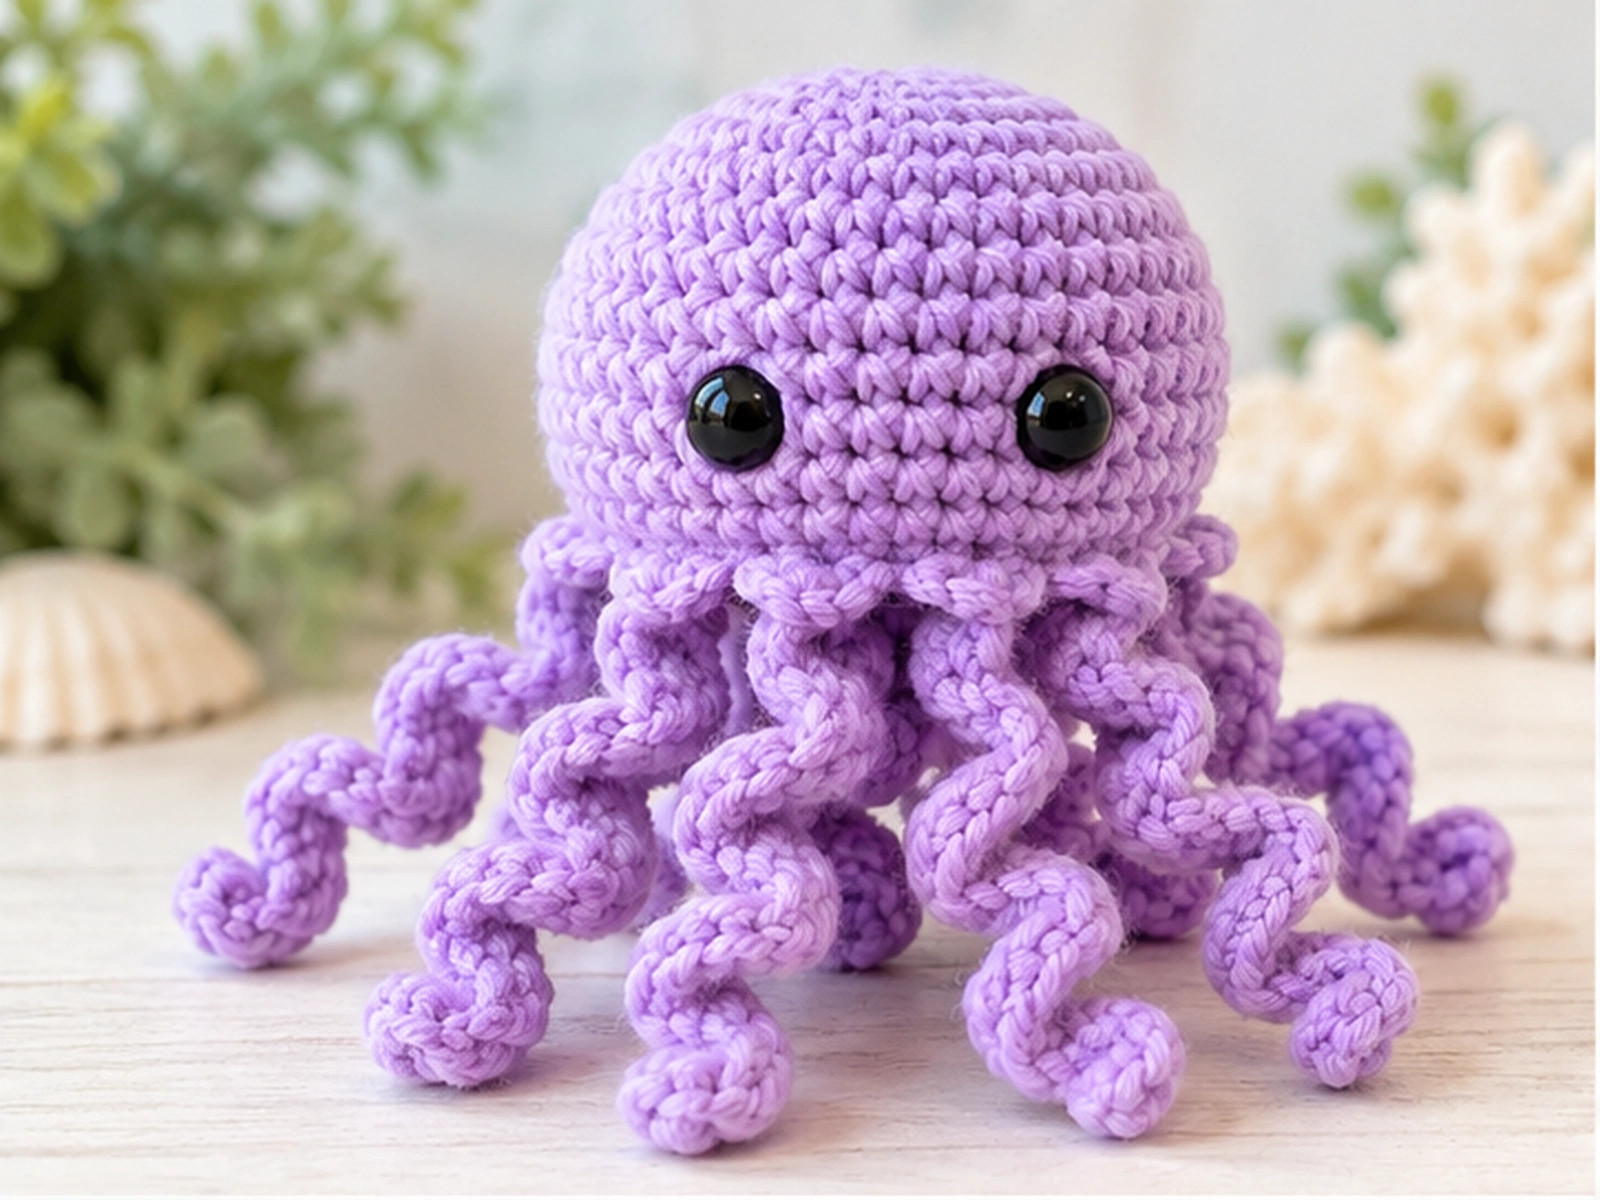
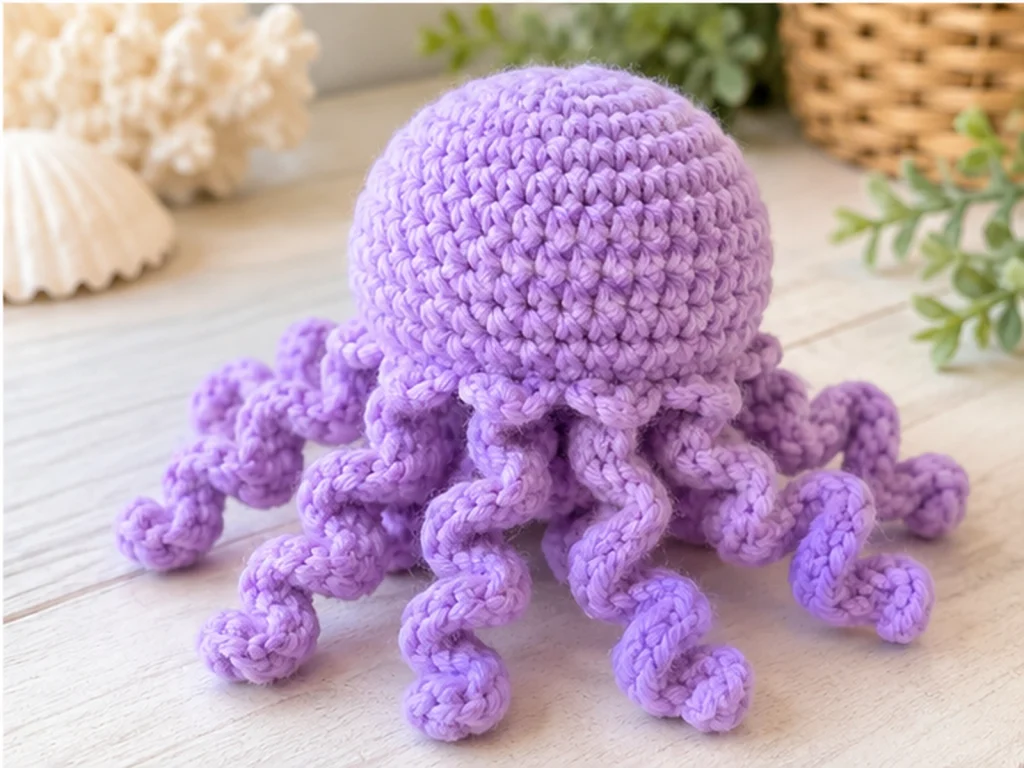
This crochet jellyfish amigurumi features a rounded bell, two simple safety eyes, and eight curly tentacles worked directly into the lower body. The entire crocheted jellyfish is built as one continuous piece, so there are no separate tentacle pieces to sew on afterward.
The pattern uses standard US crochet terminology and includes the materials, abbreviations, preparation notes, complete instructions, finishing steps, troubleshooting, customization ideas, and frequently asked questions.
Pattern note: This design has been mathematically reviewed and constructionally checked, but it has not yet been physically crocheted and tested. The finished size and shaping may vary with yarn, hook, tension, stuffing, and individual technique.
Project Overview
What You’ll Make
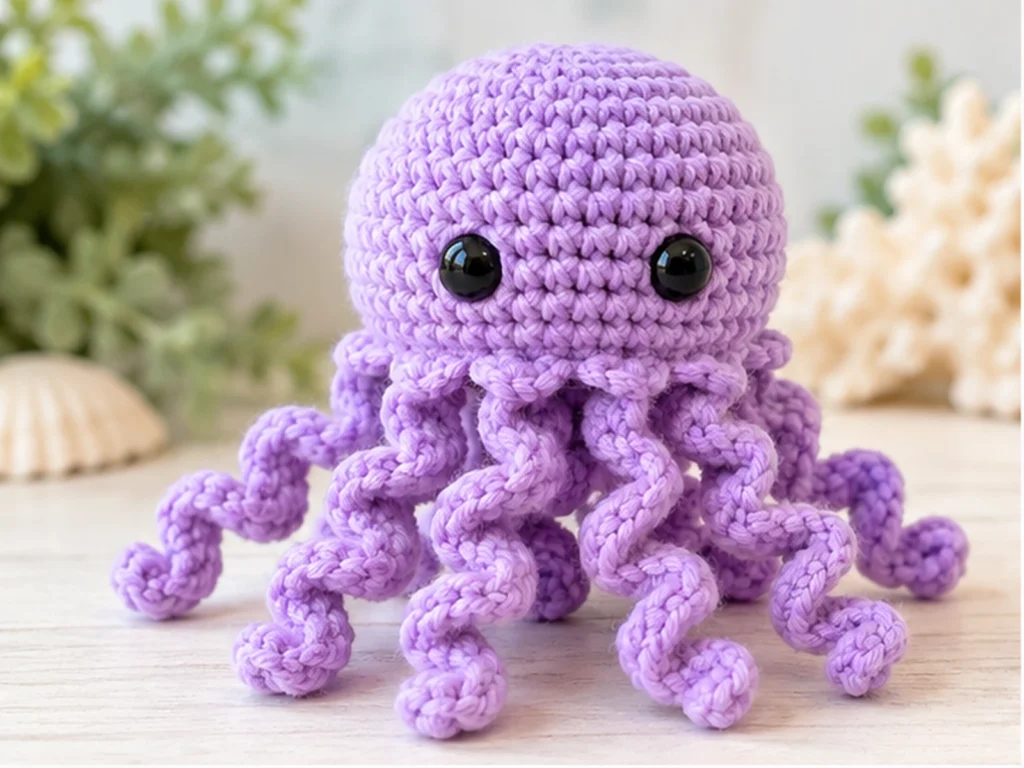
You’ll crochet a rounded jellyfish with:
- One continuous crocheted body
- Eight integrated curly tentacles
- Two 8 mm safety eyes
- A cinched lower opening
- No separate crocheted tentacles to sew on
Project Details
- Project: Crochet jellyfish amigurumi
- Construction: One-piece body with integrated tentacles
- Yarn: Category 4 worsted-weight yarn
- Hook: 4.0 mm crochet hook
- Eyes: 2 × 8 mm safety eyes
- Stuffing: Polyester fiberfill
- Finished size: Approximately 4–5 inches (10–13 cm)
- Gauge: Not required
The finished size is approximate rather than guaranteed because crochet tension, yarn, hook size, stuffing, and individual technique can all affect the final result.
Materials & Tools
- Category 4 worsted-weight yarn in your chosen main color
- 4.0 mm crochet hook
- 2 × 8 mm safety eyes
- Polyester fiberfill
- Stitch marker
- Scissors
No yarn needle is required for attaching the tentacles because they are crocheted directly into the body.
Safety Note
Safety eyes are small parts and can present a choking hazard. They are not appropriate for children under 3. Do not represent the finished jellyfish as baby-safe or child-safe.
Abbreviations
This pattern uses standard US crochet terminology.
- MR — magic ring
- ch — chain
- sc — single crochet
- inc — increase; 2 sc in the same stitch
- dec — decrease; sc 2 stitches together
- sl st — slip stitch
- FO — fasten off
Before You Start
Work the jellyfish body in continuous rounds unless otherwise noted.
Use a stitch marker to keep track of the beginning of each round.
Keep your tension firm and consistent so the stuffing does not show through the stitches.
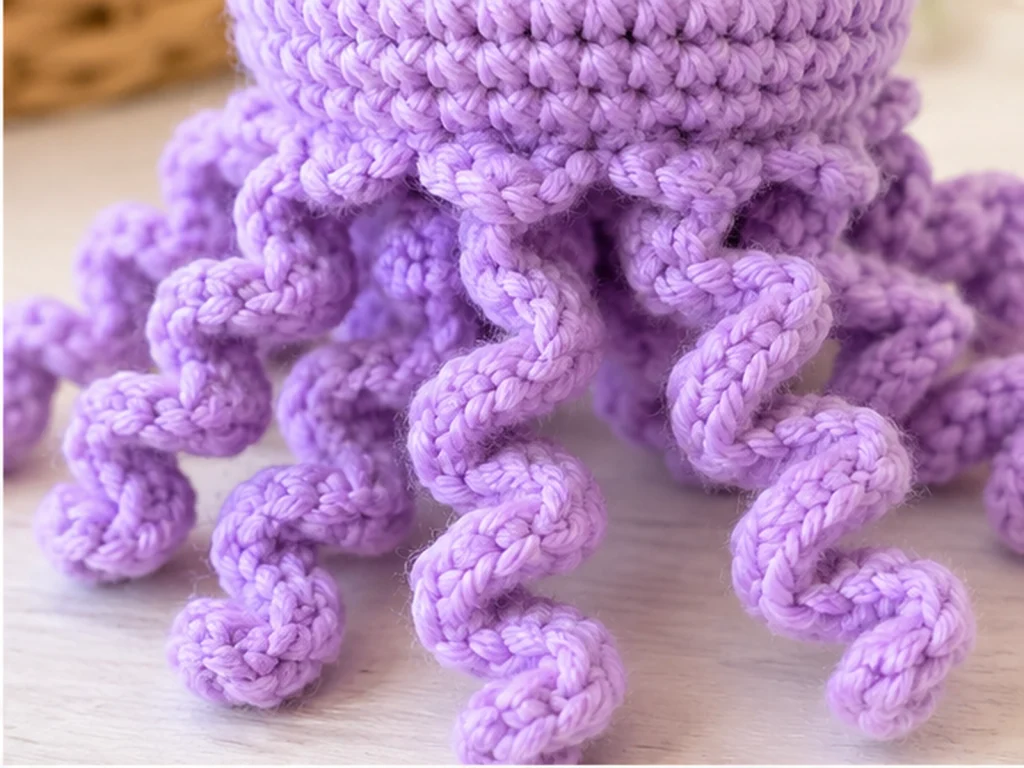
The tentacles are created directly in the lower body during Round 13. This is the key construction feature of the pattern and eliminates the need to crochet and sew eight separate tentacle pieces.
Insert the safety eyes after Round 10, before the lower shaping becomes difficult to reach.
When positioning the eyes, compare both sides from the front before securing them so they appear as even as possible.
Crochet Jellyfish Body
Round 1
Make a magic ring and work 6 sc into the ring.
(6)
Round 2
Work 6 inc around.
(12)
Round 3
Repeat the following 6 times:
sc, inc
(18)
Round 4
Repeat the following 6 times:
2 sc, inc
(24)
Round 5
Repeat the following 6 times:
3 sc, inc
(30)
Round 6
Repeat the following 6 times:
4 sc, inc
(36)
Round 7
Work 36 sc around.
(36)
Round 8
Work 36 sc around.
(36)
Round 9
Work 36 sc around.
(36)
Round 10
Work 36 sc around.
(36)
Insert the two 8 mm safety eyes on the front of the jellyfish, positioning them symmetrically around the upper-middle area.
Round 11
Repeat the following 6 times:
4 sc, dec
(30)
Round 12
Repeat the following 6 times:
3 sc, dec
(24)
Round 13 — Integrated Tentacles
This round creates the eight tentacles directly from the lower edge of the jellyfish.
Repeat the following sequence 8 times:
sc in next body stitch, ch 6, sc in 2nd ch from hook, 2 sc in each of the next 4 chains, sl st into the same body stitch where the ch-6 began, dec over the next 2 body stitches.
After all 8 repeats, you should have:
- 16 body stitches
- 8 integrated tentacles
The slip stitch returns the tentacle to the same body stitch where its chain began. The following decrease is worked over the next two body stitches.
The chain stitches and the stitches worked into the chain form the tentacle itself and do not count toward the 16 remaining body stitches.
Lightly stuff the body after completing this round and shape the upper bell evenly.
Round 14
Repeat the following 4 times:
2 sc, dec
(12)
Add more stuffing as needed, but do not overstuff the body. The lower opening still needs to close neatly.
Round 15
Work:
6 dec
(6)
Add a small amount of final stuffing if needed.
Finishing the Jellyfish
Fasten off, leaving a short yarn tail.
Using your crochet hook, draw the yarn tail through the remaining 6 stitches and gently cinch the opening closed.
Secure the yarn tail inside the body, then trim the excess.
Gently shape the body and tentacles with your fingers.
Understanding the Tentacle Construction
Each tentacle begins with a chain of 6.
After making the chain:
- Work a single crochet into the second chain from the hook.
- Work 2 sc into each of the next 4 chains.
- Slip stitch into the same body stitch where the chain began.
- Continue with the decrease over the next 2 body stitches.
Each tentacle contains 9 stitches along its chain:
- 1 sc in the second chain
- 4 groups of 2 sc
With 8 tentacles, the design creates a balanced lower silhouette around the jellyfish body.
Facial Details
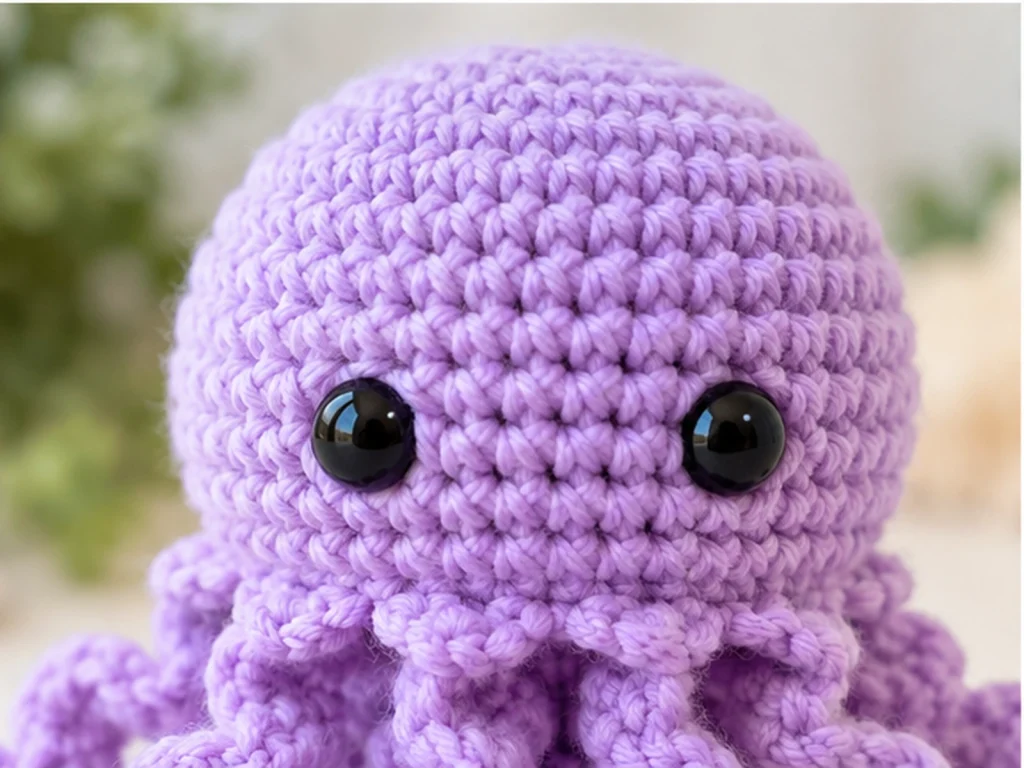
The jellyfish uses two 8 mm safety eyes.
Insert the eyes after Round 10 and before continuing with the lower body shaping.
For the cleanest result, look at the jellyfish directly from the front and compare both sides before securing the eyes.
Helpful Tips
Keep Your Tension Consistent
Firm, even tension helps create a dense amigurumi fabric and reduces visible gaps around the stuffing.
Use a Stitch Marker
Because the body is worked in continuous rounds, a stitch marker makes it easier to keep track of each round.
Stuff Gradually
Add stuffing in small amounts rather than filling the body all at once. This gives you better control over the rounded bell shape.
Avoid Overstuffing
Too much stuffing can distort the lower body and make the final closure more difficult.
Check the Eye Placement
Before fully securing the safety eyes, compare both sides of the face from the front.
Shape the Tentacles Gently
Once the jellyfish is finished, gently encourage the tentacles into their curved positions with your fingers.
Troubleshooting
Why are there gaps in my stitches?
Your tension may be too loose for the yarn and hook combination. Try maintaining a firmer, more consistent tension so the stuffing stays inside the fabric.
Why does my jellyfish look larger or smaller than the approximate size?
Finished size can vary with yarn, hook size, tension, stuffing, and individual technique. Changing the yarn or hook can also change the final dimensions.
Why is the bottom opening difficult to close?
Check that the jellyfish is not overstuffed before Round 15. A moderate amount of stuffing should make the final decrease and closure easier.
Why don’t all of my tentacles look exactly the same?
Small differences can come from tension and chain handling. Compare the tentacles as you work and gently shape them after finishing.
Customization Ideas
The simplest way to customize this jellyfish is by changing the yarn color.
You can:
- Create a bright, playful jellyfish in a bold color
- Make several jellyfish in different colorways
- Experiment with different suitable safety-eye colors
- Try a different yarn and hook combination for a different overall size
Changing yarn or hook size is an adaptation, so the finished dimensions and fabric density may change.
Frequently Asked Questions
Is this a no-sew crochet jellyfish?
Yes. The tentacles are crocheted directly into the body, so there are no separate tentacle pieces that need to be sewn on.
Do I need a yarn needle?
No yarn needle is required for the crocheted construction. The tentacles are integrated directly into the body, and the final opening can be closed with the crochet hook and yarn tail.
Can I use a different yarn?
You can adapt the design with a different yarn, but the fabric and finished size may change. The approximate size given here is based on Category 4 yarn with a 4.0 mm hook.
Can I use a different crochet hook?
A different hook can be used as an adaptation, but it can change the fabric density and finished size.
When should I add the stuffing?
Begin stuffing after completing the integrated tentacles in Round 13. Continue adding small amounts during the final decrease rounds as needed.
When should I insert the safety eyes?
Insert the safety eyes after Round 10, before continuing with the lower body shaping.
How many tentacles does this jellyfish have?
The design has 8 integrated tentacles.
More Crochet Amigurumi
Once you’ve finished your jellyfish, explore more animal and character-inspired amigurumi projects from Tiny Yarn Tales.
Final Thoughts
This crochet jellyfish is built around a simple one-piece construction, with its eight curly tentacles created directly from the lower body.
Take your time with the stitch counts, keep your tension consistent, and add stuffing gradually. The tentacle round is the most distinctive part of the construction, so following that section carefully will help maintain the intended shape.
Because the pattern has not yet been physically crocheted and tested, treat the finished size and shaping as approximate until a physical prototype has been evaluated.