
Fiddle Leaf Fig Crochet Pattern – Amigurumi Plant
Bring a little handmade greenery into your space with this…

Bring a little handmade greenery into your space with this original Fiddle Leaf Fig crochet pattern. The design features seven crocheted leaves, a supported central stem, a simple crocheted pot, and a separate soil topper for a layered plant silhouette.
The project is worked in individual components and assembled at the end, making it easy to work through the pot, stem, and leaves one section at a time.

Project Overview
What You’ll Make
This crochet Fiddle Leaf Fig is a decorative potted plant made from:
- 1 crocheted pot
- 1 crocheted soil topper
- 1 crocheted stem sleeve
- 6 medium leaves
- 1 large top leaf
- 7 crocheted leaf veins
- Flexible internal craft wire for stem support
The finished plant is designed to be approximately 8–10 inches tall. Final size can vary with yarn, hook size, tension, and individual crochet technique.
Project Details
- Technique: Crochet
- Yarn: Medium/Worsted weight (#4)
- Hook: 4.0 mm
- Colors: Terracotta, dark brown, leaf green, and dark green
- Stuffing: None required
- Leaves: 7 total
- Terminology: US crochet terms
- Stem support: Approximately 9–10 inches of flexible paper-wrapped floral or craft wire
This pattern has been mathematically reviewed and constructionally checked, but it has not been physically crocheted and tested yet.
Materials & Tools
Yarn
Use medium/worsted weight (#4) yarn in:
- Terracotta for the pot
- Dark brown for the soil
- Leaf green for the leaves
- Dark green for the stem
Exact yarn quantities have not been established.
Tools and Supplies
- 4.0 mm crochet hook
- Tapestry needle
- Stitch marker
- Scissors
- Approximately 9–10 inches of flexible paper-wrapped floral or craft wire
- Optional small cardboard circle for the inside of the pot base
Safety Note
The wire is used as hidden structural support inside the stem. Bend or curl the ends so no sharp points remain exposed, and make sure the lower wire loop is covered before it is enclosed inside the pot.
This is intended as a decorative crochet project.
Abbreviations
| Abbreviation | Meaning |
|---|---|
| MR | Magic ring |
| ch | Chain |
| sc | Single crochet |
| inc | Increase — 2 sc in the same stitch |
| dec | Single crochet decrease |
| sl st | Slip stitch |
| BLO | Back loop only |
| FO | Fasten off |
Before You Start
Use a stitch marker to keep track of the beginning of each continuous round.
Count your stitches carefully, especially during increase and decrease sections.
The pot, soil topper, and stem are worked in rounds. The leaves are worked flat in rows.
The stem contains flexible internal support, so prepare the wire carefully before completing the assembly.
Original Fiddle Leaf Fig Crochet Pattern
Crochet the Pot
Work in terracotta.
Round 1
6 sc in MR. (6)
Round 2
6 inc. (12)
Round 3
(sc, inc) × 6. (18)
Round 4
(2 sc, inc) × 6. (24)
Round 5
(3 sc, inc) × 6. (30)
Round 6
(4 sc, inc) × 6. (36)
Round 7
36 sc in BLO. (36)
Round 8
36 sc. (36)
Round 9
36 sc. (36)
Round 10
36 sc. (36)
Round 11
36 sc. (36)
Round 12
36 sc. (36)
Round 13
(5 sc, inc) × 6. (42)
Round 14
42 sc. (42)
Round 15
42 sc. (42)
Round 16
42 sc in BLO. (42)
FO and weave in the end.
Make the Soil Topper
Work in dark brown.
Round 1
6 sc in MR. (6)
Round 2
6 inc. (12)
Round 3
(sc, inc) × 6. (18)
Round 4
(2 sc, inc) × 6. (24)
Round 5
(3 sc, inc) × 6. (30)
Round 6
(4 sc, inc) × 6. (36)
Round 7
(5 sc, inc) × 6. (42)
Round 8
42 sc. (42)
FO, leaving a long sewing tail.
Do not stuff the soil topper.
Crochet the Main Stem
Work in dark green.
Round 1
6 sc in MR. (6)
Round 2
(2 sc, inc) × 2. (8)
Rounds 3–24
8 sc. (8)
Round 25
(sc, dec, sc) × 2. (6)
Round 26
6 sc. (6)
FO, leaving a long tail for assembly.
Make 6 Medium Leaves
Work each leaf in leaf green.
The leaves are crocheted flat.
Row 1
1 sc. (1)
Row 2
inc. (2)
Row 3
sc, inc. (3)
Row 4
2 sc, inc. (4)
Row 5
3 sc, inc. (5)
Row 6
4 sc, inc. (6)
Row 7
5 sc, inc. (7)
Row 8
6 sc, inc. (8)
Row 9
7 sc, inc. (9)
Row 10
inc, 7 sc, inc. (11)
Row 11
11 sc. (11)
Row 12
inc, 9 sc, inc. (13)
Rows 13–14
13 sc. (13)
Row 15
6 sc, dec, 5 sc. (12)
Row 16
4 sc, 2 dec, 4 sc. (10)
Row 17
3 sc, 2 dec, 3 sc. (8)
Row 18
2 sc, 2 dec, 2 sc. (6)
Row 19
1 sc, 2 dec, 1 sc. (4)
Row 20
2 dec. (2)
Row 21
dec. (1)
FO, leaving a long tail.
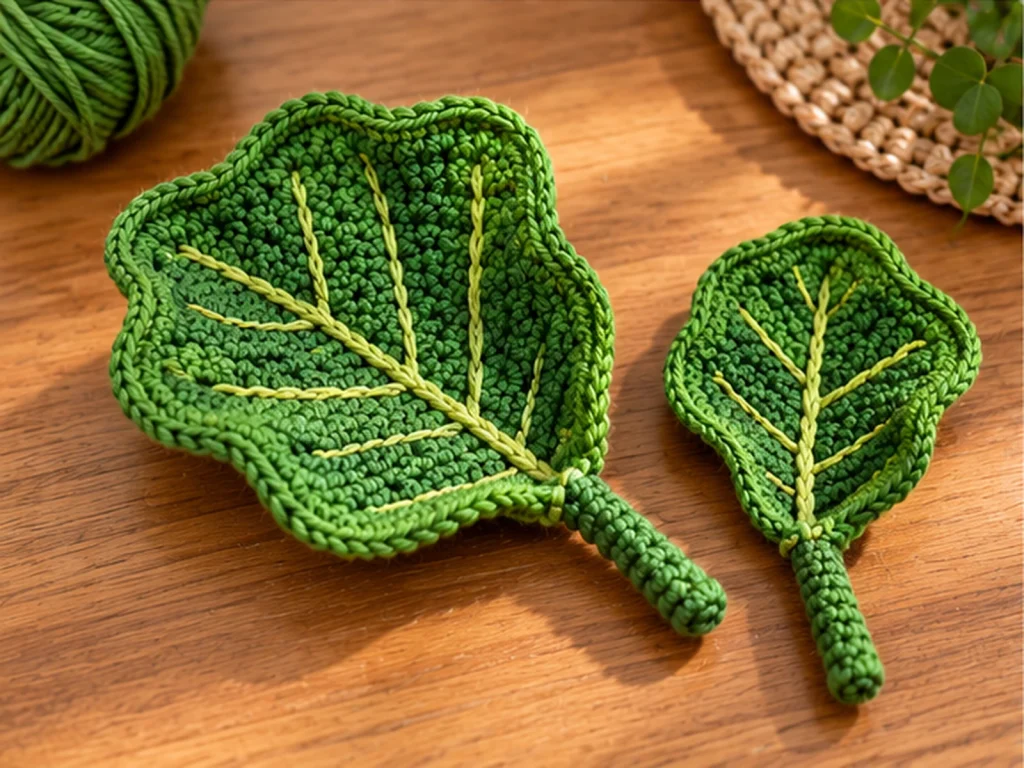
Add the Medium Leaf Petiole
Attach leaf-green yarn at the base of the finished leaf.
Ch 6.
Sl st back through each chain toward the leaf base.
FO, leaving enough yarn to sew the petiole to the main stem.
Add the Leaf Vein
Using green yarn and a tapestry needle, stitch a simple central vein from the leaf base toward the pointed tip.
Keep the stitches relaxed so the leaf does not pucker.
Repeat for all 6 medium leaves.
Make the Large Top Leaf
Work in leaf green.
Row 1
1 sc. (1)
Row 2
inc. (2)
Row 3
sc, inc. (3)
Row 4
2 sc, inc. (4)
Row 5
3 sc, inc. (5)
Row 6
4 sc, inc. (6)
Row 7
5 sc, inc. (7)
Row 8
6 sc, inc. (8)
Row 9
7 sc, inc. (9)
Row 10
8 sc, inc. (10)
Row 11
9 sc, inc. (11)
Row 12
10 sc, inc. (12)
Row 13
inc, 10 sc, inc. (14)
Row 14
14 sc. (14)
Row 15
inc, 12 sc, inc. (16)
Rows 16–17
16 sc. (16)
Row 18
6 sc, 2 dec, 6 sc. (14)
Row 19
5 sc, 2 dec, 5 sc. (12)
Row 20
4 sc, 2 dec, 4 sc. (10)
Row 21
3 sc, 2 dec, 3 sc. (8)
Row 22
2 sc, 2 dec, 2 sc. (6)
Row 23
1 sc, 2 dec, 1 sc. (4)
Row 24
2 dec. (2)
Row 25
dec. (1)
FO, leaving a long tail.
Add the Large Leaf Petiole
Attach leaf-green yarn at the base.
Ch 8, then sl st back toward the leaf base through the chain.
FO, leaving a sewing tail.
Add the central vein using the same method as the medium leaves.
Assemble the Fiddle Leaf Fig
Step 1: Prepare the Stem Support
Insert the flexible floral or craft wire through the crocheted stem sleeve.
Leave approximately 1–1½ inches of wire extending from the bottom.
Bend the exposed end into a flat, closed loop and make sure no sharp section remains exposed.
Step 2: Anchor the Stem to the Soil
Pass the lower wire loop through the center of the brown soil topper.
Use yarn to anchor the loop securely against the underside of the soil topper.
The crocheted stem should emerge vertically from the center.
Step 3: Attach the Soil to the Pot
Place the 42-stitch soil topper over the 42-stitch pot opening.
Align the circular edges and whip stitch the soil topper to the inside edge of the pot rim.
Keep the stem centered while sewing.
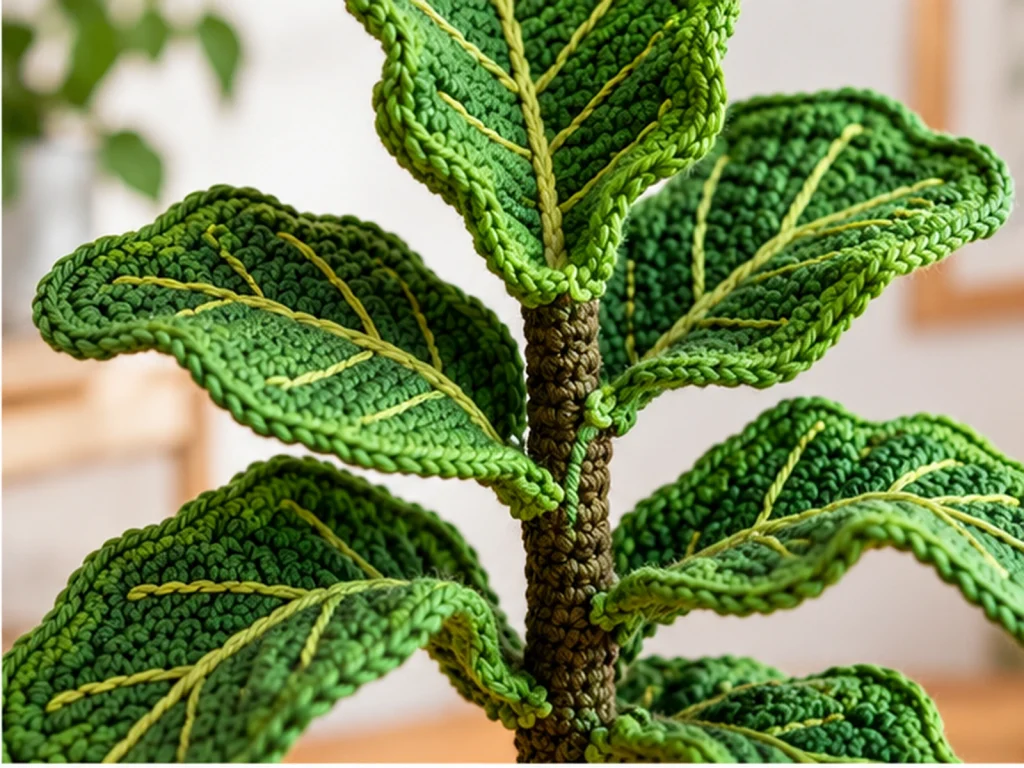
Step 4: Attach the Large Top Leaf
Sew the large leaf to the upper end of the stem.
Position it so it forms the main upright leaf at the top of the plant.
Step 5: Add the Six Medium Leaves
Arrange the six medium leaves in three opposing pairs.
- Place the first pair near the upper portion of the stem.
- Place the second pair lower down and rotate them relative to the first pair.
- Place the final pair lower still, rotating them again to create a fuller silhouette.
Before permanently sewing each leaf, look at the plant from both the front and side.
Adjust the direction of each leaf until the arrangement looks balanced.
Finishing
Once all seven leaves are attached:
- Weave in the remaining yarn tails.
- Check that every leaf is securely attached.
- Make sure the stem remains centered.
- Confirm that the wire is completely enclosed.
- Gently shape each leaf with your fingers.
The leaves should have a broader middle section and a tapered tip.
Keep the top leaf slightly more upright than the side leaves to emphasize the central growth pattern.
Helpful Tips
Keep Your Leaf Tension Consistent
Because the leaves are worked flat, differences in tension can change their width and shape. Try to keep your stitches even from row to row.
Count Carefully During Shaping
The leaf pattern changes direction through increases and decreases. Checking the stitch count at the end of each row can help prevent the leaf from becoming too wide or too narrow.
Shape Before Sewing
Lay all seven leaves beside the stem before attaching them. This gives you an opportunity to compare their sizes and decide how you want the plant to spread.
Build the Plant in Layers
The three pairs of side leaves should not all point in exactly the same direction. Rotating the pairs helps create a fuller-looking silhouette.
Troubleshooting
My Leaf Shape Looks Uneven
Check your stitch count at the end of each row and compare the increase and decrease sections carefully. Differences in tension can also affect the final shape.
My Leaves Point in the Same Direction
Before sewing them permanently, rotate each pair around the stem until the plant has a more balanced arrangement.
The Stem Feels Unstable
Check that the lower wire loop is securely anchored to the underside of the soil topper and that the soil topper is firmly attached to the pot.
The Leaf Vein Pulls the Leaf Out of Shape
Use relaxed embroidery stitches and avoid pulling the yarn tightly across the leaf.
Customization Ideas
Change the Green Shades
Use a lighter green for the leaves and a darker green for the center veins and stem.
Customize the Pot
The pot can be made in different neutral or earthy colors to suit your décor.
Change the Leaf Arrangement
The three pairs of medium leaves can be rotated slightly more or less around the stem for a different silhouette.
Create a Fuller Look
Keep the seven-leaf design as the base structure and experiment with the direction of each leaf rather than changing the pattern math.
Care
This is a decorative crochet project. Keep it away from moisture and avoid placing weight on the leaves or bending the internal support sharply.
Frequently Asked Questions
How many leaves does this crochet Fiddle Leaf Fig use?
The design uses seven leaves total: six medium leaves and one larger top leaf.
Does this crochet plant need stuffing?
No. The design does not require stuffing for the pot, leaves, or stem.
Why is wire used inside the stem?
The flexible internal wire provides structural support so the crocheted stem can remain upright.
Can I change the colors?
Yes. The pattern structure stays the same while you can change the leaf, stem, soil, or pot colors.
How tall is the finished plant?
The finished plant is designed to be approximately 8–10 inches tall. This is an estimate rather than a physically tested measurement, so the final size may vary.
Is this pattern physically tested?
No. It has been mathematically reviewed and constructionally checked, but it has not been physically crocheted and tested yet.
More Crochet Plant Projects
Explore more handmade crochet plants and amigurumi projects from Tiny Yarn Tales as they become available.

Final Thoughts
This Fiddle Leaf Fig crochet pattern combines a simple crocheted pot, a supported central stem, and seven shaped leaves to create a leafy decorative plant.
The separate components make the project easy to work through section by section, while the layered leaf arrangement gives the finished piece its recognizable silhouette.