
Strawberry Crochet Pattern: Strawberry Amigurumi
This strawberry crochet pattern creates a sweet, three-dimensional strawberry amigurumi…
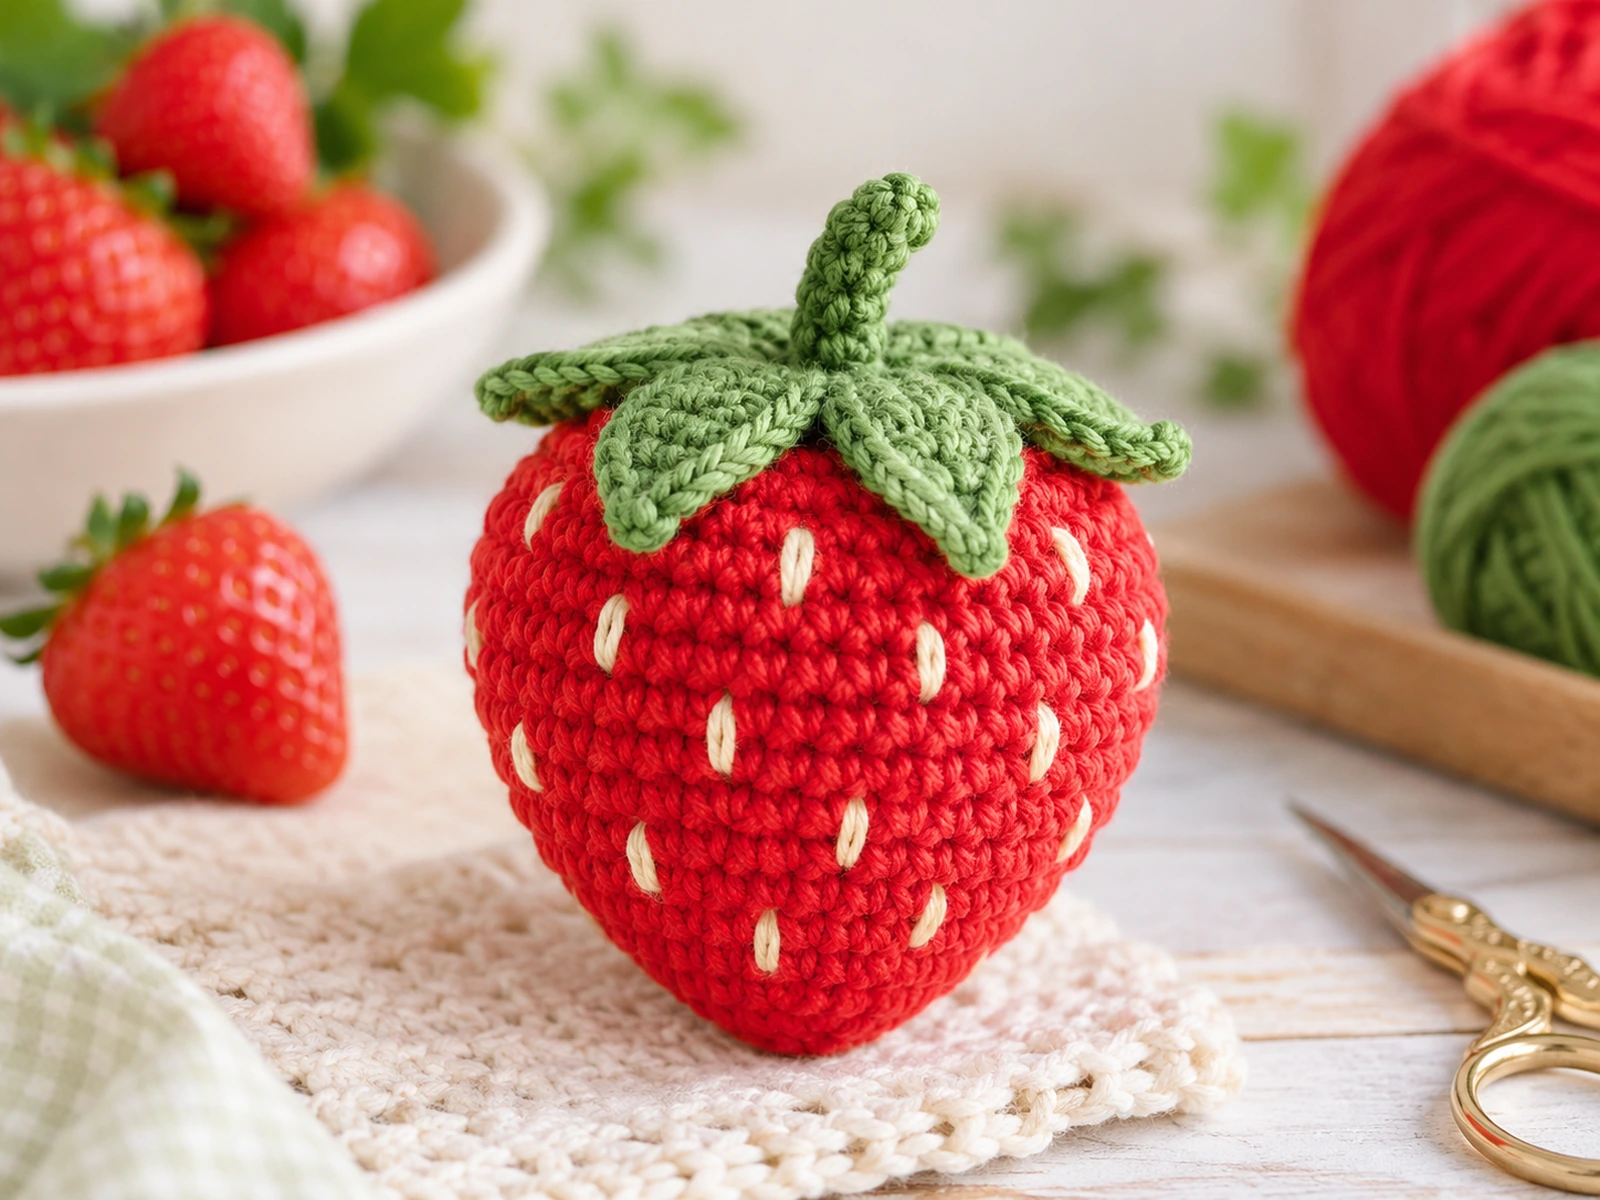
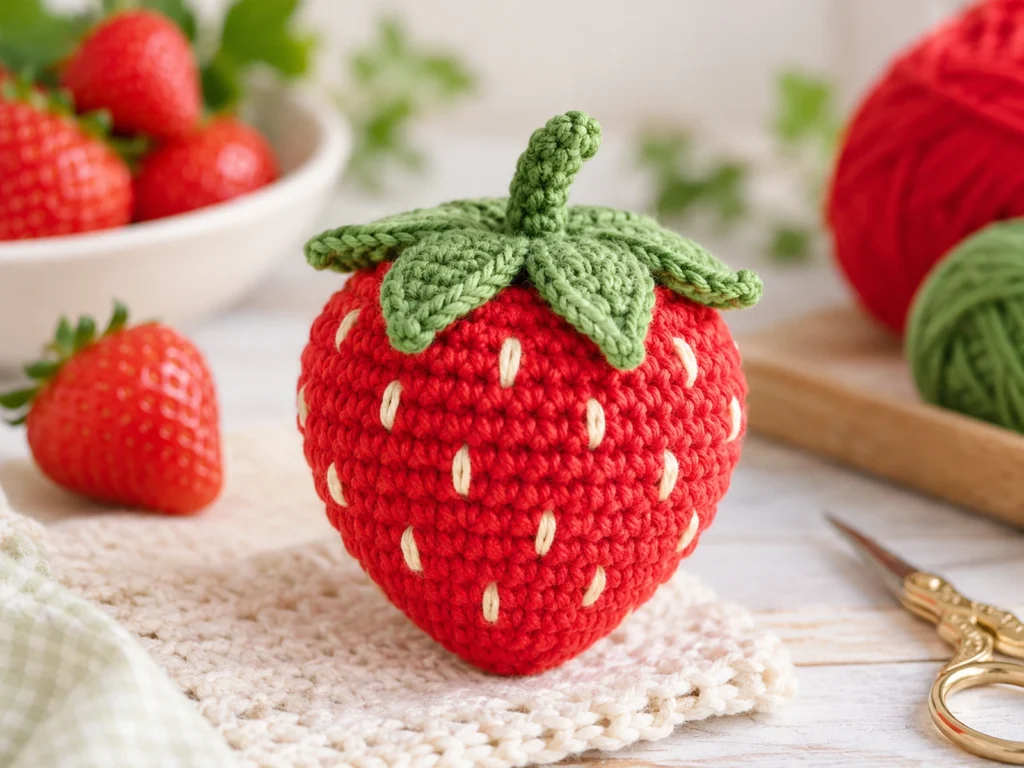
This strawberry crochet pattern creates a sweet, three-dimensional strawberry amigurumi with a green leafy top, crocheted stem, and embroidered seed details. The design is worked from the pointed bottom upward, then finished with a separate six-leaf calyx and small stem.
The finished strawberry is approximately 3–4 inches tall and 2–2½ inches wide, although the final size can vary with yarn, hook size, tension, and stuffing. The pattern also includes an optional loop for turning the finished strawberry into a keychain.
Before you begin, note that this pattern has been mathematically reviewed and constructionally reasoned, but it has not been physically prototyped and tested yet.
Project Overview
What You’ll Make
You’ll crochet a rounded strawberry with:
- A red amigurumi body
- A six-leaf green calyx
- A small green stem
- Embroidered strawberry seed details
- An optional keychain loop
The strawberry body is worked in continuous rounds and gradually increases from 6 stitches to 42 stitches. The top remains open so the matching green calyx can be sewn directly into place.
Project Details
Technique: Crochet amigurumi
Approximate size: 3–4 inches tall and 2–2½ inches wide
Yarn: Medium/worsted-weight yarn
Hook: 3.5 mm crochet hook
Stuffing: Polyester fiberfill
Main color: Red
Accent color: Green
Actual size may vary depending on yarn, hook, tension, stuffing, and individual technique.
Materials & Tools
Yarn
You’ll need medium/worsted-weight yarn in:
- Red for the strawberry body
- Green for the calyx, leaves, stem, and optional loop
- Cream, pale yellow, or beige for the embroidered seeds
Other Supplies
- 3.5 mm crochet hook
- Polyester fiberfill
- Tapestry needle
- Scissors
- Stitch marker
- Optional keyring hardware
Safety Note
Small components and keychain hardware can present a choking hazard. Do not present the finished project as a toy for children under 3.
Abbreviations
- MR — magic ring
- ch — chain
- sc — single crochet
- inc — increase, 2 single crochets in the same stitch
- sl st — slip stitch
- hdc — half double crochet
- dc — double crochet
- FO — fasten off
Before You Start
Work in Continuous Rounds
The strawberry body and calyx are worked in continuous rounds rather than joined rounds. Use a stitch marker to keep track of the beginning of each round.
Count Your Stitches
The stitch count at the end of each round is included in parentheses. The strawberry body should progress through:
6 → 12 → 18 → 24 → 30 → 36 → 42
After Round 7, the stitch count stays at 42 through Round 12.
Stuff as You Go
Add polyester fiberfill gradually as the strawberry takes shape. Aim for a firm, rounded form without packing the stuffing so tightly that the stitches stretch.
Keep the Body Opening Open
The strawberry body ends with a 42-stitch opening. Do not close it. The green calyx is designed to cover this opening.
Construction Order
The project is completed in this order:
- Crochet the strawberry body.
- Add the stuffing.
- Crochet the calyx.
- Crochet the stem.
- Attach the calyx and stem.
- Embroider the seeds.
- Add the optional keychain loop.
Strawberry Crochet Pattern
Strawberry Body
Use red yarn and work in continuous rounds.
Round 1
6 sc in MR. (6)
Round 2
6 inc. (12)
Round 3
(sc, inc) × 6. (18)
Round 4
(2 sc, inc) × 6. (24)
Round 5
(3 sc, inc) × 6. (30)
Round 6
(4 sc, inc) × 6. (36)
Round 7
(5 sc, inc) × 6. (42)
Round 8
42 sc. (42)
Round 9
42 sc. (42)
Round 10
42 sc. (42)
Round 11
42 sc. (42)
Round 12
42 sc. (42)
Fasten off, leaving a long yarn tail for assembly.
Lightly shape the lower point of the strawberry and add polyester fiberfill. Fill the body firmly enough to hold its form without overstuffing it.
Keep the 42-stitch opening open for the calyx.
Strawberry Calyx
Use green yarn.
The calyx is worked as a circular base with six pointed leaves.
Round 1
6 sc in MR. (6)
Round 2
6 inc. (12)
Round 3
(sc, inc) × 6. (18)
Round 4
(2 sc, inc) × 6. (24)
Round 5
(3 sc, inc) × 6. (30)
Round 6
(4 sc, inc) × 6. (36)
Round 7
(5 sc, inc) × 6. (42)
Do not fasten off.
Six-Leaf Edge
Repeat the following sequence 6 times:
Slip stitch in the next stitch, ch 5, then starting in the second chain from the hook work:
- sl st
- sc
- hdc
- dc
Then slip stitch across the next 6 base stitches to complete the leaf transition.
Each repeat uses 7 stitches of the 42-stitch base, so six repeats complete the full circumference.
Fasten off, leaving a long tail for sewing.
Strawberry Stem
Use green yarn.
Round 1
6 sc in MR. (6)
Round 2
6 sc. (6)
Round 3
6 sc. (6)
Add a small amount of fiberfill so the stem keeps its shape.
Fasten off, leaving a long sewing tail.
Thread the tail through the remaining stitches and gently cinch the opening closed.
Embroidered Strawberry Seeds
Use cream, pale yellow, or beige yarn.
Add approximately 12 small, vertical seed-like embroidery marks across the red body.
For a natural look, stagger the seeds instead of placing them in perfectly straight rows.
Keep the embroidery tension even so the surface stays smooth, then weave the yarn ends into the inside of the strawberry.
Make the Strawberry’s Leafy Top
Place the green calyx over the open top of the strawberry.
The circular base of the calyx corresponds to the strawberry body’s 42-stitch opening.
Before sewing it in place, arrange the six leaf points so they look evenly distributed around the top.
Use the long green yarn tail to sew around the calyx edge and secure it to the strawberry body.
As you work, check that:
- The opening is fully covered
- The leaves remain evenly distributed
- The strawberry keeps its rounded shape
- The stuffing stays contained
Attach the Stem
Position the stem at the center of the calyx and sew it securely into place.
View the strawberry from several angles before finishing the seam so you can make sure the stem sits centrally.
Embroidered Details
Add the Strawberry Seeds
Check the embroidered seeds for:
- Even tension
- Secure yarn ends
- Balanced distribution
- No loose loops on the surface
Small differences are natural with surface embroidery, so focus on a balanced overall appearance rather than exact spacing.
Assembly
Step 1: Prepare the Finished Pieces
Make sure the strawberry body is stuffed and the calyx and stem are complete before beginning the final assembly.
Step 2: Attach the Calyx
Position the six-leaf calyx over the 42-stitch opening.
Rotate it as needed before sewing so the leaves look balanced.
Step 3: Attach the Stem
Center the stem on the calyx and sew it securely.
Step 4: Finish the Surface Details
Add the embroidered seed details and weave in all loose yarn ends.
Optional Strawberry Keychain
The finished strawberry can also be adapted into a small keychain.
Using green yarn:
- Chain 12.
- Join the chain into a loop with a slip stitch in the first chain.
- Fasten off, leaving yarn tails.
- Sew both ends securely near the stem and calyx junction.
- Reinforce the attachment with several passes of yarn.
- Attach suitable keyring hardware.
The loop is optional and is not required for the basic strawberry.
Finishing
Before calling the project complete, check that:
- The calyx is securely attached
- The stem is centered
- The strawberry is evenly stuffed
- The embroidered seeds are secure
- Loose yarn ends are woven in
- The optional keychain loop is reinforced
Helpful Tips
Keep Your Stitch Count Consistent
If your count changes unexpectedly, stop at the end of the round and recount before continuing.
The body should progress through:
6 → 12 → 18 → 24 → 30 → 36 → 42
Avoid Overstuffing
Too much fiberfill can stretch the stitches and distort the strawberry’s shape. Add small amounts gradually.
Check the Calyx Before Sewing
Rotate the green calyx around the opening until the six leaf points look balanced.
Check the Stem From Different Angles
Make sure the stem is centered before completing the final stitches.
Troubleshooting
My Stitch Count Is Wrong
Stop and recount the round before continuing. Compare your work with the expected stitch count shown at the end of each round.
The Strawberry Looks Too Loose
Check your tension and stuffing. Loose stitches can make the surface more open, while insufficient stuffing can make the shape look flatter.
The Strawberry Looks Overstuffed
Remove a small amount of fiberfill until the stitches relax and the strawberry keeps its intended shape.
The Calyx Looks Uneven
Before sewing it down, rotate the calyx until the six leaves are distributed more evenly.
The Stem Looks Off-Center
Leave the stem unsecured until you’ve viewed the strawberry from multiple angles and found the best position.
Customization Ideas
Change the Seed Color
Try cream, pale yellow, or beige for the embroidered seeds.
Change the Red Shade
Different shades of red can create slightly different visual styles while keeping the green calyx for contrast.
Turn It Into a Keychain
Use the optional crocheted loop and keyring hardware to make a small strawberry accessory.
Experiment With Scale
Different yarn and hook combinations can change the finished size and fabric characteristics. Make a test version before relying on a new combination.
Care
Because the pattern has not been physically tested, no specific tested care method is established for the finished piece. Handle the embroidered details and attached components gently.
Frequently Asked Questions
How big is the finished crochet strawberry?
The design is approximately 3–4 inches tall and about 2–2½ inches wide. Actual size can vary depending on yarn, hook, tension, and stuffing.
What yarn weight is used?
The design uses medium/worsted-weight yarn.
What hook size is used?
A 3.5 mm crochet hook is specified.
Is the strawberry worked in rounds?
Yes. The strawberry body and calyx are worked in continuous rounds.
Does the strawberry need stuffing?
Yes. Polyester fiberfill is used to give the strawberry its three-dimensional shape.
Can I turn the strawberry into a keychain?
Yes. An optional crocheted loop can be attached near the stem and calyx, then connected to suitable keyring hardware.
How many leaves does the strawberry have?
The calyx is designed with six pointed leaves.
Can I change the colors?
Yes. The design can be customized with different shades of red and green, while the seed embroidery can use cream, pale yellow, or beige.
More Crochet Food & Amigurumi
Explore more fruit, food, and small amigurumi projects to build a collection of colorful handmade crochet pieces.
Final Thoughts
This strawberry crochet pattern is built around three main crocheted components: a rounded red fruit, a six-leaf green calyx, and a small stem. The optional keychain loop gives the finished piece another practical use without changing the main strawberry construction.
For the cleanest result, keep your stitch counts consistent, add stuffing gradually, and take time to balance the calyx and stem before sewing them permanently into place.
This pattern has been mathematically reviewed and constructionally checked, but it has not been physically crocheted and tested yet.