Crochet Alligator Amigurumi Pattern
This crochet alligator amigurumi features a rounded head, soft muzzle,…
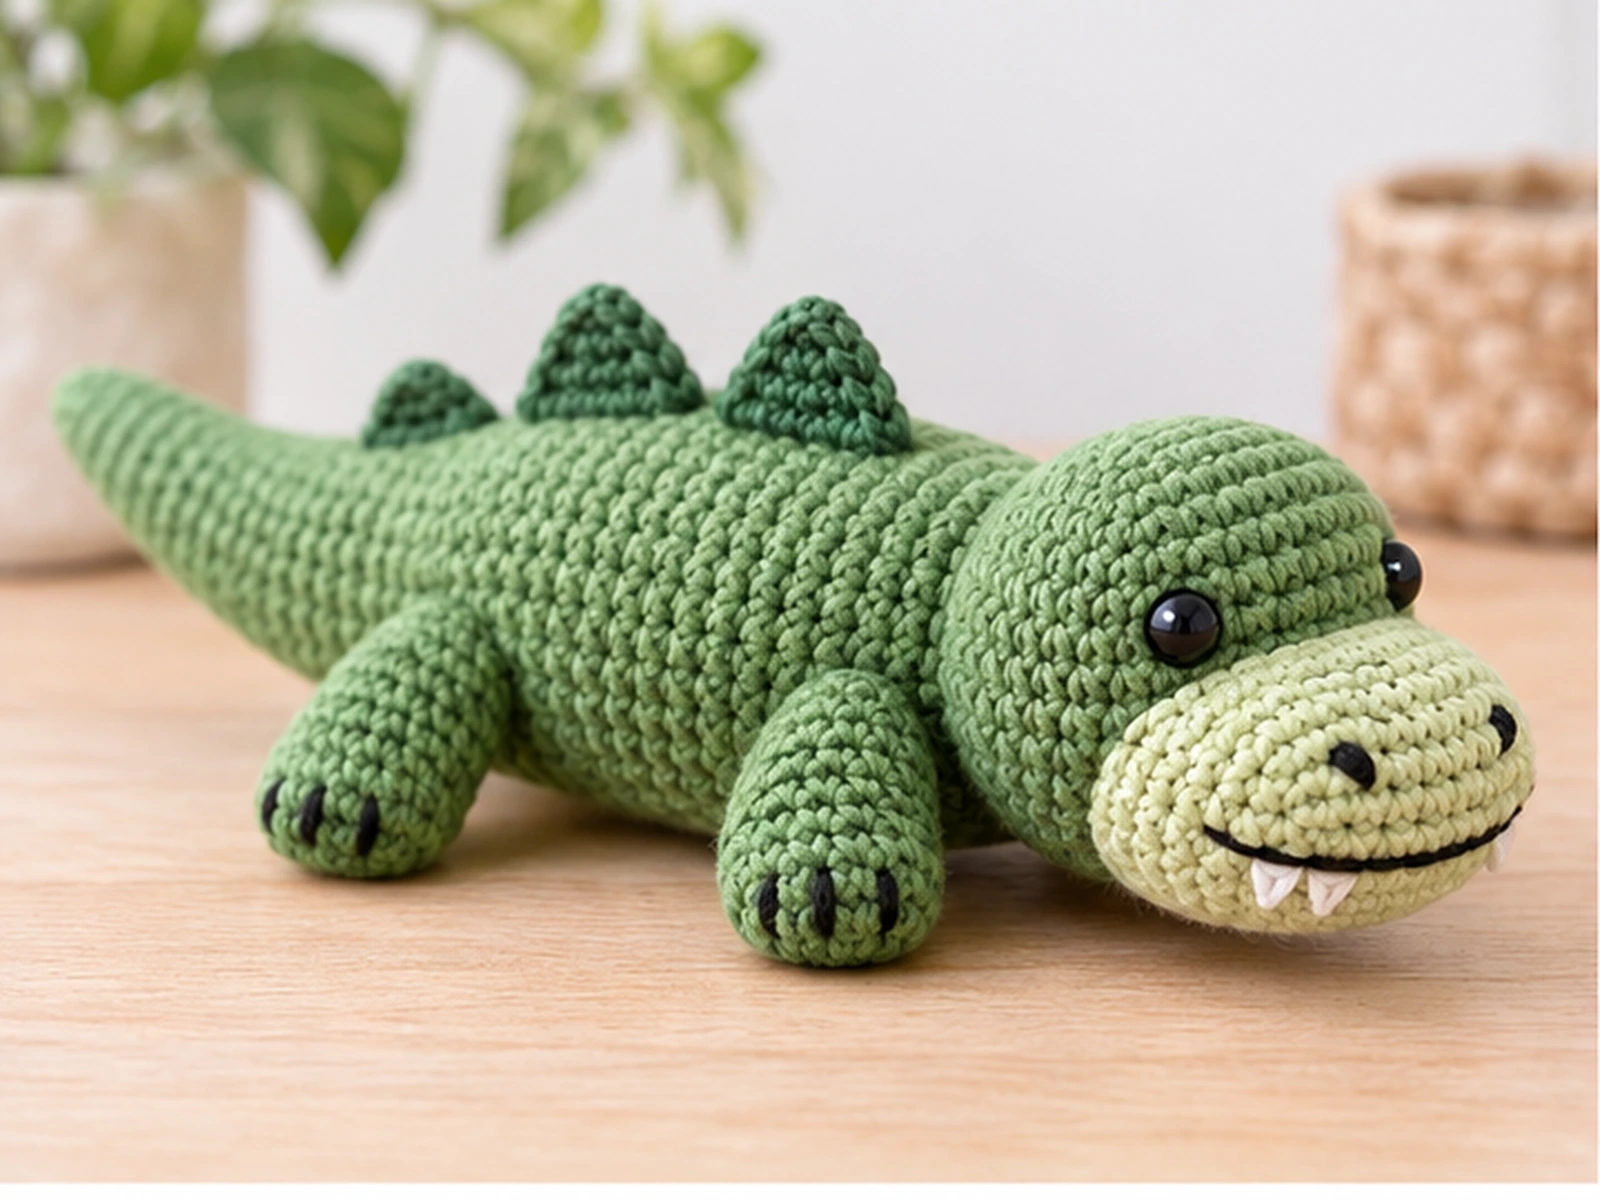
This crochet alligator amigurumi features a rounded head, soft muzzle, tapered tail, four little legs, and three dorsal plates along its back. The separate-piece construction makes it possible to shape and position each part before sewing the finished alligator together.
The pattern uses worsted-weight yarn, a 4.0 mm crochet hook, polyester stuffing, and 8 mm safety eyes. The finished size is approximately 8–10 inches long, although the actual size will vary with yarn, tension, stuffing, and individual crochet technique.
The pattern has been mathematically reviewed and constructionally checked, but it has not been physically crocheted and tested yet.

Project Overview
What You’ll Make
This pattern includes:
- 1 head
- 1 muzzle
- 1 body
- 1 tail
- 4 legs
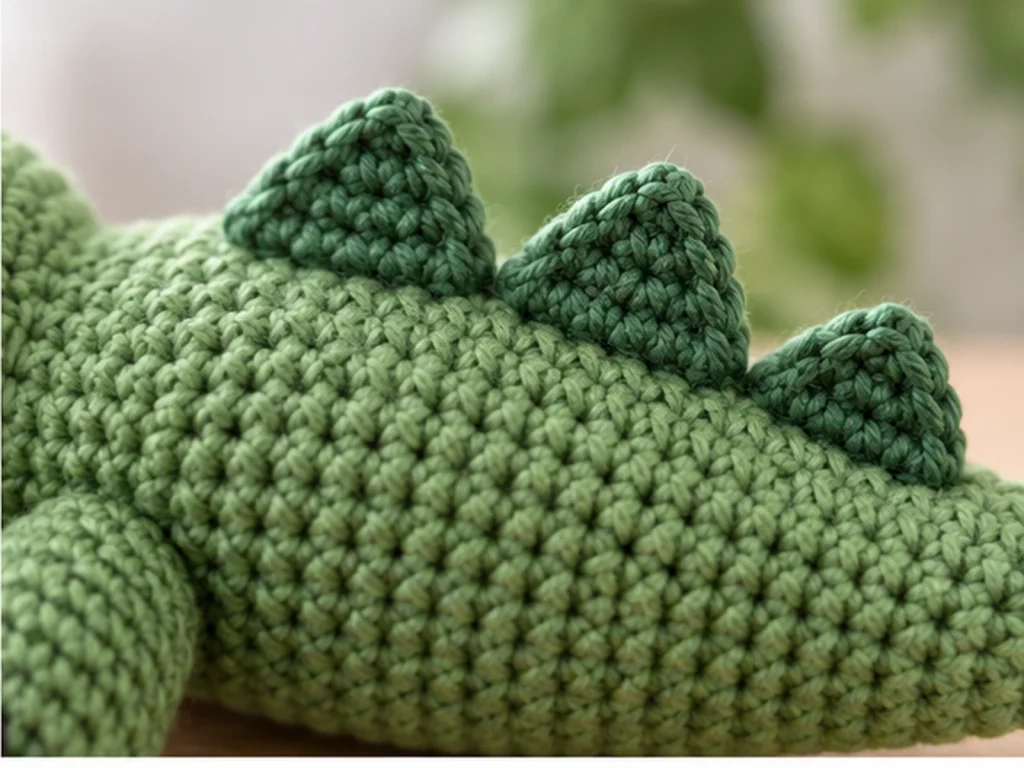
- 3 dorsal plates
- 2 safety eyes
- embroidered nostrils and mouth
- optional embroidered teeth
The main pieces are crocheted separately and then sewn together.
Project Details
- Project: Crochet alligator amigurumi
- Technique: Crochet and sewn assembly
- Yarn: Worsted-weight, category #4
- Hook: 4.0 mm crochet hook
- Main color: Green
- Accent color: Light green, cream, or pale yellow-green
- Detail color: Black or dark green
- Eyes: 8 mm safety eyes
- Filling: Polyester fiberfill
- Approximate finished size: 8–10 inches long
No specific yarn yardage or gauge is provided because those details have not been physically established for this design.
Materials & Tools
Yarn
Use worsted-weight category #4 yarn in the following colors:
- Main green
- Light green, cream, or pale yellow-green
- Black or dark green
- White, optional for teeth
The amount of yarn needed has not been physically measured.
Crochet Hook
- 4.0 mm crochet hook
Other Supplies
- 2 × 8 mm safety eyes
- Polyester fiberfill
- Tapestry or yarn needle
- Scissors
- Stitch marker
- Sewing pins
Safety Note
Safety eyes can present a choking hazard and are not appropriate for children under 3. This project is not being represented as baby-safe or child-safe.
Abbreviations
| Abbreviation | Meaning |
|---|---|
| MR | Magic ring |
| ch | Chain |
| sc | Single crochet |
| inc | Increase — 2 sc in the same stitch |
| dec | Decrease — sc 2 together |
| sl st | Slip stitch |
| FO | Fasten off |
Before You Start
Work in Continuous Rounds
The main stuffed pieces are worked in continuous rounds unless the pattern specifically says to work in rows.
Use a stitch marker to keep track of the first stitch of each round.
Count Your Stitches
Every round includes its final stitch count in parentheses. Check your count before moving to the next round, especially after increase and decrease rounds.
Stuff as You Go
Add stuffing gradually instead of filling each piece all at once. The head and body should hold their shape without being so tightly stuffed that the stitches spread apart.
The tail and legs should be stuffed more lightly.
Check Shapes Before Sewing
Pin components in place before permanently sewing them. This is especially useful for the head, legs, tail, and dorsal plates.
Construction Order
The finished alligator comes together in this general order:
- Crochet all individual components.
- Finish and stuff the appropriate pieces.
- Attach the muzzle and facial details.
- Attach the head and tail.
- Position and sew the legs.
- Add the dorsal plates.
- Complete the final shaping and finishing.
Crochet Alligator Pattern
Head — Make 1
Use the main green yarn.
Round 1: 6 sc in MR. (6)
Round 2: 6 inc. (12)
Round 3: (sc, inc) × 6. (18)
Round 4: (2 sc, inc) × 6. (24)
Round 5: (3 sc, inc) × 6. (30)
Round 6: 30 sc. (30)
Round 7: 30 sc. (30)
Round 8: 30 sc. (30)
Round 9: 30 sc. (30)
Insert the two 8 mm safety eyes after Round 9. Position them evenly on the face and compare both sides before securing them.
Begin stuffing the head.
Round 10: (3 sc, dec) × 6. (24)
Round 11: (2 sc, dec) × 6. (18)
Round 12: (sc, dec) × 6. (12)
Do not close the 12-stitch opening. Leave a yarn tail for sewing the head to the body.
Muzzle — Make 1
Use the light green, cream, or pale yellow-green yarn.
Round 1: 6 sc in MR. (6)
Round 2: 6 inc. (12)
Round 3: 12 sc. (12)
Round 4: (2 sc, inc) × 6. (18)
Round 5: 18 sc. (18)
Round 6: 18 sc. (18)
Add a small amount of stuffing.
Round 7: (sc, dec) × 6. (12)
Round 8: 12 sc. (12)
Round 9: 6 dec. (6)
FO and close the opening.
Body — Make 1
Use the main green yarn.
Round 1: 6 sc in MR. (6)
Round 2: 6 inc. (12)
Round 3: (sc, inc) × 6. (18)
Round 4: (2 sc, inc) × 6. (24)
Round 5: (3 sc, inc) × 6. (30)
Round 6: (4 sc, inc) × 6. (36)
Round 7: 36 sc. (36)
Round 8: 36 sc. (36)
Round 9: 36 sc. (36)
Round 10: 36 sc. (36)
Round 11: 36 sc. (36)
Round 12: 36 sc. (36)
Round 13: 36 sc. (36)
Round 14: 36 sc. (36)
Round 15: 36 sc. (36)
Round 16: 36 sc. (36)
Begin shaping the lower end.
Round 17: (4 sc, dec) × 6. (30)
Round 18: (3 sc, dec) × 6. (24)
Round 19: (2 sc, dec) × 6. (18)
Round 20: (sc, dec) × 6. (12)
Round 21: 6 dec. (6)
Stuff the body gradually as you work through the shaping rounds.
FO and close the opening.
Tail — Make 1
Use the main green yarn.
Foundation
Ch 16 and join with a sl st to the first chain, taking care not to twist the chain.
Round 1: 16 sc around the foundation ring. (16)
Round 2: (3 sc, inc) × 4. (20)
Round 3: (4 sc, inc) × 4. (24)
Round 4: 24 sc. (24)
Round 5: 24 sc. (24)
Round 6: 24 sc. (24)
Begin tapering the tail.
Round 7: (4 sc, dec) × 4. (20)
Round 8: 20 sc. (20)
Round 9: 20 sc. (20)
Round 10: 20 sc. (20)
Round 11: (3 sc, dec) × 4. (16)
Round 12: 16 sc. (16)
Round 13: 16 sc. (16)
Round 14: 16 sc. (16)
Round 15: (2 sc, dec) × 4. (12)
Round 16: 12 sc. (12)
Round 17: 12 sc. (12)
Round 18: 12 sc. (12)
Round 19: (sc, dec) × 4. (8)
Round 20: 8 sc. (8)
Round 21: 8 sc. (8)
Round 22: 8 sc. (8)
Lightly stuff the tail.
Round 23: (2 sc, dec) × 2. (6)
Round 24: 6 sc. (6)
Round 25: 6 sc. (6)
Round 26: 3 dec. (3)
FO and close the tip.
Keep the final section lightly stuffed so the tail remains easy to shape.
Legs — Make 4
Use the main green yarn.
Make four identical legs.
Round 1: 6 sc in MR. (6)
Round 2: 6 inc. (12)
Round 3: (3 sc, inc) × 3. (15)
Round 4: 15 sc. (15)
Round 5: 15 sc. (15)
Round 6: 15 sc. (15)
Add a small amount of stuffing.
Round 7: (3 sc, dec) × 3. (12)
Round 8: 12 sc. (12)
Round 9: 6 dec. (6)
FO and close.
Optional Toe Detail
Use the dark detail color to embroider two or three small lines near the lower front of each leg.
Keep the markings visually similar on all four legs.
Dorsal Plates
The dorsal plates are worked flat in rows and sewn to the back.
The starting chain does not count as a stitch.
Front Dorsal Plate — Make 1
Use the main green yarn.
Foundation: Ch 4
Row 1: 3 sc. (3)
Row 2: Ch 1, turn, dec. (2)
Row 3: Ch 1, turn, dec. (1)
FO.
Middle Dorsal Plate — Make 1
Foundation: Ch 6
Row 1: 5 sc. (5)
Row 2: Ch 1, turn, dec, 3 sc. (4)
Row 3: Ch 1, turn, dec, 2 sc. (3)
Row 4: Ch 1, turn, dec, 1 sc. (2)
Row 5: Ch 1, turn, dec. (1)
FO.
Rear Dorsal Plate — Make 1
Foundation: Ch 7
Row 1: 6 sc. (6)
Row 2: Ch 1, turn, dec, 4 sc. (5)
Row 3: Ch 1, turn, dec, 3 sc. (4)
Row 4: Ch 1, turn, dec, 2 sc. (3)
Row 5: Ch 1, turn, dec, 1 sc. (2)
Row 6: Ch 1, turn, dec. (1)
FO.
The pointed ends of the dorsal plates should face toward the tail when they are sewn onto the back.
Facial Details
Eye Placement
Insert the 8 mm safety eyes after Round 9 of the head.
Position them evenly above the muzzle and compare both sides before permanently securing them.
Do not rely on a fixed measurement for eye spacing, since the exact physical placement has not been prototype-tested.
Nostrils
Use black or dark green yarn to embroider two small nostril marks near the upper portion of the muzzle.
Place them by visual symmetry.
Mouth
Embroider a simple mouth line across the lower portion of the muzzle.
Keep it centered beneath the nostrils.
Optional Teeth
For a more playful expression, embroider four small white teeth along the lower edge of the mouth.
This step is optional.

Assembly
Step 1: Attach the Muzzle
Center the finished muzzle on the front of the head.
Pin it in place first and check that the eyes and muzzle look balanced.
Sew the muzzle securely to the head.
Step 2: Add the Facial Details
Embroider the nostrils and mouth after the muzzle has been attached.
Add the optional teeth if desired.
Step 3: Attach the Head to the Body
Position the open end of the head against the upper portion of the body.
Pin it first and check the angle from the front and side.
Sew around the attachment area until the head is secure.
Step 4: Attach the Tail
Place the wider end of the tail against the rear of the body.
Center it along the body’s back line.
Sew securely around the base and reinforce the attachment where needed.
Step 5: Attach the Legs
Position two legs toward the front underside and two toward the rear.
Pin all four pieces before permanently sewing them.
Check the project from the front, back, left side, and right side, then adjust the placement as needed.
Sew the legs securely.
Step 6: Attach the Dorsal Plates
Arrange the three plates along the upper back.
The intended order is:
small front plate → larger middle plate → medium rear plate
Point the tips toward the tail.
Sew along the flat lower edge of each plate.
Finishing
Once everything has been attached, gently shape the finished alligator.
Check:
- head angle
- muzzle fullness
- tail curve
- leg direction
- dorsal plate orientation
- facial symmetry
- exposed stuffing
- loose attachments
Weave in all remaining ends and trim them neatly.
Helpful Tips
Keep Your Tension Consistent
Consistent tension helps the amigurumi fabric stay even and makes the shaping more predictable.
Use a Stitch Marker
Most of the main components are worked in continuous rounds, so a stitch marker makes it easier to keep track of the round’s first stitch.
Stuff Gradually
Adding small amounts of stuffing as you work gives you more control over the finished shape and reduces the chance of creating hard lumps.
Pin Before Sewing
Pinning the components before sewing gives you an opportunity to adjust the silhouette before the placement becomes permanent.
Check Symmetry From Several Angles
A piece can appear centered from one direction but shifted from another. Check the project from multiple views before finishing the assembly.
Troubleshooting
My Stitch Count Is Off
Stop and recount the current round before continuing.
Pay particular attention to increase and decrease rounds. A small counting error can affect the shape of later rounds.
The Stuffing Is Showing Through
The piece may be too tightly stuffed or the crochet fabric may be too loose. Remove a small amount of stuffing and check the fabric again.
The Head Looks Tilted
Pin the head in place and view the project from the front and side before sewing it permanently.
The Legs Do Not Look Even
Keep all four legs pinned until you have checked the project from several angles. Adjust their positions before sewing them securely.
The Tail Feels Too Stiff
Reduce the amount of stuffing, particularly toward the narrow end of the tail.
The Dorsal Plates Move Around
Use pins to hold each plate in position while sewing along its lower edge.
Customization Ideas
Change the Green Shades
Try lighter or darker greens for a different overall look.
You can also use a contrasting light color for the muzzle and a deeper shade for the dorsal plates.
Change the Expression
Small differences in the mouth, eyes, nostrils, or optional teeth can change the personality of the finished alligator.
Create a Different Color Scheme
Experiment with contrasting body and muzzle colors while keeping in mind that changing the yarn weight or hook size can alter the finished dimensions.
Frequently Asked Questions
How big is the finished crochet alligator?
The design is approximately 8–10 inches long. This is an estimated size, not a physically tested measurement.
Your finished alligator may be larger or smaller depending on the yarn, hook, tension, stuffing, and individual technique.
What yarn should I use for this crochet alligator?
Use worsted-weight category #4 yarn.
The design uses a main green, a lighter accent color, and a dark detail color, with white optional for the teeth.
What crochet hook is used?
Use a 4.0 mm crochet hook.
Do I need safety eyes?
The design uses two 8 mm safety eyes.
Safety eyes can present a choking hazard and are not appropriate for children under 3.
Does the alligator need stuffing?
Yes. The head, muzzle, body, tail, and legs are stuffed to varying degrees.
The dorsal plates remain flat and are not stuffed.
Can I change the colors?
Yes. Color changes can be used to personalize the project.
Changing yarn weight, however, will likely change the finished size.
Does this crochet alligator pattern require sewing?
Yes. The separate components are assembled by sewing, including the head, muzzle, tail, legs, and dorsal plates.
Has the pattern been physically tested?
No. The pattern has been mathematically reviewed and constructionally checked, but it has not been physically crocheted and tested yet.
More Animal Amigurumi
You can continue building your crochet animal collection with other amigurumi projects from Tiny Yarn Tales.

This crochet alligator combines rounded amigurumi shapes with a tapered tail, compact legs, a soft muzzle, and three dorsal plates for a recognizable reptile-inspired silhouette. Take your time with the stuffing and assembly, and check the placement of each sewn component before making the final stitches.