Crochet Banana Pattern: Peeled & Unpeeled Banana Amigurumi
This crochet banana pattern gives you two ways to finish…
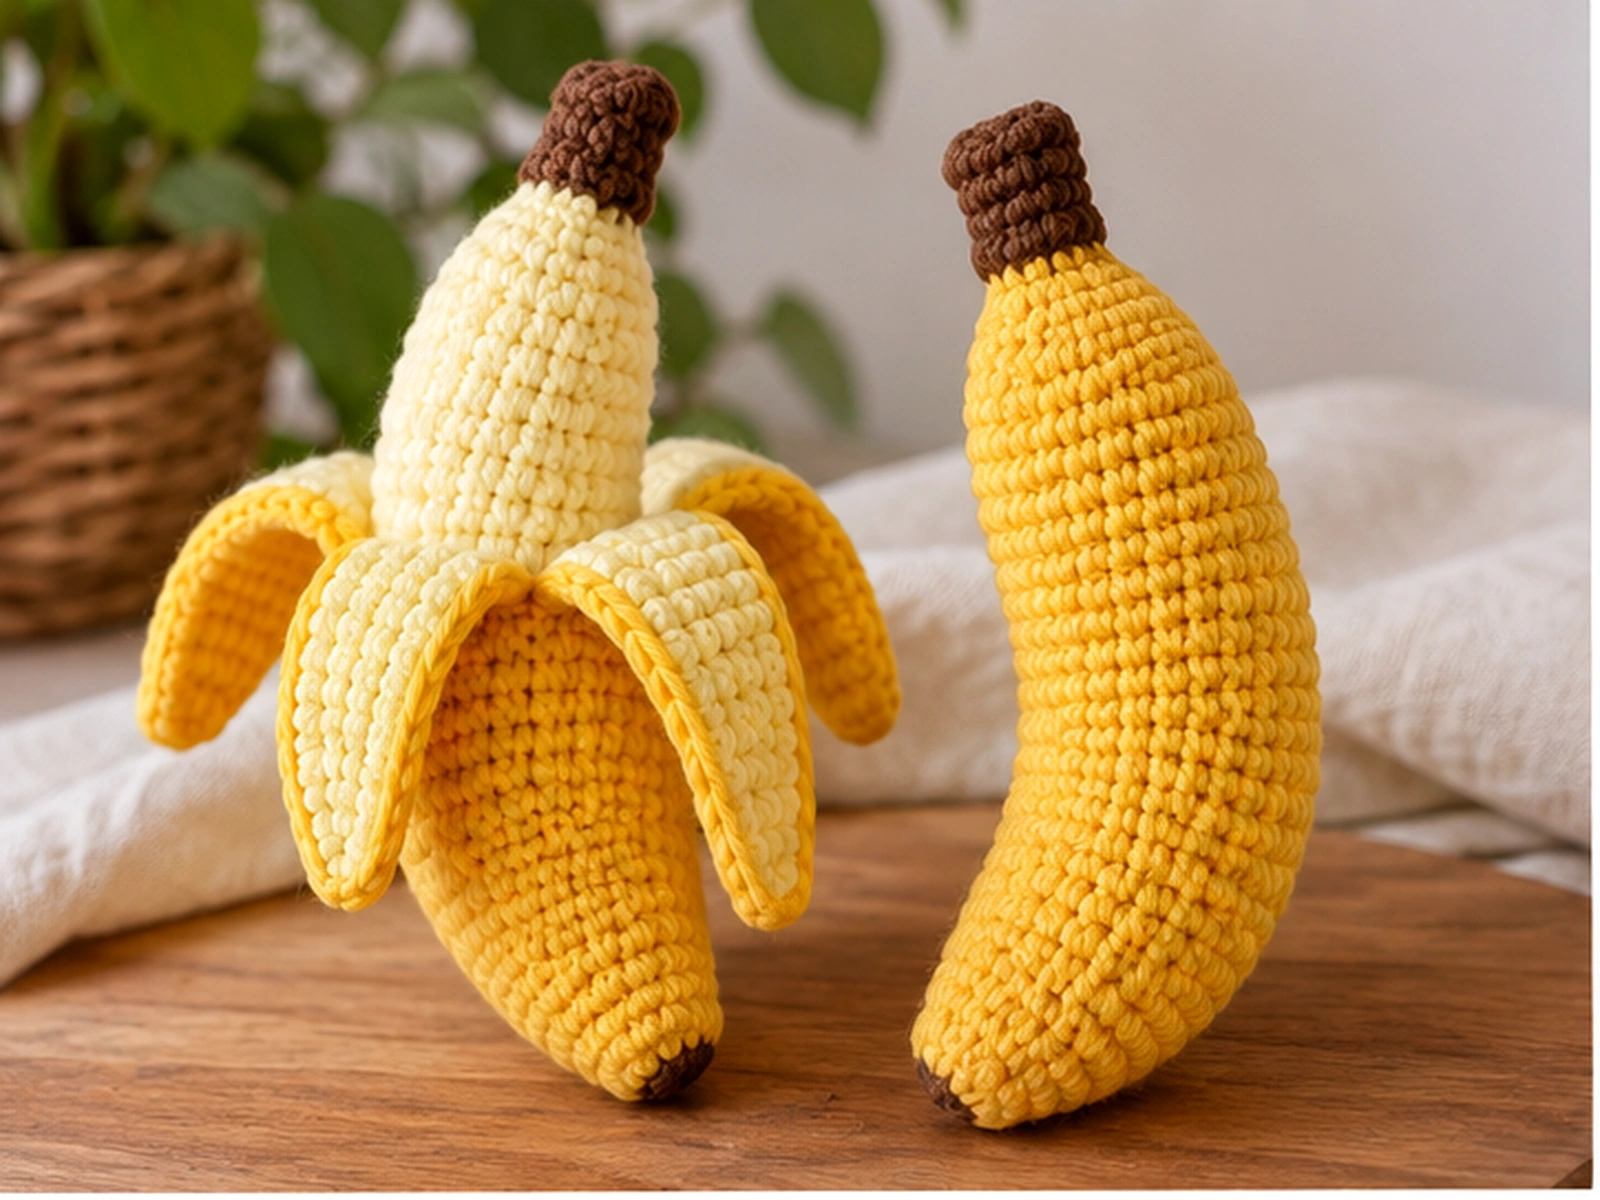
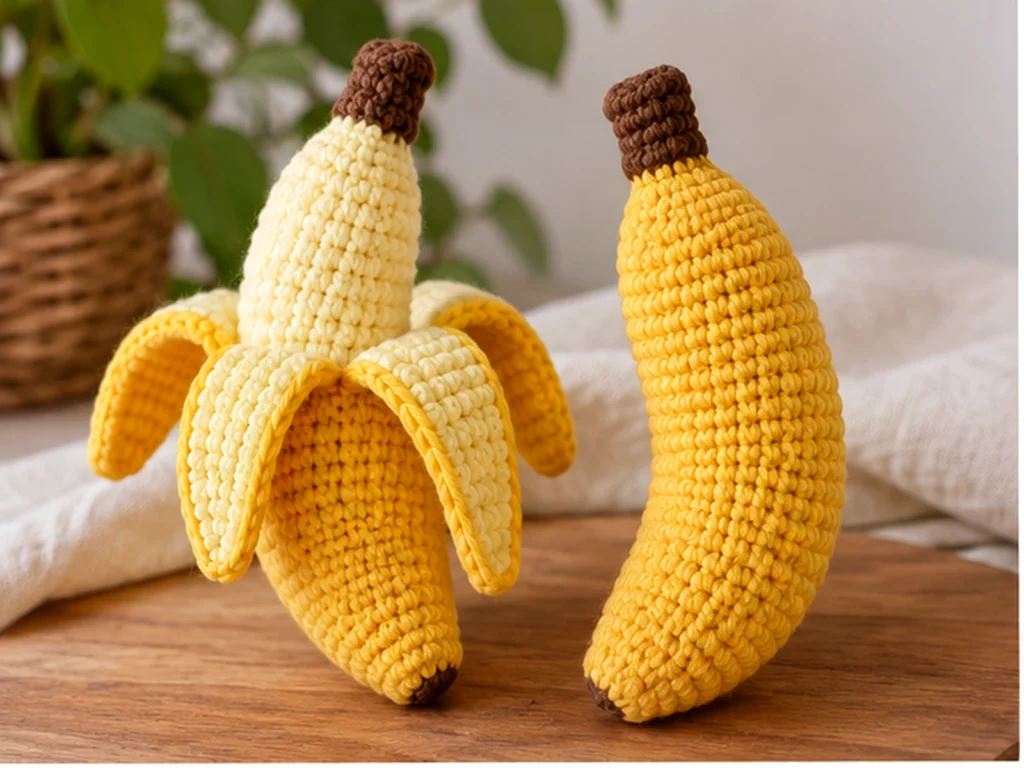
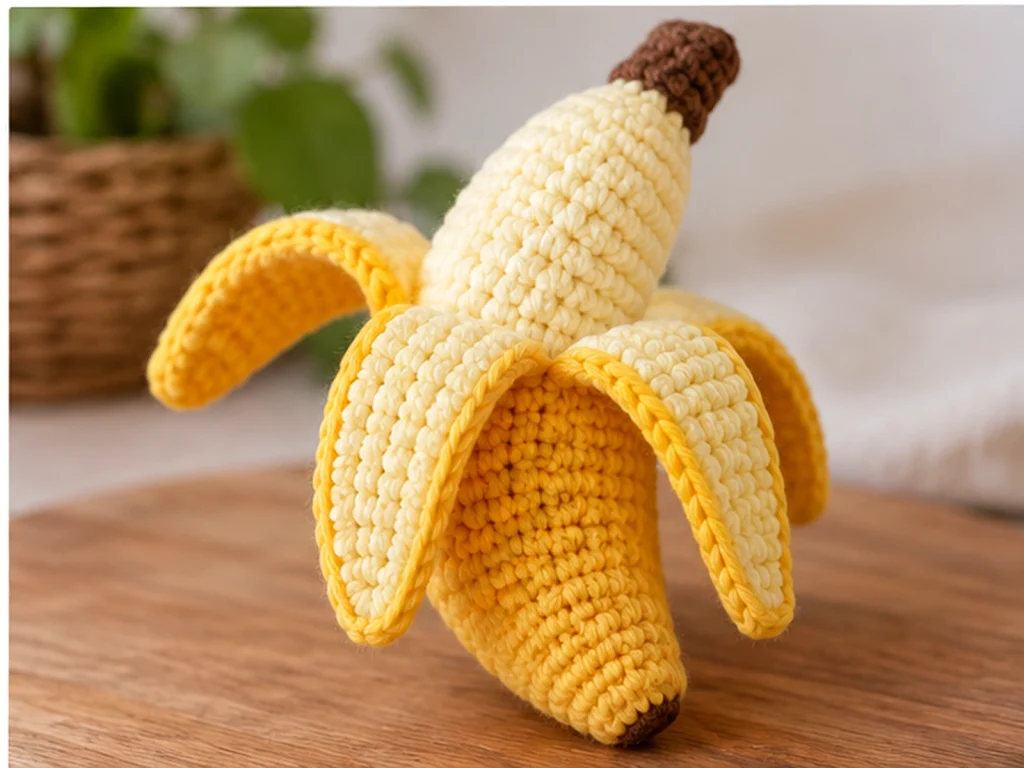
This crochet banana pattern gives you two ways to finish the same amigurumi: a closed unpeeled banana or a peeled banana with the outer sections opened to reveal the fruit inside. The design uses one stuffed banana core, three crocheted peel panels, and a small brown stem.
The finished banana is approximately 5.5–6.5 inches (14–16.5 cm), although the final size will vary with yarn, hook size, tension, stuffing, and individual crochet technique.
Project Overview
This banana amigurumi is made from three simple component types:
- 1 banana core
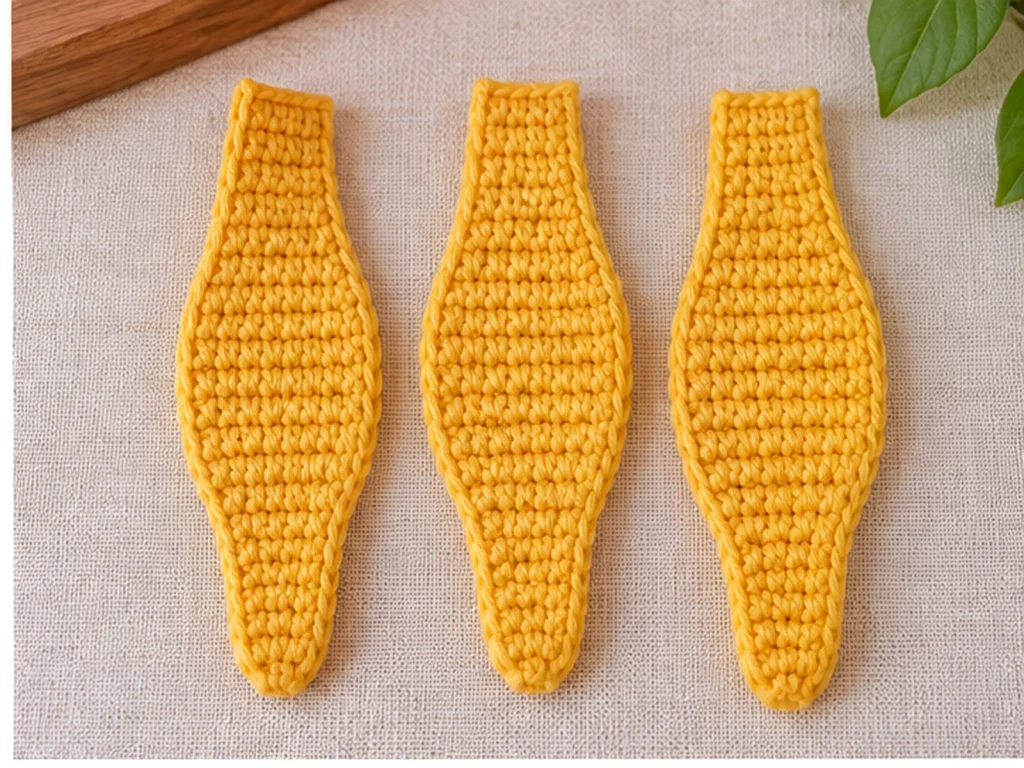
- 3 peel panels
- 1 stem
The banana core is worked in continuous rounds and shaped with increases and decreases. The peel is crocheted separately as three flat panels, allowing you to assemble the same pieces in either an open or closed configuration.
For the peeled version, the panels are attached near the stem and left open below. For the unpeeled version, the panels are joined around the banana core to create a closed outer peel.
Finished Size
Approximately 5.5–6.5 inches (14–16.5 cm).
This is an approximate size rather than a tested measurement. Your finished banana may be smaller or larger depending on yarn, hook, tension, stuffing, and individual technique.
Construction at a Glance
The banana core forms the stuffed fruit.
Three separate peel panels create the outer banana skin. Because they are crocheted individually, they can be arranged in two different ways for two distinct finished looks.
A small crocheted stem completes the top.
Materials & Tools
You’ll need:
- Worsted-weight yarn in soft banana yellow
- Worsted-weight yarn in golden yellow
- Worsted-weight yarn in brown
- 3.5 mm crochet hook
- Polyester fiberfill
- Tapestry needle
No eyes or facial features are used in this design.
Abbreviations
This pattern uses standard US crochet terminology.
- MR — magic ring
- ch — chain
- sc — single crochet
- inc — increase, 2 sc in the same stitch
- dec — invisible decrease
- FO — fasten off
Before You Start
Work in Continuous Rounds
The banana core and stem are worked in continuous rounds rather than joined rounds. Use a stitch marker to identify the beginning of each round if needed.
Count Your Stitches
Keep track of the stitch count at the end of every round. The shaping depends on maintaining the correct count as the banana widens and narrows.
Stuff as You Go
Add stuffing gradually once the banana has enough depth to hold it. Avoid overstuffing, especially toward the final rounds.
Shape the Banana as You Stuff
The stitch structure creates the basic tapered form, while stuffing helps refine the final silhouette. As you work, gently shape the inner and outer sides of the banana to encourage a soft curve.
Prepare the Peel Separately
The peel panels are worked flat and are not stuffed. Make all three panels before beginning the final assembly.
Crochet Banana Pattern
Banana Core — Make 1
Work in soft banana yellow.
Round 1: 6 sc in MR. (6)
Round 2: 6 inc. (12)
Round 3: (sc, inc) × 6. (18)
Round 4: (2 sc, inc) × 6. (24)
Round 5: 24 sc. (24)
Round 6: 24 sc. (24)
Round 7: 24 sc. (24)
Round 8: (5 sc, inc) × 4. (28)
Round 9: 28 sc. (28)
Round 10: 28 sc. (28)
Round 11: 28 sc. (28)
Round 12: (6 sc, inc) × 4. (32)
Round 13: 32 sc. (32)
Round 14: 32 sc. (32)
Round 15: 32 sc. (32)
Round 16: 32 sc. (32)
Begin stuffing gradually.
Round 17: (6 sc, dec) × 4. (28)
Round 18: (5 sc, dec) × 4. (24)
Continue stuffing as the opening becomes smaller.
Round 19: 24 sc. (24)
Round 20: 24 sc. (24)
Round 21: 24 sc. (24)
Round 22: (2 sc, dec) × 6. (18)
Round 23: (sc, dec) × 6. (12)
Add the final stuffing, taking care not to overfill the banana.
Round 24: 6 dec. (6)
Fasten off, leaving a long yarn tail. Use the tail to close the remaining opening securely, then weave in the end.
Peel Panel — Make 3
Work each panel in golden yellow.
Each panel is worked flat in rows.
Row 1: Ch 4. Sc in 2nd ch from hook and across. (3)
Row 2: 3 inc. (6)
Row 3: 6 sc. (6)
Row 4: 6 sc. (6)
Row 5: 6 sc. (6)
Row 6: (sc, inc) × 3. (9)
Row 7: 9 sc. (9)
Row 8: 9 sc. (9)
Row 9: 9 sc. (9)
Row 10: (2 sc, inc) × 3. (12)
Row 11: 12 sc. (12)
Row 12: 12 sc. (12)
Row 13: 12 sc. (12)
Row 14: 12 sc. (12)
Row 15: (2 sc, dec) × 3. (9)
Row 16: 9 sc. (9)
Row 17: 9 sc. (9)
Row 18: 9 sc. (9)
Row 19: (sc, dec) × 3. (6)
Row 20: 6 sc. (6)
Row 21: 6 sc. (6)
Row 22: 3 dec. (3)
Fasten off, leaving a long sewing tail.
Repeat until you have 3 identical peel panels.
Stem — Make 1
Work in brown.
Round 1: 6 sc in MR. (6)
Round 2: 6 sc. (6)
Round 3: 6 sc. (6)
Round 4: 6 inc. (12)
Round 5: 12 sc. (12)
Round 6: 12 sc. (12)
Round 7: 6 dec. (6)
Round 8: 6 sc. (6)
Round 9: 6 sc. (6)
Fasten off, leaving a sewing tail.
Lightly stuff the stem only if you want a little more structure.
Peeled Banana Assembly
- Start with the finished banana core and stem.
- Sew the brown stem securely to the top of the banana core.
- Arrange the three peel panels so their narrow top edges sit evenly around the stem.
- Secure the top of each peel panel.
- Leave the lower length of each panel unattached.
- Arrange the three panels so they fall naturally around the banana.
- Fan the panels outward slightly so the yellow banana core remains visible.
- Compare the three sections before adding any final securing stitches.
- Weave in the remaining yarn ends.
The peel panels should remain flexible rather than being sewn tightly along their full length.
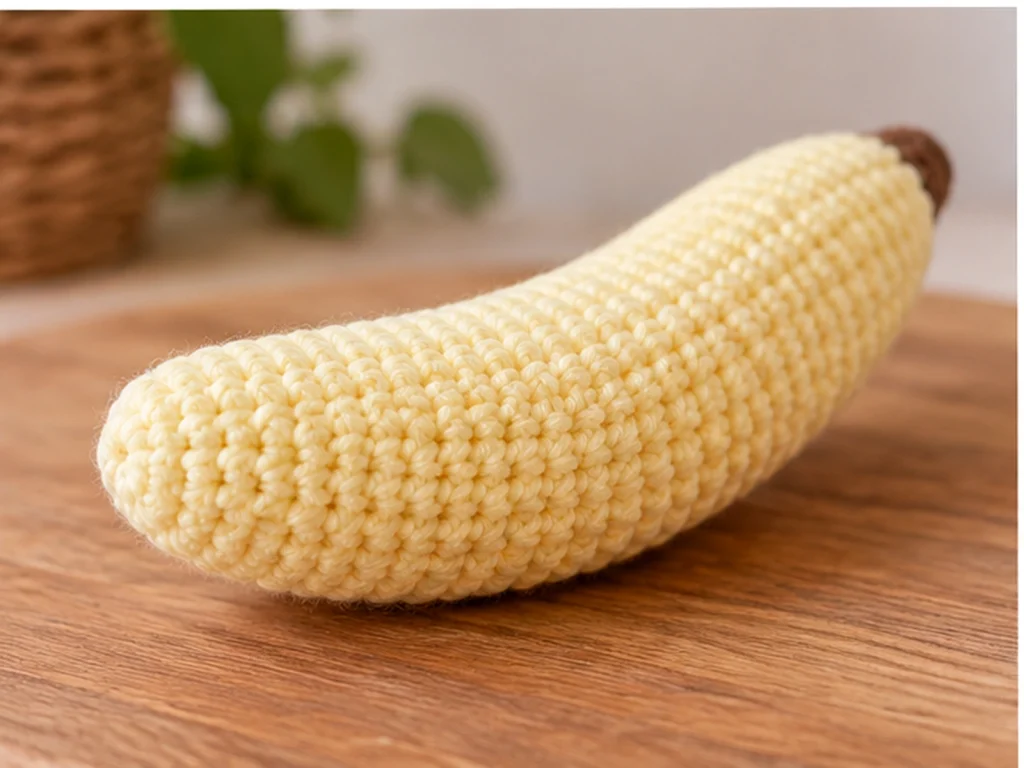
Unpeeled Banana Assembly
- Place the banana core in the center.
- Arrange the three peel panels around the core.
- Position the widest parts of the panels around the middle of the banana.
- Align the neighboring panel edges.
- Using the long yarn tails, sew the adjacent panel edges together from the upper section downward.
- Continue around the banana until the peel forms a closed outer layer.
- Bring the narrow top sections together around the base of the stem.
- Secure the lower pointed ends near the bottom of the banana.
- Add a few discreet stitches where needed to keep the peel from shifting excessively.
- Weave in all remaining ends.
Avoid pulling the seams too tightly. The peel should have enough flexibility to follow the shape of the stuffed banana core.
Finishing
After assembly, gently shape the banana with your hands.
Check that:
- the stem is secure
- the peel sits evenly
- the three peel sections are balanced
- the banana core is not overly stuffed
- all yarn tails are securely woven in
For the peeled version, make sure the three panels remain open enough to clearly reveal the fruit inside.
For the unpeeled version, check the seams around the outer peel and make any small hidden securing stitches needed to prevent shifting.
Helpful Tips
Keep the Stuffing Controlled
Add small amounts of fiberfill at a time. Overstuffing can make the banana look too round and can reduce the soft curved effect.
Watch Your Stitch Counts
The widest part of the banana reaches 32 stitches. Once the decreases begin, the stitch count gradually moves back toward the final 6 stitches.
If your count is off, stop and correct the previous round before continuing.
Shape the Curve While Stuffing
As you fill the banana, gently compress the inner side and allow a little more fullness along the outer side. This can help emphasize the curved banana silhouette.
Balance the Peel
Before sewing the peel permanently, arrange all three panels around the banana and check their spacing from several angles.
Avoid Tight Seams
The peel needs some flexibility. Pulling the seams too tightly can distort the outer shape and make the panels sit unevenly.
Troubleshooting
Why does my banana look too round?
Check the amount of stuffing. Too much fiberfill can make the body look more spherical than tapered. Remove a small amount and reshape the core if needed.
Why doesn’t my banana have much of a curve?
Try adjusting the stuffing distribution. A little more fullness along the outer side and slightly less along the inner side can help reinforce the curved shape.
Why don’t my peel panels line up?
Place all three panels around the banana before sewing. Adjust their spacing first, then permanently secure them once the arrangement looks balanced.
Why do I see a gap at the final opening?
Check that the final decrease round has the correct stitch count and that the remaining opening is drawn closed evenly with the yarn tail.
Why does my unpeeled banana feel too tight?
Loosen the peel seams slightly. The three panels should follow the stuffed core rather than squeeze it.
Customization Ideas
You can change the look of the project while keeping the same basic construction.
Try:
- a paler yellow for the banana core
- a deeper golden shade for the peel
- a darker brown stem
- different yarn and hook combinations for a smaller or larger version
Changing yarn weight, hook size, or tension will affect the finished size and proportions.
For the peeled version, you can also vary how far the three panels are opened to change how much of the banana core is visible.
Frequently Asked Questions
Can I make both the peeled and unpeeled versions from this pattern?
Yes. Both versions use the same banana core, three peel panels, and stem. The difference is entirely in how the peel panels are assembled.
Are the peel panels stuffed?
No. The peel panels are crocheted flat and remain unstuffed.
Does this banana have a face?
No. This design is a simple fruit-shaped amigurumi without eyes, a mouth, or other facial details.
What creates the banana’s curved shape?
The tapered construction of the banana core provides the basic silhouette, while stuffing distribution and gentle shaping help reinforce the curve.
Is the finished size exact?
No. The finished banana is approximately 5.5–6.5 inches long. Actual size varies with yarn, hook, tension, stuffing, and individual technique.
More Crochet Fruit & Amigurumi Patterns
This banana can fit naturally into a collection of crochet fruit and food-inspired amigurumi projects. Explore the rest of your crochet collection for more small handmade projects and playful designs.
A Note About This Pattern
This pattern has been mathematically reviewed and constructionally checked, but it has not been physically crocheted and tested yet. The finished size, final proportions, and physical fit of the peel should therefore be considered approximate until a crocheted sample has been made and evaluated.