
Crochet Birthday Cake Slice Pattern
Celebrate with a tiny handmade dessert! This crochet birthday cake…

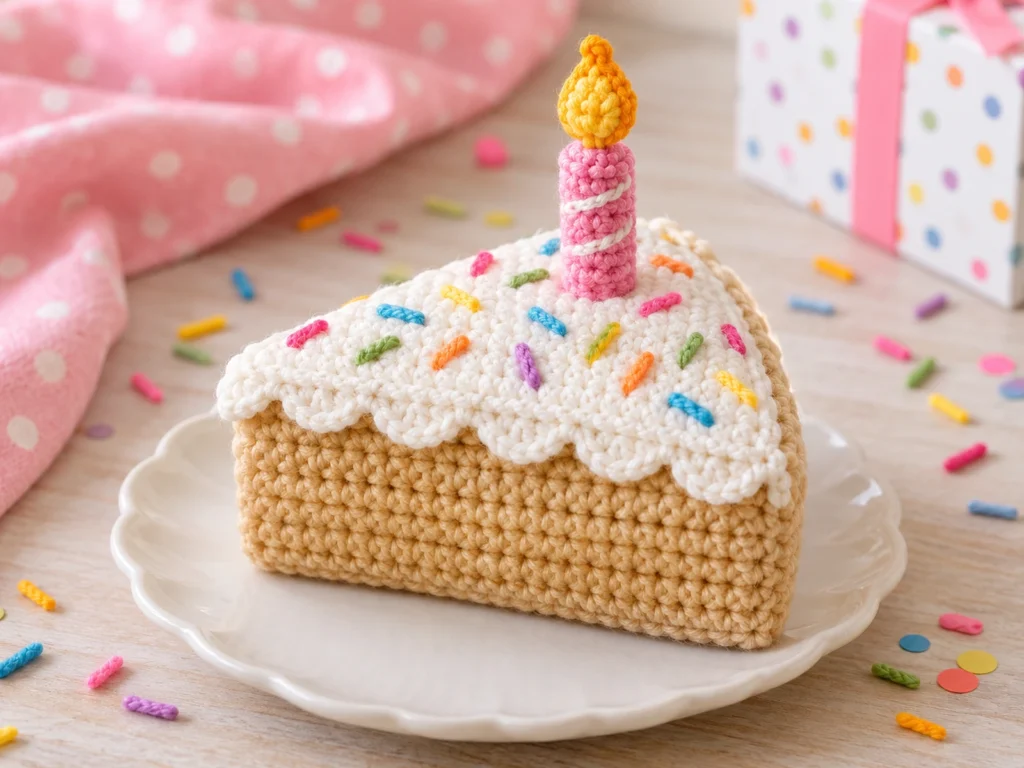
Celebrate with a tiny handmade dessert! This crochet birthday cake slice is a dimensional cake wedge topped with frosting, colorful sprinkles, a candle, and a little flame.
The design is built from two triangular cake panels joined with a perimeter gusset, then finished with a separate frosting layer and birthday-cake details. It uses worsted-weight yarn and a 4.0 mm crochet hook.
The finished cake slice is approximately 4–5 inches across, depending on yarn, hook size, tension, stuffing, and individual technique.
Project Overview
What You’ll Make
This pattern creates a 3D crochet birthday cake slice with:
- A triangular cake shape
- A separate frosting overlay
- Colorful embroidered sprinkles
- A small crochet candle
- A tapered flame
- Polyester-fiberfill stuffing
The main cake is formed from two matching triangular side panels and a long gusset that connects them.
Project Details
- Technique: Crochet
- Yarn: Worsted weight, category 4
- Hook: 4.0 mm
- Approximate finished size: 4–5 inches across
- Stuffing: Polyester fiberfill
- Main construction: Two side panels + one perimeter gusset + frosting overlay
The pattern has been mathematically reviewed and constructionally checked, but it has not been physically crocheted and tested yet.
Materials & Tools
Yarn
Use worsted-weight/category 4 yarn in:
- Warm beige or golden tan for the cake
- White, cream, or pastel for the frosting
- Pink or another accent color for the candle
- Yellow or orange for the flame
- Small scraps in assorted colors for the sprinkles
Other Supplies
- 4.0 mm crochet hook
- Polyester fiberfill
- Tapestry needle
- Stitch markers
- Scissors
Abbreviations
The pattern uses standard US crochet terminology.
- MR — magic ring
- ch — chain
- sc — single crochet
- inc — 2 sc in the same stitch
- dec — single crochet 2 stitches together
- sl st — slip stitch
- FO — fasten off
- st/sts — stitch/stitches
Before You Start
Keep Track of Your Stitch Counts
The triangular cake panels decrease by one stitch on every row. Count your stitches at the end of each row so both panels remain identical.
Work Carefully Around the Corners
The gusset is divided into three sections that correspond to the three sides of the triangular cake panel. Marking these sections before sewing can make assembly much easier.
Stuff Gradually
Add polyester fiberfill little by little. The cake should feel firm enough to hold its wedge shape without becoming overly rounded or distorted.
Follow the Construction Order
The main assembly is:
- Make two triangular side panels.
- Make the perimeter gusset.
- Attach the gusset to the first side.
- Attach the second side.
- Add stuffing before the final seam is closed.
- Attach the frosting.
- Add sprinkles.
- Attach the candle and flame.
Crochet Birthday Cake Slice Pattern
Triangular Cake Side Panels
Make 2 in the cake color.
These panels create the triangular side profile of the cake slice.
Row 1
Ch 21. Sc in 2nd ch from hook and across. (20)
Row 2
Ch 1, turn. Sc 18, dec over the last 2 sts. (19)
Row 3
Ch 1, turn. Sc 17, dec. (18)
Row 4
Ch 1, turn. Sc 16, dec. (17)
Row 5
Ch 1, turn. Sc 15, dec. (16)
Row 6
Ch 1, turn. Sc 14, dec. (15)
Row 7
Ch 1, turn. Sc 13, dec. (14)
Row 8
Ch 1, turn. Sc 12, dec. (13)
Row 9
Ch 1, turn. Sc 11, dec. (12)
Row 10
Ch 1, turn. Sc 10, dec. (11)
Row 11
Ch 1, turn. Sc 9, dec. (10)
Row 12
Ch 1, turn. Sc 8, dec. (9)
Row 13
Ch 1, turn. Sc 7, dec. (8)
Row 14
Ch 1, turn. Sc 6, dec. (7)
Row 15
Ch 1, turn. Sc 5, dec. (6)
Row 16
Ch 1, turn. Sc 4, dec. (5)
Row 17
Ch 1, turn. Sc 3, dec. (4)
Row 18
Ch 1, turn. Sc 2, dec. (3)
Row 19
Ch 1, turn. Sc 1, dec. (2)
Row 20
Ch 1, turn. Dec. (1)
Fasten off, leaving a sewing tail.
Make a second identical panel.
Perimeter Cake Gusset
Make 1 in the cake color.
The gusset connects the two triangular side panels and gives the cake slice its 3D shape.
Row 1
Ch 19. Sc in 2nd ch from hook and across. (18)
Rows 2–58
Ch 1, turn. Sc across. (18 each row)
For assembly, divide the gusset into three sections:
- Rows 1–20: Bottom edge
- Rows 21–39: Sloped top edge
- Rows 40–58: Back edge
Fasten off, leaving a long sewing tail.
Frosting Overlay
Make 1 in the frosting color.
The frosting sits over the sloped top of the cake.
Row 1
Ch 19. Sc in 2nd ch from hook and across. (18)
Rows 2–19
Ch 1, turn. Sc across. (18 each row)
Fasten off, leaving a sewing tail.
Scalloped Frosting Edge
Work along one long 19-row edge of the frosting panel.
First, sl st in the next 2 edge stitches.
Then repeat the following sequence 3 times:
- Sl st in next 2 edge stitches
- 3 sc in next edge stitch
- Sc in next edge stitch
- Sl st in next edge stitch
Finally, sl st in the last 2 edge stitches.
This uses all 19 edge stitches and creates three evenly spaced frosting scallops.
Fasten off and weave in the end.
Crochet Candle
Make 1 in the candle color.
Work in continuous rounds.
Round 1
6 sc in MR. (6)
Round 2
Sc around. (6)
Round 3
Sc around. (6)
Round 4
Sc around. (6)
Round 5
Sc around. (6)
Round 6
Sc around. (6)
Round 7
Sc around. (6)
Round 8
Sc around. (6)
Round 9
Sc around. (6)
Round 10
Sc around. (6)
Lightly stuff the candle.
Fasten off, leaving a sewing tail. Thread the tail through the front loops of the remaining 6 stitches and gently pull to close.
For extra detail, add one or two narrow surface-embroidered bands around the candle.
Crochet Flame
Make 1 in yellow or orange.
Round 1
4 sc in MR. (4)
Round 2
(Sc, inc) × 2. (6)
Round 3
Sc around. (6)
Round 4
Dec × 3. (3)
Round 5
Sc around. (3)
Fasten off, leaving a sewing tail.
Add a very small amount of stuffing if desired. Thread the tail through the final 3 stitches and gently cinch the opening closed.
Assembly
Step 1: Prepare the First Cake Side
Lay one triangular cake panel flat with the wide bottom edge at the bottom and the single-stitch point at the top.
Identify the three edges:
- Bottom edge
- Sloped edge
- Back edge
Step 2: Attach the Gusset
Using the gusset’s sewing tail:
- Align the beginning of the gusset with the bottom edge of the triangular panel.
- Sew Rows 1–20 along the bottom edge.
- Continue with Rows 21–39 along the sloped edge.
- Finish with Rows 40–58 along the back edge.
- Keep each corner aligned with the corresponding corner of the triangular panel.
Use a consistent whip stitch or mattress-style joining stitch.
Step 3: Attach the Second Side
Place the second triangular panel against the free edge of the gusset.
Match:
- Bottom edge with Rows 1–20
- Sloped edge with Rows 21–39
- Back edge with Rows 40–58
Sew around the perimeter.
Step 4: Add the Stuffing
Before completely closing the final seam, gradually add polyester fiberfill.
Keep the stuffing firm enough to hold the wedge shape without forcing the triangular side panels outward.
Pay extra attention to the pointed end so it stays clearly defined.
Close the remaining opening and weave in the yarn end.
Step 5: Attach the Frosting
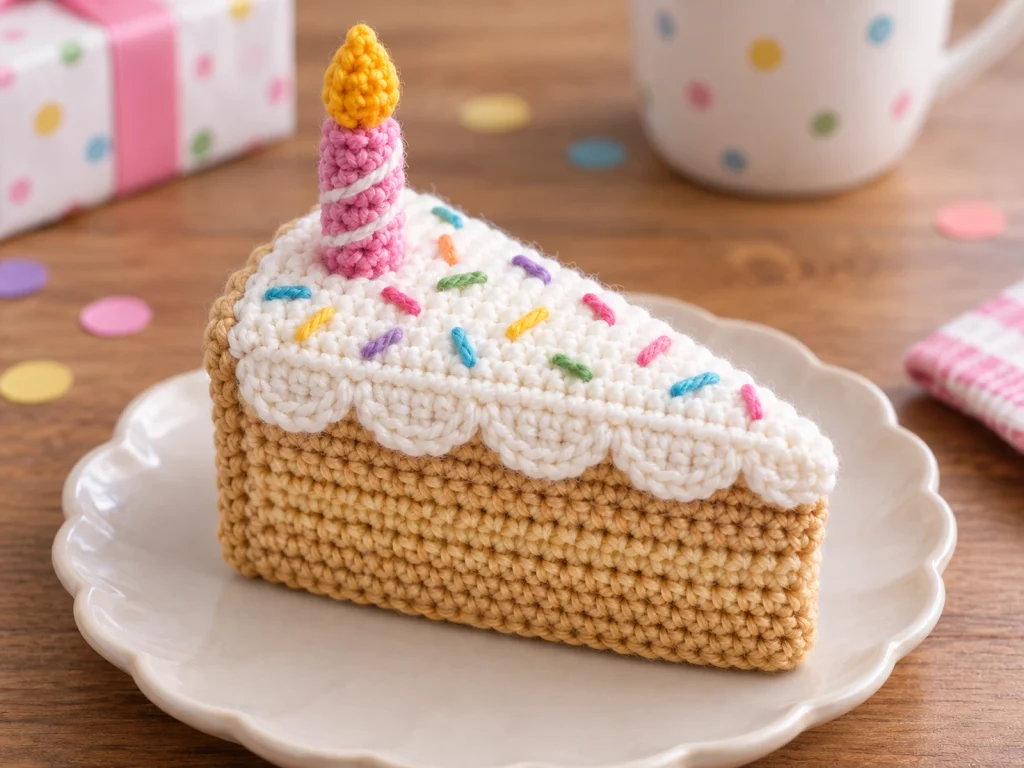
Place the frosting overlay on the sloped top surface.
Center it from side to side and leave a narrow visible cake-colored border around it.
Keep the scalloped edge facing the front/open edge of the cake.
Sew around the perimeter and weave in the ends.
Step 6: Add the Sprinkles
Use small scraps of contrasting yarn to embroider short sprinkle marks across the frosting.
Vary the direction of the sprinkles for a more natural look.
Keep the decorations slightly away from the outer edge so the frosting border remains visible.
Birthday Details
Attach the Candle
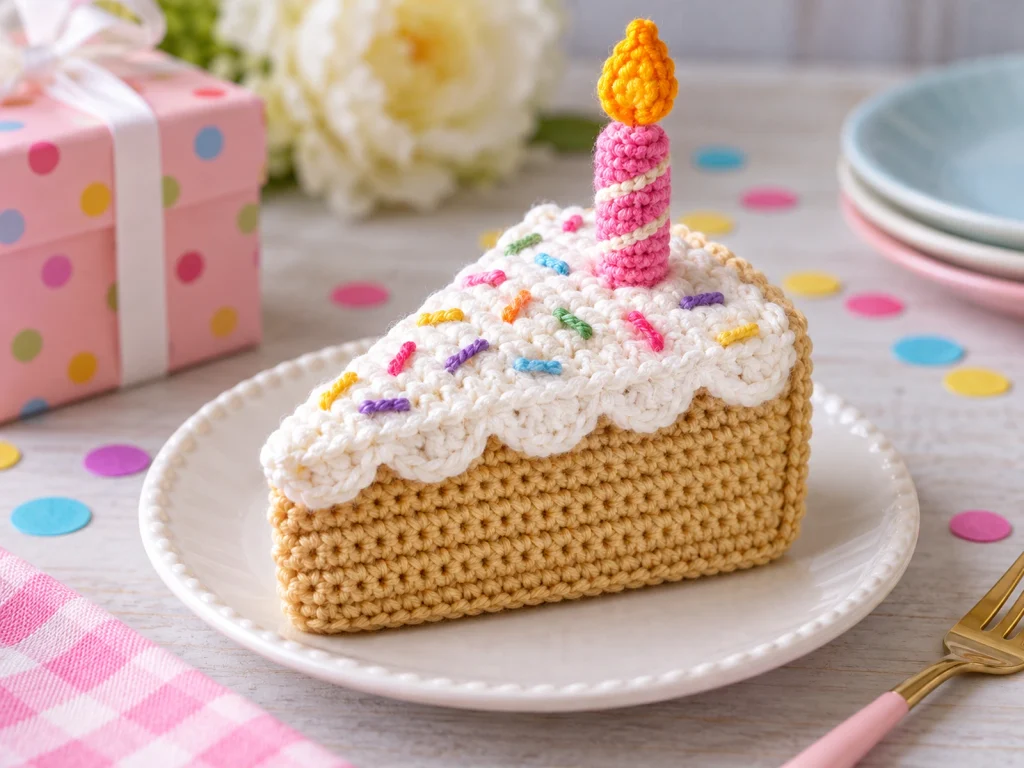
Position the candle on the frosting slightly toward the wider/back portion of the slice rather than directly at the pointed tip.
Sew the base securely to the frosting and the cake beneath it.
Check that the candle stands upright before weaving in the ends.
Attach the Flame
Place the flame on top of the candle.
Sew it securely in place and gently shape it with your fingers to create a small pointed silhouette.
Finishing
Before finishing the project:
- Weave in all remaining yarn ends.
- Check that both triangular side panels are symmetrical.
- Make sure the frosting is centered.
- Check that the candle is upright.
- Redistribute the stuffing if necessary.
- Gently reshape the cake slice.
Helpful Tips
Keep the Triangle Crisp
Avoid overstuffing the cake. Too much fiberfill can push the side panels outward and soften the wedge shape.
Count Every Row
The triangular panels change size on every row, so checking the stitch count regularly helps keep both sides identical.
Check the Corners Before Closing
When sewing the gusset to the panels, pause at each corner and check that the next section begins in the correct place.
Stuff in Small Amounts
Adding a little fiberfill at a time gives you more control over the final shape and makes it easier to keep the point of the cake defined.
Troubleshooting
My Cake Slice Looks Too Rounded
Remove a little stuffing and reshape the wedge by hand. The triangular side panels should remain visibly defined.
The Two Sides Do Not Match
Check the stitch counts on both triangular panels. Each panel should finish with the same sequence and the same final stitch count.
The Gusset Does Not Line Up at the Corners
Recheck the three gusset sections:
- Rows 1–20
- Rows 21–39
- Rows 40–58
Match each section to the corresponding edge before sewing further.
The Candle Tilts
Before weaving in the sewing end, reposition the candle and add a few additional stitches around its base to stabilize it.
The Frosting Looks Uneven
Center the frosting before sewing it down and keep a similar visible cake border around the top surface.
Customization Ideas
Change the Cake Color
Use warm tan for vanilla-style cake, brown for chocolate, or another color combination that suits your theme.
Change the Frosting
Try white, pink, mint, lavender, yellow, or blue frosting for different birthday looks.
Mix Up the Sprinkles
Use small scraps in different colors to create your own sprinkle palette.
Personalize the Candle
Choose a bright accent color and add embroidered bands for extra decoration.
Frequently Asked Questions
What yarn is used for this crochet birthday cake slice?
The pattern is written for worsted-weight/category 4 yarn.
What crochet hook size is used?
A 4.0 mm crochet hook is used throughout the design.
How is the cake slice constructed?
The main cake is made from two matching triangular side panels joined with a long perimeter gusset. The frosting is crocheted separately and attached afterward.
Does the cake slice need stuffing?
Yes. Polyester fiberfill is used to create the 3D wedge shape.
How do I keep the cake slice from looking uneven?
Keep both triangular panels at matching stitch counts, align the gusset sections carefully, and add stuffing gradually.
Can I change the colors?
Yes. You can customize the cake, frosting, candle, flame, and sprinkle colors while keeping the same main construction.
How large is the finished cake slice?
The finished project is approximately 4–5 inches across. Actual size will vary with yarn, hook size, tension, stuffing, and individual technique.
More Crochet Food Projects
The cake-slice construction also provides a useful starting point for experimenting with other decorative crochet food designs. Keep the same careful approach to shaping, stuffing, joining, and finishing when adapting the construction to your own ideas.
Final Thoughts
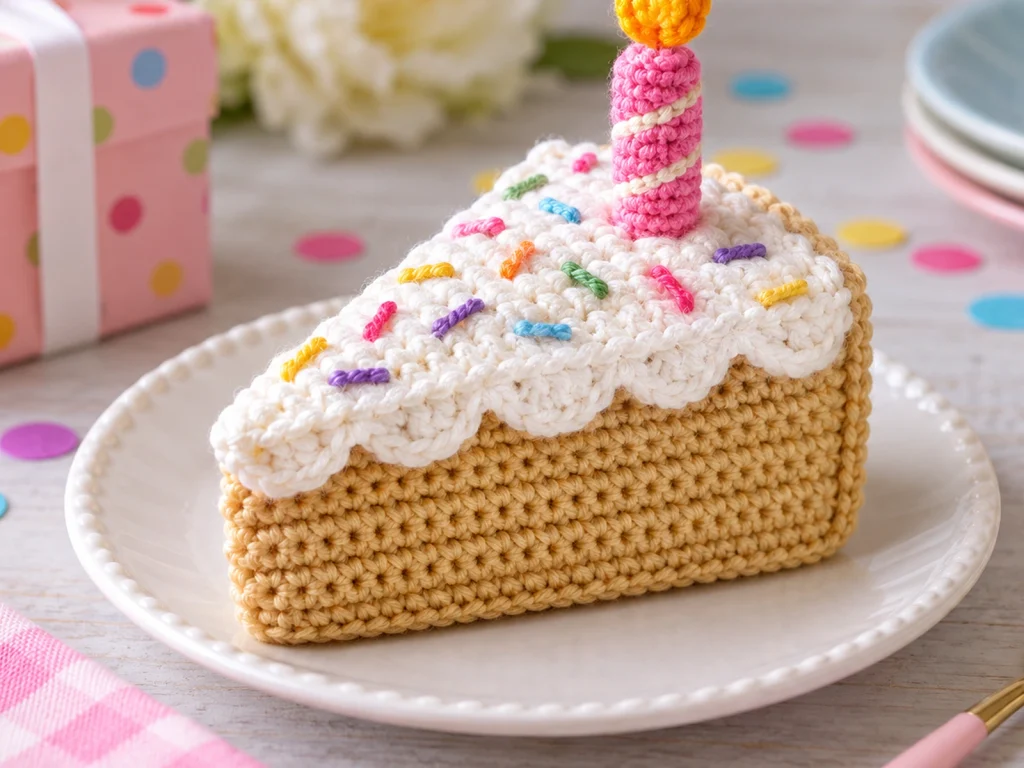
This crochet birthday cake slice combines a simple geometric structure with colorful celebration details. The triangular panels create the cake wedge, the gusset gives it dimension, and the frosting, sprinkles, candle, and flame complete the birthday look.
For the cleanest result, focus on consistent stitch counts, careful corner alignment, even stuffing, and a centered frosting layer.
Happy crocheting!