
Crochet Croissant Amigurumi Pattern: A Step-by-Step Tutorial
This crochet croissant amigurumi is made from five stuffed crochet…
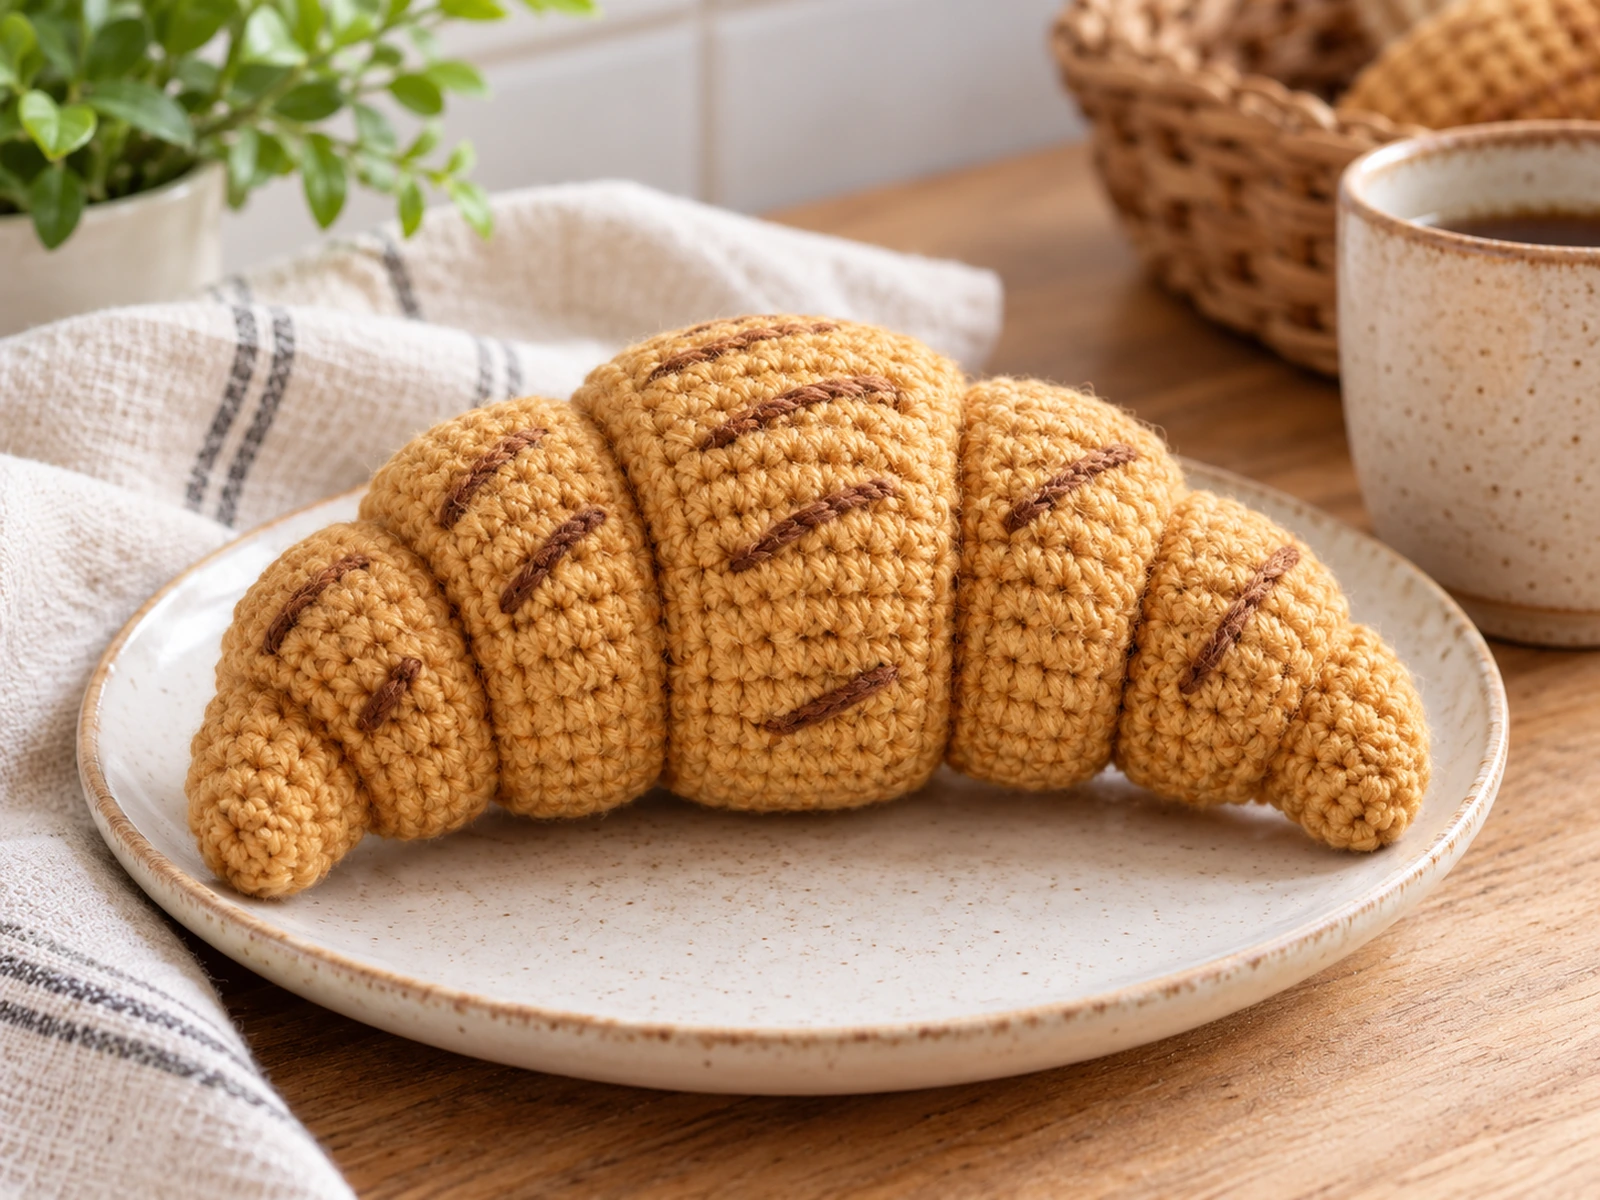
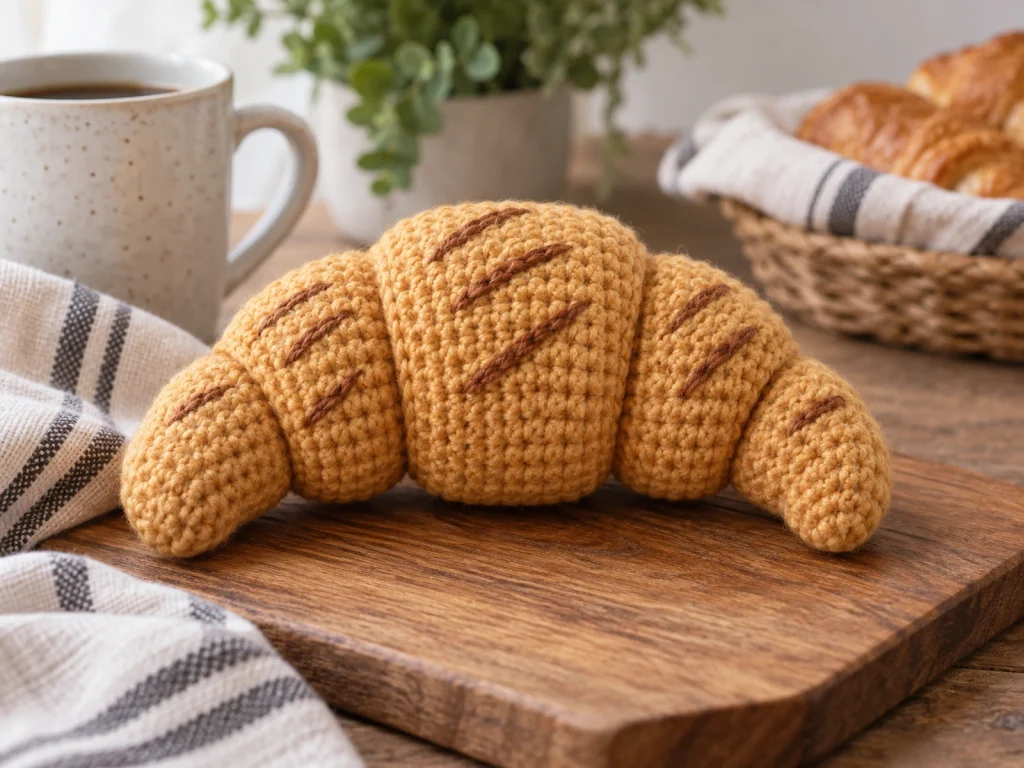
This crochet croissant amigurumi is made from five stuffed crochet sections that come together to create a soft, curved pastry shape. The design uses simple single crochet shaping, gradual increases and decreases, and toasted-brown embroidery details for a warm baked look.
The finished croissant is approximately 5–6 inches across, depending on your yarn, hook, tension, stuffing, and individual crochet technique.
Project Overview
What You’ll Make
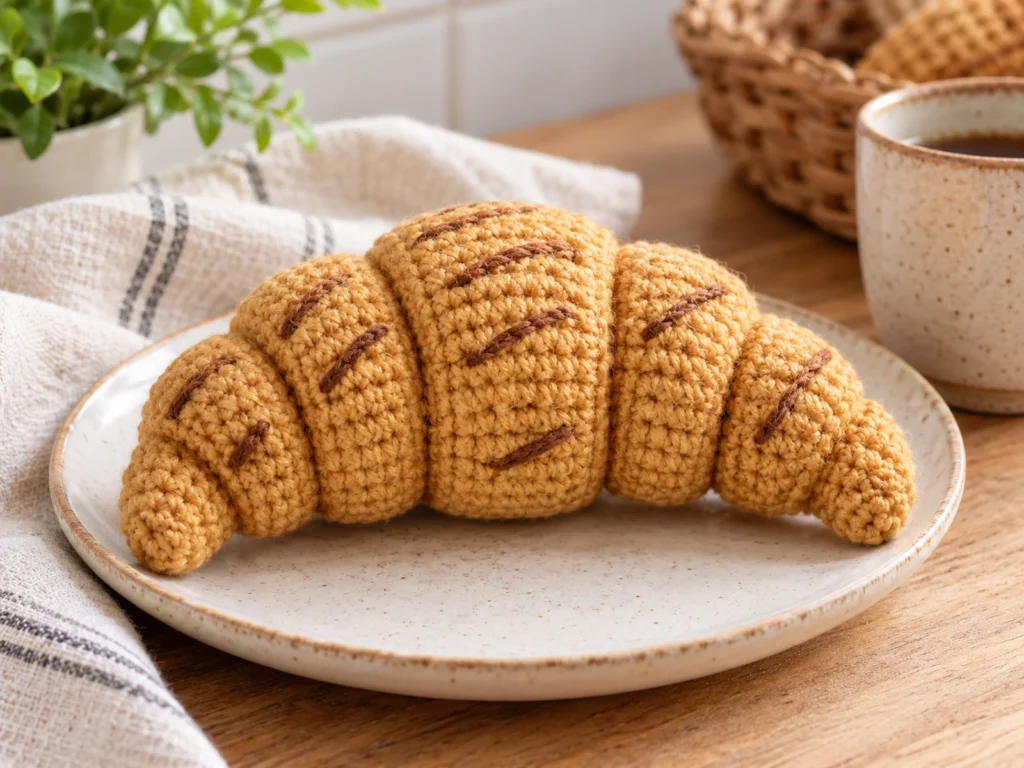
You’ll make one crocheted croissant from five individual stuffed sections:
Outer Tip → Inner Section → Center Section → Inner Section → Outer Tip
The center section is the widest part of the design. The sections gradually become smaller toward the ends, and the two outer tips are angled slightly upward and inward during assembly to create the crescent silhouette.
The finished project has no facial features or safety eyes. Instead, toasted-brown yarn is embroidered onto the surface to create simple pastry details.
Project Details
- Project: Crochet croissant amigurumi
- Approximate finished size: 5–6 inches across
- Yarn: Worsted-weight/category 4
- Hook: 3.5 mm crochet hook
- Main color: Warm golden tan
- Accent color: Toasted brown
- Stuffing: Polyester fiberfill
- Construction: Five separately crocheted and stuffed sections
- Working method: Continuous rounds
The finished size is approximate and will vary with yarn, hook size, tension, stuffing, and individual technique.
Materials & Tools
- Worsted-weight/category 4 yarn in warm golden tan
- A small amount of worsted-weight/category 4 yarn in toasted brown
- 3.5 mm crochet hook
- Polyester fiberfill
- Tapestry needle
- Stitch marker
- Scissors
Abbreviations
This pattern uses standard US crochet terminology.
- MR — magic ring
- sc — single crochet
- inc — increase; work 2 sc in the same stitch
- dec — single crochet decrease
- FO — fasten off
Before You Start
Work in Continuous Rounds
The crochet sections are worked in continuous rounds rather than joined rounds. A stitch marker can help you keep track of the beginning of each round.
Count Your Stitches
Each round includes its expected stitch count in parentheses. Check your count before moving on, especially after increase and decrease rounds.
Stuff as You Go
Add stuffing gradually as each section is crocheted. The pieces should be rounded without becoming overly firm.
The outer tips should remain a little softer so they can be shaped naturally during assembly.
Shape Before Sewing
The final croissant shape depends partly on how the five pieces are positioned. Before reinforcing the final attachment points, compare both sides and adjust the outer tips so the silhouette looks balanced.
Construction Order
The project is assembled in this order:
Outer Tip → Inner Section → Center Section → Inner Section → Outer Tip
Crochet Croissant Pattern
Center Segment — Make 1
Using warm golden-tan yarn, begin with a magic ring.
Round 1: 6 sc in MR (6)
Round 2: 6 inc (12)
Round 3: (sc, inc) × 6 (18)
Round 4: (2 sc, inc) × 6 (24)
Round 5: (3 sc, inc) × 6 (30)
Begin adding stuffing lightly after Round 5.
Round 6: 30 sc (30)
Round 7: 30 sc (30)
Round 8: 30 sc (30)
Round 9: 30 sc (30)
Round 10: 30 sc (30)
Round 11: 30 sc (30)
Round 12: 30 sc (30)
Continue keeping the stuffing evenly distributed.
Round 13: (3 sc, dec) × 6 (24)
Add the remaining stuffing as needed while keeping the piece rounded without overfilling it.
Round 14: (2 sc, dec) × 6 (18)
Round 15: (sc, dec) × 6 (12)
Round 16: 6 dec (6)
Fasten off, leaving a long yarn tail. Thread the tail through the front loops of the remaining 6 stitches, pull the opening closed, secure the yarn, and hide the end inside the piece.
Set the center segment aside.
Inner Segment — Make 2
Make two identical pieces in warm golden-tan yarn.
Round 1: 6 sc in MR (6)
Round 2: 6 inc (12)
Round 3: (sc, inc) × 6 (18)
Round 4: (2 sc, inc) × 6 (24)
Begin stuffing lightly after Round 4.
Round 5: 24 sc (24)
Round 6: 24 sc (24)
Round 7: 24 sc (24)
Round 8: 24 sc (24)
Round 9: 24 sc (24)
Round 10: 24 sc (24)
Adjust the stuffing as needed so the section remains rounded without becoming too firm.
Round 11: (2 sc, dec) × 6 (18)
Round 12: (sc, dec) × 6 (12)
Round 13: 6 dec (6)
Fasten off, leaving a sewing tail. Close the final opening through the front loops of the remaining stitches and secure the yarn.
Repeat to make the second inner segment.
Outer Tip Segment — Make 2
Make two identical pieces in warm golden-tan yarn.
Round 1: 6 sc in MR (6)
Round 2: 6 inc (12)
Round 3: (sc, inc) × 6 (18)
Begin stuffing lightly after Round 3.
Round 4: 18 sc (18)
Round 5: 18 sc (18)
Round 6: 18 sc (18)
Round 7: 18 sc (18)
Keep the stuffing lighter toward the narrow end so the tip can curve naturally.
Round 8: (sc, dec) × 6 (12)
Round 9: 6 dec (6)
Fasten off, leaving a sewing tail. Close the remaining opening and secure the yarn.
Repeat to make the second outer tip.
Add the Toasted Surface Details
Using toasted-brown yarn and a tapestry needle, add three short diagonal lines to each segment on the visible front side.
Keep the embroidered lines:
- Short
- Slightly angled
- Evenly distributed
- Balanced across both sides of the croissant
Because the finished project is curved, exact spacing does not need to be measured. Use the assembled silhouette as your visual guide.
Assemble the Crochet Croissant
Step 1: Arrange the Finished Pieces
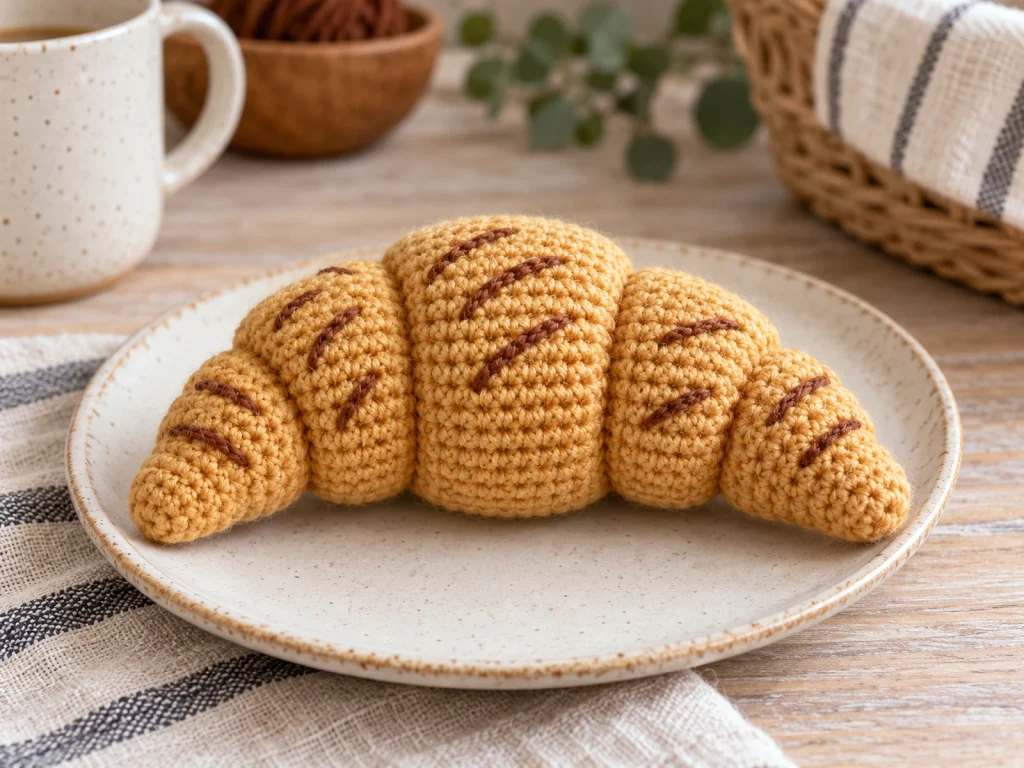
Place the five pieces in this order:
Outer Tip → Inner Section → Center Section → Inner Section → Outer Tip
The center should be the widest section, with the medium-sized inner pieces on either side and the smallest tips at the ends.
Step 2: Attach the Inner Sections
Position one inner section against each side of the center segment.
The wider portions should sit beside the center’s widest area.
Sew the touching surfaces together securely while keeping the individual pieces rounded rather than flattening them completely.
Step 3: Attach the Outer Tips
Place one outer tip beyond each inner section.
Angle both tips slightly upward and inward as you sew them into place.
This creates the beginning of the crescent-shaped croissant silhouette.
Step 4: Adjust the Final Shape
Look at the project from the front and compare both sides.
The intended progression is:
wide center → medium middle sections → narrow upward-curving ends
Make any small positioning adjustments before reinforcing the final stitches.
Step 5: Secure the Assembly
Reinforce the main attachment points and weave all remaining yarn tails into the crocheted sections.
Trim the excess yarn only after the ends are securely hidden.
Finishing
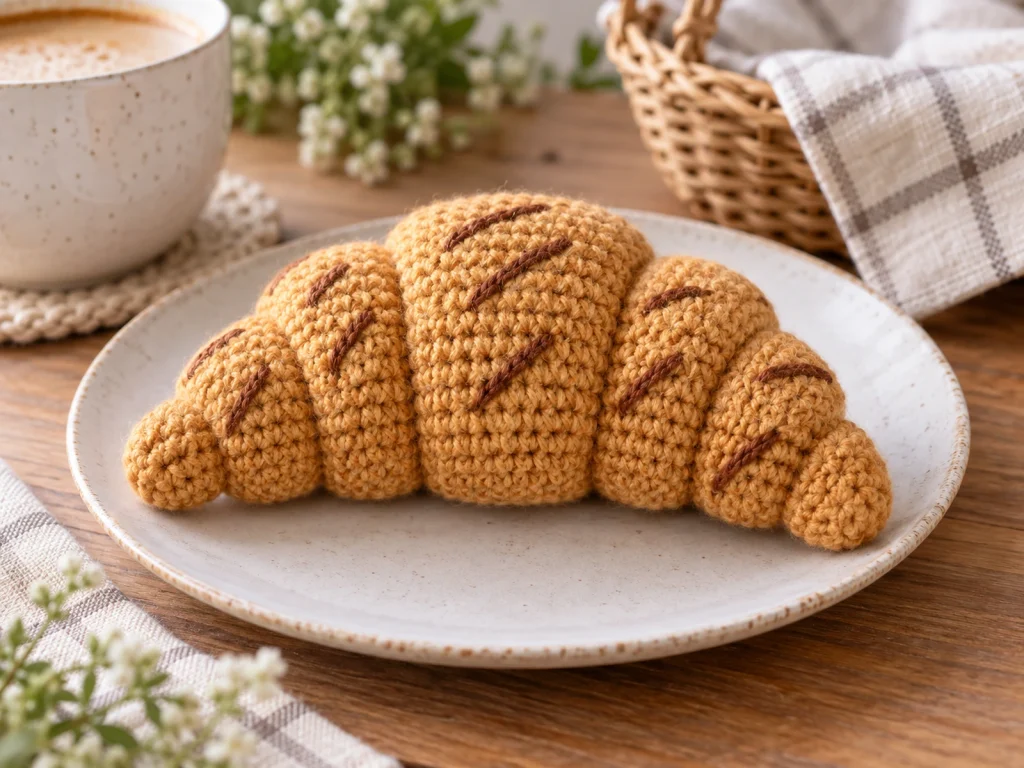
Check the completed croissant from the front and sides.
Make sure:
- The center remains the widest section.
- The two inner sections sit evenly on either side.
- The outer tips curve upward and inward.
- The surface embroidery remains visible on the front.
- No stuffing is exposed.
- All yarn ends are securely woven in.
Helpful Tips
Keep the Stuffing Moderate
Too much stuffing can make the pieces overly round and rigid. The outer tips especially benefit from lighter stuffing because they need to curve during assembly.
Check the Shape Before Final Sewing
The components can be adjusted slightly before the final attachment points are reinforced. Use this opportunity to compare both sides of the croissant.
Keep the Toasted Details Subtle
The embroidered lines should complement the pastry shape rather than overpower it. Short, evenly distributed marks work well with the rounded sections.
Watch Your Stitch Count
Because the three component types reach different maximum stitch counts, check the number at the end of each round before continuing.
Troubleshooting
Why does my croissant look too straight?
Check the positioning of the five sections before tightening the final attachment stitches. The two outer tips should angle gently upward and inward.
Why does my croissant look too round?
The piece may be overstuffed. Remove or redistribute a small amount of fiberfill from the affected section before closing it.
Why do the two sides look uneven?
Compare the left and right sections before sewing them permanently. Differences in tension, stuffing, or placement can affect the finished silhouette.
Why does one piece look larger than the other?
Check the stitch count first, then compare your crochet tension. Even identical written instructions can produce slightly different shapes when tension changes.
Customization Ideas
Change the Pastry Color
Try a lighter or deeper golden shade for a different baked look. A warmer tan creates a softer pastry appearance, while a deeper brown gives a more toasted effect.
Adjust the Surface Embroidery
You can use fewer or more diagonal lines or slightly change their angle while keeping the details balanced across the finished croissant.
Experiment With Yarn
Changing yarn weight or hook size will change the finished dimensions and overall proportions. Since this design was created around worsted-weight yarn and a 3.5 mm hook, significant changes should be treated as a variation rather than an exact size-preserving substitution.
Frequently Asked Questions
How big is the finished crochet croissant?
The finished croissant is approximately 5–6 inches across. Your final size may vary depending on yarn, hook size, tension, stuffing, and individual technique.
What yarn is used for this crochet croissant pattern?
The pattern is designed for worsted-weight/category 4 yarn, using warm golden tan for the pastry and a small amount of toasted brown for the surface details.
Does this pattern use safety eyes?
No. This design does not use eyes or other facial features.
What stitches are used?
The pattern uses single crochet, increases, and decreases, beginning each section with a magic ring.
Can I use a different yarn weight?
You can, but the finished size and proportions will change. A different yarn weight should be considered a variation rather than an exact size match.
When should I add the stuffing?
Stuffing is added gradually while each section is being crocheted. The center begins after Round 5, the inner sections after Round 4, and the outer tips after Round 3.
How is the croissant shape created?
The crescent shape comes from assembling five differently sized stuffed sections and angling the two outer tips slightly upward and inward.
More Crochet Amigurumi
This croissant can be a fun starting point for exploring other food-inspired and small amigurumi projects. Look for projects that use similar shaping, stuffing, and assembly techniques.
Final Notes
This crochet croissant uses five stuffed sections with a gradual size progression from the center toward the two ends. Taking your time with stuffing and assembly will help maintain the rounded sections while creating the curved final silhouette.
The pattern has been mathematically reviewed and constructionally checked, but it has not been physically crocheted and tested yet. The finished size, shaping, and ease of assembly should be evaluated with a physical prototype before describing the pattern as physically tested.
Happy crocheting!