
Crochet Lamb Amigurumi Patterns & Cute Lamb Ideas
A crochet lamb is one of those amigurumi projects where…
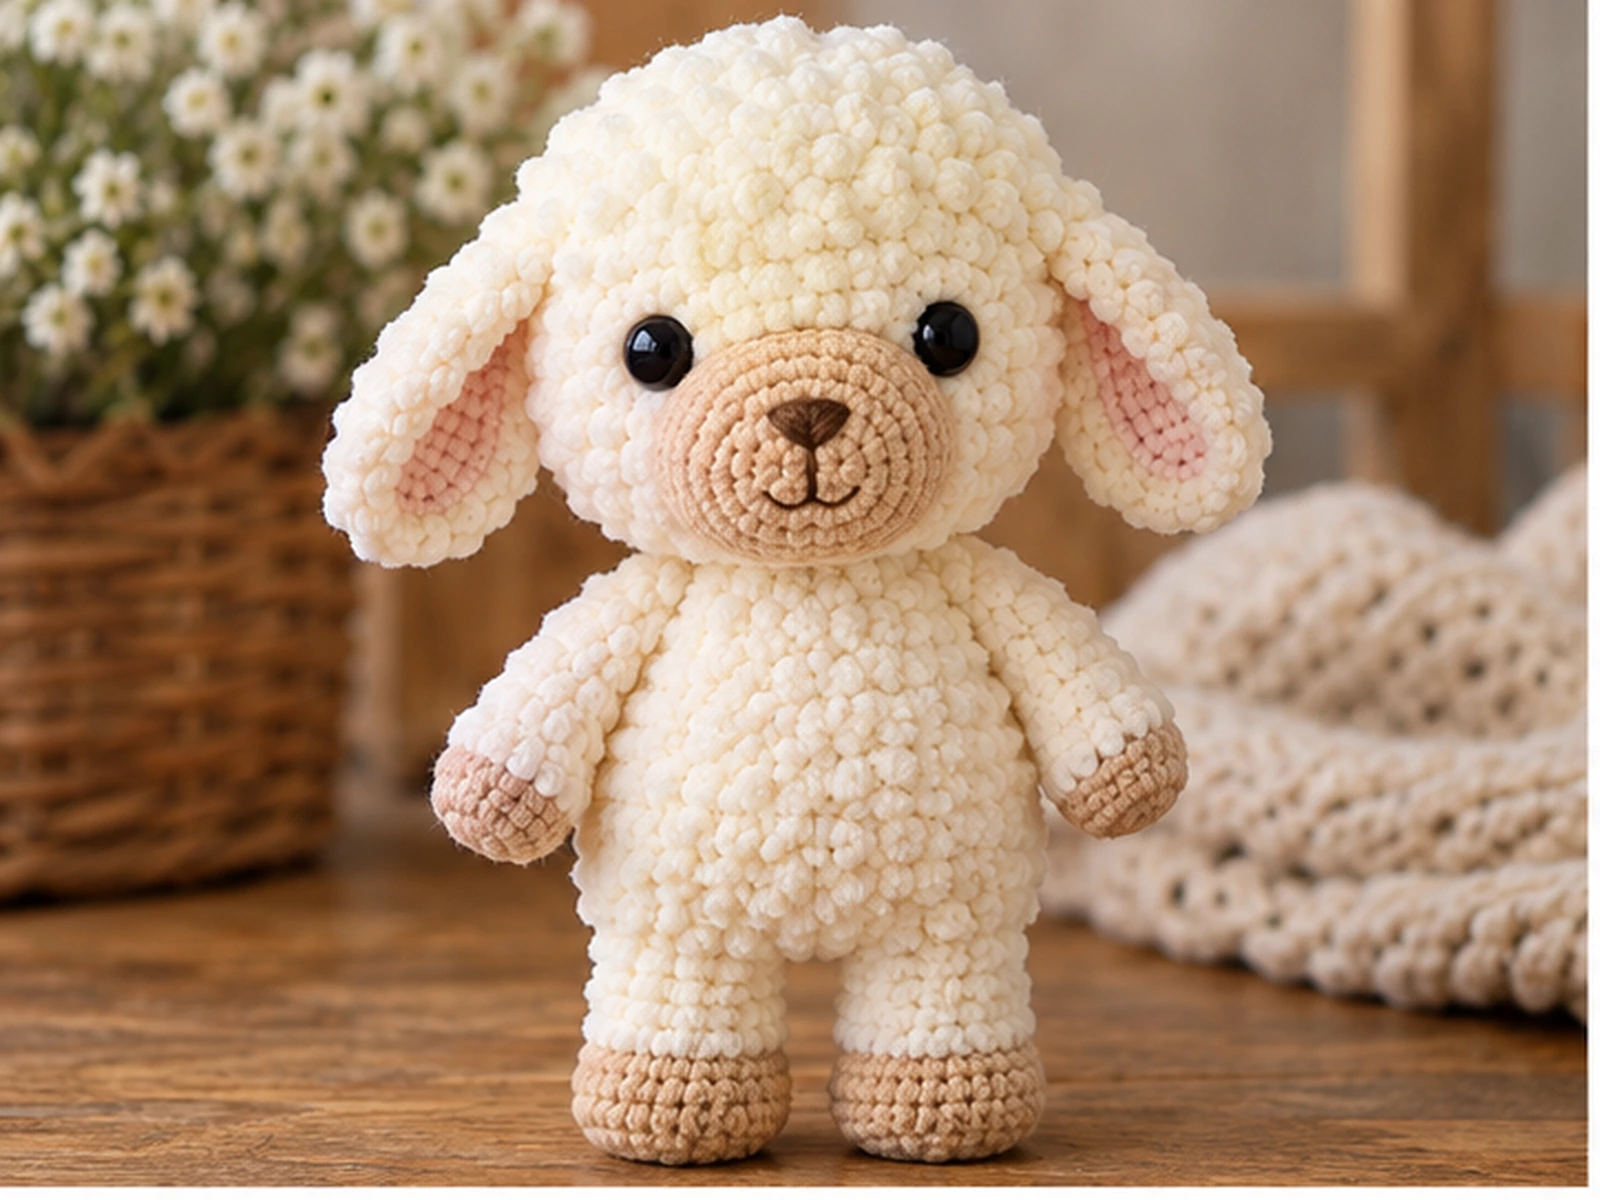
A crochet lamb is one of those amigurumi projects where a few simple shapes can become a sweet little animal with plenty of character. This original Cloud Lamb Amigurumi features a rounded cream body, floppy ears, short legs, a small tail, and a contrasting muzzle for a soft lamb-inspired look.
The finished size is approximately 7–8 inches tall, although your final size can vary with yarn, hook size, tension, stuffing, and individual technique.
Pattern status: Mathematically reviewed and constructionally checked, but not physically crocheted and tested yet.
Project Overview
What You’ll Make
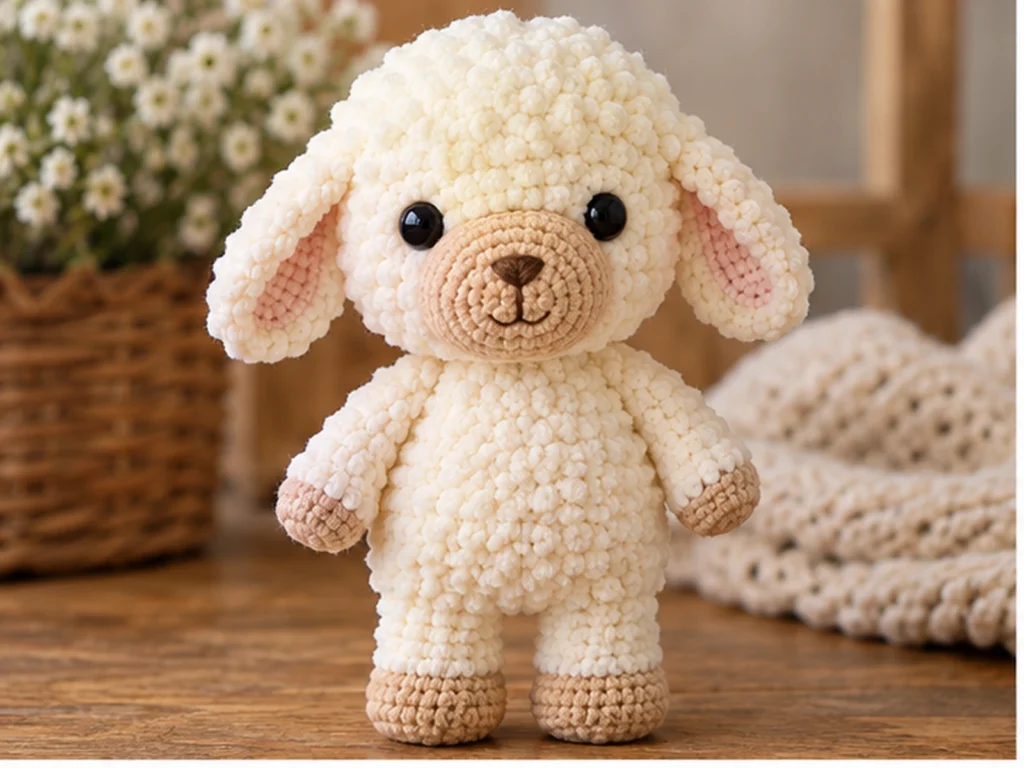
This crochet lamb is made from separate crocheted components that are assembled into a standing lamb:
- 1 head
- 1 body
- 1 muzzle
- 4 legs
- 2 arms
- 2 ears
- 1 tail
The cream plush or chenille yarn gives the main pieces a soft fleece-like appearance, while warm beige yarn adds contrast to the muzzle and hooves.
Project Details
- Project: Cloud Lamb Amigurumi
- Animal: Lamb
- Approximate finished height: 7–8 inches
- Main yarn: Cream plush or chenille yarn in a worsted/#4 range
- Accent yarn: Warm beige yarn
- Hook: 3.5 mm crochet hook
- Eyes: 8 mm black safety eyes
- Stuffing: Polyester fiberfill
- Construction: Separate crocheted pieces sewn together
Materials & Tools
Yarn
You will need:
- Cream plush or chenille yarn for the head, body, ears, and arms
- Warm beige yarn for the muzzle and hoof sections
- Black embroidery thread for the nose
- Optional muted pink embroidery thread for the inner ears
Other Supplies
- 3.5 mm crochet hook
- 8 mm black safety eyes
- Polyester fiberfill
- Tapestry needle
- Stitch marker
- Scissors
Safety Note
Safety eyes can present a choking hazard and are not appropriate for children under 3. Embroidered eyes can be used instead.
Abbreviations
- MR — magic ring
- sc — single crochet
- inc — increase; work 2 sc in the same stitch
- dec — single crochet decrease
- FO — fasten off
Before You Start
This pattern is worked mainly in continuous rounds, so place a stitch marker at the beginning of each round and check your stitch count regularly.
Plush and chenille yarn can make individual stitches harder to see than smooth yarn. Use your fingers to help locate the next stitch when necessary, and avoid pulling your stitches excessively tight.
Stuff the rounded pieces gradually so they hold their shape without becoming overly stretched.
Leave a sewing tail whenever the instructions call for one. The pieces are assembled after crocheting.
Original Crochet Lamb Amigurumi Pattern
Head — Make 1
Use cream yarn.
Round 1: 6 sc in MR. (6)
Round 2: 6 inc. (12)
Round 3: (sc, inc) × 6. (18)
Round 4: (2 sc, inc) × 6. (24)
Round 5: (3 sc, inc) × 6. (30)
Round 6: (4 sc, inc) × 6. (36)
Round 7: 36 sc. (36)
Round 8: 36 sc. (36)
Round 9: 36 sc. (36)
Round 10: 36 sc. (36)
Round 11: 36 sc. (36)
Round 12: 36 sc. (36)
Place the safety eyes between Rounds 8 and 9, adjusting their position visually so the face remains centered.
Round 13: (4 sc, dec) × 6. (30)
Round 14: (3 sc, dec) × 6. (24)
Begin stuffing gradually.
Round 15: (2 sc, dec) × 6. (18)
Round 16: (sc, dec) × 6. (12)
Add the remaining stuffing while keeping the head rounded.
Round 17: 6 dec. (6)
FO, leaving a yarn tail.
Weave the tail through the remaining stitches, pull closed, and hide the end.
Muzzle — Make 1
Use warm beige yarn.
Round 1: 6 sc in MR. (6)
Round 2: 6 inc. (12)
Round 3: (sc, inc) × 6. (18)
Round 4: 18 sc. (18)
Round 5: (sc, dec) × 6. (12)
Lightly stuff the muzzle.
Round 6: 6 dec. (6)
FO, leaving a sewing tail.
Body — Make 1
Use cream yarn.
Round 1: 8 sc in MR. (8)
Round 2: 8 inc. (16)
Round 3: (sc, inc) × 8. (24)
Round 4: (2 sc, inc) × 8. (32)
Round 5: (3 sc, inc) × 8. (40)
Round 6: 40 sc. (40)
Round 7: 40 sc. (40)
Round 8: 40 sc. (40)
Round 9: 40 sc. (40)
Round 10: 40 sc. (40)
Round 11: 40 sc. (40)
Round 12: (3 sc, dec) × 8. (32)
Round 13: 32 sc. (32)
Round 14: (2 sc, dec) × 8. (24)
Round 15: 24 sc. (24)
Round 16: (sc, dec) × 8. (16)
Round 17: 16 sc. (16)
Stuff firmly enough to hold the shape without stretching the stitches.
Round 18: 8 dec. (8)
FO and close the opening.
Legs — Make 4
Each leg begins with a warm beige hoof section and then changes to cream.
Hoof
Use warm beige yarn.
Round 1: 6 sc in MR. (6)
Round 2: 6 inc. (12)
Round 3: 12 sc. (12)
Round 4: 12 sc. (12)
Round 5: 12 sc. (12)
Change to cream yarn.
Leg
Round 6: 12 sc. (12)
Round 7: (2 sc, dec) × 3. (9)
Round 8: 9 sc. (9)
Round 9: 9 sc. (9)
Round 10: 9 sc. (9)
Round 11: 9 sc. (9)
Round 12: 9 sc. (9)
Lightly stuff the lower and middle sections while keeping the top flexible enough for sewing.
FO, leaving a long sewing tail.
Make four identical legs.
Arms — Make 2
Use cream yarn.
Round 1: 6 sc in MR. (6)
Round 2: 6 inc. (12)
Round 3: 12 sc. (12)
Round 4: 12 sc. (12)
Round 5: 12 sc. (12)
Round 6: (2 sc, dec) × 3. (9)
Round 7: 9 sc. (9)
Round 8: 9 sc. (9)
Round 9: 9 sc. (9)
Lightly stuff.
FO, leaving a sewing tail.
Make two identical arms.
Ears — Make 2
Use cream yarn.
Round 1: 6 sc in MR. (6)
Round 2: 6 inc. (12)
Round 3: (sc, inc) × 6. (18)
Round 4: 18 sc. (18)
Round 5: 18 sc. (18)
Round 6: (sc, dec) × 6. (12)
Round 7: 6 dec. (6)
Do not stuff the ears.
FO, leaving a sewing tail.
Flatten each ear gently and pinch the lower portion slightly before attaching.
Optional: use a small amount of muted pink embroidery thread for the inner ear.
Tail — Make 1
Use cream yarn.
Round 1: 6 sc in MR. (6)
Round 2: 6 inc. (12)
Round 3: 12 sc. (12)
Round 4: (sc, dec) × 6. (6)
Lightly stuff.
FO and close.
Assembly
Step 1: Attach the Legs
Position the four legs around the lower half of the body.
Sew each leg securely around its top opening.
Before sewing them permanently, compare the left and right sides so the placement stays visually balanced.
The rear legs can be angled slightly outward or backward to help create a stable standing silhouette.
Step 2: Attach the Arms
Place one arm on each side of the body, slightly below the upper third of the torso.
Check both sides visually before sewing.
Step 3: Attach the Head
Center the head over the upper portion of the body.
Sew gradually around the connection area, checking that the head remains centered as you work.
Step 4: Add the Ears
Place one ear on each side of the head.
The ears should sit slightly below the top center of the head and angle gently outward and downward.
Compare both sides before completing the sewing.
Step 5: Attach the Muzzle
Center the muzzle on the lower front of the head beneath the eyes.
Sew around the outer edge.
Step 6: Add the Facial Details
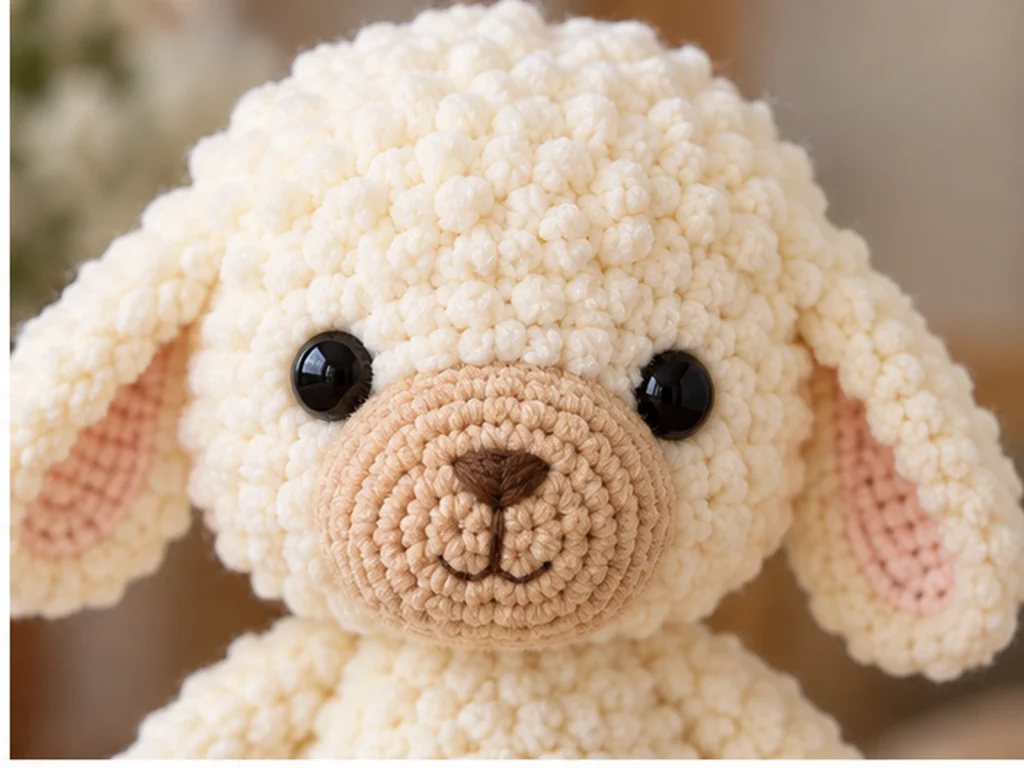
Embroider a small dark nose near the upper center of the muzzle.
A very small embroidered mouth can also be added below the nose.
Keep the facial details visually centered.
Step 7: Attach the Tail
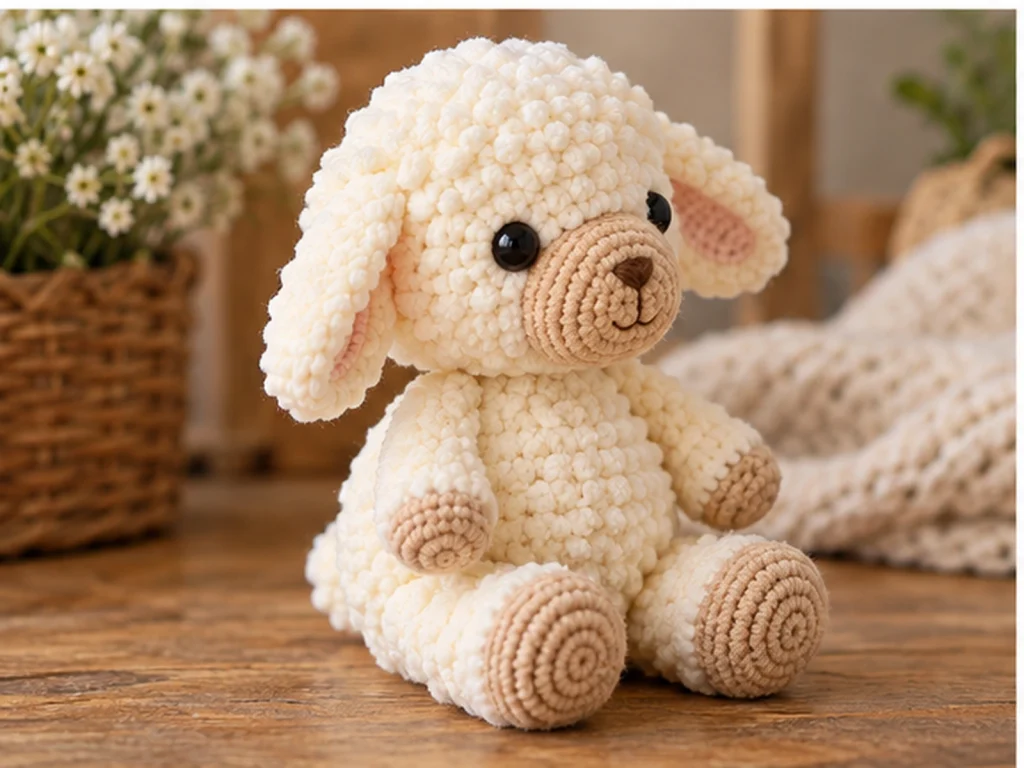
Sew the tail to the center-rear portion of the body.
Keep it close to the body so it does not pull the lamb backward.
Finishing
Once assembly is complete:
- Weave in all loose ends.
- Trim excess yarn.
- Check that every component is securely attached.
- Gently shape the head and body.
- Compare both ears, arms, and legs for symmetry.
- Check that no stuffing is exposed.
- Recheck the face from the front.
The target finished height is approximately 7–8 inches, but the actual result will vary with yarn, hook size, tension, stuffing, and individual technique.
Helpful Tips
Count Every Round
Keep a stitch marker at the beginning of each round and verify your stitch count before moving on.
Work Carefully With Plush Yarn
When the stitches are difficult to see, use your fingers to find the stitch openings instead of relying only on sight.
Avoid Overstuffing
Too much stuffing can stretch the crochet fabric and make the shaping look uneven.
Compare Paired Pieces
Before attaching ears, arms, or legs, compare both pieces side by side so the finished lamb stays balanced.
Keep the Face Centered
The muzzle and facial details have a strong effect on the finished expression. Check the face directly from the front before sewing pieces permanently.
Troubleshooting
My Stitch Count Is Off
Stop at the end of the current round and recount your stitches before continuing. On shaping rounds, check each increase and decrease carefully.
I Can’t See My Stitches in the Plush Yarn
Slow down and locate the next stitch by touch. A stitch marker is particularly useful when working in continuous rounds.
My Lamb Looks Too Firm
You may have added more stuffing than needed. Reduce the stuffing slightly and reshape the piece before closing it.
My Ears Don’t Look Symmetrical
Position both ears on the head before sewing them permanently. Adjust their height and angle until they look balanced.
My Lamb Does Not Stand Evenly
Check the position and angle of all four legs. The rear legs can be positioned slightly outward or backward to improve the standing silhouette.
My Face Looks Off-Center
Temporarily reposition the muzzle and inspect the lamb directly from the front. Small visual adjustments can make a noticeable difference.
Customization Ideas
Change the Lamb’s Colors
Try different fleece colors while keeping the muzzle and hooves in a contrasting shade.
Create a Different Expression
The eye placement and embroidered mouth can be adjusted visually to create a different expression.
Customize the Ears
A little contrasting embroidery inside the ears can add another layer of detail.
Create a Character Variation
A small accessory or color change can turn the base lamb into a distinct character without changing its main body construction.
Remember that changing yarn, hook size, or tension can also change the finished size and proportions.
Frequently Asked Questions
What yarn is used for this crochet lamb?
The design uses cream plush or chenille yarn in a worsted/#4 range for the main fleece areas, with warm beige yarn for the muzzle and hoof sections.
What crochet hook size do I need?
The pattern is designed around a 3.5 mm crochet hook.
How big is the finished lamb?
The target size is approximately 7–8 inches tall. Your finished lamb may be smaller or larger depending on yarn, hook size, tension, stuffing, and individual technique.
Is the lamb physically tested?
No. The pattern has been mathematically reviewed and constructionally checked, but it has not been physically crocheted and tested yet.
Can I use embroidered eyes instead of safety eyes?
Yes. Embroidered eyes can be used instead of safety eyes.
Does the lamb need to be stuffed?
The head, body, muzzle, legs, arms, and tail use stuffing as described in the pattern. The ears are left unstuffed.
How do I keep the lamb symmetrical?
Before permanently sewing paired pieces, compare their height, angle, and orientation.
Can I change the yarn?
A yarn substitution is possible, but it can affect finished size, stitch definition, texture, and overall proportions.
More Animal Amigurumi to Crochet
Explore more crochet animal projects and amigurumi patterns from Tiny Yarn Tales when available.
