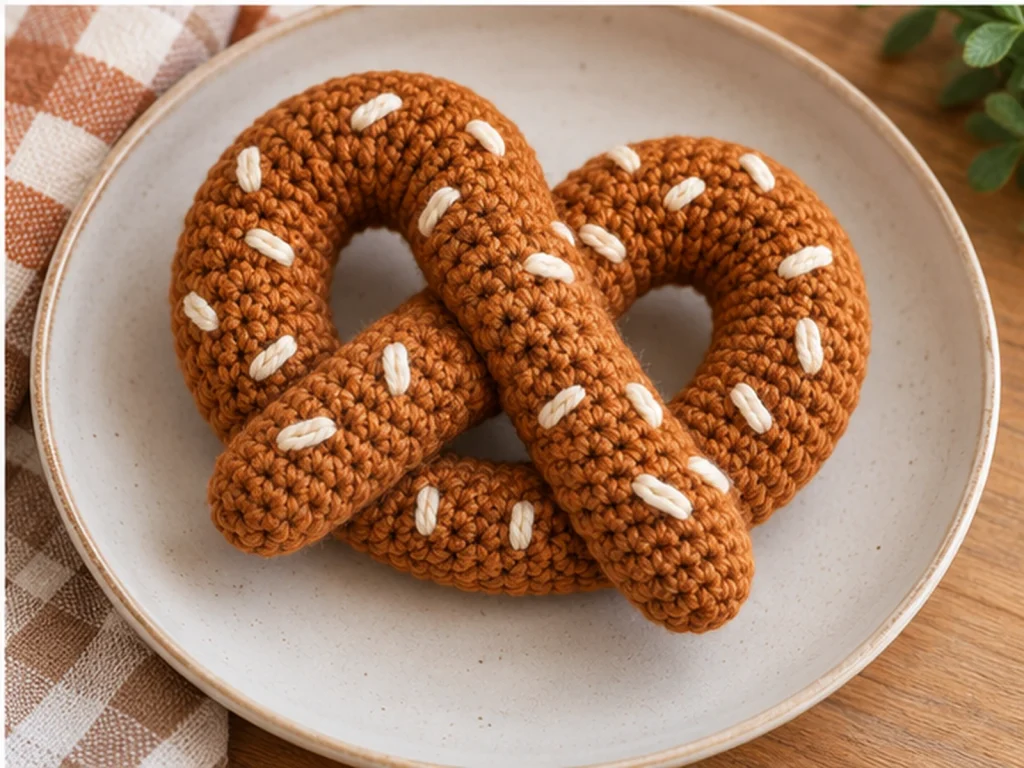
Crochet Pretzel Amigurumi Pattern
This crochet pretzel amigurumi turns one rounded stuffed crochet rope…
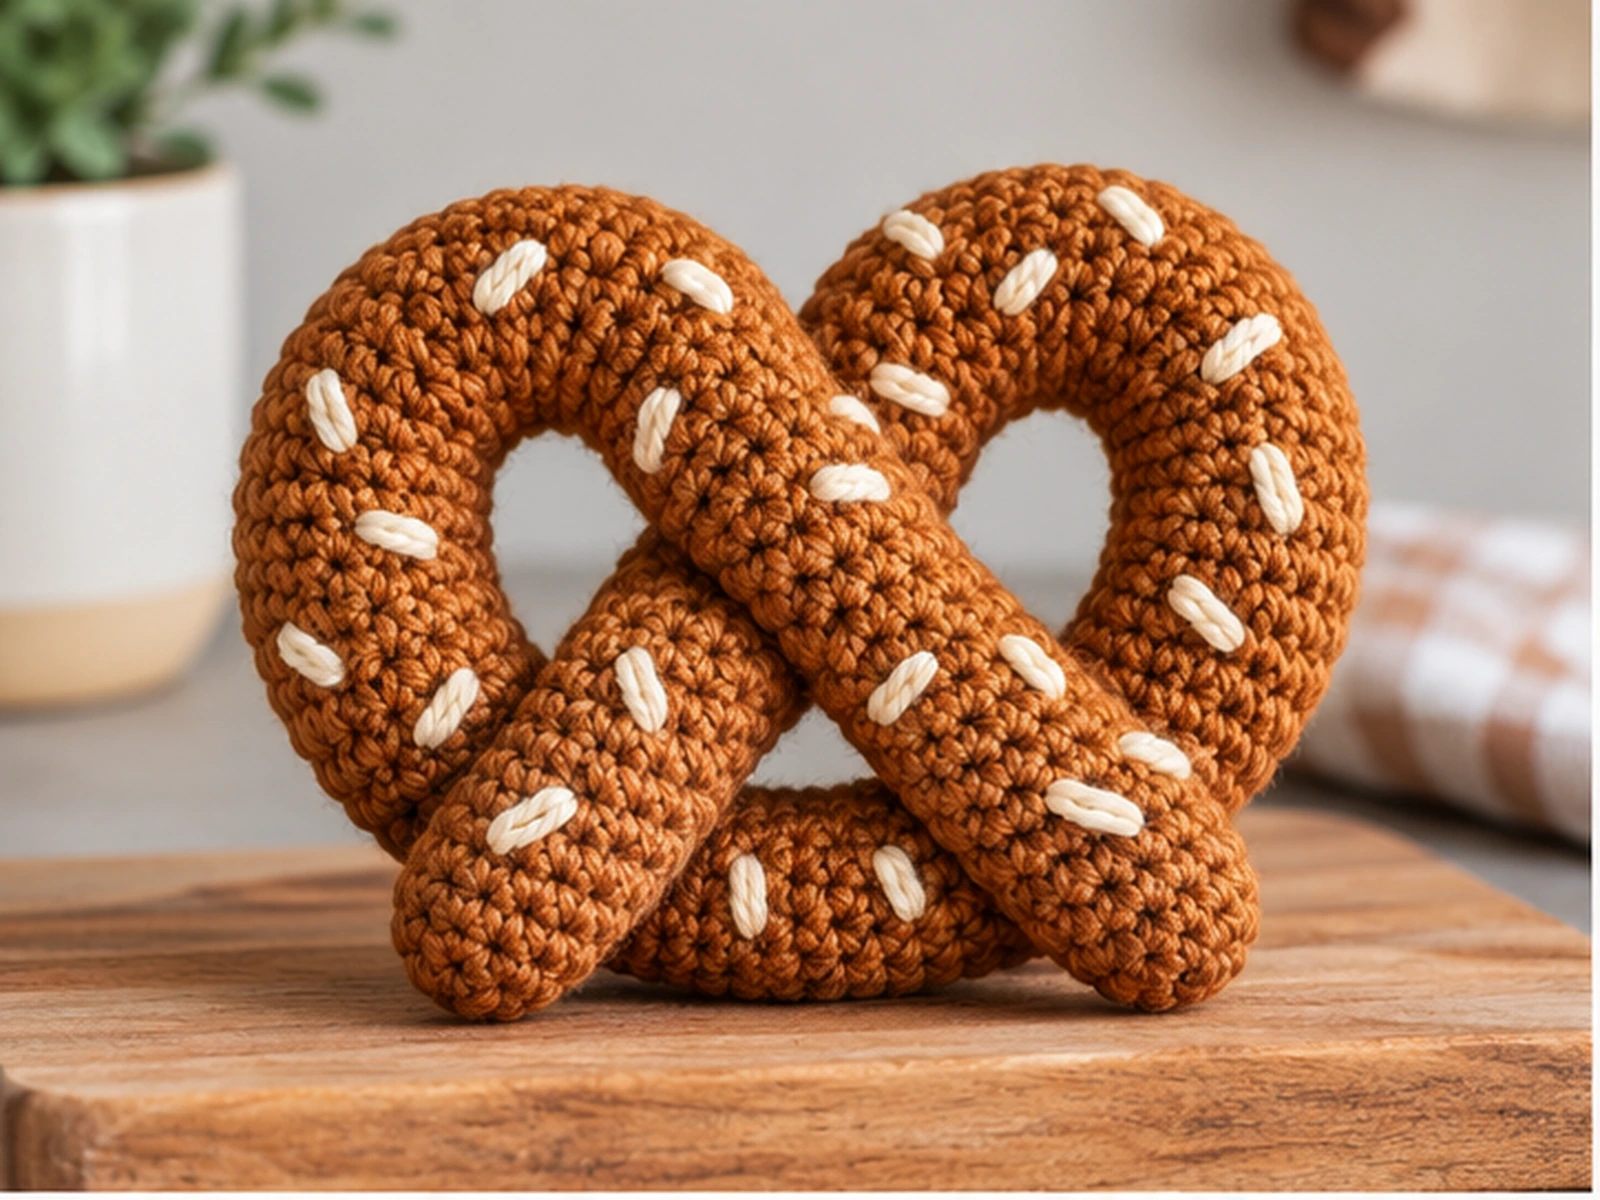
This crochet pretzel amigurumi turns one rounded stuffed crochet rope into a classic pretzel shape. The main piece is worked continuously, stuffed as you go, then shaped and sewn into the finished silhouette with simple cream-colored salt details.
The finished pretzel is approximately 5–7 inches across when shaped, although the final size will vary with yarn, hook size, tension, stuffing, and individual technique.

Project Overview
What You’ll Make
You’ll crochet one continuous pretzel-brown tube, gradually stuff it, taper both ends, and then shape it into the familiar pretzel form.
The finished design includes:
- One continuous stuffed crochet rope
- A central pretzel crossing
- Two tapered ends
- Cream or off-white salt details
- No eyes or facial features
Project Details
- Project: Crochet Pretzel Amigurumi
- Technique: Crochet amigurumi
- Yarn: Worsted-weight #4 yarn
- Hook: 3.25 mm crochet hook
- Main color: Warm pretzel brown
- Accent color: Cream or off-white
- Filling: Polyester fiberfill
- Approximate finished size: 5–7 inches across when shaped
The finished size is approximate and can change depending on yarn, hook, tension, stuffing, and shaping.
Materials & Tools
Yarn
- Worsted-weight #4 yarn in a warm pretzel-brown shade
- A small amount of cream or off-white yarn for the salt details
Tools
- 3.25 mm crochet hook
- Polyester fiberfill
- Tapestry needle
- Stitch marker
- Scissors
- Optional pins for temporarily holding the pretzel shape
Abbreviations
This pattern uses standard US crochet terminology.
- MR — magic ring
- sc — single crochet
- inc — increase; work 2 single crochets into the same stitch
- dec — decrease; single crochet decrease
- FO — fasten off
Before You Start
Work in Continuous Rounds
The main pretzel rope is crocheted in continuous rounds. A stitch marker can help you keep track of the beginning of each round.
Count Your Stitches
Every round includes a stitch count. Keep your count accurate, especially during the increase and decrease sections.
Stuff as You Go
Begin adding stuffing after Round 4. Add the fiberfill gradually so the tube remains rounded but flexible enough to curve into the pretzel shape.
Shape Before Sewing
The final pretzel silhouette is created after the crochet tube is finished. Temporarily pin the rope into position before making the permanent sewing stitches.
Construction Order
The project follows this basic sequence:
- Crochet the main rope.
- Stuff it gradually.
- Taper and close both ends.
- Shape the rope into the pretzel silhouette.
- Temporarily secure the arrangement.
- Sew the central crossing and tapered ends.
- Add the salt details.
Crochet Pretzel Pattern
Main Pretzel Rope
Make 1.
Work in continuous rounds.
Round 1
5 sc in MR. (5)
Round 2
5 inc. (10)
Round 3
(sc, inc) × 5. (15)
Round 4
15 sc. (15)
Begin adding a small amount of stuffing.
Round 5
15 sc. (15)
Round 6
15 sc. (15)
Round 7
15 sc. (15)
Round 8
15 sc. (15)
Round 9
15 sc. (15)
Round 10
15 sc. (15)
Round 11
15 sc. (15)
Round 12
15 sc. (15)
Round 13
15 sc. (15)
Round 14
15 sc. (15)
Round 15
15 sc. (15)
Round 16
15 sc. (15)
Round 17
15 sc. (15)
Round 18
15 sc. (15)
Round 19
15 sc. (15)
Round 20
15 sc. (15)
Round 21
15 sc. (15)
Round 22
15 sc. (15)
Round 23
15 sc. (15)
Round 24
15 sc. (15)
Round 25
15 sc. (15)
Round 26
15 sc. (15)
Round 27
15 sc. (15)
Round 28
15 sc. (15)
Round 29
15 sc. (15)
Round 30
15 sc. (15)
Round 31
15 sc. (15)
Round 32
15 sc. (15)
Round 33
15 sc. (15)
Before beginning the taper, check for hollow areas and add a little more stuffing where needed. Keep the rope flexible enough to shape.
Round 34
(sc, dec) × 5. (10)
Round 35
5 dec. (5)
Round 36
5 sc. (5)
Add only a small amount of stuffing to the final tip if needed.
FO, leaving a long tail for closing the opening.
Using a tapestry needle, weave through the remaining stitches, pull the opening closed, secure the yarn, and weave in the end.
Shape and Assemble the Pretzel
Step 1: Find the Center Area
The central portion of the rope is around the middle of the finished piece, near Rounds 18–19. Use this as a shaping reference rather than an exact measurement.
Step 2: Form the Lower Curve
Lay the rope into a broad U-shaped curve. This forms the lower portion of the pretzel while the two sides rise upward.
Step 3: Bring the Sides Upward
Lift both sides and begin forming the two upper loops. Try to keep the left and right sides reasonably balanced.
Step 4: Create the Crossing
Bring one side across the other near the middle to create the defining pretzel crossing.
Keep the crossing visible rather than pressing it tightly against the lower curve.
Step 5: Position the Tapered Ends
Guide each tapered tip downward toward the opposite lower section.
The tips should rest against the lower part of the pretzel to create the finished outline.
Step 6: Temporarily Pin the Shape
Use pins or scrap yarn to hold the arrangement before sewing.
Check that:
- The two loops look reasonably balanced.
- The center opening remains visible.
- The crossing sits near the middle.
- Both tapered ends are positioned securely.
- The overall silhouette resembles a pretzel.
Adjust the rope before making the sewing stitches permanent.
Step 7: Secure the Crossing
Using matching brown yarn and a tapestry needle, make several small stitches through the overlapping sections of the central crossing.
Keep the stitches as discreet as possible within the crochet texture.
Step 8: Secure the Tapered Ends
Sew each tapered tip to the lower section where it naturally rests.
Use several small stitches to keep the ends securely positioned.
Step 9: Shape the Finished Piece
Once the sewing is complete, gently adjust the loops and curves with your fingers.
Avoid pulling the crochet too tightly, since excessive tension can distort the tube.
Add the Pretzel Salt Details
Use the cream or off-white yarn to add short, irregular surface stitches across the brown pretzel.
For a natural look:
- Concentrate most of the salt on the upper-facing areas.
- Leave some brown crochet visible between the details.
- Avoid making perfectly even rows.
- Keep the central crossing visually clear.
Secure the cream yarn on the underside and trim the excess.

Tips for a Neater Pretzel
Keep the Stuffing Even
Large pockets of stuffing can make one part of the rope look fuller than another. Add small amounts gradually and work the fiberfill through the tube evenly.
Do Not Overstuff
A very firm tube can be harder to curve into the pretzel shape. Aim for a rounded but flexible result.
Check the Silhouette Before Sewing
Temporarily positioning the rope lets you adjust the loops and crossing before the shape becomes permanent.
Compare Both Sides
The two loops do not need to be perfectly identical, but comparing them side by side makes obvious differences easier to spot.
Troubleshooting
My Stitch Count Is Off. What Should I Do?
Stop before continuing to the next round. Recount the current round and check the increase or decrease sequence.
The pattern follows a 5 → 10 → 15 increase sequence, a 15-stitch center section, and a 15 → 10 → 5 decrease sequence.
My Rope Feels Too Stiff to Shape
Check the stuffing density. Working the fiberfill more lightly can help the tube remain flexible enough to curve.
My Pretzel Looks Uneven
Temporarily loosen the shaping stitches and reposition the loops before resewing. Compare both sides and make small adjustments instead of pulling one area tightly.
The Crossing Keeps Shifting
Add a few additional small securing stitches through the overlap. Temporary pins can also help you find the best position before permanent sewing.
The Finished Pretzel Looks Too Flat
Check the stuffing and the way the rope is positioned during assembly. The tube should remain rounded rather than being pressed flat while forming the silhouette.
Customization Ideas
Try Different Brown Shades
A darker chocolate brown, golden brown, or warm caramel shade can create a different pretzel look.
Change the Salt Color
Cream, ivory, or another pale neutral can be used for the surface details.
Experiment With the Shaping
A slightly tighter or more open loop arrangement can change the silhouette while keeping the same crocheted rope.
Create a Character Version
Face details or other decorative features could be added as a separate variation, while the base design remains a facial-feature-free pretzel.
Pattern Testing Note
This pattern has been mathematically reviewed and constructionally checked, but it has not been physically crocheted and tested yet. A physical sample should eventually be used to verify the final dimensions, proportions, stuffing amount, shaping, assembly, and written-instruction clarity.
Frequently Asked Questions
What yarn is used for this crochet pretzel?
The pattern uses worsted-weight #4 yarn in a warm pretzel-brown shade, plus a small amount of cream or off-white yarn for the salt details.
What crochet hook size is used?
The pattern uses a 3.25 mm crochet hook.
How is the pretzel constructed?
The main body is crocheted as one continuous stuffed rope. The finished rope is then shaped into the pretzel silhouette and secured with sewing stitches.
When should I add the stuffing?
Begin adding stuffing after Round 4 and continue gradually as you crochet the tube.
How do I keep the pretzel shape?
Temporarily pin the rope into position first, check the loops and central crossing, then sew the main anchor points securely.
Does this pattern use safety eyes?
No. This design does not have eyes or other facial features.
What size will the finished pretzel be?
The intended finished size is approximately 5–7 inches across when shaped, but the final result can vary with yarn, hook size, tension, stuffing, and shaping technique.
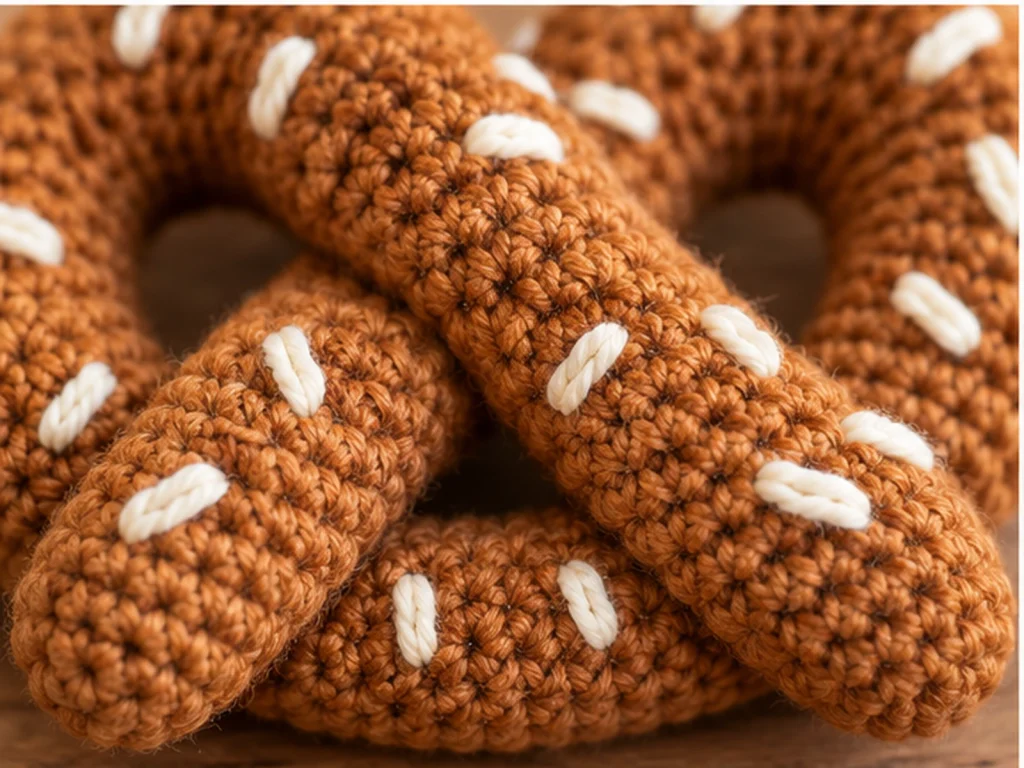
Finishing
Once the crossing and both tapered ends are secure, gently reshape the loops and curves so the pretzel has a balanced silhouette.
Check the surface for:
- Loose yarn tails
- Uneven stuffing
- Visible securing stitches
- Gaps where the rope meets
- Salt details that need repositioning
Trim and weave in any remaining ends securely.
The finished pretzel should remain rounded and flexible enough to retain its shaped silhouette.