
Crochet Puppy Amigurumi Pattern: A Step-by-Step Tutorial
This crochet puppy amigurumi is designed with a rounded head,…
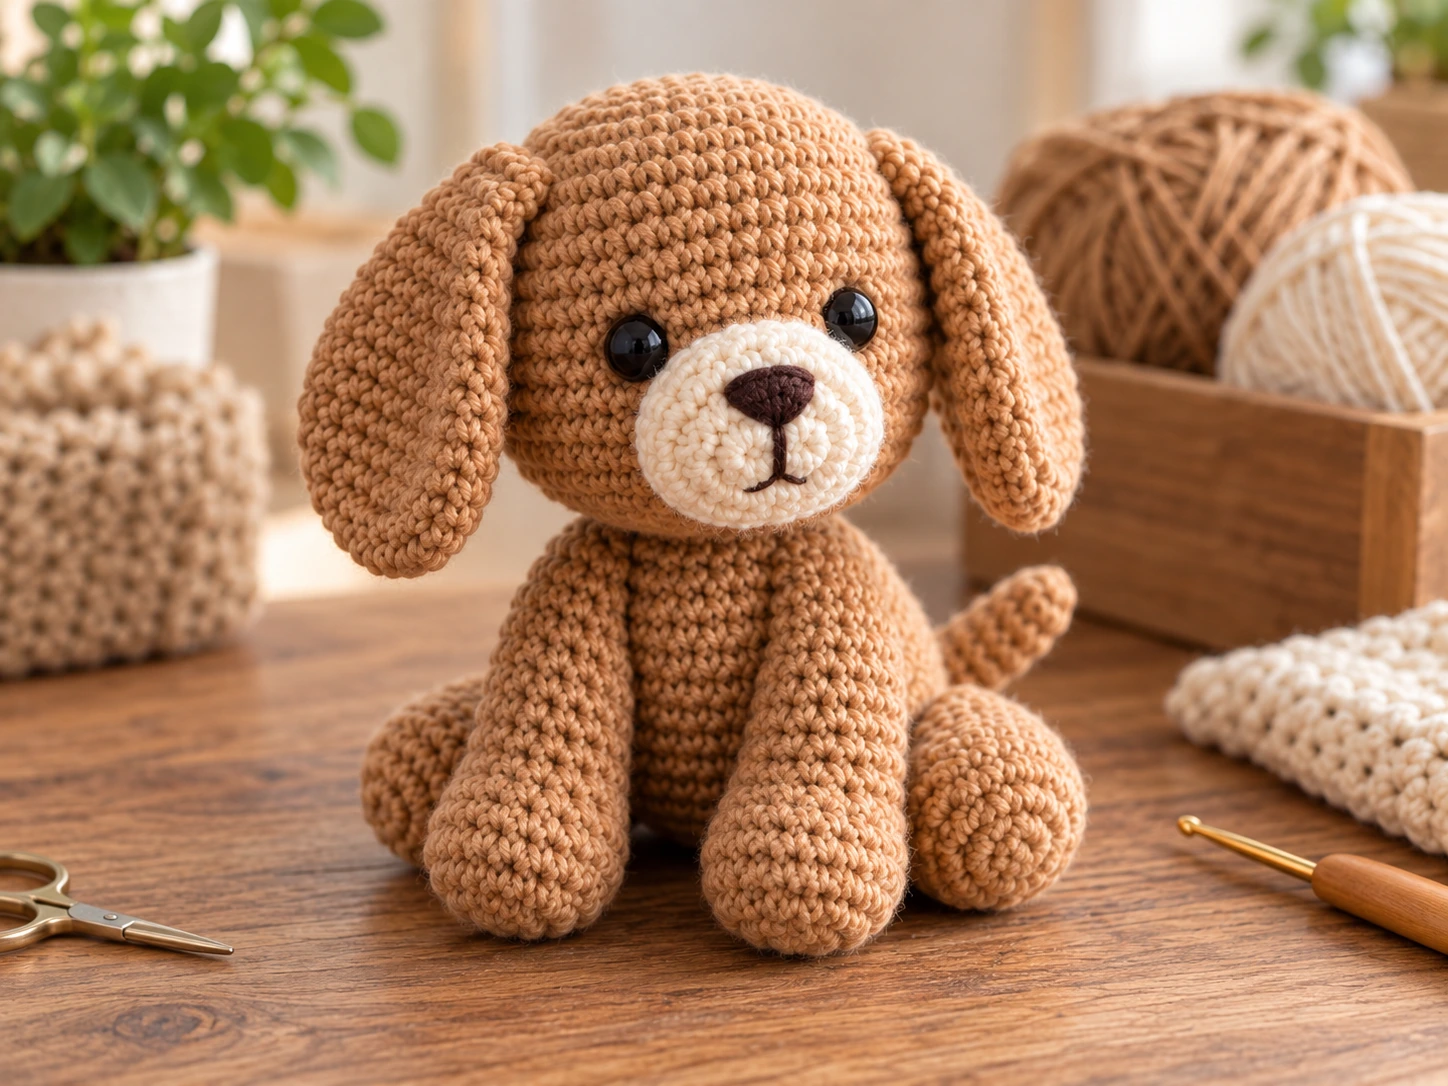
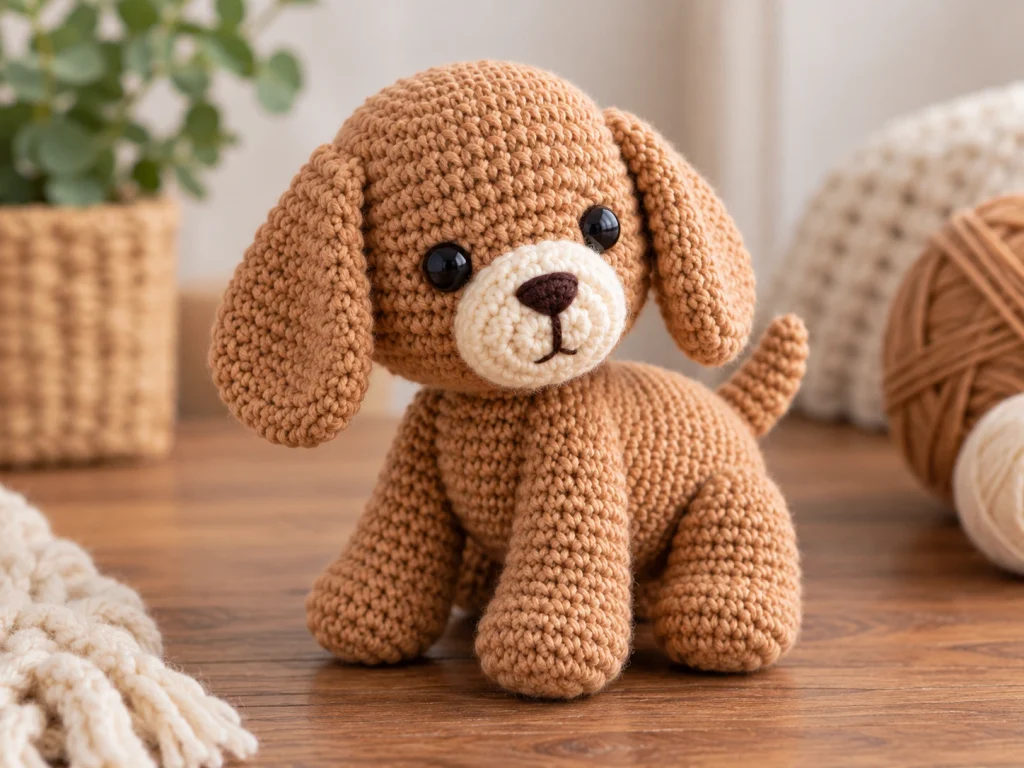
This crochet puppy amigurumi is designed with a rounded head, soft ears, a raised muzzle, compact body, and tapered tail. The puppy is made from separate crocheted pieces and then sewn together to create a small plush dog.
The finished puppy is approximately 7–8 inches tall, depending on yarn, hook size, tension, stuffing, and individual crochet technique.
Project Overview
What You’ll Make
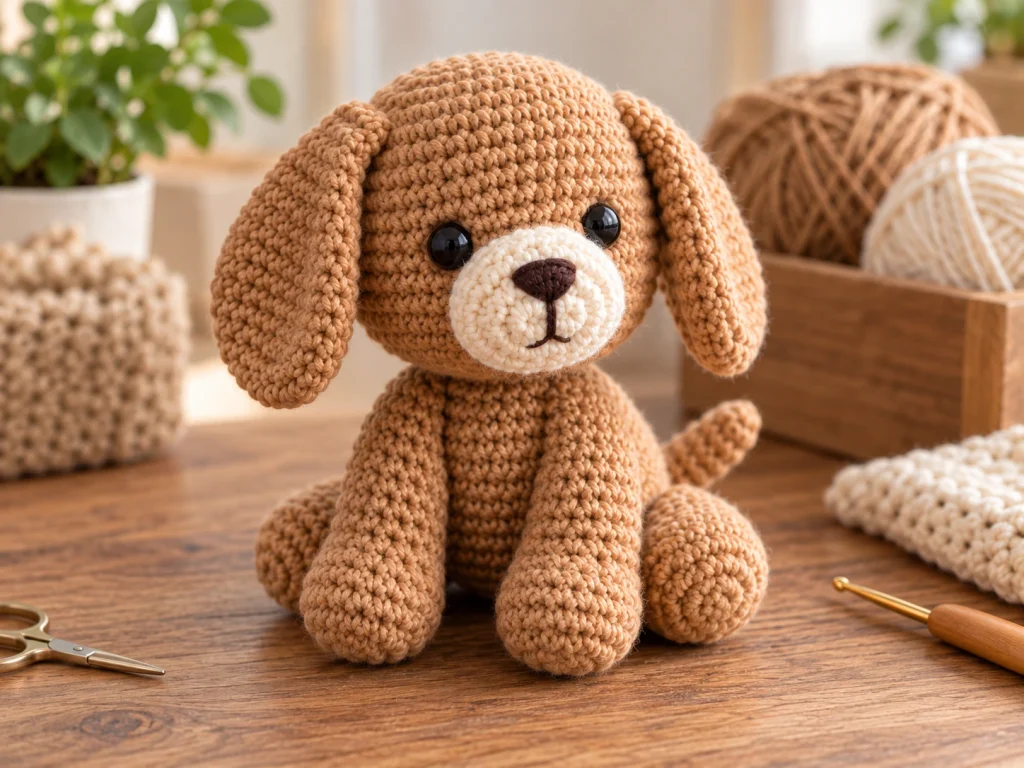
This pattern creates a small crochet puppy with:
- A rounded head
- A compact body
- Two front legs
- Two back legs
- Two soft, unstuffed ears
- A raised cream muzzle
- A tapered tail
- Black safety eyes
- An embroidered nose and optional mouth detail
The pieces are crocheted separately and assembled at the end.
Project Details
- Technique: Crochet amigurumi
- Finished size: Approximately 7–8 inches
- Main yarn color: Warm tan
- Accent color: Cream
- Eye color: Black
- Safety eye size: 10 mm
- Hook: 3.25 mm
- Filling: Polyester fiberfill
- Terminology: US crochet terms
The exact amount of yarn required is not specified.
Materials & Tools
You will need:
- Worsted-weight #4 yarn in warm tan
- Worsted-weight #4 yarn in cream
- Dark brown yarn for embroidery
- 3.25 mm crochet hook
- 10 mm black safety eyes
- Polyester fiberfill
- Tapestry needle
- Stitch marker
- Scissors
Safety Note
Safety eyes can present a choking hazard and are not appropriate for children under 3. This pattern does not claim the finished puppy is child-safe or baby-safe.
Abbreviations
| Abbreviation | Meaning |
|---|---|
| MR | Magic Ring |
| sc | Single Crochet |
| inc | Increase — 2 sc in the same stitch |
| dec | Decrease — single crochet decrease |
| FO | Fasten Off |
Before You Start
Work in Continuous Rounds
The crocheted pieces are worked in continuous rounds unless otherwise stated. Use a stitch marker to identify the first stitch of each round.
Count Your Stitches
Check your stitch count at the end of every round. An incorrect increase or decrease can change the shape of the entire piece.
Stuff as You Go
Add stuffing gradually as the head and body take shape. Avoid overstuffing, which can stretch the stitches and make the stuffing visible.
The front legs and back legs should be lightly stuffed. The muzzle receives light stuffing, while the tail only needs a small amount.
The ears remain unstuffed.
Shape Before Sewing
For paired pieces, compare both pieces side by side before sewing them permanently. This is especially important for:
- Front legs
- Back legs
- Ears
Construction Order
Finish all of the crocheted pieces first. Then assemble the body, attach the head and limbs, add the ears and muzzle, and finish the facial details.
Original Crochet Puppy Pattern
Head — Make 1
Color: Tan
Round 1
6 sc in MR. (6)
Round 2
6 inc. (12)
Round 3
(sc, inc) × 6. (18)
Round 4
(2 sc, inc) × 6. (24)
Round 5
(3 sc, inc) × 6. (30)
Round 6
(4 sc, inc) × 6. (36)
Round 7
36 sc. (36)
Round 8
36 sc. (36)
Round 9
36 sc. (36)
Round 10
36 sc. (36)
Round 11
36 sc. (36)
Round 12
36 sc. (36)
Begin stuffing gradually.
Round 13
(4 sc, dec) × 6. (30)
Round 14
(3 sc, dec) × 6. (24)
Round 15
(2 sc, dec) × 6. (18)
Round 16
(sc, dec) × 6. (12)
Add any final stuffing needed.
Round 17
6 dec. (6)
Fasten off, close the opening, and weave in the yarn end.
Place the safety eyes symmetrically on the face around the muzzle area. Compare both sides before securing them permanently.
Body — Make 1
Color: Tan
Round 1
6 sc in MR. (6)
Round 2
6 inc. (12)
Round 3
(sc, inc) × 6. (18)
Round 4
(2 sc, inc) × 6. (24)
Round 5
(3 sc, inc) × 6. (30)
Round 6
30 sc. (30)
Round 7
30 sc. (30)
Round 8
30 sc. (30)
Round 9
30 sc. (30)
Round 10
30 sc. (30)
Round 11
30 sc. (30)
Begin stuffing.
Round 12
(3 sc, dec) × 6. (24)
Round 13
24 sc. (24)
Round 14
(2 sc, dec) × 6. (18)
Round 15
18 sc. (18)
Round 16
(sc, dec) × 6. (12)
Add the final amount of stuffing needed.
Round 17
6 dec. (6)
Fasten off, close the opening, and weave in the yarn end.
Front Legs — Make 2
Color: Tan
Round 1
6 sc in MR. (6)
Round 2
6 inc. (12)
Round 3
(sc, inc) × 6. (18)
Round 4
18 sc. (18)
Round 5
18 sc. (18)
Round 6
18 sc. (18)
Round 7
18 sc. (18)
Round 8
18 sc. (18)
Round 9
18 sc. (18)
Round 10
18 sc. (18)
Round 11
(sc, dec) × 6. (12)
Stuff lightly.
Round 12
6 dec. (6)
Fasten off and close.
Repeat for the second front leg.
Back Legs — Make 2
Color: Tan
Round 1
6 sc in MR. (6)
Round 2
6 inc. (12)
Round 3
(sc, inc) × 6. (18)
Round 4
(2 sc, inc) × 6. (24)
Round 5
24 sc. (24)
Round 6
24 sc. (24)
Round 7
24 sc. (24)
Round 8
24 sc. (24)
Round 9
24 sc. (24)
Round 10
(2 sc, dec) × 6. (18)
Round 11
(sc, dec) × 6. (12)
Stuff lightly.
Round 12
6 dec. (6)
Fasten off and close.
Repeat for the second back leg.
Ears — Make 2
Color: Tan
Keep the ears unstuffed.
Round 1
6 sc in MR. (6)
Round 2
6 inc. (12)
Round 3
(sc, inc) × 6. (18)
Round 4
18 sc. (18)
Round 5
18 sc. (18)
Round 6
18 sc. (18)
Round 7
(sc, dec) × 6. (12)
Round 8
6 dec. (6)
Fasten off, flatten the ear gently, and leave a long yarn tail for sewing.
Repeat for the second ear.
Muzzle — Make 1
Color: Cream
Round 1
6 sc in MR. (6)
Round 2
6 inc. (12)
Round 3
(sc, inc) × 6. (18)
Round 4
18 sc. (18)
Round 5
18 sc. (18)
Round 6
(sc, dec) × 6. (12)
Add light stuffing.
Round 7
6 dec. (6)
Fasten off and close the opening.
Tail — Make 1
Color: Tan
Round 1
6 sc in MR. (6)
Round 2
6 sc. (6)
Round 3
6 sc. (6)
Round 4
(sc, inc) × 3. (9)
Round 5
9 sc. (9)
Round 6
9 sc. (9)
Round 7
9 sc. (9)
Round 8
9 sc. (9)
Round 9
(2 sc, inc) × 3. (12)
Round 10
12 sc. (12)
Round 11
12 sc. (12)
Round 12
12 sc. (12)
Round 13
(2 sc, dec) × 3. (9)
Round 14
9 sc. (9)
Round 15
9 sc. (9)
Add a small amount of stuffing so the tail keeps its shape without becoming heavy.
Fasten off and leave a long yarn tail for sewing.
Facial Details
Eye Placement
Place the two 10 mm safety eyes symmetrically on the front of the head around the muzzle area.
Before securing them permanently, compare:
- Eye height
- Eye spacing
- Distance from the muzzle
- Left-to-right symmetry
Because the design has not been physically tested, use visual alignment rather than an exact unverified spacing measurement.
Nose
Embroider the nose in dark brown yarn near the upper center of the cream muzzle.
Mouth
A short embroidered line can be added beneath the nose for a simple mouth detail.
Assembly
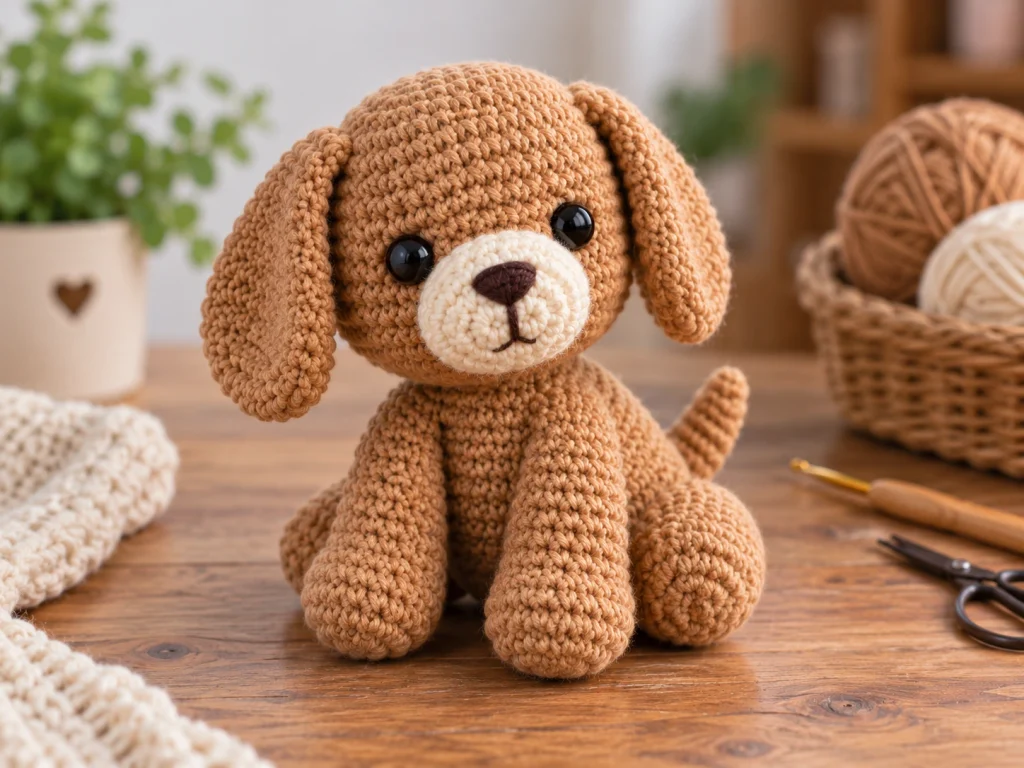
Step 1: Prepare the Finished Pieces
Lay the head, body, two front legs, two back legs, ears, muzzle, and tail together before sewing.
Check that paired pieces look symmetrical.
Step 2: Attach the Back Legs
Sew the back legs toward the lower rear portion of the body.
Position both legs at matching heights before sewing them permanently.
Step 3: Attach the Front Legs
Attach the front legs closer to the front underside of the body.
Check them from the front to keep them visually parallel.
Step 4: Attach the Ears
Position one ear on each upper side of the head.
Compare both ears from the front and adjust their position before permanently sewing them into place.
Step 5: Attach the Muzzle
Center the cream muzzle on the front of the head.
Sew around the edge while checking that the muzzle remains centered between the eyes.
Step 6: Attach the Tail
Sew the tail securely to the rear of the body without pulling the body out of shape.
Step 7: Attach the Head
Center the head over the body and sew the two pieces together gradually.
Check the puppy from the front and both sides as you work.
Step 8: Finish the Face
Secure the safety eyes and embroider the nose and optional mouth detail.
Finishing
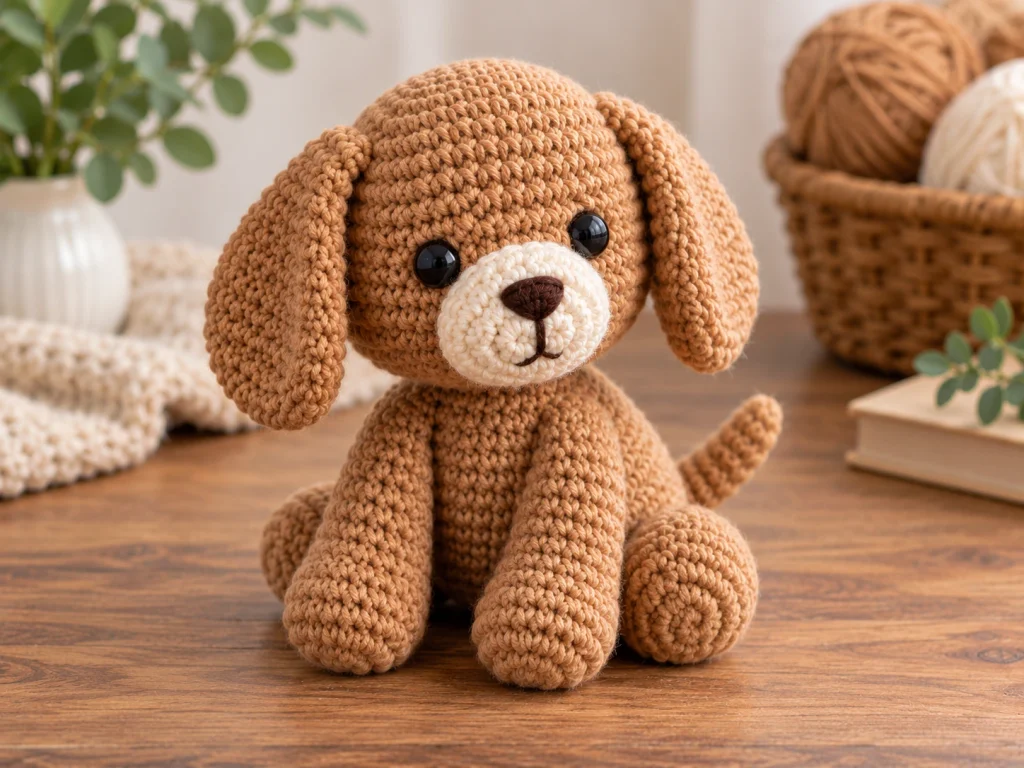
After the puppy has been assembled:
- Check that no stuffing is visible.
- Make sure all major seams are secure.
- Weave in and trim loose yarn ends.
- Check the head and body alignment.
- Compare both ears and all four legs for symmetry.
- Make any final shaping adjustments by hand.
Helpful Tips
Keep Your Tension Consistent
Uneven tension can cause paired pieces to differ in size. This is particularly noticeable with ears and legs.
Count Every Round
If your count changes unexpectedly, return to the last correctly counted round before continuing.
Add Stuffing Gradually
Small amounts of stuffing make it easier to control the final shape and reduce the chance of overstretching the stitches.
Compare Paired Pieces
Place matching pieces side by side before sewing them permanently.
Sew Gradually
When attaching pieces, work around the seam in small sections rather than pulling the yarn tightly through a large area at once.
Troubleshooting
My Stitch Count Is Wrong
Return to the last round where your count was correct and check each increase and decrease. Fixing the problem early is easier than compensating for it later.
I Can See the Stuffing
The piece may be overstuffed or the stitches may be too loose. Remove a small amount of stuffing and check your tension.
One Ear Is Higher Than the Other
Wait before permanently sewing the second ear. Compare both ears from the front and reposition them until they look balanced.
The Head Looks Off-Center
Check the head from the front, left side, and right side while the seam is still accessible. Small adjustments during sewing can improve the final alignment.
The Finished Puppy Looks Uneven
Check the position of the legs, ears, muzzle, and head before changing the crocheted pieces themselves. Uneven attachment can create the appearance of a proportion problem.
Customization Ideas
Change the Main Color
Swap the warm tan yarn for another color while keeping the same stitch counts and construction.
Try a Different Muzzle Color
A lighter or darker muzzle can change the overall expression of the puppy.
Embroider the Eyes
You can replace the safety eyes with embroidered eyes for a different facial finish.
Change the Expression
Small changes to the embroidered nose and mouth details can create a different expression without changing the main crochet structure.
Care
Care for the finished amigurumi according to the characteristics of the yarn used. Avoid stretching the crocheted pieces and handle sewn facial details carefully.
Frequently Asked Questions
How big will this crochet puppy be?
The finished puppy is approximately 7–8 inches, but the actual size can vary according to yarn, hook size, tension, stuffing, and individual crochet technique.
What crochet terminology does this pattern use?
The pattern uses standard US crochet terminology.
Do I need a gauge swatch?
No separate gauge swatch is specified for this design. Consistent tension is still important because it affects the finished size and shape.
Should I stuff the ears?
No. The ears are intentionally left unstuffed.
When should I add stuffing?
Stuff the head and body gradually as you work. The legs and muzzle are lightly stuffed, while the tail receives only a small amount.
Can I use a different yarn?
Yes, but changing the yarn weight or hook size can change the final size and proportions.
Can I replace the safety eyes?
Yes. Embroidered eyes can be used as an alternative, provided they are securely finished and appropriate for your intended use.
Why does my puppy look different from the sample?
Amigurumi can vary because of yarn, hook size, tension, stuffing, and the placement of individual pieces during assembly.
More Animal Amigurumi
After finishing your puppy, explore other animal amigurumi projects and crochet characters to build your handmade collection.
Final Thoughts
This crochet puppy amigurumi comes together from a collection of rounded pieces that create a soft, recognizable little dog. Keep an eye on your stitch counts, compare paired pieces before sewing, and take your time with the facial placement for the best result.
The pattern has been mathematically reviewed and constructionally checked, but it has not been physically crocheted and tested yet.