
Crochet Squirrel Pattern: A Tiny Squirrel in an Acorn
This crochet squirrel amigurumi combines a rounded little squirrel, a…
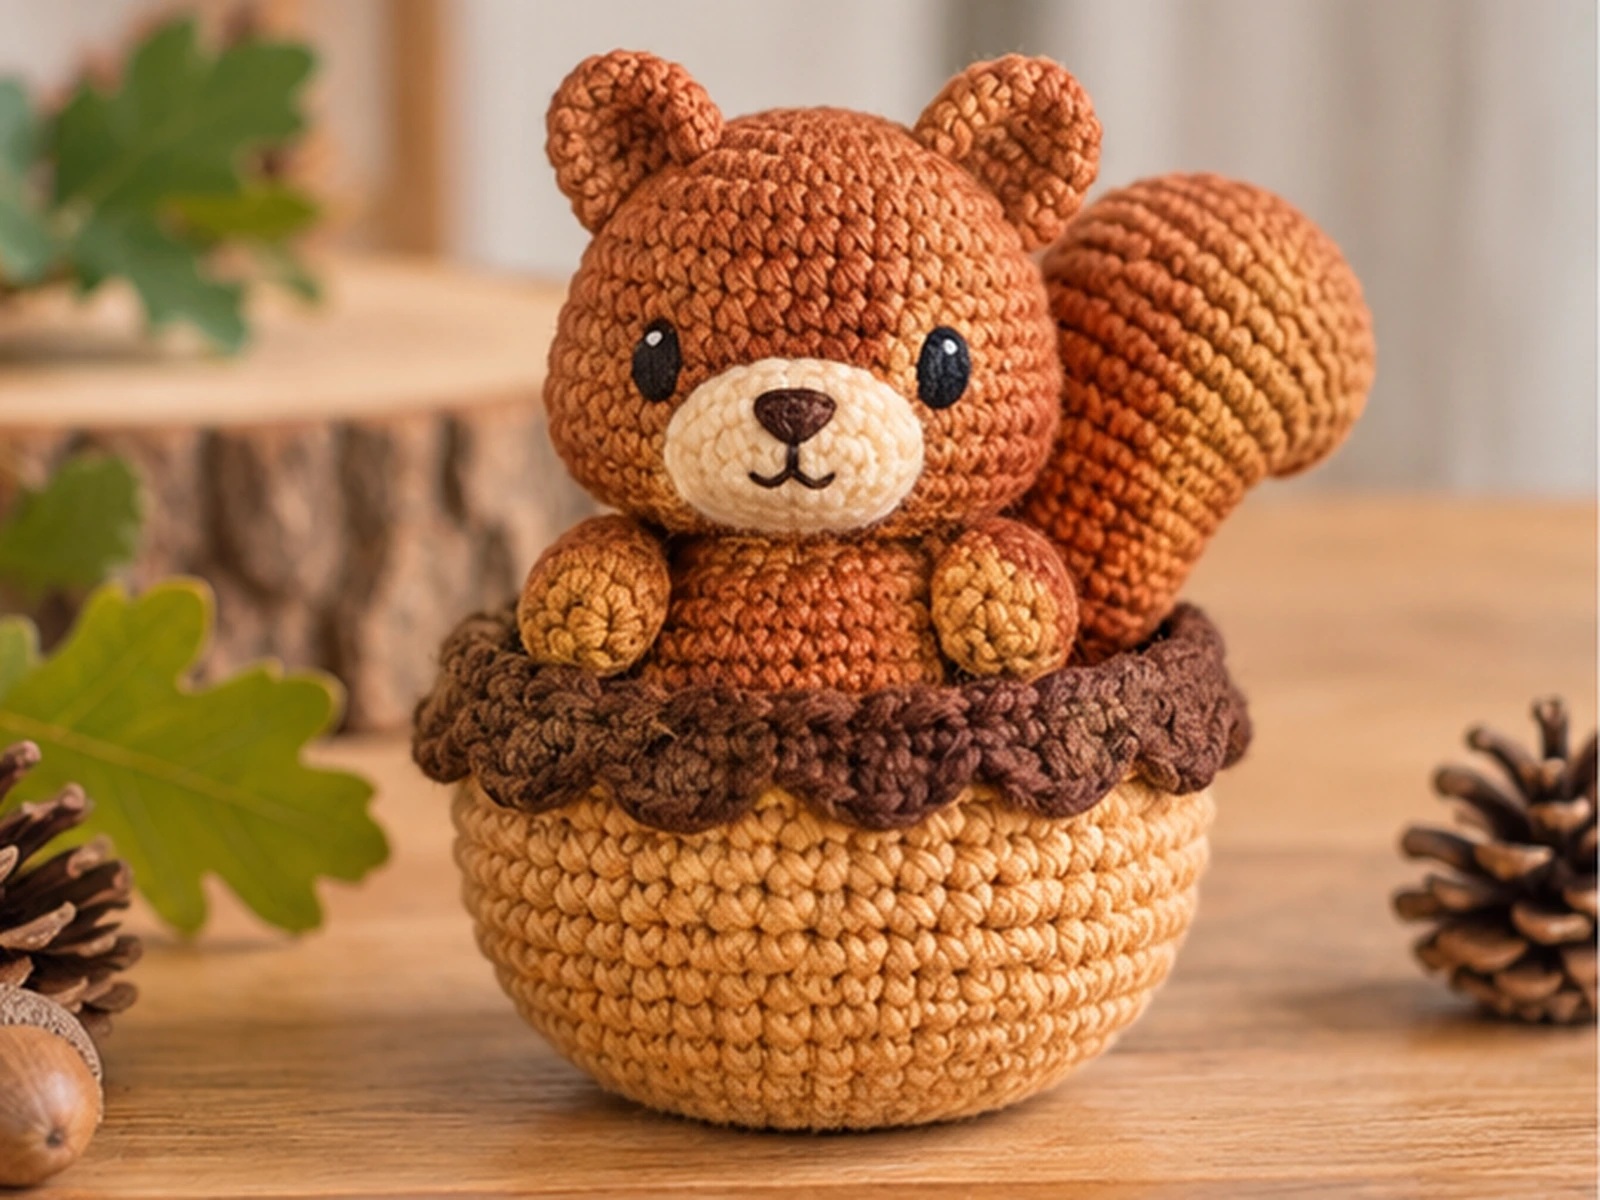
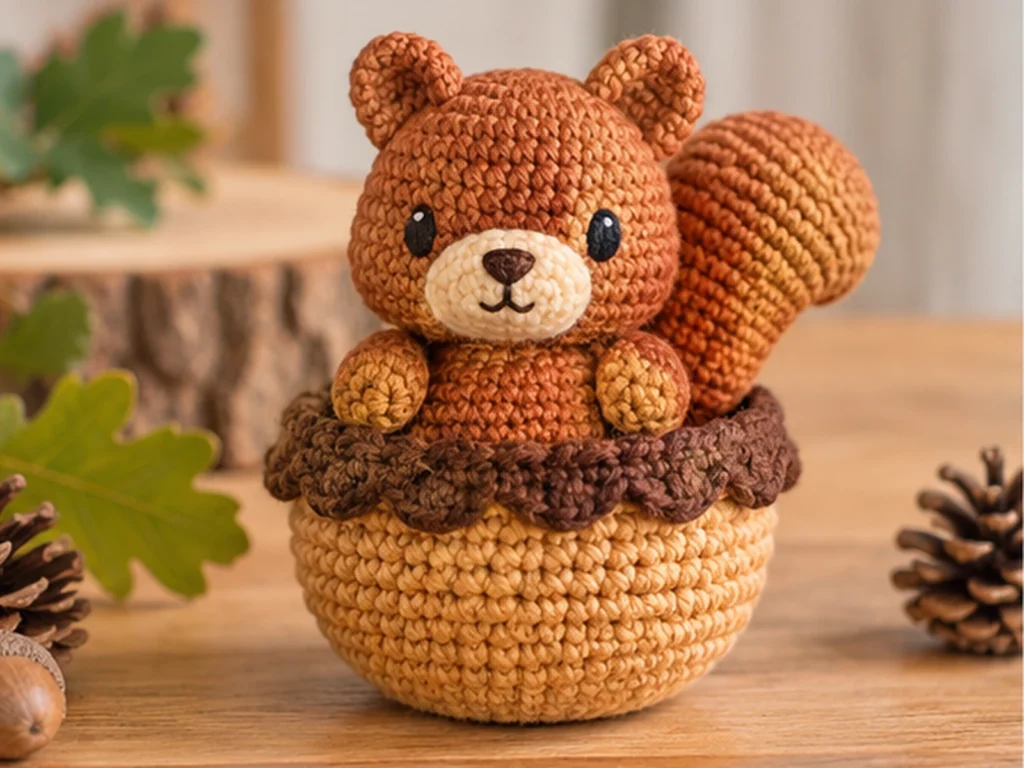
This crochet squirrel amigurumi combines a rounded little squirrel, a large tapered tail, and an open acorn cup into one woodland-inspired project. The squirrel is made from separate crocheted pieces and finished with embroidered facial details before being positioned inside the acorn.
The finished project is approximately 5–6 inches tall, depending on your yarn, hook, tension, stuffing, and individual crochet style.
Project Overview
What You’ll Make
You’ll crochet:
- One rounded squirrel head
- Two ears
- One small muzzle
- One body
- Two arms
- Two legs/feet
- One tapered tail
- One open acorn cup
- One decorative acorn cap band
The squirrel is assembled first, then positioned inside the open acorn cup and secured discreetly.
Project Details
- Technique: Amigurumi crochet
- Yarn: Worsted-weight yarn
- Hook: 3.25 mm crochet hook
- Main color: Warm chestnut brown
- Muzzle: Cream or light tan
- Acorn cup: Golden tan or acorn brown
- Acorn cap band: Dark brown
- Eyes: Embroidered
- Filling: Polyester fiberfill
- Finished size: Approximately 5–6 inches
A formal skill level and gauge have not been established for this design.
The pattern has been mathematically reviewed and constructionally checked, but it has not been physically crocheted and tested yet. Treat the finished size and physical fit as approximate.
Materials & Tools
For this squirrel amigurumi, you’ll need:
- Worsted-weight yarn in chestnut brown
- Worsted-weight yarn in cream or light tan
- Worsted-weight yarn in golden tan or acorn brown
- Worsted-weight yarn in dark brown
- 3.25 mm crochet hook
- Polyester fiberfill
- Tapestry needle
Exact yarn quantities are not established for this pattern.
Abbreviations
- MR — magic ring
- ch — chain
- sc — single crochet
- inc — increase; 2 sc in the same stitch
- dec — decrease; crochet 2 stitches together as one stitch
- sl st — slip stitch
- BLO — back loop only
- FO — fasten off
Before You Start
This pattern is worked mainly in continuous rounds. A stitch marker can help you keep track of the beginning of each round.
Count your stitches carefully, especially after increase and decrease rounds.
The head and body each finish with a 6-stitch opening. These openings are intentionally joined together to create the neck.
Keep stuffing moderate. Overstuffing can stretch the crochet fabric and change the intended shape.
The acorn cup remains open at the top and is not stuffed.
Original Crochet Squirrel Pattern
Head
Make 1. Use chestnut brown.
Round 1
6 sc in MR. (6)
Round 2
6 inc. (12)
Round 3
(sc, inc) × 6. (18)
Round 4
(2 sc, inc) × 6. (24)
Round 5
(3 sc, inc) × 6. (30)
Round 6
sc around. (30)
Round 7
sc around. (30)
Round 8
sc around. (30)
Round 9
sc around. (30)
Round 10
sc around. (30)
Begin adding firm stuffing toward the later part of this round, keeping the head rounded rather than overfilled.
Round 11
(3 sc, dec) × 6. (24)
Round 12
(2 sc, dec) × 6. (18)
Adjust the stuffing before continuing.
Round 13
(sc, dec) × 6. (12)
Round 14
6 dec. (6)
FO, leaving a long yarn tail.
Do not close the 6-stitch opening.
Ears
Make 2. Use chestnut brown. Work flat.
Row 1
Ch 2, 2 sc in the 2nd ch from hook. (2)
Row 2
Inc in each stitch across. (4)
Row 3
(sc, inc) × 2. (6)
Row 4
(2 sc, inc) × 2. (8)
Row 5
sc across. (8)
Row 6
dec, 4 sc, dec. (6)
FO, leaving a long sewing tail.
Gently flatten the lower edge before attaching each ear.
Muzzle
Make 1. Use cream or light tan.
Round 1
6 sc in MR. (6)
Round 2
(sc, inc) × 3. (9)
Round 3
sc around. (9)
Round 4
(sc, dec) × 3. (6)
FO, leaving a sewing tail.
Do not stuff the muzzle.
Body
Make 1. Use chestnut brown.
Round 1
6 sc in MR. (6)
Round 2
6 inc. (12)
Round 3
(sc, inc) × 6. (18)
Round 4
(2 sc, inc) × 6. (24)
Round 5
sc around. (24)
Round 6
sc around. (24)
Round 7
sc around. (24)
Begin adding moderate stuffing.
Round 8
(2 sc, dec) × 6. (18)
Round 9
sc around. (18)
Round 10
sc around. (18)
Add more stuffing as needed while keeping the body compact.
Round 11
(sc, dec) × 6. (12)
Round 12
sc around. (12)
Finish shaping the body.
Round 13
6 dec. (6)
FO, leaving a long yarn tail.
Do not close the 6-stitch opening.
Arms
Make 2. Use chestnut brown.
Round 1
6 sc in MR. (6)
Round 2
(sc, inc) × 3. (9)
Round 3
sc around. (9)
Round 4
sc around. (9)
Round 5
sc around. (9)
Round 6
sc around. (9)
Add a small amount of stuffing if desired.
Round 7
(sc, dec) × 3. (6)
FO, leaving a long sewing tail.
Lightly cinch the opening closed.
Legs / Feet
Make 2. Use chestnut brown.
Round 1
6 sc in MR. (6)
Round 2
6 inc. (12)
Round 3
(sc, inc) × 6. (18)
Round 4
sc around. (18)
Round 5
sc around. (18)
Begin adding light-to-moderate stuffing.
Round 6
(sc, dec) × 6. (12)
Round 7
sc around. (12)
FO, leaving a long sewing tail.
Finish stuffing lightly and cinch the opening closed.
Tail
Make 1. Use chestnut brown.
The tail is designed to be fuller through the middle and gradually taper toward the tip.
Round 1
6 sc in MR. (6)
Round 2
(sc, inc) × 3. (9)
Round 3
sc around. (9)
Round 4
(2 sc, inc) × 3. (12)
Round 5
sc around. (12)
Round 6
sc around. (12)
Round 7
(3 sc, inc) × 3. (15)
Round 8
sc around. (15)
Round 9
sc around. (15)
Round 10
(4 sc, inc) × 3. (18)
Round 11
sc around. (18)
Round 12
sc around. (18)
Round 13
sc around. (18)
Begin adding light stuffing from approximately Round 10 onward.
Round 14
(4 sc, dec) × 3. (15)
Round 15
sc around. (15)
Round 16
(3 sc, dec) × 3. (12)
Round 17
sc around. (12)
Round 18
(2 sc, dec) × 3. (9)
Round 19
sc around. (9)
Round 20
(sc, dec) × 3. (6)
Round 21
sc around. (6)
Round 22
3 dec. (3)
Round 23
sc around. (3)
FO and cinch the final 3 stitches closed.
Keep the tail lightly stuffed so it can curve naturally when attached.
Make the Acorn
Acorn Cup
Make 1. Use golden tan or acorn brown.
The top remains open.
Round 1
6 sc in MR. (6)
Round 2
6 inc. (12)
Round 3
(sc, inc) × 6. (18)
Round 4
(2 sc, inc) × 6. (24)
Round 5
sc around. (24)
Round 6
(3 sc, inc) × 6. (30)
Round 7
sc around. (30)
Round 8
sc around. (30)
Round 9
sc around. (30)
Round 10
sc around. (30)
FO and weave in the end.
Do not stuff the acorn cup.
Acorn Cap Band
Make 1. Use dark brown.
Round 1
Ch 30. Join with a sl st to the first chain, making sure the chain is not twisted. Ch 1 and sc around. (30)
Round 2
Working in BLO, sc around. (30)
Round 3
Working into the unused front loops of Round 2:
(sl st in next st, 2 sc in next st, sl st in next st) × 10. (40)
FO, leaving a sewing tail.
The final round creates a scalloped decorative edge.

Facial Details
Before joining the head to the body:
- Sew the cream muzzle onto the front of the head.
- Embroider two small oval eyes.
- Check that the eyes look symmetrical before securing them.
- Embroider a small nose above the muzzle.
- Add a short mouth line beneath the nose if desired.
This design uses embroidered facial details rather than safety eyes.
Assembly
Step 1: Attach the Ears
Place the two ears on the upper sides of the head.
Compare both sides carefully before sewing them permanently.
Secure the lower portion of each ear to the head.
Step 2: Join the Head and Body
The head ends with a 6-stitch opening, and the body ends with a matching 6-stitch opening.
Align the two openings and sew them together around the complete neck seam.
Adjust the stuffing before finishing the seam so the head remains rounded.
Step 3: Attach the Arms
Position one arm on each side of the upper body.
Compare both sides before sewing permanently.
Sew through the upper portion of each arm and into the body.
Step 4: Attach the Legs
Place the two feet on the lower front of the body.
Compare the left and right sides before sewing.
The legs should create a compact seated silhouette.
Step 5: Attach the Tail
Sew the 6-stitch base of the tail to the lower back of the body.
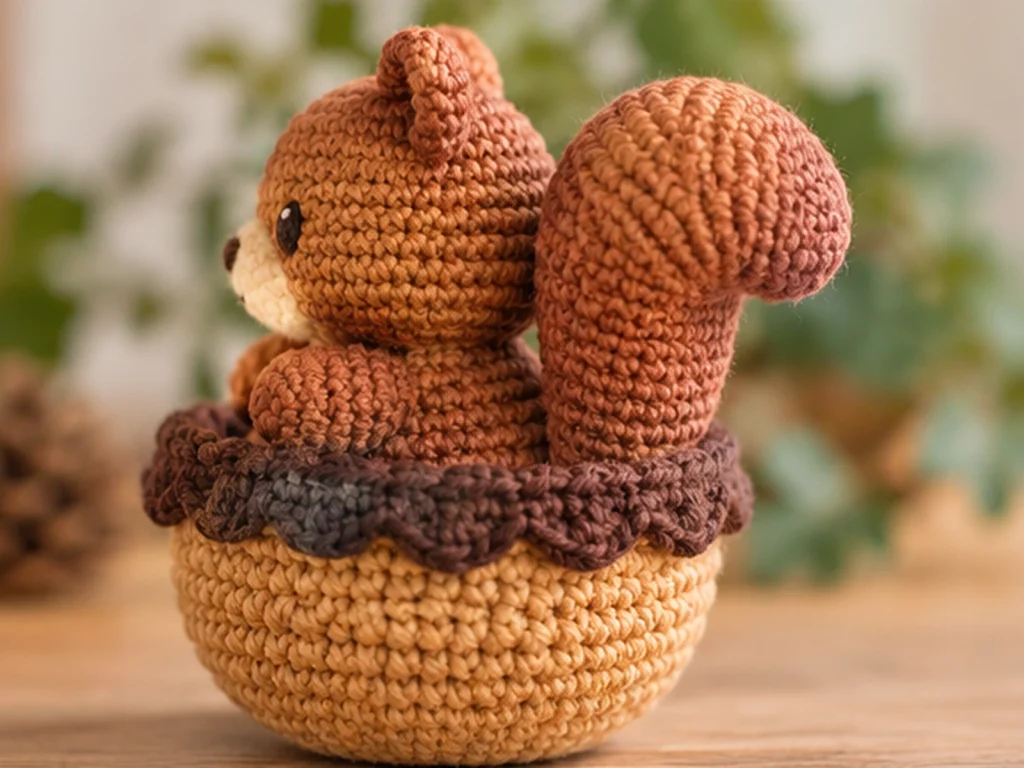
Secure the base well, then gently curve the tail upward and outward as you finish sewing.
Avoid forcing it into a sharp bend.
Step 6: Attach the Acorn Cap Band
Position the 30-stitch attachment edge of the cap band around the upper edge of the acorn cup.
The decorative scalloped edge should face outward.
Sew evenly around the rim.
Step 7: Place the Squirrel in the Acorn
Set the finished squirrel into the open acorn cup.
Center the squirrel so that:
- the head remains upright,
- the body is centered,
- the tail remains visible,
- the feet stay balanced,
- the acorn opening keeps its shape.
Once the position looks right, secure the body to the inside of the acorn at a few discreet points.
Use visual placement rather than fixed measurements.
Finishing
Take a final look at the whole piece before trimming the remaining yarn ends.
Check that:
- both ears look balanced,
- the face is centered,
- the arms sit at similar heights,
- the legs create a stable seated pose,
- the tail has a natural curve,
- the squirrel sits comfortably inside the acorn,
- no stuffing is visible through the stitches.
Gently shape the head, body, tail, and acorn cup with your hands rather than pulling aggressively on the stitches.
Helpful Tips
- Count your stitches after every increase and decrease round.
- Use a stitch marker to keep track of the beginning of continuous rounds.
- Avoid overstuffing the head and body.
- Compare paired pieces before sewing them permanently.
- Keep the tail lightly stuffed so it can be shaped naturally.
- Check the squirrel’s position inside the acorn before adding the final securing stitches.
Troubleshooting
My stitch count doesn’t match.
Stop at the end of the round and recount before continuing. Increase and decrease rounds are the easiest places to lose or accidentally add a stitch.
My head looks too loose.
Check your tension and stuffing. Overstuffing can stretch the stitches and make the fabric look more open.
My ears don’t look symmetrical.
Place both ears against the head before sewing them permanently. Comparing their position first makes it easier to correct small differences.
My neck seam looks uneven.
Because both openings contain 6 stitches, line up the stitches one by one before sewing around the entire opening.
My tail keeps falling flat.
The tail is lightly stuffed by design. Check that the base is securely sewn to the lower back and gently shape the curve while attaching it.
The squirrel doesn’t sit nicely inside the acorn.
Center the body inside the cup first, then check the head, feet, and tail from the front before adding the discreet securing stitches.
Customization Ideas
Color is one of the simplest ways to personalize this squirrel.
Try:
- deeper brown with a warm cream muzzle,
- reddish-brown with a pale tan accent,
- a darker acorn cap with a lighter cup,
- contrasting embroidery for the facial expression.
You can also adjust the embroidered expression slightly by changing the nose and mouth details.
Changing yarn weight or hook size can change the finished dimensions and may also affect how the squirrel fits inside the acorn.
Care
The care method for the finished amigurumi has not been specifically established for this design. Follow the care guidance appropriate to the yarn used for your project.
Frequently Asked Questions
What yarn is used for this crochet squirrel pattern?
The design is written for worsted-weight yarn. The squirrel uses chestnut brown, with cream or light tan for the muzzle and golden tan/acorn brown and dark brown for the acorn.
What crochet hook size is used?
The pattern uses a 3.25 mm crochet hook.
How big is the finished squirrel?
The complete squirrel-and-acorn project is designed to be approximately 5–6 inches tall. This is an approximate target, and your finished size may vary.
Does this pattern use safety eyes?
No. The design uses embroidered eyes.
Is gauge provided?
A formal gauge is not established for this design.
Does the squirrel fit inside the acorn?
The design is built around an open acorn cup. The squirrel is positioned inside the cup and secured once the desired placement has been established.
Is the pattern physically tested?
Not yet. The pattern has been mathematically reviewed and constructionally checked, but it has not been physically crocheted and tested.
Can I change the colors?
Yes. Changing colors is a simple way to personalize the squirrel and acorn. Keep in mind that changing yarn weight can also affect the finished size and fit.
Final Thoughts
This crochet squirrel brings together a rounded woodland character, an oversized tapered tail, and an acorn cup in one compact amigurumi project.
The squirrel’s embroidered face and seated pose keep the design simple, while the acorn gives the finished piece a distinctive woodland feel.
Because the pattern has not yet been physically crocheted and tested, use the approximate measurements and visual placement guidance as intended, and evaluate the finished proportions as you work.
Happy crocheting!