Crochet Stingray Amigurumi Pattern
This crochet stingray amigurumi has a soft, low-profile body, wide…

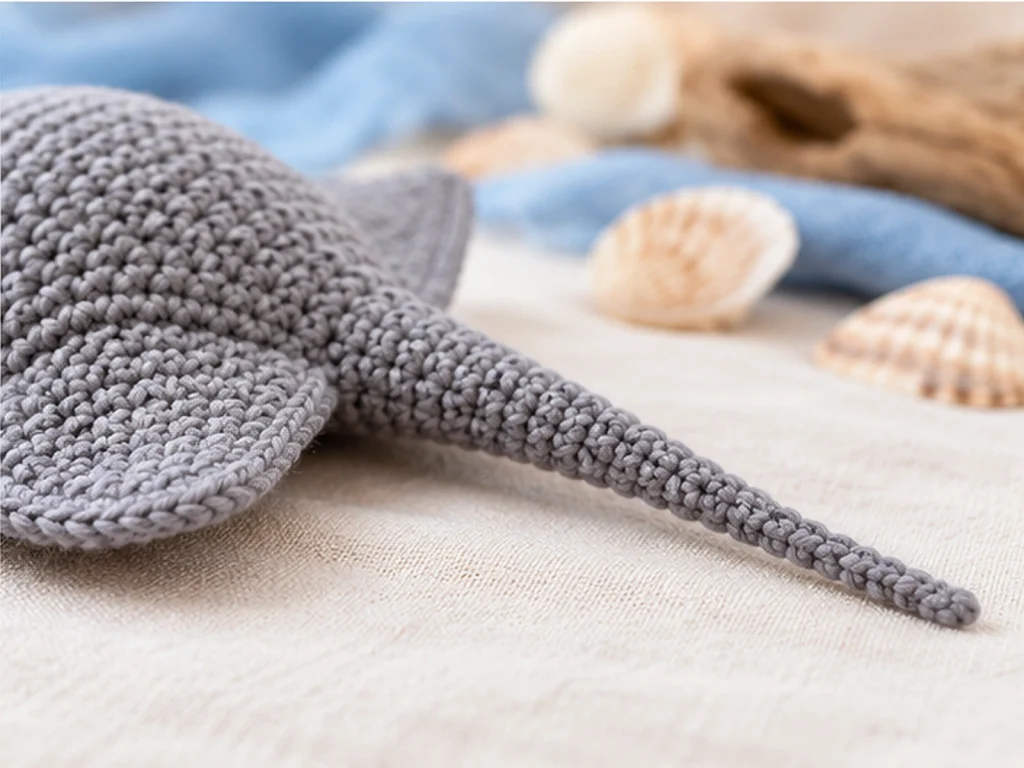
This crochet stingray amigurumi has a soft, low-profile body, wide side fins, a tapered tail, and a simple embroidered smile. The design is made from two flat body panels, two fins, and one tail, giving you a clear construction path from the first stitches to the final assembly.
The finished stingray measures approximately 7–8.5 inches long and 6–7.5 inches wide, depending on your yarn, hook, tension, stuffing, and individual crochet technique. The body is lightly stuffed to preserve its broad shape, while the fins and tail remain unstuffed.
Stingray Amigurumi at a Glance
- Project: Stingray amigurumi
- Finished size: Approximately 7–8.5 in. long × 6–7.5 in. wide
- Yarn: #4 worsted-weight yarn
- Hook: 3.5 mm crochet hook
- Main color: Medium gray
- Accent color: Black
- Construction: Two body panels, two side fins, and one tail
- Face: Embroidered eyes and smile
- Stuffing: Polyester fiberfill
- Gauge: Not specified
- Terminology: US crochet terms
Pattern status: This pattern has been mathematically reviewed and constructionally reasoned, but it has not been physically prototype-tested yet. Final size and proportions may vary with yarn, hook, tension, stuffing, and individual technique.

Materials and Tools
Yarn
- #4 worsted-weight yarn in medium gray
- Black yarn for the embroidered face
Crochet Hook
- 3.5 mm crochet hook
Other Supplies
- Polyester fiberfill
- Yarn needle
- Stitch marker
- Scissors
Crochet Abbreviations
This pattern uses standard US crochet terminology.
- ch — chain
- sc — single crochet
- inc — increase; work 2 sc in the same stitch
- dec — decrease; single crochet 2 stitches together
- MR — magic ring
- FO — fasten off
Before You Start
The stingray is made from separate components that are assembled at the end.
You will make:
- Two identical body panels
- Two side fins
- One tapered tail
The face is embroidered onto one body panel before the body is assembled.
Work the body panels in continuous rounds and use a stitch marker to identify the beginning of each round.
The body should be lightly to moderately stuffed. Avoid overstuffing because too much filling can make the stingray look round instead of flat.
The fins and tail remain unstuffed.
When working the paired fins, compare both sides before sewing them permanently so the finished stingray remains visually balanced.

Crochet Stingray Pattern
Body Panel — Make 2
Use medium gray yarn.
Round 1
Ch 8.
Sc in the 2nd ch from hook and in the next 5 ch, 3 sc in the last ch; working along the underside of the foundation chain, sc in the next 5 ch, then 2 sc in the same chain where the first sc was made. (16)
Round 2
(Inc, 5 sc, 3 inc, 5 sc, 2 inc). (22)
Round 3
(Sc, inc, 5 sc, (sc, inc) × 3, 5 sc, (sc, inc) × 2). (28)
Round 4
(2 sc, inc, 5 sc, (2 sc, inc) × 3, 5 sc, (2 sc, inc) × 2). (34)
Round 5
(3 sc, inc, 5 sc, (3 sc, inc) × 3, 5 sc, (3 sc, inc) × 2). (40)
Round 6
Sc around. (40)
FO and leave a long yarn tail for sewing.
Make a second identical body panel.
Side Fin — Make 2
Use medium gray yarn.
These pieces remain flat and unstuffed.
Row 1
Ch 2, sc in the 2nd ch from hook. (1)
Row 2
Inc. (2)
Row 3
Inc in each stitch. (4)
Row 4
Inc, 2 sc, inc. (6)
Row 5
Inc, 4 sc, inc. (8)
Row 6
Inc, 6 sc, inc. (10)
FO and leave a long yarn tail for sewing.
Make a second identical fin.
Tail
Use medium gray yarn.
Round 1
6 sc in MR. (6)
Rounds 2–10
Sc around. (6)
Round 11
2 dec, 2 sc. (4)
Round 12
2 dec. (2)
Round 13
2 sc. (2)
FO and close the small opening with the yarn tail.
Leave the tail unstuffed so it stays flexible.
Add the Stingray Face
Work the face on one body panel before joining the two panels.
Embroidered Eyes
Using black yarn and a yarn needle, embroider two small eyes on the upper/front area of the body panel.
Keep the eyes visually balanced and similar in size. Because the body shape can vary slightly with tension, use the finished panel itself as your placement guide rather than relying on a fixed measurement.
Embroidered Smile
Add a small curved smile centered beneath the eyes.
Check the expression from above before moving on to assembly.
Assemble the Stingray
1. Position the Fins
Place one fin on each side of the body.
The wider edge of each fin should sit against the body, with the pointed end extending outward.
Compare both sides before sewing so the fins have a similar angle and placement.
2. Join the Body Panels
Place the two body panels together with the finished sides facing outward.
Align the outer edges carefully.
Use gray yarn and a whip stitch to sew the panels together.
Leave a small opening for stuffing.
3. Stuff the Body
Add polyester fiberfill gradually through the opening.
Use light to moderate stuffing and shape the body as you work.
The finished body should stay relatively flat rather than becoming fully round.
Pause occasionally and check the silhouette from above.
4. Close the Body
Once the body has the shape you want, continue sewing the remaining opening closed.
Weave in the yarn securely and trim the excess.
5. Secure the Fins
Sew the base of each fin securely to the side of the body.
Check both sides again before finishing the second fin so the stingray remains balanced.
6. Attach the Tail
Center the tail at the rear edge of the body.
Sew the base of the tail securely to the back seam.
Keep the tail centered and flexible.
7. Shape the Finished Stingray
Gently shape the body with your hands.
Check that:
- Both fins are balanced.
- The tail is centered.
- The face is clearly visible.
- The body remains relatively flat.
- No stuffing is exposed.
- All attachment points are secure.

Tips for a Better Finish
Keep the Body Lightly Stuffed
The wide, low-profile shape is one of the main features of this project. Adding too much stuffing can make the body look more rounded than intended.
Use a Stitch Marker
The body is worked in continuous rounds, so a stitch marker helps you keep the beginning of each round consistent.
Compare Paired Pieces
Before permanently sewing the second fin, compare it directly with the first one. This makes it easier to correct asymmetry while you still have access to the attachment point.
Shape Before Closing Completely
Take a moment to look at the body from above while the stuffing opening is still accessible. It is much easier to correct the silhouette before the final stitches are made.
Troubleshooting
My Stingray Looks Too Round
Remove a little stuffing and reshape the body. The finished body is intended to remain relatively flat.
My Fins Look Uneven
Place the stingray flat and compare both fins from above. Adjust the second fin before securing it permanently.
The Tail Looks Off-Center
Check the center of the rear body seam before sewing the tail in place. Reposition it visually if necessary.
The Face Looks Uneven
Because the embroidered features are added by hand, compare both eyes before finishing the second one. Use the body panel as your visual guide rather than measuring from an untested fixed distance.
The Body Edges Do Not Match
Make sure both panels were worked to the same final stitch count of 40. Small differences in tension can also change the way the panels sit together.
Customization Ideas
Try Different Body Colors
Swap the gray for another solid color to create a different look.
Change the Expression
A slightly different embroidered smile or eye shape can change the character of the finished stingray without changing the main construction.
Create a Color Pair
You can use one color for the main body and another for small embroidered details for a higher-contrast appearance.
Make a Small Character Collection
The same basic concept can inspire a group of ocean-themed amigurumi in different colors and shapes.
Any size modification should be treated as a design adjustment rather than an exact-size guarantee because changing yarn or hook size will also change the finished dimensions.
Frequently Asked Questions
What yarn is used for this stingray amigurumi?
The pattern is designed for #4 worsted-weight yarn.
What crochet hook size is used?
A 3.5 mm crochet hook is specified for the base design.
Is the stingray stuffed?
Yes. The body is lightly to moderately stuffed. The fins and tail are left unstuffed.
Are the eyes safety eyes?
No. This design uses embroidered eyes rather than safety eyes.
How many body panels are needed?
Two identical body panels are crocheted and sewn together to create the main body.
Does the tail need stuffing?
No. The tail is intentionally left unstuffed so it remains flexible.
Why does my finished stingray look different in size?
Finished dimensions can vary with yarn, hook size, tension, stuffing, and individual crochet technique. The listed dimensions are approximate rather than physically tested measurements.
Final Thoughts
This crochet stingray amigurumi comes together from a small set of components: two body panels, two flat fins, and a tapered tail. The key to the finished shape is keeping the body relatively flat, positioning the fins symmetrically, and adding the facial details with care.
Take your time during assembly, especially when checking the fin placement and tail position. Those small finishing decisions make a noticeable difference in the overall silhouette and expression of the finished stingray.