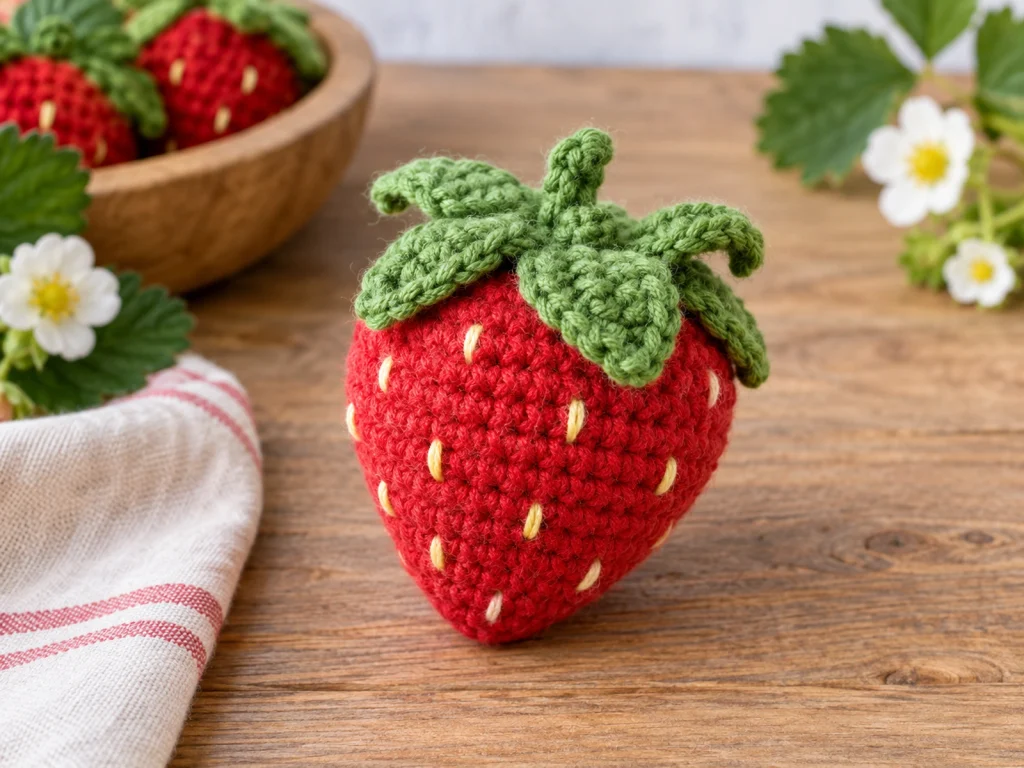
Crochet Strawberry Pattern: A Step-by-Step Amigurumi Tutorial
This crochet strawberry pattern creates a small three-dimensional strawberry with…
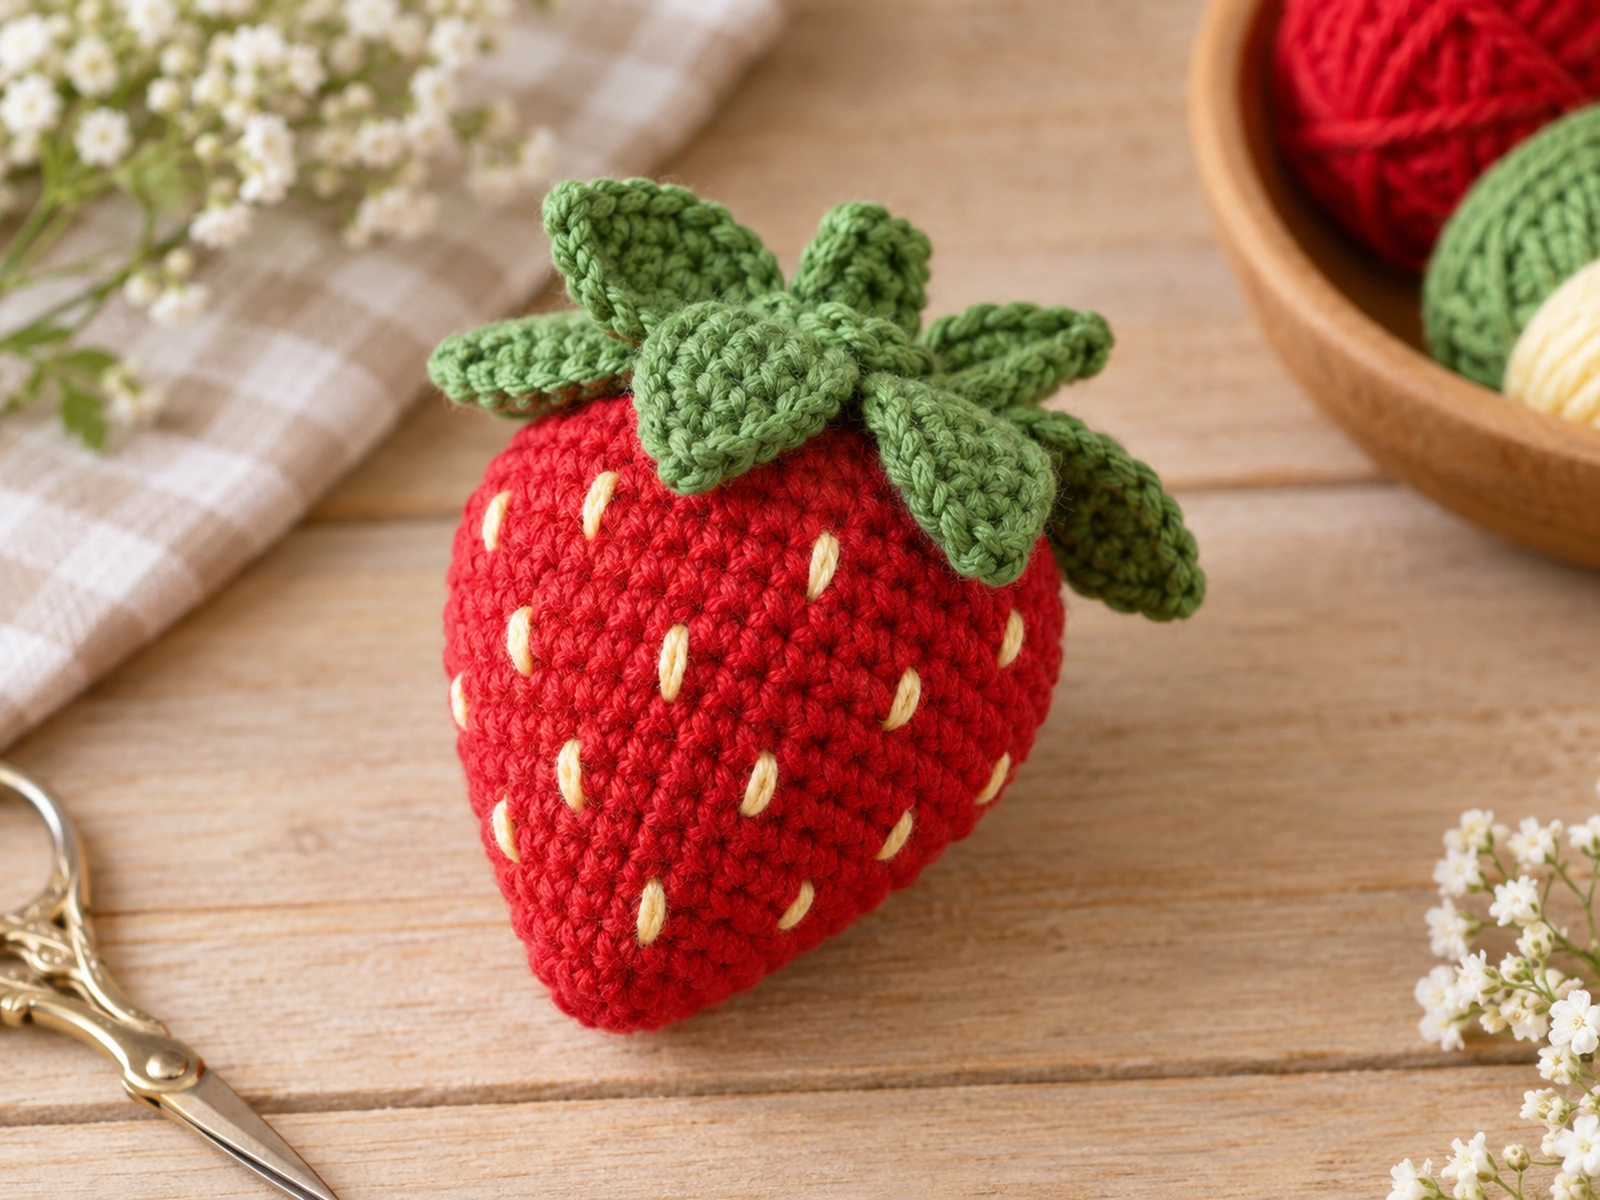
This crochet strawberry pattern creates a small three-dimensional strawberry with a rounded red fruit body, embroidered seed details, and a five-leaf green crown. The strawberry is worked in continuous rounds, stuffed before closing, and finished with a separate green center and five individual leaves.
The finished size is approximately 3–3.5 inches (7.5–9 cm), although the final size can vary with yarn, hook size, tension, stuffing, and individual crochet technique.
Project Overview
What You’ll Make
You’ll make a small stuffed crochet strawberry with:
- One red strawberry body
- One green center cap
- Five green leaves
- Approximately 8–10 embroidered seed details
The strawberry body grows from a narrow lower point, expands to its widest section, stays full for several rounds, and then narrows toward the top.
Project Details
- Project: Crochet Strawberry
- Technique: Crochet in continuous rounds
- Hook: 3.25 mm crochet hook
- Main color: Red
- Leaf color: Green
- Seed color: Pale yellow or cream
- Filling: Polyester fiberfill
- Approximate finished size: 3–3.5 inches (7.5–9 cm)
The pattern has been mathematically reviewed and constructionally checked, but it has not been physically crocheted and tested yet. Treat the finished size and physical proportions as approximate.
Materials & Tools
- Red yarn
- Green yarn
- A small amount of pale yellow or cream yarn
- Polyester fiberfill
- 3.25 mm crochet hook
- Yarn needle
- Scissors
- Stitch marker, if desired
Abbreviations
US crochet terminology is used throughout the pattern.
- MR — magic ring
- sc — single crochet
- inc — increase, 2 sc in the same stitch
- dec — single crochet decrease
- ch — chain
- hdc — half double crochet
- dc — double crochet
- tr — treble crochet
- sl st — slip stitch
- FO — fasten off
Before You Start
Work in Continuous Rounds
The strawberry body is worked in continuous rounds, so the rounds are not joined with a slip stitch.
A stitch marker can help you keep track of the beginning of each round.
Count Your Stitches
Accurate stitch counting is important because the shape depends on a specific sequence of increases, even rounds, and decreases.
For the strawberry body, the stitch counts progress as follows:
6 → 12 → 18 → 24 → 30 → 36 → 36 → 36 → 36 → 36 → 30 → 24 → 18 → 18 → 12 → 12 → 6
Stuff as You Go
Begin stuffing during Round 16.
Add polyester fiberfill gradually so the strawberry stays rounded without becoming overstuffed.
Shape Before Closing
As you stuff the body, gently shape the fruit so the lower point remains defined and the upper section stays rounded.
Construction Order
Make the strawberry body first, then the green center cap and five leaves. Once the body is closed, sew on the green center, arrange the leaves, and add the embroidered seed details.
Original Crochet Strawberry Pattern
Strawberry Body — Make 1
Work continuously in the round.
Round 1
6 sc in MR. (6)
Round 2
6 inc. (12)
Round 3
(sc, inc) × 6. (18)
Round 4
(2 sc, inc) × 6. (24)
Round 5
(3 sc, inc) × 6. (30)
Round 6
(4 sc, inc) × 6. (36)
Round 7
36 sc. (36)
Round 8
36 sc. (36)
Round 9
36 sc. (36)
Round 10
36 sc. (36)
Gently shape the work with your fingers as you continue so the body develops a strawberry-like silhouette rather than becoming completely spherical.
Round 11
(4 sc, dec) × 6. (30)
Round 12
(3 sc, dec) × 6. (24)
Round 13
(2 sc, dec) × 6. (18)
Round 14
18 sc. (18)
Round 15
(sc, dec) × 6. (12)
Round 16
12 sc. (12)
Begin adding polyester fiberfill.
Add the stuffing gradually and shape the body as you work. Avoid overstuffing.
Round 17
6 dec. (6)
Fasten off, leaving a yarn tail.
Weave the yarn through the front loops of the remaining six stitches and gently pull to close the opening. Secure the yarn and weave the remaining end into the body.
Green Center Cap — Make 1
Work in continuous rounds.
Round 1
6 sc in MR. (6)
Round 2
6 inc. (12)
Round 3
(sc, inc) × 6. (18)
Fasten off, leaving a yarn tail for sewing.
Do not stuff the center cap.
Green Leaves — Make 5
Each leaf is worked around a short foundation chain.
Leaf
Chain 6.
Starting in the second chain from the hook:
sc, hdc, dc, tr,
3 sc in the final chain,
then continue along the opposite side of the foundation chain:
tr, dc, hdc, sc.
Finish with a sl st at the base of the leaf.
Fasten off, leaving a yarn tail for sewing.
Repeat until you have 5 leaves.
Each leaf contains 11 stitches, not including the final slip stitch used for finishing.
Seed Details
Use pale yellow or cream yarn to embroider approximately 8–10 small seed marks over the red strawberry body.
Distribute the seeds naturally across the visible surface rather than placing them in a rigid pattern.
Keep the marks relatively small so they complement the crocheted texture.
Assembly
Step 1: Finish the Strawberry Body
Make sure the strawberry is completely stuffed and the final opening is securely closed.
Gently adjust the stuffing so the lower section remains pointed while the main body stays rounded.
Step 2: Attach the Green Center
Place the green center cap over the top closure of the strawberry.
Use its yarn tail to sew around the perimeter and secure it to the top of the red body.
Because the design has not been physically prototype-tested, adjust the final placement visually rather than relying on an exact measured overlap.
Step 3: Arrange the Five Leaves
Place the five leaves around the green center before sewing them permanently.
Start with one leaf and add the others around it while checking the strawberry from several angles.
Aim for an evenly balanced leafy crown.
Step 4: Sew the Leaves
Once the arrangement looks balanced, sew each leaf securely at its base to the green center.
Where useful, the base can also be anchored into the top area of the strawberry.
Step 5: Add the Seed Details
Embroider the seed marks across the red body after the leafy crown has been completed.
Step 6: Final Check
Before trimming the remaining yarn ends, make sure:
- The green center is secure.
- All five leaves are firmly attached.
- The stuffing is fully enclosed.
- The strawberry keeps its intended pointed-to-rounded silhouette.
- No loose yarn ends remain exposed.
Finishing
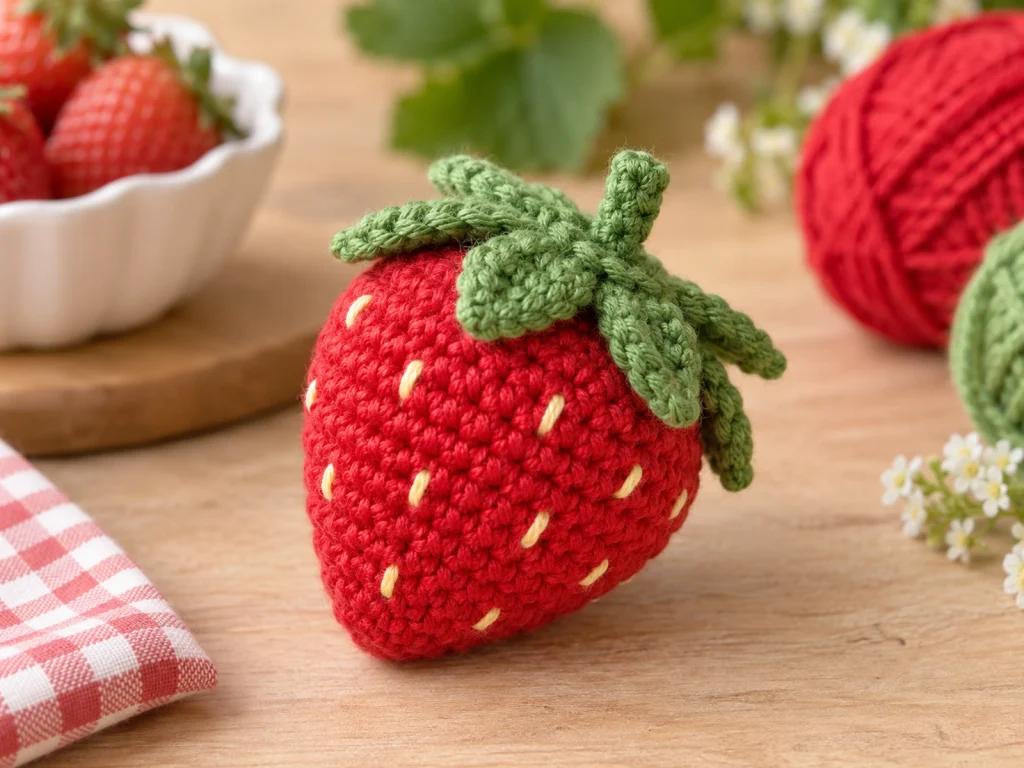
After assembly, check the entire strawberry from different angles.
Secure any remaining yarn ends, trim excess yarn, and make final adjustments to the stuffing and leaf arrangement.
The finished strawberry should have a defined lower point, a full rounded body, and a balanced five-leaf crown.
Helpful Tips
Keep Your Stitch Count Consistent
If a round does not end with the expected stitch count, stop and recount before moving forward.
Shape the Stuffing Gradually
Adding small amounts of stuffing at a time gives you more control over the strawberry’s silhouette.
Avoid Overstuffing
Too much stuffing can make the fruit overly spherical and reduce the definition of the lower point.
Arrange the Leaves Before Sewing
Position all five leaves first, then sew them permanently once the crown looks balanced from multiple angles.
Troubleshooting
My Stitch Count Is Wrong
Stop at the end of the current round and recount.
For the strawberry body, the expected progression is:
6 → 12 → 18 → 24 → 30 → 36 → 36 → 36 → 36 → 36 → 30 → 24 → 18 → 18 → 12 → 12 → 6
Correcting a missed or extra stitch early is easier than trying to compensate several rounds later.
The Strawberry Looks Too Round
Check the amount of stuffing.
Overstuffing can make the body more spherical and reduce the definition of the lower point.
The Top Looks Uneven
Check that the final six stitches have been closed evenly and that the stuffing is distributed before attaching the green center.
The Leaves Do Not Look Balanced
Arrange all five leaves before sewing them permanently.
Rotate the strawberry while checking the crown from several viewpoints rather than judging it from one angle.
The Green Center Does Not Sit Exactly as Expected
Adjust the center visually during assembly. The design has not been physically prototype-tested, so exact physical coverage has not been established.
Customization Ideas
Change the Seed Color
Try cream, pale yellow, or another light contrasting shade that remains visible against the red body.
Experiment With Color
The strawberry body can be explored in other shades for a stylized fruit-inspired look while keeping the green crown.
Adjust the Leaf Arrangement
Changing the rotation of the five leaves can give the finished strawberry a slightly different character without changing the crochet structure.
Experiment With Scale
A larger or smaller version would require testing how yarn and hook changes affect the finished proportions rather than assuming the same dimensions will scale exactly.
Frequently Asked Questions
How big is the crochet strawberry?
The design target is approximately 3–3.5 inches (7.5–9 cm). Final size can vary with yarn, hook size, tension, stuffing, and individual technique.
Is the strawberry worked in continuous rounds?
Yes. The red strawberry body is worked continuously in rounds.
Does the strawberry need stuffing?
Yes. The red body is designed as a stuffed three-dimensional piece.
How many leaves does the strawberry have?
The design uses five separate green leaves around the top center.
How are the strawberry seeds made?
The seeds are embroidered onto the finished red body using a small amount of pale yellow or cream yarn.
Has the pattern been physically tested?
No. The stitch mathematics and construction have been reviewed, but the design has not been physically crocheted and tested yet.
Final Notes
This crochet strawberry pattern combines a rounded red fruit body with a separate five-leaf green crown and embroidered seed details.
Keep the stitch counts accurate, add stuffing gradually, and arrange the leaves visually before sewing them permanently.
The finished size and physical proportions are approximate because the design has not yet been physically prototype-tested.