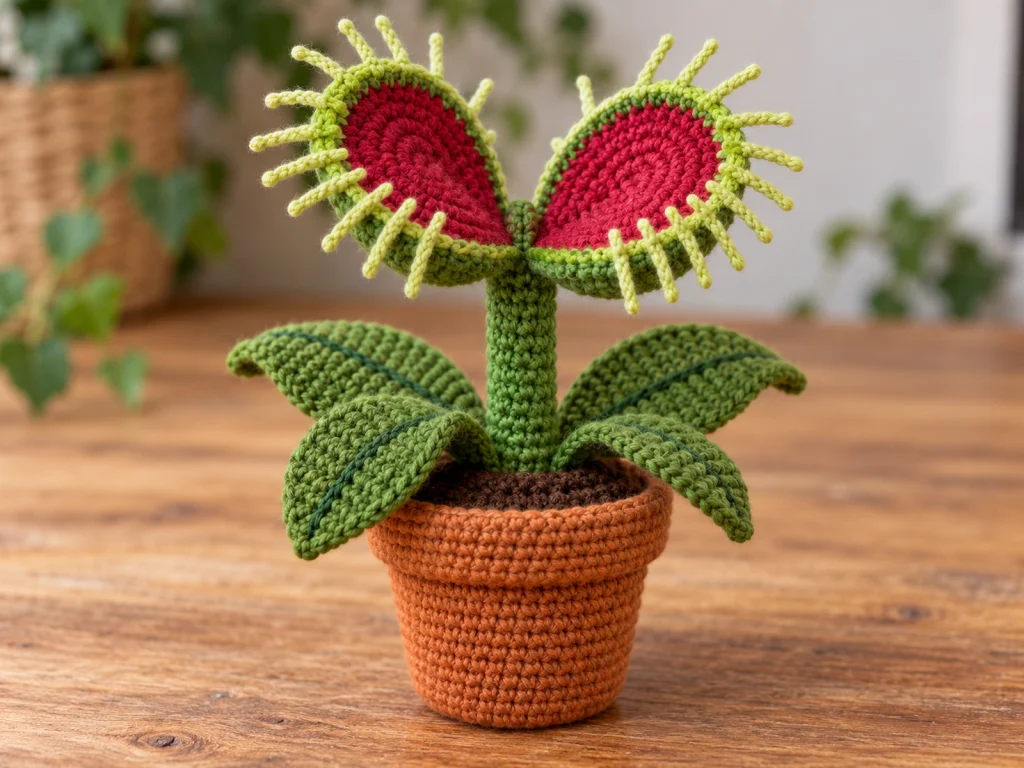
Crochet Venus Flytrap Amigurumi Pattern
Give your crochet collection a little botanical personality with this…
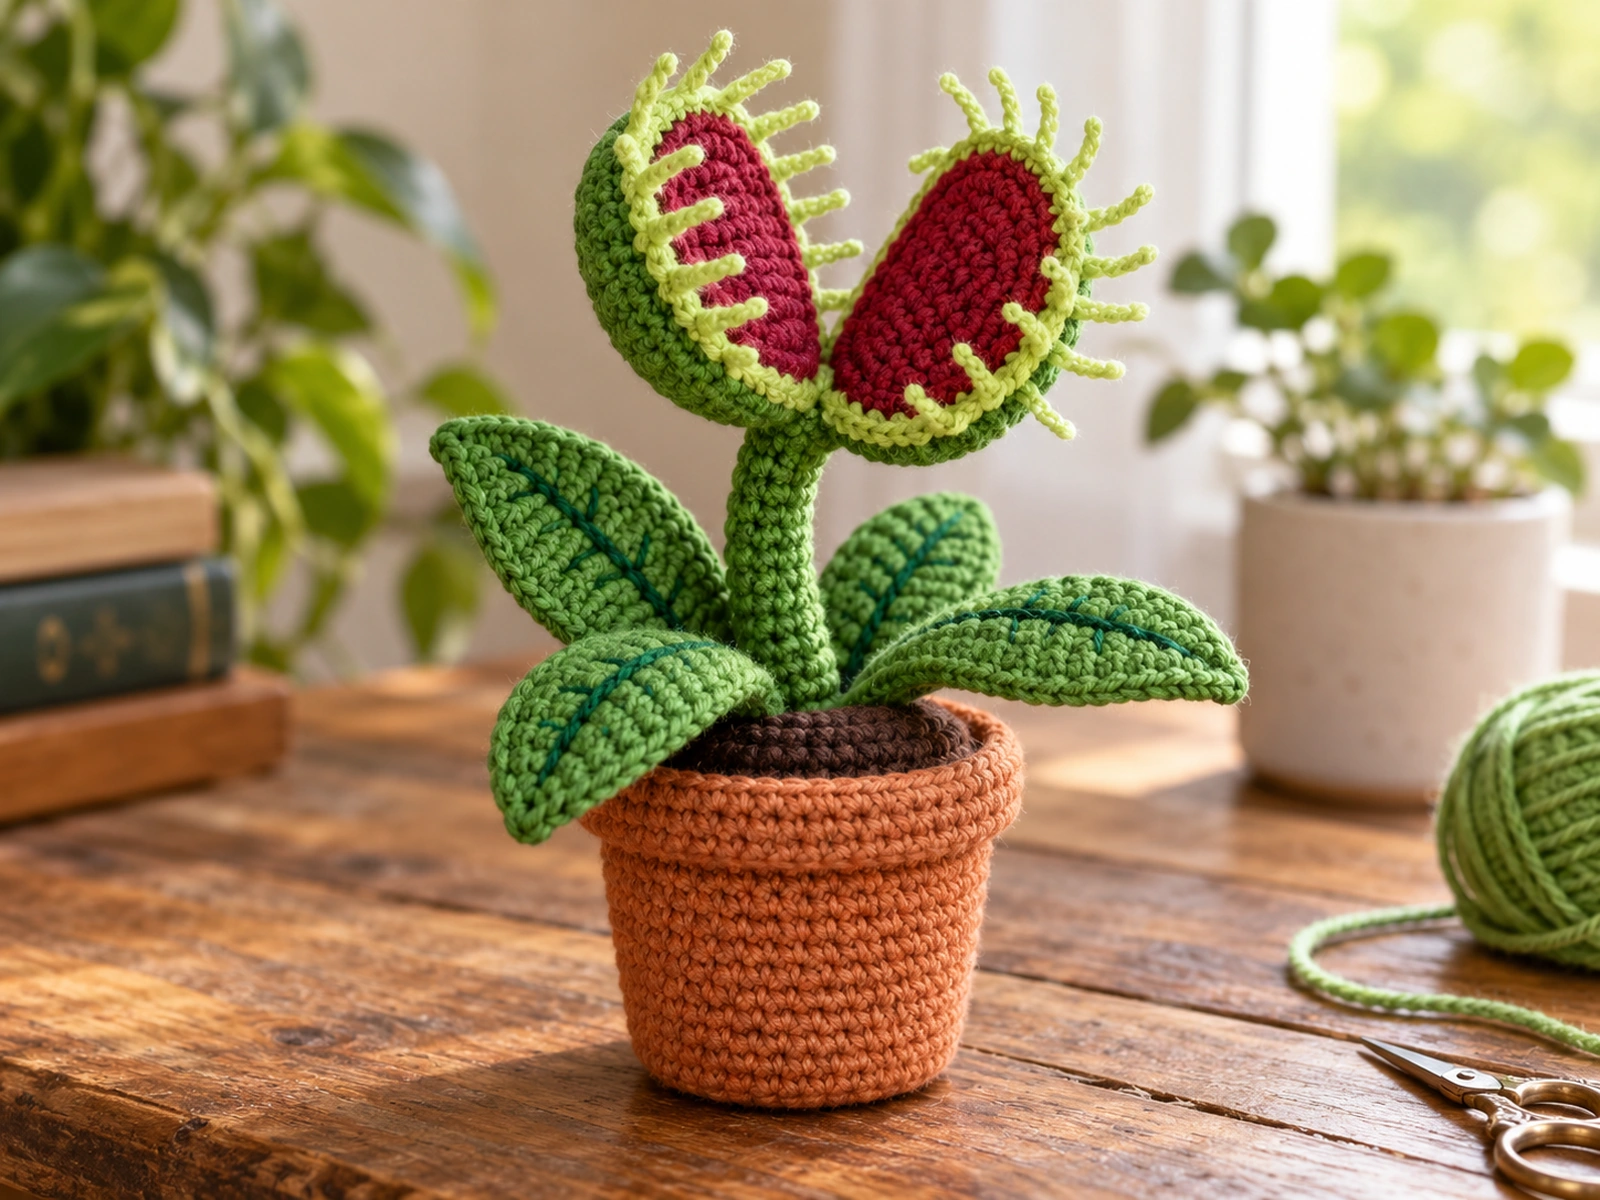
Give your crochet collection a little botanical personality with this Crochet Venus Flytrap Amigurumi Pattern. This original design combines a small terracotta-style pot, a simple upright stem, four leaves, and a distinctive two-lobed flytrap with a contrasting inner surface and crocheted cilia.
The finished project is designed as a decorative plant-style amigurumi. It uses standard US crochet terminology and is worked with a 4.0 mm crochet hook and worsted-weight yarn.
This pattern has been mathematically reviewed and constructionally checked, but it has not been physically crocheted and tested. Final size and proportions may vary depending on yarn, hook, tension, stuffing, and individual technique.
Project Overview
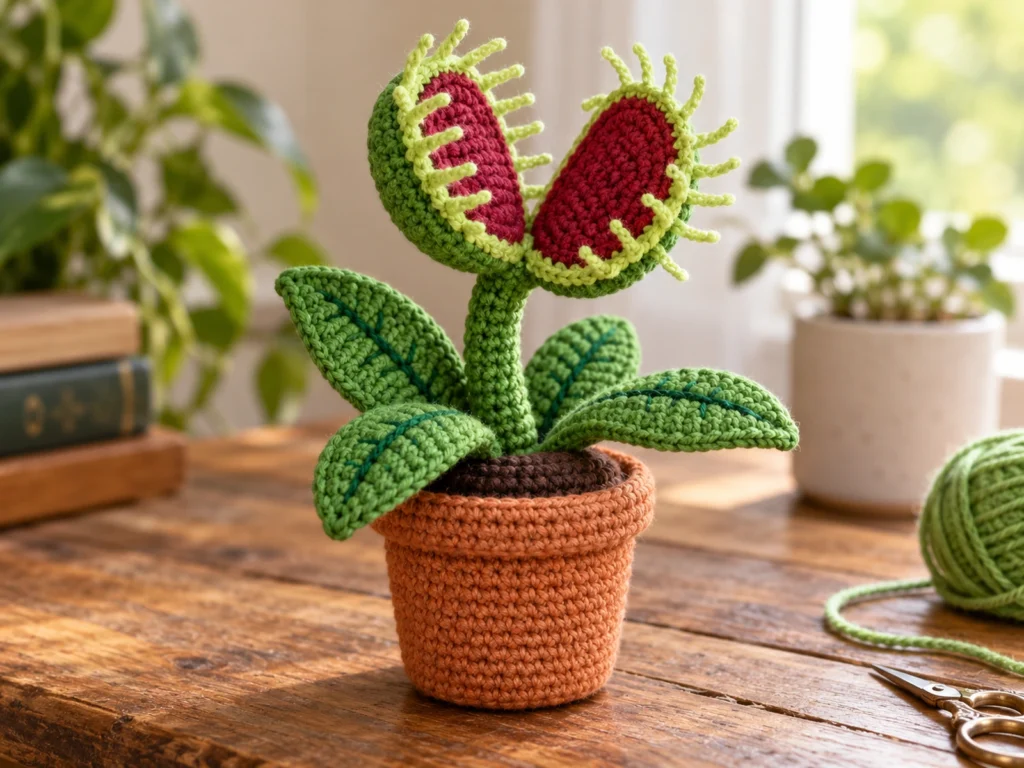
What You’ll Make
This Venus flytrap is assembled from several separate crochet pieces:
- 1 crochet pot
- 1 soil disk
- 1 stuffed stem
- 4 leaves
- 2 outer trap lobes
- 2 inner trap linings
- 16 crocheted cilia
The open flytrap is the main feature. Two matching green lobes are lightly stuffed, lined with a contrasting color, joined at a central hinge, and attached to the top of the stem.
Project Details
- Technique: Crochet amigurumi
- Yarn: Worsted-weight (#4)
- Hook: 4.0 mm
- Approximate finished size: 6–8 inches tall and 4–5 inches wide
- Eyes: None
- Filling: Polyester fiberfill
- Construction: Separate crocheted components assembled by sewing
The finished dimensions are approximate. Your final size can vary with yarn, hook size, tension, stuffing, and individual crochet technique.
Materials & Tools
Yarn
Use worsted-weight (#4) yarn in the following colors:
- Deep or forest green for the plant
- Burgundy, deep coral, or red for the inside of the trap
- Light green for the cilia
- Terracotta for the pot
- Dark brown for the soil
- Optional darker green for embroidered leaf veins
Exact yardage is not established for this pattern, so have enough yarn available for each component and keep extra yarn for sewing and finishing.
Crochet Hook
- 4.0 mm crochet hook
Other Supplies
- Polyester fiberfill
- Tapestry or yarn needle
- Scissors
- Stitch marker
Safety Note
No safety eyes are required for this botanical design.
Abbreviations
US crochet terminology:
- MR — magic ring
- ch — chain
- sc — single crochet
- inc — increase; 2 sc in the same stitch
- dec — single crochet decrease
- sl st — slip stitch
- BLO — back loop only
- FO — fasten off
Before You Start
The pot, soil disk, stem, leaves, trap lobes, and inner trap pieces are crocheted separately and assembled afterward.
Use a stitch marker to identify the beginning of continuous rounds.
For the leaves, work back and forth in rows. At the end of each row, ch 1 and turn; the turning chain is not counted as a stitch.
Keep your stitch count accurate, especially on increase and decrease rounds. The finished trap depends on both lobes being worked consistently.
When stuffing the stem and trap lobes, use a light to moderate amount of fiberfill. Overstuffing can change the intended shape and make assembly more difficult.
Crochet Venus Flytrap Pattern
Pot
Make 1.
Color: Terracotta
Work in continuous rounds.
Round 1
6 sc in MR. (6)
Round 2
6 inc. (12)
Round 3
(sc, inc) × 6. (18)
Round 4
(2 sc, inc) × 6. (24)
Round 5
(3 sc, inc) × 6. (30)
Round 6
30 sc. (30)
Round 7
30 sc. (30)
Round 8
30 sc. (30)
Round 9
30 sc. (30)
Round 10
30 sc. (30)
Round 11
(4 sc, inc) × 6. (36)
Round 12
36 sc. (36)
Round 13
36 sc. (36)
Round 14
36 sc. (36)
Round 15
36 sc BLO. (36)
Round 16
(5 sc, inc) × 6. (42)
Round 17
42 sc. (42)
Round 18
42 sc. (42)
Round 19
42 sc. (42)
FO and leave a long sewing tail.
Add a small amount of fiberfill inside the pot to help the walls hold their shape. Do not overstuff.
Soil Disk
Make 1.
Color: Dark brown
Work in continuous rounds.
Round 1
6 sc in MR. (6)
Round 2
6 inc. (12)
Round 3
(sc, inc) × 6. (18)
Round 4
(2 sc, inc) × 6. (24)
Round 5
(3 sc, inc) × 6. (30)
Round 6
(4 sc, inc) × 6. (36)
Round 7
(5 sc, inc) × 6. (42)
Round 8
42 sc. (42)
FO and leave a long sewing tail.
Do not stuff the soil disk.
Stem
Make 1.
Color: Green
Work in continuous rounds.
Round 1
10 sc in MR. (10)
Round 2
10 sc. (10)
Round 3
10 sc. (10)
Round 4
10 sc. (10)
Round 5
10 sc. (10)
Round 6
10 sc. (10)
Round 7
10 sc. (10)
Round 8
10 sc. (10)
Round 9
10 sc. (10)
Round 10
10 sc. (10)
Round 11
10 sc. (10)
Round 12
10 sc. (10)
Round 13
(4 sc, inc) × 2. (12)
Round 14
12 sc. (12)
Round 15
12 sc. (12)
Add light stuffing as you work.
FO, leaving a long tail. Weave the tail through the final 12 stitches and pull the opening closed.
Leaves
Make 4.
Color: Green
Work in rows.
Row 1
Ch 9; sc in 2nd ch from hook and across. (8)
Row 2
8 sc. (8)
Row 3
inc, 6 sc, inc. (10)
Row 4
10 sc. (10)
Row 5
inc, 8 sc, inc. (12)
Row 6
12 sc. (12)
Row 7
dec, 8 sc, dec. (10)
Row 8
10 sc. (10)
Row 9
dec, 6 sc, dec. (8)
Row 10
dec, 4 sc, dec. (6)
Row 11
dec, 2 sc, dec. (4)
Row 12
2 dec. (2)
Row 13
dec. (1)
FO and leave a long sewing tail.
Make 4 matching leaves.
Optional Leaf Veins
For additional botanical detail, use darker green yarn to embroider one loose line from the wider base toward the pointed tip of each leaf.
Keep the embroidery relaxed so the leaf does not pucker.
Outer Trap Lobes
Make 2.
Color: Green
Work in continuous rounds.
Round 1
6 sc in MR. (6)
Round 2
6 inc. (12)
Round 3
(sc, inc) × 6. (18)
Round 4
(2 sc, inc) × 6. (24)
Round 5
(3 sc, inc) × 6. (30)
Round 6
(4 sc, inc) × 6. (36)
Round 7
36 sc. (36)
Round 8
36 sc. (36)
Round 9
(4 sc, dec) × 6. (30)
Round 10
30 sc. (30)
Round 11
(3 sc, dec) × 6. (24)
Round 12
24 sc. (24)
Round 13
(2 sc, dec) × 6. (18)
Round 14
18 sc. (18)
Round 15
(sc, dec) × 6. (12)
Round 16
6 dec. (6)
Add light stuffing before completing the final decreases.
The lobe should be dimensional without becoming firmly stuffed.
FO and leave a long sewing tail.
Make 2 identical lobes.
Inner Trap Linings
Make 2.
Color: Burgundy, deep coral, or red
Work in continuous rounds.
Round 1
6 sc in MR. (6)
Round 2
6 inc. (12)
Round 3
(sc, inc) × 6. (18)
Round 4
(2 sc, inc) × 6. (24)
Round 5
(3 sc, inc) × 6. (30)
Round 6
30 sc. (30)
Round 7
(3 sc, dec) × 6. (24)
Round 8
24 sc. (24)
Round 9
(2 sc, dec) × 6. (18)
Round 10
18 sc. (18)
Round 11
(sc, dec) × 6. (12)
Round 12
6 dec. (6)
Do not stuff.
FO and leave a sewing tail.
Make 2 matching inner linings.
Assemble the Trap
Step 1: Attach the Inner Trap Linings
Place one inner lining piece on the front of one green outer lobe.
Center it so a visible green border remains around the outside.
Sew the lining around its perimeter.
Repeat with the second lobe.
Avoid pulling the sewing yarn too tightly, since this can distort the rounded outer piece.
Step 2: Create the Trap Hinge
Place the two finished lobes together at their narrow ends.
Sew approximately the first 6-stitch section of each lobe together.
This joined section forms the center hinge of the flytrap.
Keep the remaining edges separate so the trap stays open.
Spread the two lobes into a shallow V shape with the contrasting inner surfaces facing inward.
Step 3: Add the Cilia
Use light green yarn.
Create 8 cilia on each lobe, for 16 total.
For each cilium:
ch 3, sl st in 2nd ch from hook, sl st into the selected edge stitch.
Place the cilia visually along the curved outer edge of each lobe.
Keep the placement reasonably mirrored from one side to the other and avoid placing them across the sewn hinge.
Final Assembly
Step 1: Attach the Soil
Place the soil disk into the opening at the top of the pot.
Sew the outer edge of the disk to the top/inside edge of the pot so the soil sits securely and relatively flat.
Step 2: Attach the Stem
Center the bottom of the stem on the soil surface.
Sew around the base of the stem securely.
Check that the stem remains upright before finishing the sewing.
Step 3: Attach the Leaves
Arrange the four leaves around the stem:
- one toward the front
- one toward the back
- one toward the left
- one toward the right
Sew the wider end of each leaf to the soil and stem area.
Before making the stitches permanent, check the arrangement from several angles so the plant stays visually balanced.
Step 4: Attach the Trap
Position the hinged trap at the top of the stem.
Center the hinge above the stem and sew the lower/back portion of the trap securely to the stem.
Keep the two lobes open.
View the project from the front and side before completing the final stitches.

Finishing
Weave in all remaining yarn ends securely.
Trim excess yarn after the ends are safely secured.
Check the finished piece from multiple angles and gently shape the leaves and trap lobes as needed.
The trap should remain visibly open, with the contrasting inner surfaces facing inward.
Helpful Tips
Keep the trap lightly stuffed
The flytrap lobes need enough filling to look dimensional, but too much stuffing can flatten the intended open shape or make assembly more difficult.
Match both trap lobes carefully
The two lobes are identical by design. Compare them before sewing so the finished trap stays balanced.
Use visual placement during assembly
Exact placement measurements have not been physically established for this design. For the stem, leaves, hinge, and trap, use the overall silhouette as your guide.
Keep stuffing away from sewing edges
When joining the trap components, move loose fiberfill toward the center so the sewing edge remains easy to work with.
Check the soil fit before sewing
The soil disk and pot are both designed around a 42-stitch circumference at their joining point. Check the fit before permanently attaching the disk.
Troubleshooting
My leaf looks uneven. What should I check?
Check the stitch count at the end of every row. A missed increase or decrease can noticeably change the leaf shape.
My trap looks too flat.
Try redistributing the stuffing instead of adding a large amount. The outer lobes are meant to be lightly stuffed, and the open V shape comes from the way the two lobes are joined and positioned.
My two trap lobes do not match.
Make sure both lobes were worked with the same number of rounds and consistent tension. Compare them before attaching the inner linings.
The inner lining puckers.
Loosen the sewing tension and work around the perimeter gradually instead of pulling the yarn tightly after every stitch.
My stem leans.
Check the amount of stuffing inside the stem and make sure its base is centered on the soil before sewing. An uneven attachment point can also affect the final angle.
My leaves seem crowded.
Temporarily hold all four leaves in place before sewing. Small changes in their orientation can create a more balanced silhouette.
Customization Ideas
Change the plant colors
A green-and-red combination gives the project a classic Venus flytrap appearance, but different shades of green or a warmer inner trap color can create a different look.
Change the pot color
Terracotta creates a traditional potted-plant appearance. Other earthy shades can give the finished piece a different decorative style.
Try a darker botanical palette
Deep green leaves with a rich burgundy interior can create a more dramatic look without changing the basic construction.
Add embroidered leaf veins
A few simple embroidered lines can add botanical detail while keeping the leaves flat and lightweight.
For substantial size changes, remember that changing yarn or hook size also affects the proportions and may require adjustments to the component relationships.

Frequently Asked Questions
What crochet terminology does this pattern use?
This pattern uses standard US crochet terminology, including sc, inc, dec, MR, sl st, BLO, and FO.
What type of yarn is used?
The design is written for worsted-weight (#4) yarn.
Does this pattern use safety eyes?
No. This Venus flytrap is designed as a botanical amigurumi and does not require a face or safety eyes.
How big is the finished Venus flytrap?
The intended finished size is approximately 6–8 inches tall and 4–5 inches wide. Actual size varies with yarn, hook, tension, stuffing, and individual technique.
Is the pattern physically tested?
Not yet. The stitch mathematics and construction logic have been reviewed, but this version has not been physically crocheted and tested.
Can I change the colors?
Yes. The design can be customized with different plant, inner-trap, pot, and soil colors while keeping the same basic construction.
Can I make the leaves a different size?
A size change is possible, but changing the leaf dimensions can affect the overall balance of the plant. Test the proportions before making all four leaves if you significantly alter the design.
Final Notes
This crochet Venus fly trap design is built as a standalone botanical amigurumi with a potted base, four leaves, and an open two-lobed trap.
The finished piece is intended as a decorative crochet project, and its final appearance will vary with yarn, tension, hook size, stuffing, and individual technique.