
Free Crochet Acorn Pattern – Cute Textured Acorn Amigurumi
This free crochet acorn pattern makes a small woodland-inspired amigurumi…
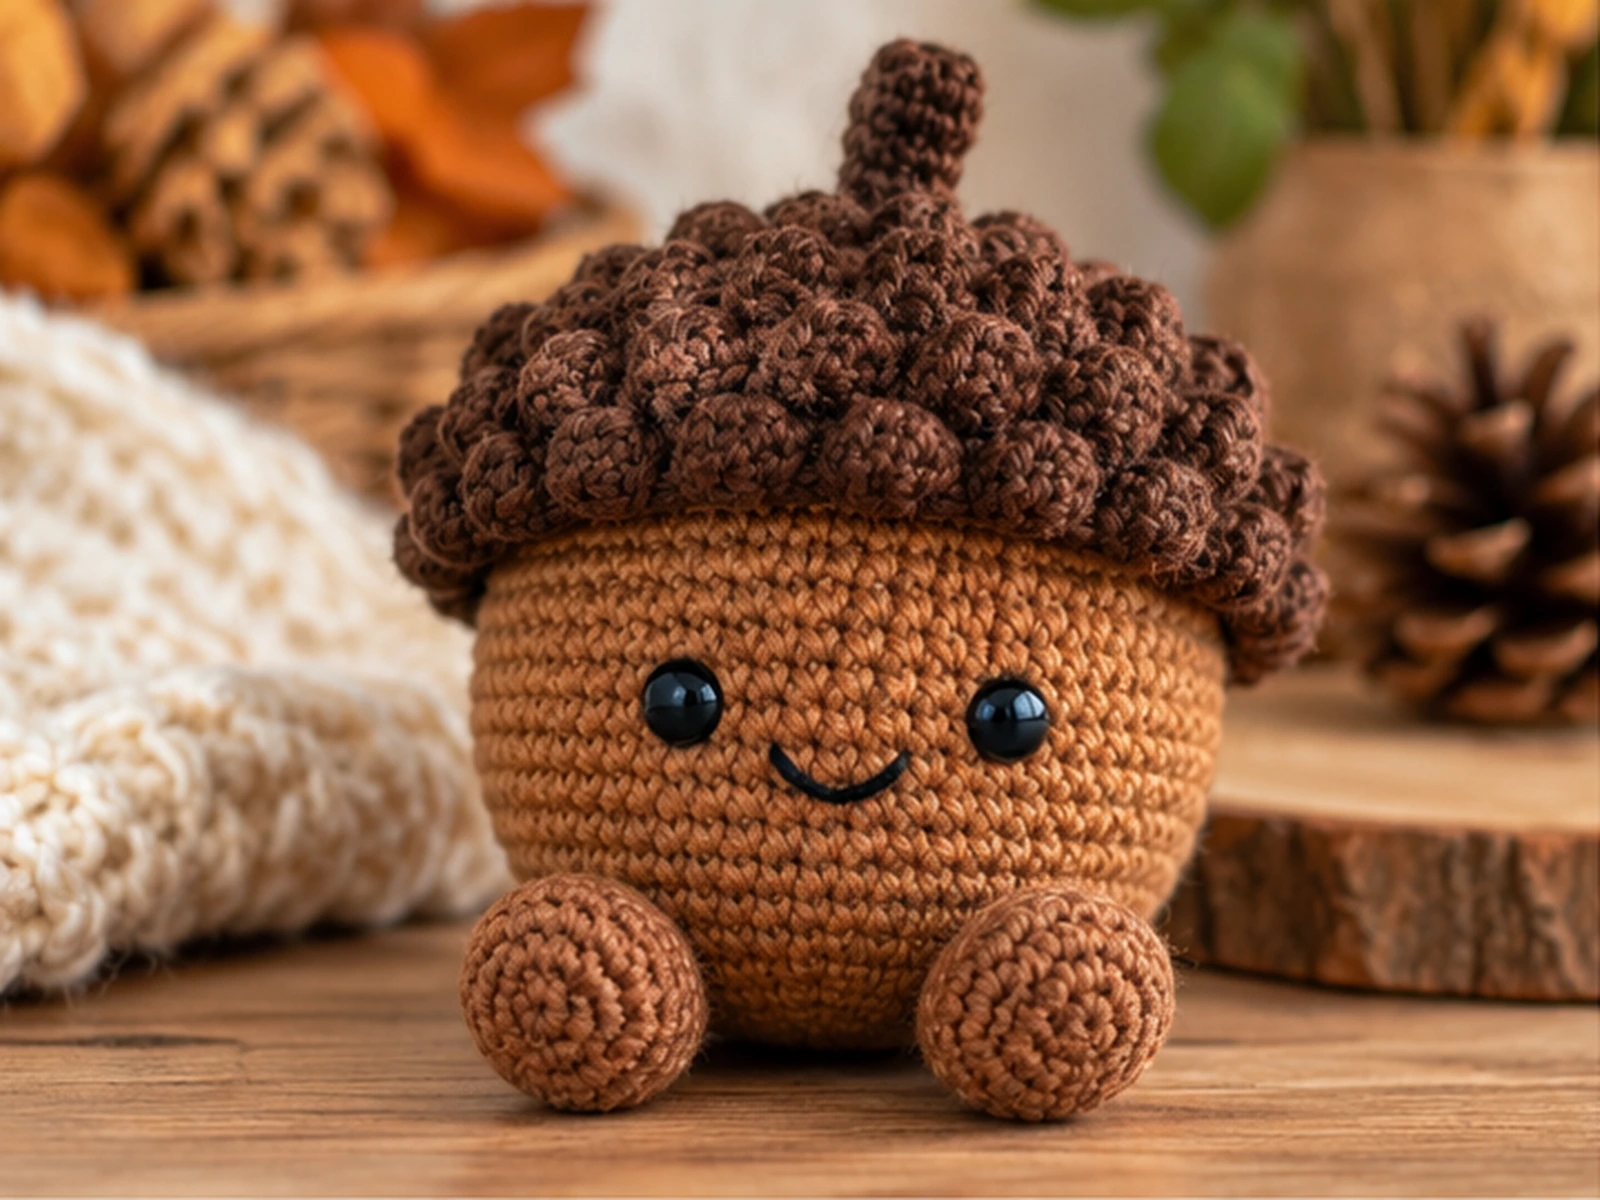
This free crochet acorn pattern makes a small woodland-inspired amigurumi with a rounded brown body, a raised textured cap, a little stem, tiny feet, and a sweet embroidered smile. The separate cap is the standout feature, with two rounds of bobbles that create a fun, bumpy texture.
The pattern uses US crochet terms and includes the complete body, cap, feet, stem, facial details, assembly, troubleshooting, and customization ideas.
About This Crochet Acorn
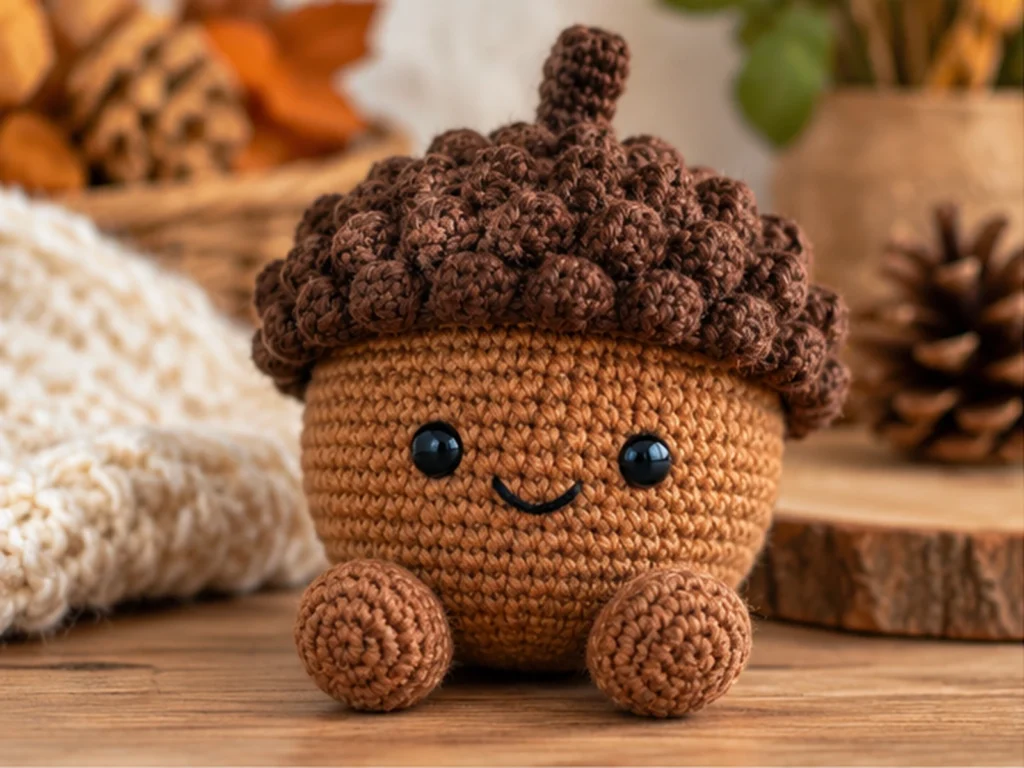
This crochet acorn is designed as a small character-style amigurumi rather than a flat decoration. The body is stuffed to create a rounded shape, while the cap is crocheted separately and finished with raised bobble stitches.
What You’ll Make
You’ll crochet:
- 1 acorn body
- 1 textured cap
- 2 feet
- 1 stem
- 2 safety eyes
- 1 embroidered smile
The finished acorn is approximately 4–4.5 inches tall, including the stem. Final size can vary with yarn, hook size, tension, stuffing, and individual technique.
How the Acorn Is Constructed
The body and cap are made separately. The body is stuffed and closed, then the cap is sewn around the upper portion of the body. The stem is attached to the center of the cap, and the two feet are sewn onto the lower front.
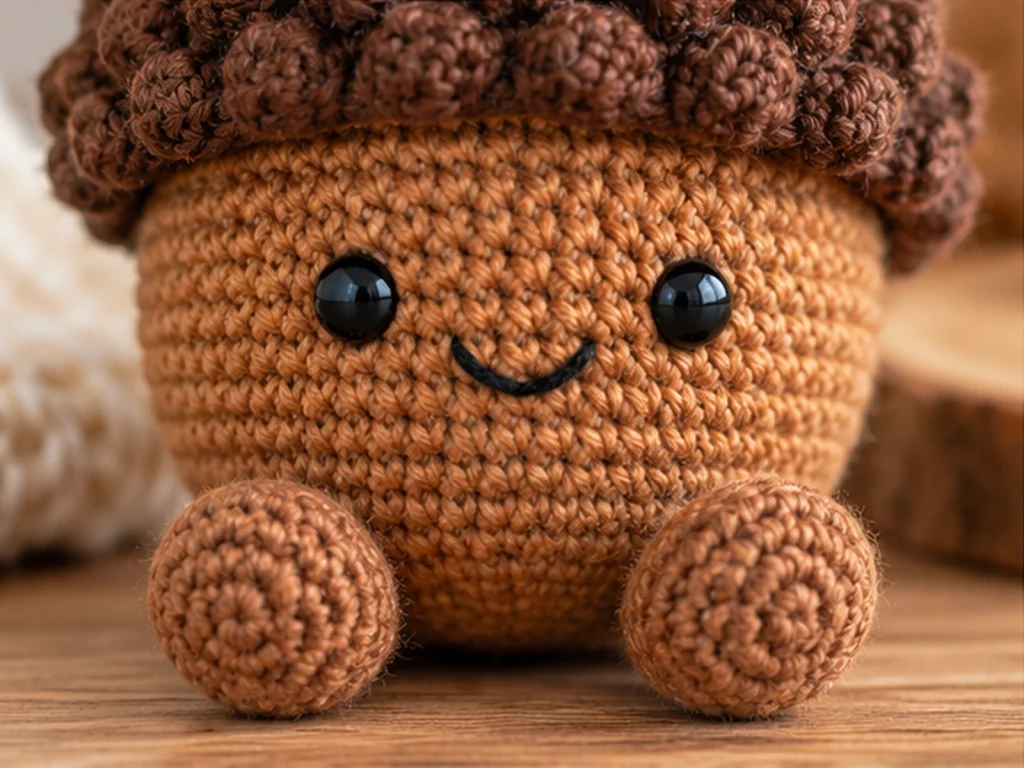
The face is finished with 6 mm safety eyes and a small embroidered smile.
Materials & Tools
For this design, you’ll need:
- Medium #4 worsted-weight yarn in medium brown
- Medium #4 worsted-weight yarn in dark brown
- Black embroidery yarn or thread for the smile
- 3.5 mm crochet hook
- 6 mm safety eyes
- Polyester fiberfill
- Yarn needle
- Stitch marker
- Scissors
No specific yarn brand is required. Different yarns or hook sizes will affect the finished size and stitch appearance.
Safety Note
Safety eyes are small components and can present a choking hazard. They are not appropriate for children under 3.
Abbreviations
This pattern uses standard US crochet terminology.
- MR — magic ring
- ch — chain
- sc — single crochet
- inc — increase, 2 sc in the same stitch
- dec — invisible single-crochet decrease
- bo — 5-dc bobble, counted as 1 stitch
- sl st — slip stitch
- FO — fasten off
- st/sts — stitch/stitches
Special Stitch: 5-dc Bobble
To make the bobble, work five partial double crochets into the same stitch. After the fifth partial double crochet, you’ll have six loops on your hook. Yarn over and draw through all six loops.
The completed bobble counts as 1 stitch.
Before You Start
Work the body, cap, and stem in continuous rounds unless noted otherwise. A stitch marker is helpful for keeping track of the first stitch of each round.
Keep your tension fairly firm so the stuffing does not show through the body.
Stuff the body gradually as you work. The goal is a rounded acorn shape without stretching the stitches apart.
The cap is not stuffed. Its final 36-stitch round matches the 36-stitch body round used for attachment.
This pattern has been mathematically reviewed and constructionally checked, but it has not been physically crocheted and tested on a prototype yet. Treat the finished size as approximate.
Free Crochet Acorn Pattern
Acorn Body
Color: medium brown
The body starts at the bottom, expands to its widest section, then tapers toward the top.
Round 1
6 sc in MR. (6)
Round 2
6 inc. (12)
Round 3
(sc, inc) × 6. (18)
Round 4
(2 sc, inc) × 6. (24)
Round 5
(3 sc, inc) × 6. (30)
Round 6
(4 sc, inc) × 6. (36)
Round 7
sc around. (36)
Round 8
sc around. (36)
Round 9
sc around. (36)
Round 10
(4 sc, dec) × 6. (30)
Round 11
sc around. (30)
Round 12
(3 sc, dec) × 6. (24)
Round 13
sc around. (24)
Position the Safety Eyes
Before the body becomes too narrow, position the two 6 mm safety eyes on the upper front of the stuffed body.
Keep them in the exposed face area below the cap’s eventual lower edge. Before permanently securing the eyes, temporarily hold the cap in its finished position and check from the front that both eyes will remain fully visible once the cap is attached.
Compare both sides carefully before securing the eye backs.
Round 14
(2 sc, dec) × 6. (18)
Begin adding stuffing gradually. Shape the body as you go so it stays rounded without becoming overly firm.
Round 15
(sc, dec) × 6. (12)
Add the remaining stuffing as needed.
Round 16
6 dec. (6)
Fasten off, leaving a yarn tail. Close the remaining opening and weave in the end.
Textured Acorn Cap
Color: dark brown
The cap is crocheted separately and left unstuffed.
Round 1
6 sc in MR. (6)
Round 2
6 inc. (12)
Round 3
(sc, inc) × 6. (18)
Round 4
(2 sc, inc) × 6. (24)
Round 5
(3 sc, inc) × 6. (30)
Round 6
(4 sc, inc) × 6. (36)
Round 7
(bo, sc) × 18. (36)
Round 8
sc around. (36)
Round 9
(bo, sc) × 18. (36)
Round 10
sc around. (36)
Fasten off, leaving a long sewing tail.
Tips for an Even Cap Texture
The bobble rounds create the raised surface that gives this acorn its textured look.
Try to keep the bobbles similar in size throughout the round. Avoid pulling some bobbles much tighter than others, since uneven tension can make the cap look irregular.

Crochet the Feet
Color: medium brown
Make 2.
The feet are worked as small flattened ovals and are not stuffed.
Foundation Chain
Ch 5.
Round 1
Starting in the 2nd ch from hook:
sc in the next 3 chains, 3 sc in the final chain, continue along the underside of the foundation chain with sc in the next 2 chains, then 2 sc in the final chain. (10)
Continue around the foundation chain without turning.
Round 2
inc, 2 sc, 3 inc, 2 sc, 2 inc. (16)
Round 3
sc around. (16)
Round 4
(2 sc, dec) × 4. (12)
Fasten off, leaving a sewing tail.
Flatten the piece gently into a small oval and repeat for the second foot.
Crochet the Stem
Color: dark brown
Round 1
6 sc in MR. (6)
Round 2
(inc, sc) × 3. (9)
Round 3
sc around. (9)
Round 4
sc around. (9)
Round 5
sc around. (9)
Add a small amount of stuffing.
Round 6
(sc, dec) × 3. (6)
Round 7
3 dec. (3)
Fasten off, leaving a sewing tail.
Do not overstuff the stem. It should remain small and slightly flexible.
Facial Details
Eyes
The 6 mm safety eyes are positioned on the exposed front of the body below the cap area.
Before securing them, temporarily place the cap over the body and check that both eyes remain completely visible and balanced from the front.
This visual check is important because yarn tension and stuffing can slightly change the final shape.
Embroidered Smile
Use black embroidery yarn or thread to stitch a small curved smile underneath the eyes.
Keep the smile centered visually between the eyes.
Assemble the Crochet Acorn
Step 1: Attach the Cap
Place the finished cap over the upper portion of the body.
The cap’s final round contains 36 stitches, matching the body’s 36-stitch Round 9.
Align the cap evenly around the body and check the acorn from the front, back, and sides before sewing.
Using the cap’s long yarn tail, sew the cap securely around the full circumference.
Step 2: Attach the Stem
Center the 3-stitch base of the stem over the middle of the cap.
Sew it securely in place and check the stem from several angles so it stays upright.
Step 3: Attach the Feet
Place one foot on each lower front side of the body.
Compare both sides from the front before sewing them permanently.
Once the placement looks balanced, sew the upper edge of each foot securely to the body.
Step 4: Final Face Check
Look at the finished acorn straight on.
Check that:
- both eyes are fully visible below the cap,
- the eyes look balanced,
- the smile is centered,
- the cap sits evenly,
- the stem is centered,
- the feet look balanced.
Weave in any remaining yarn tails and gently reshape the finished piece.
Helpful Tips & Troubleshooting
The Body Looks Too Firm
Use a little less stuffing. The goal is to fill the shape without stretching the stitches.
Stuffing Is Showing Through
Check your crochet tension. Looser stitches create larger spaces between the fibers. Adding stuffing gradually can also help prevent stretching.
The Cap Looks Uneven
Check your bobble tension and make sure the cap has not been pulled tighter on one side during sewing.
When attaching the cap, work gradually around the rim instead of tightening one small section completely before moving to the next.
The Eyes Seem Too High
Temporarily loosen the cap and check the relationship between the eye position and the cap’s lower edge.
The eyes should remain completely visible in the exposed face area beneath the cap.
If necessary, reposition the eyes before permanently securing them.
The Stem Leans
Check the stem from the front and side before finishing the final stitches. Small adjustments while sewing can improve the finished silhouette.
The Feet Look Uneven
Compare both feet from straight on before making the final stitches. Small placement adjustments are easier before the pieces are firmly attached.
Customize Your Crochet Acorn
Try Different Color Combinations
A medium-brown body with a darker cap creates a classic acorn look, but different brown shades can give the character a softer or warmer appearance.
Change the Expression
Keep the eyes balanced while changing the embroidered smile for a different personality.
Add a Small Bow
A tiny handmade bow can be attached after the main assembly is finished for an optional decorative touch.
Embroider the Eyes
Embroidered eyes are an alternative to plastic safety eyes. The final appearance will depend on your embroidery technique and tension.
Frequently Asked Questions
Is this an official Jellycat pattern?
No. This is an original Tiny Yarn Tales crochet design and is not an official pattern from Jellycat or another plush brand.
What size is the finished crochet acorn?
The finished acorn is approximately 4–4.5 inches tall, including the stem. Final size varies with yarn, hook size, tension, stuffing, and individual technique.
What yarn should I use?
This design was planned around medium #4 worsted-weight yarn.
Can I use plush yarn instead?
You can experiment with plush or blanket-style yarn, but the finished size, stitch visibility, stuffing behavior, and bobble definition may change.
Can I embroider the eyes instead of using safety eyes?
Yes. Embroidered eyes are a reasonable alternative when you prefer not to use plastic safety eyes.
Can I sell finished acorns made from this pattern?
Finished-item selling terms should follow the final Tiny Yarn Tales pattern-use policy. Add the site’s current policy before publication if one is provided.
Is this crochet acorn pattern beginner-friendly?
A formal difficulty level has not been established for this design. You should be comfortable with basic amigurumi techniques such as a magic ring, single crochet, increases, decreases, stuffing, and sewing pieces together.
More Crochet Patterns to Explore
Explore more woodland-inspired and small amigurumi projects from Tiny Yarn Tales.
Final Thoughts
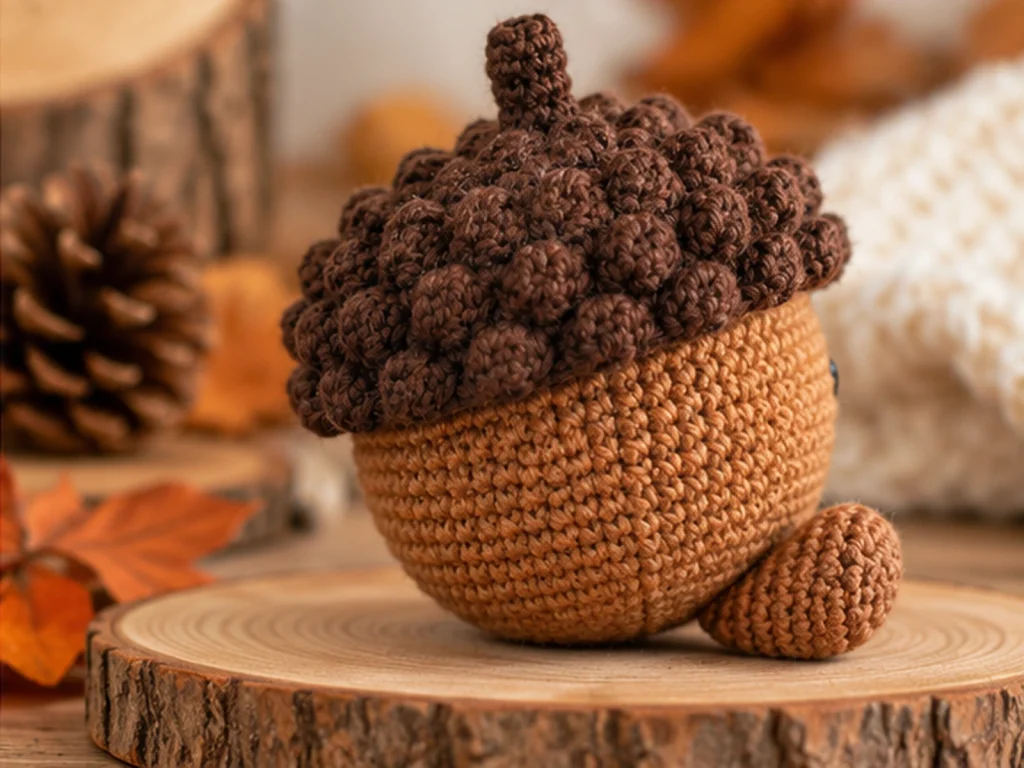
This crochet acorn combines a simple rounded shape with a textured cap, little feet, a stem, and a sweet embroidered face.
The separate cap makes the raised bobble texture stand out, while the simple color changes give you plenty of room to personalize the finished character.
Happy crocheting!