
Mini Pie Crochet Pattern: A Tiny Lattice-Topped Amigurumi
This mini pie crochet pattern creates a small, shallow pie…

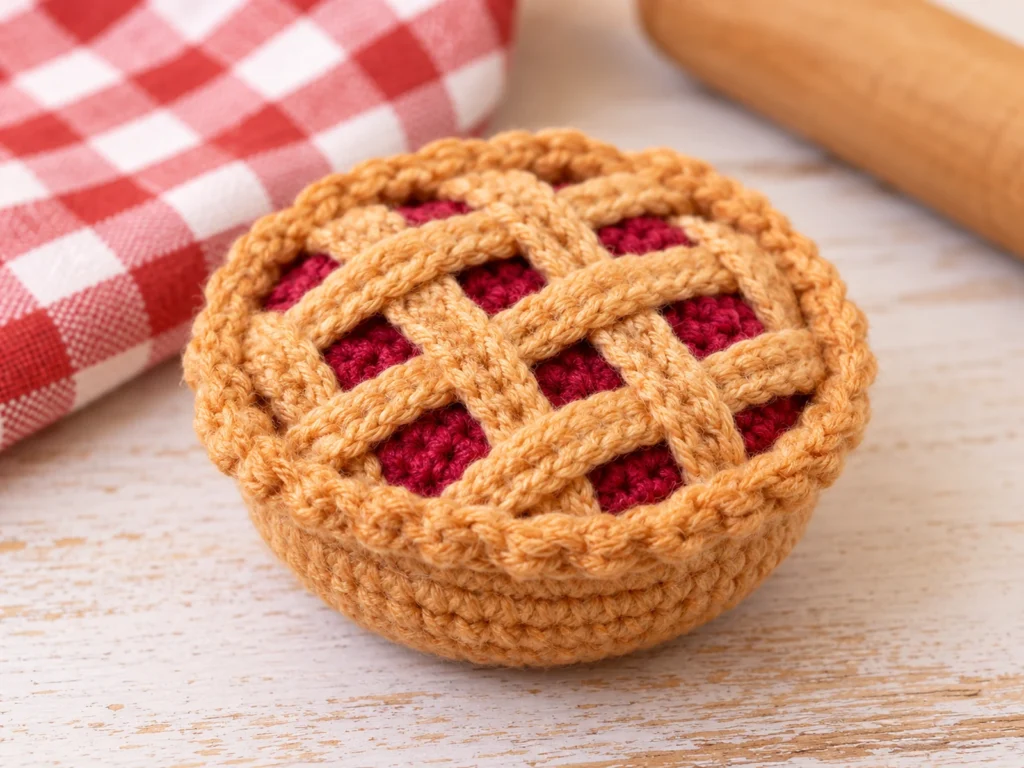
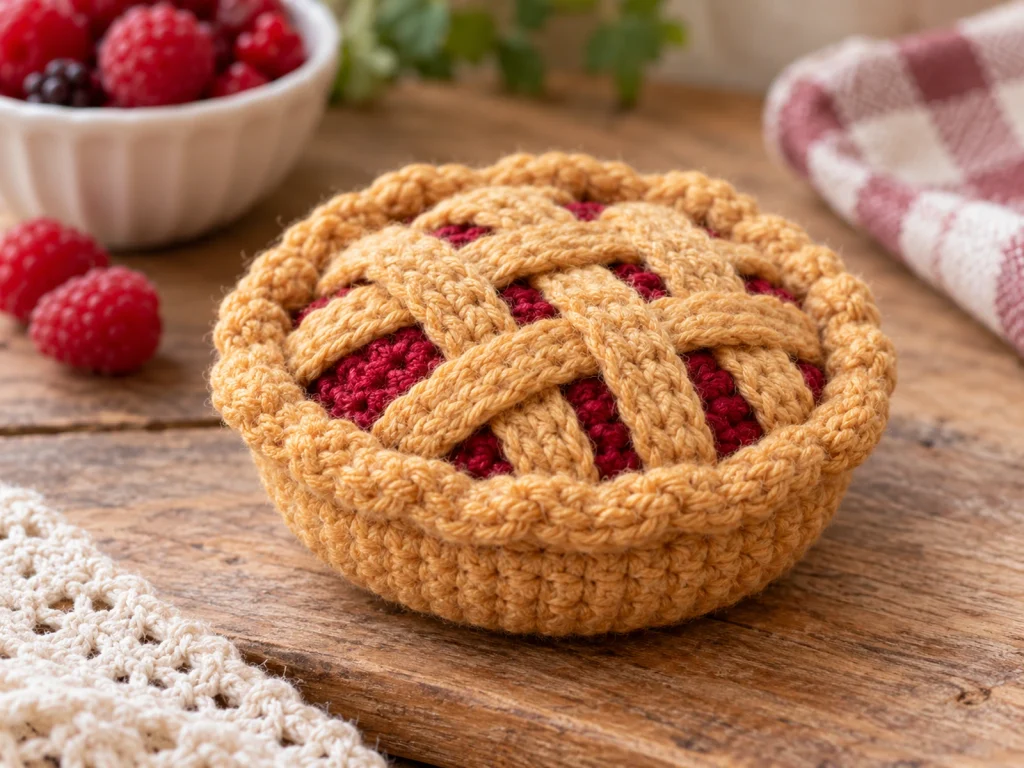
This mini pie crochet pattern creates a small, shallow pie with a golden-brown crust, berry-colored filling, and a simple woven lattice topping. The design is made from a few separate crocheted pieces and finished with straightforward sewing and shaping.
The target finished size is approximately 2.5–3 inches (6.5–7.5 cm) in diameter and 1–1.25 inches (2.5–3 cm) tall. Actual size will vary with yarn, hook, tension, stuffing, and individual technique.
Project Overview
What You’ll Make
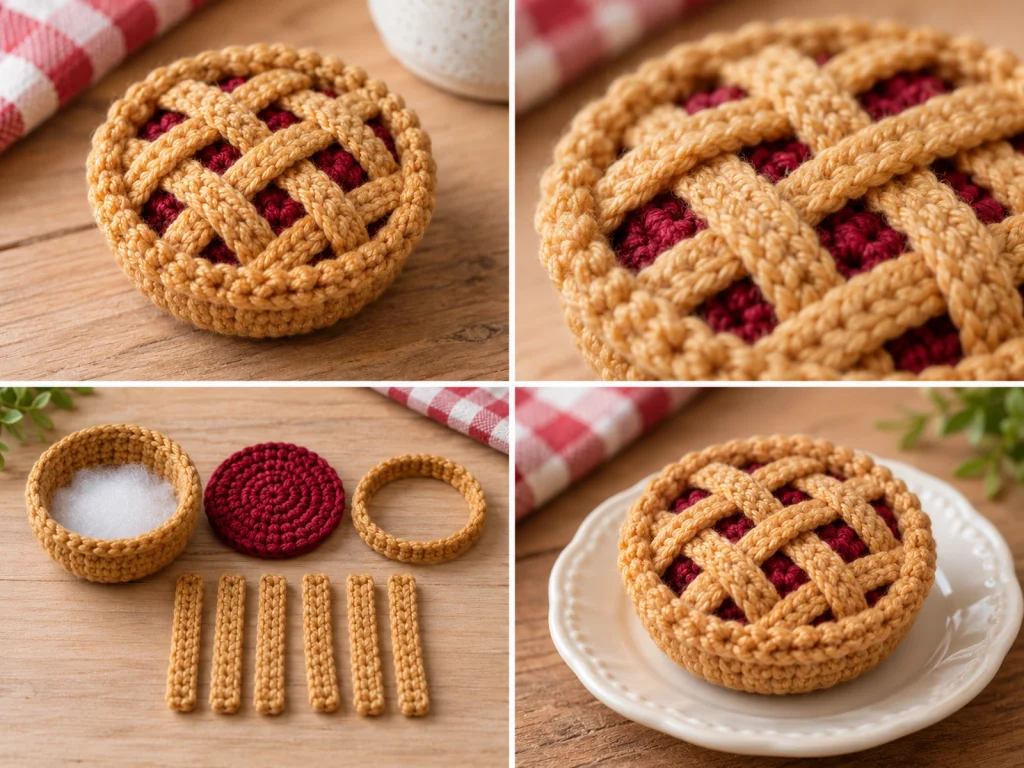
This design is built from four main parts:
- One shallow pie body
- One berry-colored filling disk
- One crust rim
- Six narrow lattice strips
The body is stuffed lightly to maintain a shallow pie shape. The filling is sewn to the top, the crust rim finishes the edge, and the six strips are arranged in a crossed lattice.
Project Details
- Project: Mini pie crochet pattern
- Technique: Amigurumi crochet
- Yarn: Medium #4 worsted-weight yarn
- Hook: 3.5 mm crochet hook
- Main color: Golden-brown
- Filling color: Deep berry red
- Stuffing: Polyester fiberfill
- Approximate finished size: 2.5–3 inches in diameter and 1–1.25 inches tall
The pattern has been mathematically reviewed and constructionally checked, but it has not been physically crocheted and tested yet.
Materials & Tools
- Medium #4 worsted-weight yarn in golden-brown
- Medium #4 worsted-weight yarn in deep berry red
- 3.5 mm crochet hook
- Polyester fiberfill
- Yarn needle
- Scissors
- Stitch marker
Abbreviations
- MR — magic ring
- ch — chain
- sc — single crochet
- inc — increase
- BLO — back loop only
- sl st — slip stitch
- FO — fasten off
Before You Start
Work in Continuous Rounds
The pie body and filling disk are worked in continuous rounds. Use a stitch marker to keep track of the beginning of each round.
Count Your Stitches
The shaping rounds increase by six stitches at a time. The pie body and filling disk both finish with 42 stitches, which makes their edges compatible during assembly.
Stuff Lightly
The pie body should stay relatively shallow. Use light-to-moderate stuffing and avoid overfilling it into a rounded shape.
Shape Before Sewing
After stuffing, gently shape the body so the sides remain even and the top opening stays suitable for attaching the filling disk.
Construction Order
For the cleanest finish, complete the body, filling disk, crust rim, and all six lattice strips before beginning the final assembly.
Mini Pie Crochet Pattern
Pie Body
Make 1 in golden-brown.
Work in continuous rounds.
Round 1
6 sc in MR. (6)
Round 2
6 inc. (12)
Round 3
(sc, inc) × 6. (18)
Round 4
(2 sc, inc) × 6. (24)
Round 5
(3 sc, inc) × 6. (30)
Round 6
(4 sc, inc) × 6. (36)
Round 7
(5 sc, inc) × 6. (42)
Round 8
BLO sc around. (42)
Round 9
sc around. (42)
Round 10
sc around. (42)
Round 11
sc around. (42)
Fasten off, leaving a long yarn tail for sewing.
Add a light-to-moderate amount of polyester fiberfill through the open top.
Filling Disk
Make 1 in deep berry red.
Work in continuous rounds.
Round 1
6 sc in MR. (6)
Round 2
6 inc. (12)
Round 3
(sc, inc) × 6. (18)
Round 4
(2 sc, inc) × 6. (24)
Round 5
(3 sc, inc) × 6. (30)
Round 6
(4 sc, inc) × 6. (36)
Round 7
(5 sc, inc) × 6. (42)
Fasten off, leaving a long yarn tail for sewing.
Crust Rim
Make 1 in golden-brown.
Chain 42 and join with a sl st to the first chain. Make sure the chain is not twisted.
Round 1
sc around. (42)
Round 2
sc around. (42)
Fasten off, leaving a long yarn tail for sewing.
Lattice Strips
Make 6 in golden-brown.
For each strip:
Foundation: ch 18
Row 1
Starting in the 2nd ch from the hook, sc across. (17)
Fasten off, leaving a long yarn tail.
Repeat until you have six matching strips.
Assemble the Mini Pie
Step 1: Attach the Filling
Place the berry-colored filling disk over the open top of the stuffed pie body.
The filling disk and the body opening are both designed around 42 stitches. Match the edge of the filling evenly around the opening and sew it securely in place.
Keep the disk centered and avoid pulling the seam too tightly.
Step 2: Add the Crust Rim
Position the golden-brown crust ring around the edge where the filling meets the pie body.
Sew the ring securely around the top edge. The rim helps create a clean finished transition between the crust and filling.
Step 3: Position the Lattice
Arrange the six golden-brown strips over the berry filling.
Place three strips diagonally in one direction and three strips crossing them in the opposite direction.
Before sewing, check that:
- The lattice is centered
- The spacing looks balanced
- The strip ends remain inside the crust rim
- The crossed pattern looks even from above
Once you are happy with the placement, secure the strip ends to the filling area.
Add a few small securing stitches where the strips cross to help keep the lattice in position.
Finishing
Gently shape the finished pie by hand.
Check that:
- The body remains shallow
- The filling sits relatively flat
- The crust rim stays upright
- The lattice remains centered
- No stuffing is visible
Weave in the remaining yarn ends and trim the excess.
Helpful Tips
Keep the Body Shallow
The pie is designed with a broad, low profile. Too much stuffing can make the body look more rounded than intended.
Watch the Stitch Counts
The body and filling both finish with 42 stitches. Keeping those counts correct makes the assembly more straightforward.
Arrange the Lattice Before Sewing
Place all six strips on the filling before attaching them permanently. This gives you room to adjust the spacing and crossing pattern.
Keep the Crust Join Neat
The crust rim is designed to cover the join between the filling and outer body, so take your time when sewing around this area.
Troubleshooting
My pie looks too round.
The body may be overstuffed. Remove a small amount of fiberfill and reshape the sides into a shallower profile.
The filling does not sit flat.
Check that the filling disk is centered before sewing. Make sure the stitches are distributed evenly around the 42-stitch edge.
My lattice looks uneven.
Reposition the strips before making the final securing stitches. Viewing the pie from directly above makes uneven spacing easier to spot.
I lost track of my stitch count.
Return to the previous round and recount the stitches before continuing. The body and filling follow a six-stitch increase progression through Round 7.
Customization Ideas
Change the Filling Color
Try a different filling shade while keeping the same construction. A new color can give the pie a completely different look.
Change the Crust Shade
A lighter or darker golden-brown can change the appearance of the finished crust while keeping the pattern structure the same.
Adjust the Lattice Arrangement
Experiment with the spacing and placement of the six strips before sewing them down. Arrange the pieces until the top looks balanced.
Frequently Asked Questions
What yarn weight is used for this mini pie?
The pattern is designed for medium #4 worsted-weight yarn.
What crochet hook size is used?
Use a 3.5 mm crochet hook.
How big is the finished crochet pie?
The target size is approximately 2.5–3 inches in diameter and 1–1.25 inches tall. The actual finished size will vary with yarn, hook, tension, stuffing, and individual technique.
How many lattice strips are needed?
You will make six identical lattice strips. Each strip begins with a chain of 18 and finishes with 17 single crochet stitches.
Can I change the filling color?
Yes. Changing the filling color is a simple way to create a different pie-inspired look without changing the basic construction.
Has this crochet pie pattern been physically tested?
Not yet. The pattern has been mathematically reviewed and constructionally checked, but it has not been physically crocheted and tested.
