
Mini Suitcase Crochet Pattern: A Tiny Amigurumi Project
This mini suitcase crochet pattern creates a tiny travel-inspired crochet…

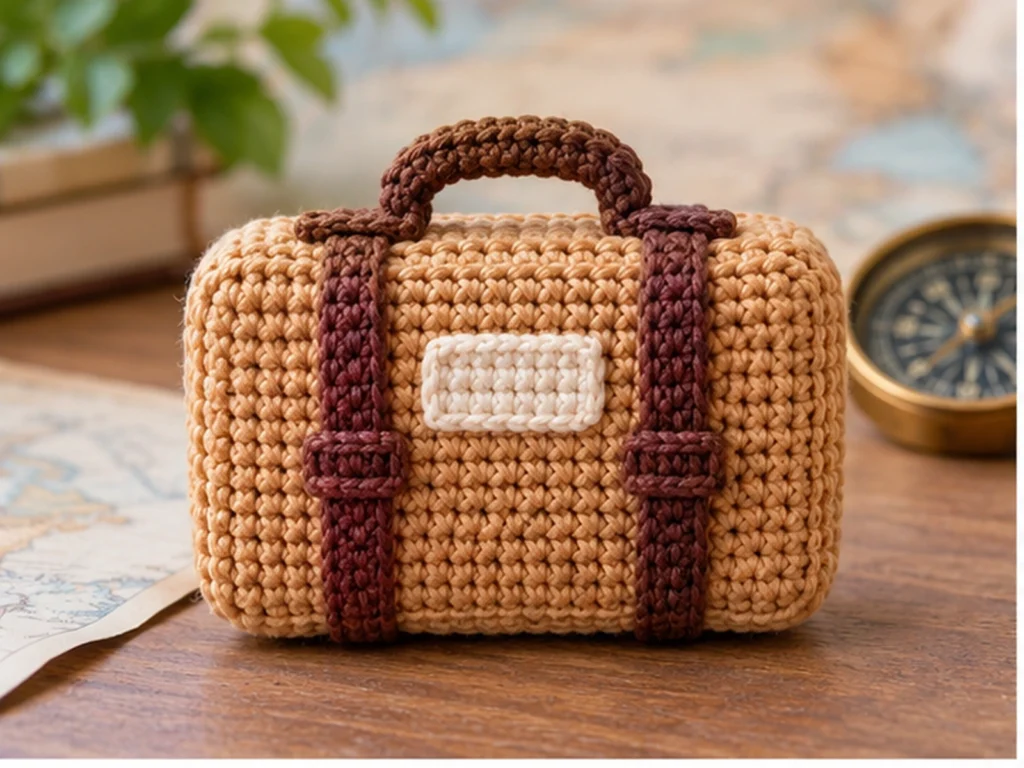
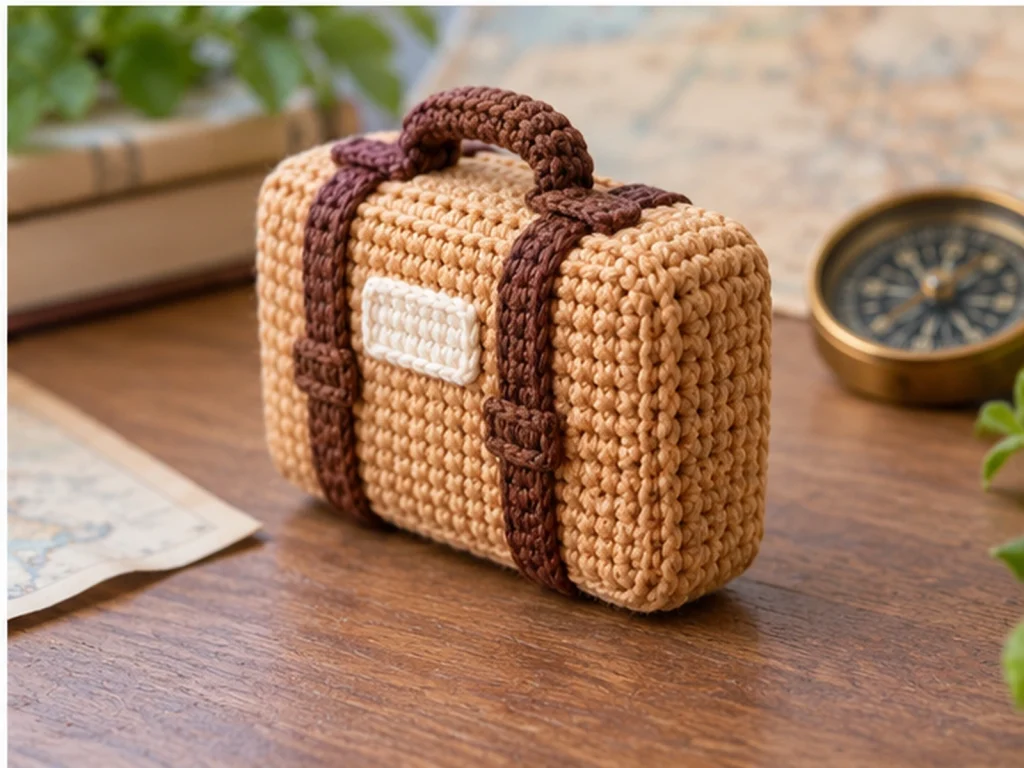
This mini suitcase crochet pattern creates a tiny travel-inspired crochet piece with a structured rectangular body, a top handle, two front straps, and a small luggage label.
The suitcase is made from two matching panels and four separate gusset pieces. Each gusset section corresponds to one edge of the suitcase, making the assembly easier to follow while creating the shallow three-dimensional shape.
The finished suitcase is approximately 3–3.5 inches wide, 2.25–2.75 inches tall, and about 0.5–0.75 inches deep, depending on yarn, hook size, tension, stuffing, and individual crochet technique.
Project Overview
What You’ll Make
This miniature crochet suitcase includes:
- 1 front panel
- 1 back panel
- 1 top gusset
- 1 bottom gusset
- 2 side gussets
- 2 front straps
- 1 top handle
- 1 luggage label
The front and back panels are identical, while the four gusset pieces create the suitcase depth.
The design has been mathematically reviewed and constructionally reasoned, but it has not been physically crocheted and tested yet. Finished measurements should therefore be treated as approximate.
Project Details
| Detail | Pattern |
|---|---|
| Project | Mini crochet suitcase |
| Yarn | Sport-weight cotton |
| Hook | 2.5 mm |
| Construction | Two panels + four gussets |
| Approximate width | 3–3.5 inches |
| Approximate height | 2.25–2.75 inches |
| Approximate depth | 0.5–0.75 inch |
| Main details | Handle, straps, luggage label |
| Crochet terminology | US terms |
Materials & Tools
Yarn
Use sport-weight cotton yarn in:
- a main color for the suitcase body
- an accent color for the straps and handle
- a small amount of cream yarn for the luggage label
Crochet Hook
- 2.5 mm crochet hook
Other Supplies
- Polyester fiberfill
- Tapestry needle
- Scissors
- Removable stitch markers
Abbreviations
- ch — chain
- sc — single crochet
- st/sts — stitch/stitches
- FO — fasten off
Before You Start
This pattern is worked primarily in rows.
Because the front and back panels need to match, keep a close eye on the stitch count at the end of every row.
The body uses four separate gusset pieces:
- Top gusset — matches the 23-stitch top edge
- Bottom gusset — matches the 23-stitch bottom edge
- Side gusset — follows the 17-row height
- Side gusset — follows the opposite 17-row height
This construction keeps the gusset pieces aligned with the direction in which the corresponding panel edges were crocheted.
Count Your Stitches
The front and back panels remain at 23 stitches for all 17 rows.
Check your stitch count regularly so the finished pieces maintain the intended dimensions.
Keep the Main Panels Identical
The front and back panels use exactly the same construction.
Maintaining similar tension on both pieces will make assembly much easier.
Stuff Lightly
The suitcase should keep a shallow, structured shape.
Avoid overstuffing because too much fiberfill can push the front and back panels outward.
Mini Suitcase Crochet Pattern
Front Panel — Make 1
Work in the main color.
Row 1: Ch 24. Sc in the 2nd ch from hook and across. (23 sts)
Rows 2–17: Sc across. (23 sts)
FO and leave a sewing tail.
Set aside.
Back Panel — Make 1
Repeat the Front Panel.
Row 1: Ch 24. Sc in the 2nd ch from hook and across. (23 sts)
Rows 2–17: Sc across. (23 sts)
FO and leave a sewing tail.
You should now have two identical rectangular panels.
Top Gusset — Make 1
Work in the main color.
Row 1: Ch 24. Sc in the 2nd ch from hook and across. (23 sts)
Rows 2–5: Sc across. (23 sts)
FO and leave a long sewing tail.
The 23-stitch length corresponds to the 23-stitch top edge of the main panels.
Bottom Gusset — Make 1
Repeat the Top Gusset.
Row 1: Ch 24. Sc in the 2nd ch from hook and across. (23 sts)
Rows 2–5: Sc across. (23 sts)
FO and leave a long sewing tail.
Side Gussets — Make 2
Work in the main color.
Row 1: Ch 5. Sc in the 2nd ch from hook and across. (4 sts)
Rows 2–18: Sc across. (4 sts)
FO and leave a long sewing tail.
Make a second identical side gusset.
Each side gusset has 4 stitches across and 18 total rows. Its long dimension is created by the same row direction used for the 17-row height of the main panel.
Front Straps — Make 2
Work in the accent color.
Row 1: Ch 4. Sc in the 2nd ch from hook and across. (3 sts)
Rows 2–13: Sc across. (3 sts)
FO and leave a sewing tail.
Make a second strap.
Top Handle — Make 1
Work in the accent color.
Row 1: Ch 15. Sc in the 2nd ch from hook and across. (14 sts)
Rows 2–4: Sc across. (14 sts)
FO and leave sewing tails.
Luggage Label — Make 1
Work in cream yarn.
Row 1: Ch 8. Sc in the 2nd ch from hook and across. (7 sts)
Rows 2–4: Sc across. (7 sts)
FO and leave a sewing tail.
Decorating the Front Panel
Attach the Front Straps
Place the two straps vertically on the front panel.
Use this centered arrangement across the 23-stitch width:
4 stitches + 3-stitch strap + 9-stitch center space + 3-stitch strap + 4 stitches
Check both sides before sewing the straps permanently.
Add the Luggage Label
Center the 7-stitch-wide luggage label between the two straps.
Sew it securely to the front panel.
Attach the Handle
Place the handle at the center of the top edge.
Use this reference across the 23-stitch top edge:
5 + 4 + 5 + 4 + 5
Attach each end of the handle securely over its 4-stitch attachment area.

Assembly
Step 1: Attach the Top Gusset
Align the 23-stitch long edge of the Top Gusset with the 23-stitch top edge of the front panel.
Sew the two edges together from corner to corner.
Step 2: Attach the Bottom Gusset
Align the 23-stitch long edge of the Bottom Gusset with the bottom edge of the front panel.
Sew it in place carefully.
Step 3: Attach the Side Gussets
Position one Side Gusset along one side of the front panel.
Use the 17-row height of the main panel as the visual guide for alignment.
Work from the top corner toward the bottom corner while keeping the gusset consistently aligned with the panel’s row structure.
Repeat on the opposite side with the second Side Gusset.
Step 4: Join the Gusset Corners
Bring the neighboring gusset pieces together at each corner.
Sew the short ends together so the top, bottom, and side gussets form a continuous shallow frame around the front panel.
Keep the corners as square as possible while sewing.
Step 5: Attach the Back Panel
Place the Back Panel against the opposite side of the gusset frame.
Match:
- top gusset to top edge
- bottom gusset to bottom edge
- left side gusset to left edge
- right side gusset to right edge
Sew around the perimeter, leaving a small opening for stuffing.
Step 6: Add the Stuffing
Insert a light amount of polyester fiberfill.
Shape the suitcase gently as you work.
Avoid heavy stuffing that could distort the rectangular form.
Step 7: Close the Opening
Once the suitcase has the desired shape, sew the remaining opening closed.
Secure the yarn and weave in the ends.

Finishing
Before trimming the remaining yarn tails, inspect the suitcase from every side.
Check that:
- the front and back panels are aligned
- the gusset creates an even shallow depth
- the corners are neat
- the straps are symmetrical
- the handle is centered
- the luggage label is centered
- the stuffing is distributed evenly
- all openings are closed
Helpful Tips
Keep Your Tension Consistent
The project combines stitch counts and row dimensions, so consistent tension helps the separate pieces fit together more naturally.
Count the Main Panels
Both the front and back panels should have 23 stitches for all 17 rows.
Keep the Gussets Separate
Do not join the four gussets into one continuous loop before assembly. The four-piece construction is intentional.
Take Your Time at the Corners
The suitcase corners are easier to keep neat when the gusset pieces are joined gradually instead of pulled tightly into place.
Shape While Closing
Adjust the stuffing and corners during the final closure rather than trying to reshape the suitcase afterward.
Troubleshooting
My Front Panel Does Not Have 23 Stitches
Count the previous row before continuing.
Every row of the front and back panels should contain 23 stitches.
My Side Gusset Seems Too Short or Too Long
Confirm that it contains:
- 4 stitches across
- 18 total rows
Then compare its long edge against the side of the main panel before sewing.
Small differences caused by individual tension should be eased evenly during assembly.
My Top Gusset Does Not Match the Top Edge
Confirm that the top gusset contains 23 stitches across and that the corresponding panel edge also contains 23 stitches.
The Suitcase Looks Too Rounded
Remove some stuffing and gently reshape the corners.
The finished piece should remain shallow rather than becoming heavily rounded.
The Straps Look Uneven
Use the front-panel spacing:
4 + 3 + 9 + 3 + 4
Compare both sides before permanently sewing them.
The Handle Is Off-Center
Use the top-edge reference:
5 + 4 + 5 + 4 + 5
This provides a balanced placement across the 23-stitch edge.
Customization Ideas
Change the Main Color
Try tan, brown, charcoal, navy, cream, or a soft pastel shade for a completely different suitcase look.
Change the Accent Color
Use a contrasting shade for the straps and handle to make the details stand out.
Customize the Luggage Label
A different light-colored yarn can give the front of the suitcase a new contrast.
Create a Miniature Travel Scene
The suitcase can be combined with other small handmade pieces to create a travel-inspired miniature or amigurumi setting.
Changing yarn weight or hook size may alter the finished dimensions, so resized versions should be treated as experimental variations rather than confirmed measurements.
Frequently Asked Questions
What size is the finished mini suitcase?
The intended finished size is approximately 3–3.5 inches wide, 2.25–2.75 inches tall, and about 0.5–0.75 inches deep.
Actual size can vary based on yarn, hook size, tension, stuffing, and individual crochet technique.
What yarn is used for the mini suitcase?
The design uses sport-weight cotton yarn in a main color, an accent color, and a small amount of cream yarn for the label.
What hook size should I use?
Use a 2.5 mm crochet hook.
How is the suitcase constructed?
The body uses two matching 23-stitch × 17-row panels and four separate gusset pieces.
The top and bottom gussets are 23 stitches long, while each side gusset develops its long dimension over 18 rows.
Why are there four gusset pieces?
Using separate gusset pieces makes each body edge easier to align with the direction in which that edge was crocheted.
Does the suitcase need stuffing?
Yes. Add a light amount of polyester fiberfill before closing the final opening.
Can I change the colors?
Yes. The main body, straps, handle, and luggage label can all be customized with different color combinations.
Can I make the suitcase larger?
A larger version would require corresponding changes to the main panels and gusset pieces. Because this pattern has not been physically prototype-tested, larger or smaller versions should be treated as experimental modifications.
Final Thoughts
This mini suitcase crochet pattern uses a collection of simple rectangular pieces to create a recognizable miniature travel accessory.
The combination of two main panels and four separate gussets keeps the construction organized while giving the finished project its shallow suitcase shape. The handle, straps, and luggage label add the small details that make the design distinctive.
For the cleanest result, focus on consistent stitch counts, careful corner sewing, centered decorative details, and light stuffing.
The pattern has been mathematically reviewed and constructionally reasoned, but it has not been physically crocheted and tested yet. The finished dimensions are approximate and may vary with materials and technique.