Penguin Amigurumi Crochet Pattern with Winter Hat, Scarf, and Star
This penguin amigurumi crochet pattern creates a rounded winter-themed penguin…
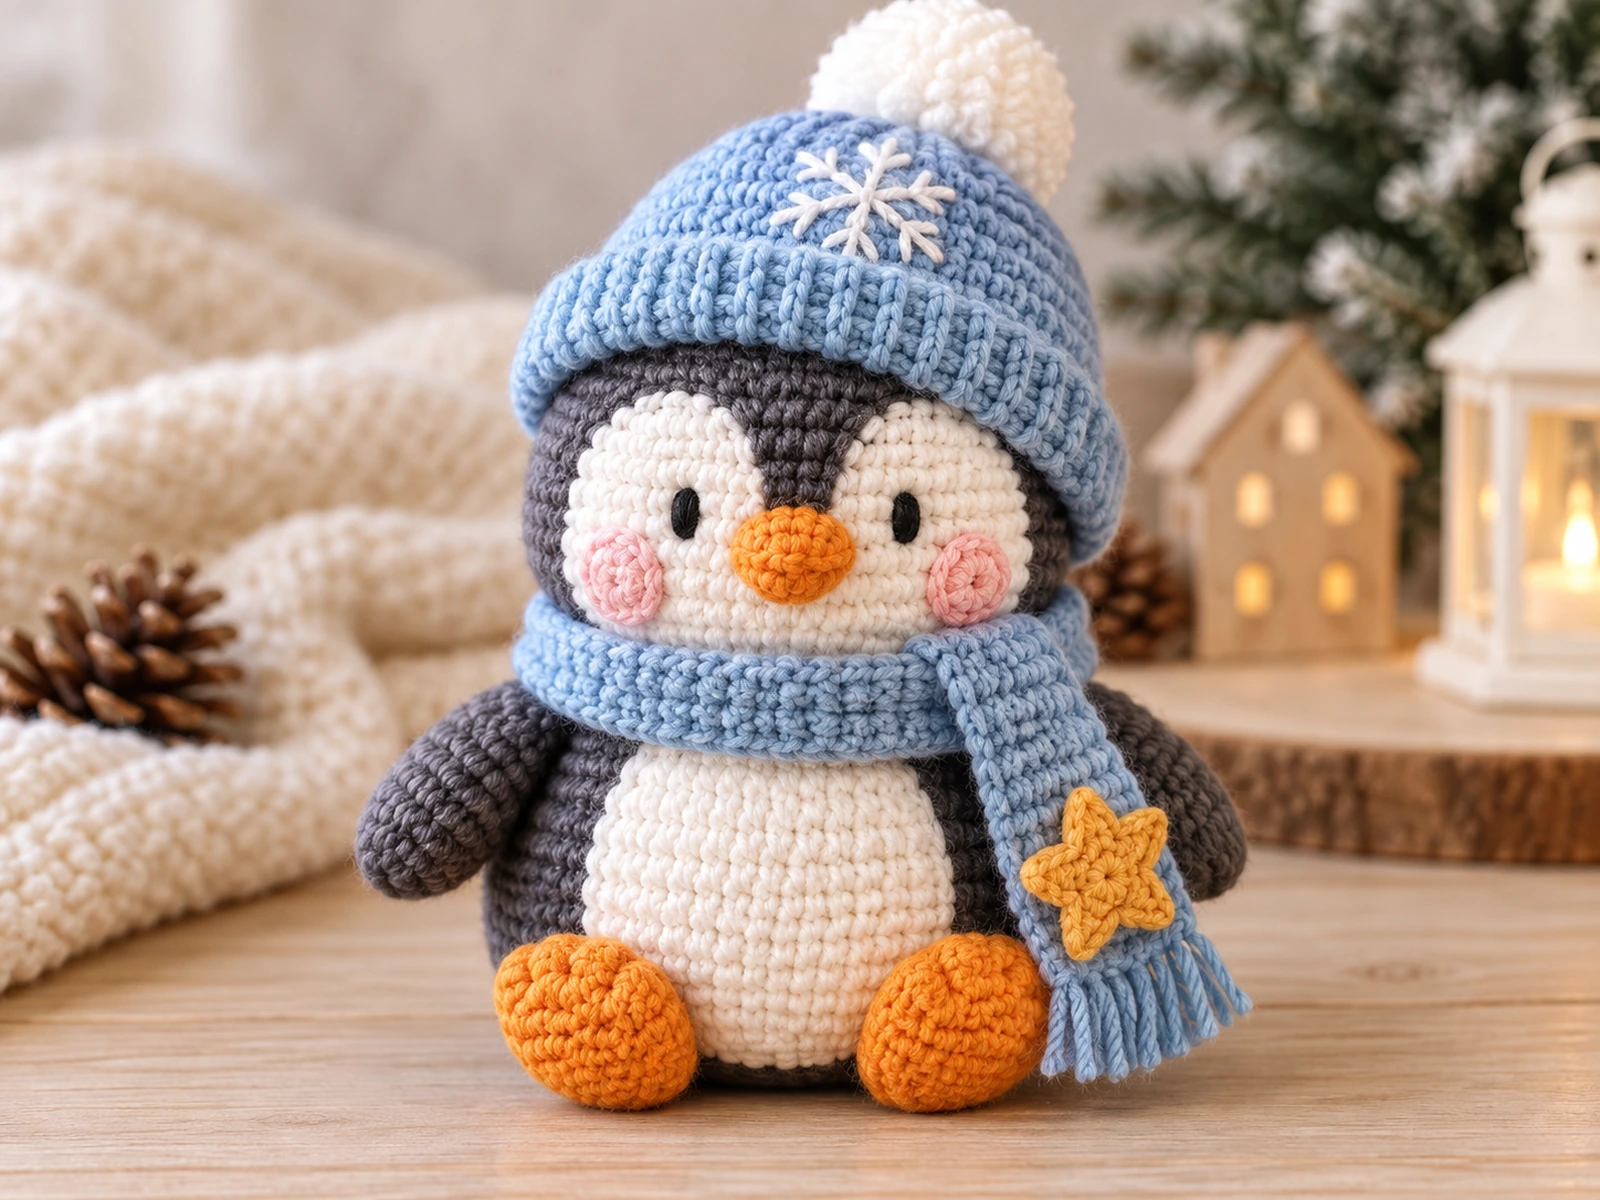
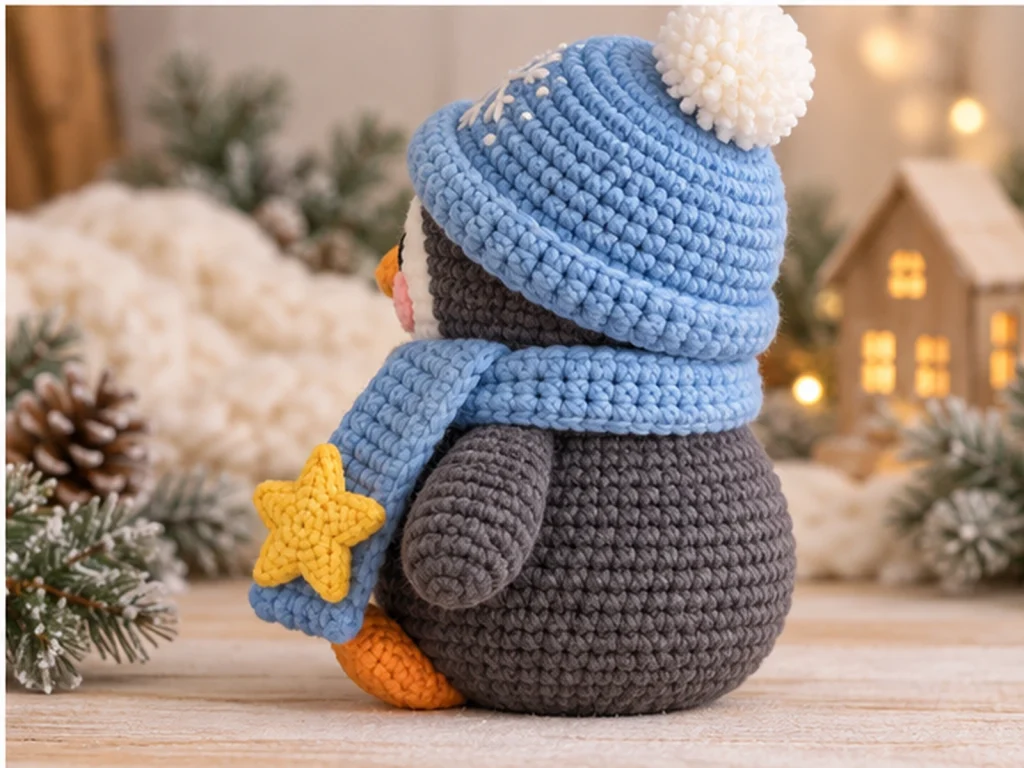
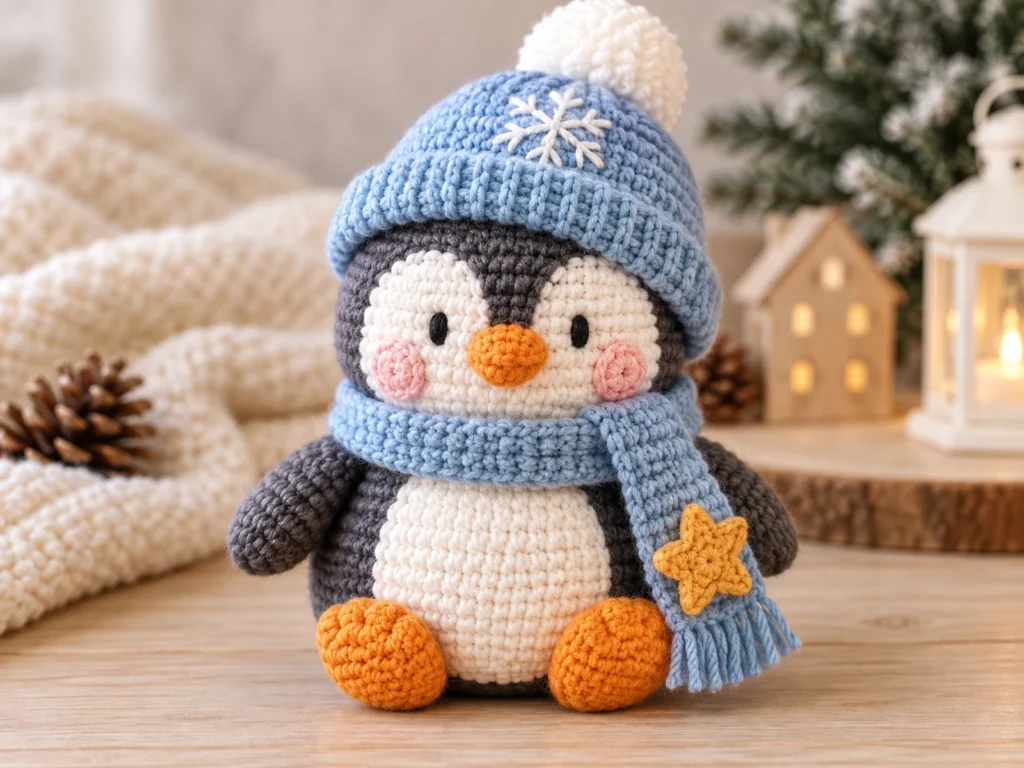
This penguin amigurumi crochet pattern creates a rounded winter-themed penguin with a white belly, layered face details, orange beak and feet, a cozy hat, a scarf, and a small star accessory. The design is worked as separate crocheted pieces and then assembled into one finished character.
Project Overview
What You’ll Make
This winter penguin includes:
- A rounded penguin head
- A slightly wider stuffed body
- A white belly patch
- Two white face patches
- An orange beak
- Two cheek patches
- Two wings
- Two orange feet
- A winter hat
- A small white pompom
- A crochet scarf
- A two-panel star accessory
- Embroidered eyes
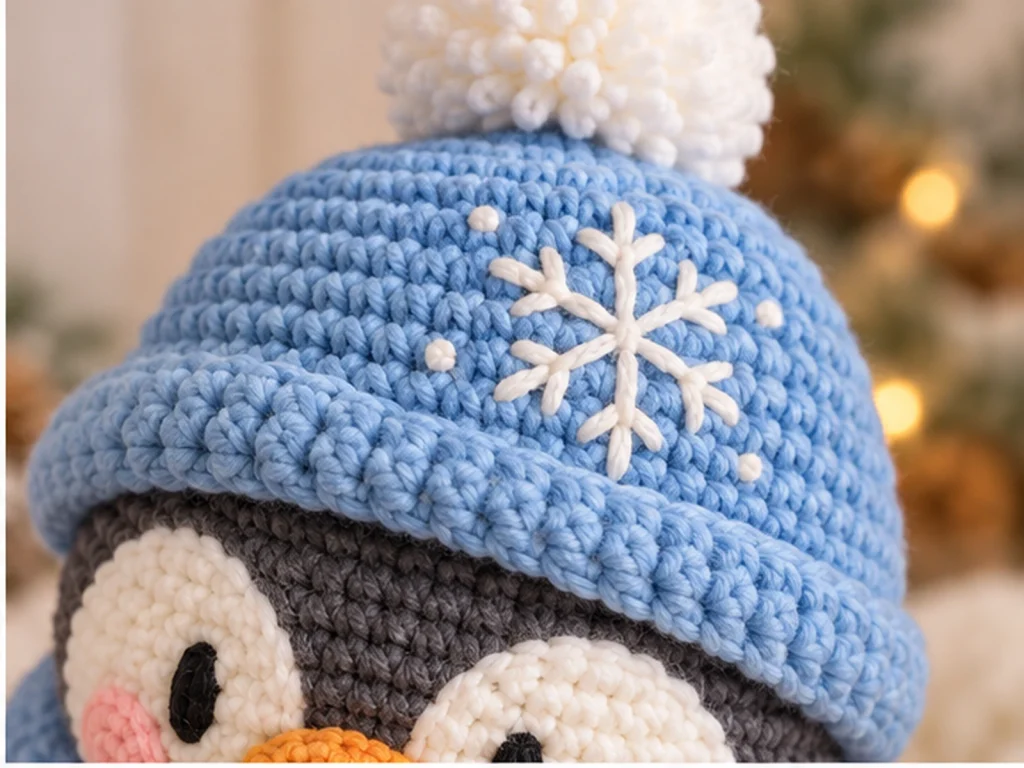
- A small embroidered snowflake
Project Details
- Project: Winter Penguin Amigurumi
- Technique: Crochet amigurumi
- Yarn: Medium/worsted-weight yarn (#4)
- Hook: 3.5 mm crochet hook
- Approximate finished size: 7–8 inches (18–20 cm) tall
- Filling: Polyester fiberfill
- Eyes: Embroidered black yarn
The finished size is approximate and can vary depending on yarn, hook size, tension, stuffing, and individual crochet technique.
The project is built in separate pieces, then assembled and finished with the winter accessories.
Materials & Tools
Yarn
Use medium/worsted-weight yarn (#4) in these colors:
- Charcoal gray: head, body, and wings
- White: belly, face patches, pompom, and snowflake embroidery
- Orange: beak and feet
- Soft pink: cheek patches
- Icy blue: hat and scarf
- Golden yellow: star
- Black: embroidered eyes
Other Materials
- 3.5 mm crochet hook
- Polyester fiberfill
- Yarn or tapestry needle
- Scissors
- Stitch marker
This design uses embroidered eyes rather than safety eyes.
Abbreviations
- MR — magic ring
- sc — single crochet
- inc — increase; 2 sc in the same stitch
- dec — invisible decrease
- ch — chain
- sl st — slip stitch
- hdc — half double crochet
- dc — double crochet
- tr — treble crochet
- FO — fasten off
Before You Start
Work in Continuous Rounds
The stuffed components are worked in continuous rounds. Use a stitch marker to keep track of the first stitch of each round.
Count Your Stitches
Every round includes a stitch count in parentheses. Check your count at the end of each round, especially when working increases and decreases.
Stuff as You Go
Add fiberfill gradually rather than filling each piece all at once. This helps you control the shape and avoid overstuffing.
Check Symmetry Before Sewing
For paired pieces such as the wings, feet, face patches, and cheeks, compare both sides before permanently attaching them.
Construction Order
A useful workflow is:
- Crochet the head and body.
- Make the belly and facial pieces.
- Crochet the wings and feet.
- Make the hat, pompom, and scarf.
- Make the two star panels.
- Add the embroidered details.
- Assemble the penguin.
- Finish the winter accessories.
Penguin Amigurumi Crochet Pattern
Head
Make 1 with charcoal yarn.
Work in continuous rounds.
Round 1
6 sc in MR. (6)
Round 2
6 inc. (12)
Round 3
(sc, inc) × 6. (18)
Round 4
(2 sc, inc) × 6. (24)
Round 5
(3 sc, inc) × 6. (30)
Round 6
(4 sc, inc) × 6. (36)
Rounds 7–11
sc around. (36)
Begin stuffing lightly and continue shaping the head as you work.
Round 12
(4 sc, dec) × 6. (30)
Round 13
(3 sc, dec) × 6. (24)
Round 14
(2 sc, dec) × 6. (18)
Add the remaining stuffing gradually. Avoid overfilling.
Round 15
(sc, dec) × 6. (12)
Round 16
6 dec. (6)
Fasten off, close the opening, and weave in the yarn end.
Body
Make 1 with charcoal yarn.
Round 1
6 sc in MR. (6)
Round 2
6 inc. (12)
Round 3
(sc, inc) × 6. (18)
Round 4
(2 sc, inc) × 6. (24)
Round 5
(3 sc, inc) × 6. (30)
Round 6
(4 sc, inc) × 6. (36)
Round 7
(5 sc, inc) × 6. (42)
Rounds 8–14
sc around. (42)
Begin stuffing gradually.
Round 15
(5 sc, dec) × 6. (36)
Round 16
(4 sc, dec) × 6. (30)
Round 17
(3 sc, dec) × 6. (24)
Round 18
(2 sc, dec) × 6. (18)
Finish stuffing while keeping the body rounded.
Round 19
(sc, dec) × 6. (12)
Round 20
6 dec. (6)
Fasten off, close the opening, and weave in the end.
White Belly Patch
Make 1 with white yarn.
Work in rows.
Row 1
Ch 10. Starting in the second chain from the hook, sc across. (9)
Row 2
inc, 7 sc, inc. (11)
Row 3
inc, 9 sc, inc. (13)
Row 4
inc, 11 sc, inc. (15)
Row 5
sc across. (15)
Row 6
dec, 11 sc, dec. (13)
Row 7
dec, 9 sc, dec. (11)
Row 8
dec, 7 sc, dec. (9)
Row 9
dec, 5 sc, dec. (7)
Row 10
dec, 3 sc, dec. (5)
Row 11
dec, 1 sc, dec. (3)
Fasten off and leave a sewing tail.
Face Patches
Make 2 with white yarn.
Work in continuous rounds.
Round 1
6 sc in MR. (6)
Round 2
6 inc. (12)
Round 3
(sc, inc) × 6. (18)
Fasten off and leave a sewing tail.
Beak
Make 1 with orange yarn.
Work in rows.
Row 1
Ch 5. Starting in the second chain from the hook, sc across. (4)
Row 2
sc, dec. (3)
Row 3
sc, dec. (2)
Row 4
dec. (1)
Fasten off and leave a sewing tail.
Lightly shape the piece into a small triangle before attaching it to the face.
Cheek Patches
Make 2 with soft pink yarn.
Round 1
6 sc in MR. (6)
Round 2
6 inc. (12)
Fasten off and leave a sewing tail.
Embroidered Eyes
Make 2 with black yarn.
Embroider two small vertical oval eyes above the white face patches.
Before securing the embroidery permanently:
- Check that both eyes are at a similar height.
- Compare their size.
- View the face straight on.
- Make sure the beak remains centered between the facial details.
Wings
Make 2 with charcoal yarn.
Round 1
6 sc in MR. (6)
Round 2
6 inc. (12)
Round 3
(sc, inc) × 6. (18)
Rounds 4–5
sc around. (18)
Round 6
(sc, dec) × 6. (12)
Rounds 7–8
sc around. (12)
Round 9
(sc, dec) × 4. (8)
Round 10
sc around. (8)
Add a small amount of stuffing so the wing holds its shape without becoming bulky.
Flatten the opening.
Fasten off and leave a sewing tail.
Repeat for the second wing.
Feet
Make 2 with orange yarn.
Round 1
6 sc in MR. (6)
Round 2
6 inc. (12)
Round 3
(sc, inc) × 6. (18)
Round 4
(2 sc, inc) × 6. (24)
Round 5
sc around. (24)
Do not overstuff the feet.
Flatten them slightly, then fasten off and leave sewing tails.
Repeat for the second foot.
Winter Hat
Make 1 with icy blue yarn.
Round 1
6 sc in MR. (6)
Round 2
6 inc. (12)
Round 3
(sc, inc) × 6. (18)
Round 4
(2 sc, inc) × 6. (24)
Round 5
(3 sc, inc) × 6. (30)
Rounds 6–8
sc around. (30)
Round 9
(4 sc, inc) × 6. (36)
Rounds 10–11
sc around. (36)
Fasten off and weave in the end.
The hat is designed to fit over the upper portion of the rounded head. Avoid stretching the stitches excessively when putting it on.
Hat Pompom
Make 1 with white yarn.
Round 1
6 sc in MR. (6)
Round 2
6 inc. (12)
Round 3
(sc, inc) × 6. (18)
Round 4
sc around. (18)
Add a small amount of stuffing.
Round 5
(sc, dec) × 6. (12)
Round 6
6 dec. (6)
Fasten off and close the opening.
Sew the pompom securely to the center of the hat.
Scarf
Make 1 with icy blue yarn.
Row 1
Ch 46. Starting in the second chain from the hook, sc across. (45)
Rows 2–3
Ch 1, turn, sc across. (45)
Fasten off and weave in the end.
Wrap the scarf around the penguin’s neck and overlap the ends slightly.
Optional fringe can be added to the short ends.
Five-Point Star
Make 2 panels with golden yellow yarn.
Round 1
Make a magic ring.
Ch 2.
Work:
(2 dc, ch 2) × 5
Join with a sl st to the starting point.
You now have five ch-2 spaces that will become the star points.
Round 2
Work into each ch-2 space.
Repeat the following sequence in each space:
sc, hdc, dc, tr, ch 1, tr, dc, hdc, sc
After each point, sl st into the next ch-2 space.
After completing all five points, sl st to the beginning.
Fasten off and leave a sewing tail.
Make a second identical panel.
Place both panels together and sew around the outer edges. Keep the center flat or add only a very small amount of stuffing for a lightly raised effect.
Attach the finished star to one end of the scarf.
Snowflake Embroidery
Use white yarn to add a small snowflake to the front of the hat.
Start with a small central point, then embroider six short rays radiating outward.
Add small diagonal branches to selected rays for a simple snowflake shape.
Keep the motif compact so the hat remains the visual focus.
Secure the embroidery inside the hat and trim the yarn neatly.
Facial Details
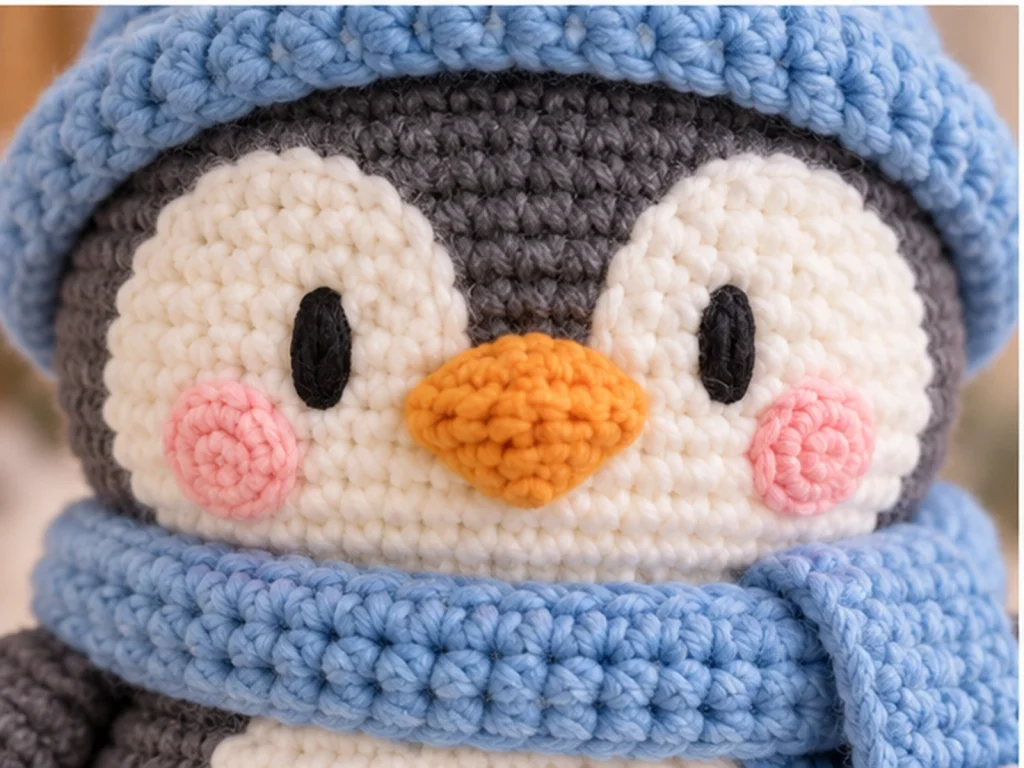
Face Placement
Place the two white face patches on the front of the head as a balanced pair.
Leave a central area between them for the orange beak.
Beak Placement
Position the orange beak between the two white face patches and keep it centered.
Cheek Placement
Place one soft pink cheek on each side of the beak.
Eye Placement
Embroider the two black eyes above the face details.
Check the face from straight ahead before securing the final yarn ends.
Assembly
Step 1: Attach the Belly
Center the white belly patch on the front of the body.
Pin it temporarily if needed, then sew around the edges.
Check the patch from the front before weaving in the final yarn end.
Step 2: Attach the Face Patches
Place the two white face patches on the front of the head.
They should sit as a balanced pair with a central space for the beak.
Compare both sides before sewing permanently.
Step 3: Add the Beak and Cheeks
Sew the orange beak between the white face patches.
Then attach one soft pink cheek to each side of the beak.
Step 4: Embroider the Eyes
Add the two black embroidered eyes above the face details.
Look at the character from straight ahead and make any small placement adjustments before securing the final yarn ends.
Step 5: Join the Head and Body
Center the bottom of the head over the top of the body.
Sew the pieces together securely around the connection area.
Check the silhouette from the front and side as you work.
Step 6: Attach the Wings
Place one wing on each side of the body.
Keep the two wings at matching heights and angles.
Pin both wings before sewing so you can compare the sides.
Step 7: Attach the Feet
Place both orange feet near the bottom front of the body.
Check that the penguin has a balanced seated appearance before sewing them in place.
Step 8: Finish the Hat
Sew the pompom to the hat crown.
Add the embroidered snowflake to the front.
Fit the hat over the penguin’s head.
Step 9: Add the Scarf and Star
Wrap the scarf around the neck.
Attach the finished star to one scarf end and arrange the scarf for the final look.
Finishing
Take a final look at the finished penguin from the front and sides.
Make sure:
- The face looks balanced.
- The wings sit at similar heights.
- The feet are positioned evenly.
- The hat sits comfortably on the head.
- The scarf is arranged neatly.
- Loose yarn ends are woven in securely.
Helpful Tips
Keep the Face Symmetrical
Facial placement has a major effect on the finished character.
Before sewing any facial element permanently, check:
- The height of both face patches
- The position of the beak
- The placement of the cheeks
- The eye level
Avoid Overstuffing
Too much stuffing can stretch the crochet fabric and make the stitches look uneven.
Add fiberfill gradually and shape each piece with your fingers as you go.
Use Stitch Counts to Find Mistakes
When a piece looks too wide or too narrow, check the last completed round first.
A missed increase or an accidental extra stitch can change the shape quickly.
Check Both Sides Before Sewing
For paired pieces, lay both parts side by side before attaching them.
This is especially useful for:
- Wings
- Feet
- Face patches
- Cheeks
Troubleshooting
If a Piece Looks Warped
Uneven tension can make a flat detail look slightly distorted.
Before sewing it on, gently smooth and shape the piece with your hands. Avoid forcing it into an extreme shape.
If the Hat Feels Too Tight
The final fit can vary with yarn and tension. Avoid pulling the hat aggressively over the head.
The hat should sit around the upper head without excessive stretching.
If the Face Looks Uneven
Remove or loosen the temporary placement and compare both sides from straight ahead.
Adjust the facial details before permanently securing them.
If the Body Loses Its Shape
Check the stuffing density and add fiberfill gradually. Overfilling can stretch the fabric, while too little stuffing can leave the body looking soft or uneven.
Customization Ideas
Change the Main Body Color
Try a different dark neutral for the penguin body while keeping the white face and belly contrast.
Change the Winter Accessories
The hat and scarf can be coordinated in a single color or changed to contrasting colors for a more playful look.
Try a Different Star Color
The star can be changed to another winter shade without altering its construction.
Adjust the Facial Expression
Small changes in embroidered eye shape or positioning can give the penguin a different personality.
Keep any adjustments symmetrical and compatible with the face layout.
Frequently Asked Questions
What yarn weight is used for this penguin amigurumi?
The pattern is designed for medium/worsted-weight yarn (#4).
What crochet hook size is used?
The design uses a 3.5 mm crochet hook.
How big is the finished penguin?
The intended finished height is approximately 7–8 inches (18–20 cm). Actual size can vary with yarn, tension, hook size, stuffing, and technique.
Does this pattern use safety eyes?
No. The design uses embroidered black yarn eyes.
Is the gauge fixed?
No fixed gauge is required for this design. Finished size is influenced by yarn, hook, tension, and stuffing.
How should the penguin be stuffed?
Stuff the head and body gradually as you crochet, adding enough fiberfill to hold the form without overfilling.
The wings and pompom need only light stuffing, while the feet are kept mostly flat.
Can the hat and scarf be changed?
Yes. Because they are separate accessories, their colors can be changed without changing the main penguin construction.
Can I make the penguin larger or smaller?
Size changes are possible in principle, but alternate sizes have not been physically tested. A size modification may require additional pattern adjustments.
Has this pattern been physically tested?
Not yet. The pattern has been mathematically reviewed and constructionally checked, but it has not been physically crocheted and tested.
Final Thoughts
This winter penguin amigurumi combines a rounded animal base with separate seasonal details, so you can build the main character first and finish the project with the hat, scarf, star, and snowflake.
Take your time with the face and final assembly. Small placement differences can change the expression and silhouette, so comparing both sides before sewing permanently is one of the most useful finishing habits for this project.