
Tiny Fox Amigurumi Crochet Pattern
This tiny fox amigurumi features a rounded head, pointed ears,…
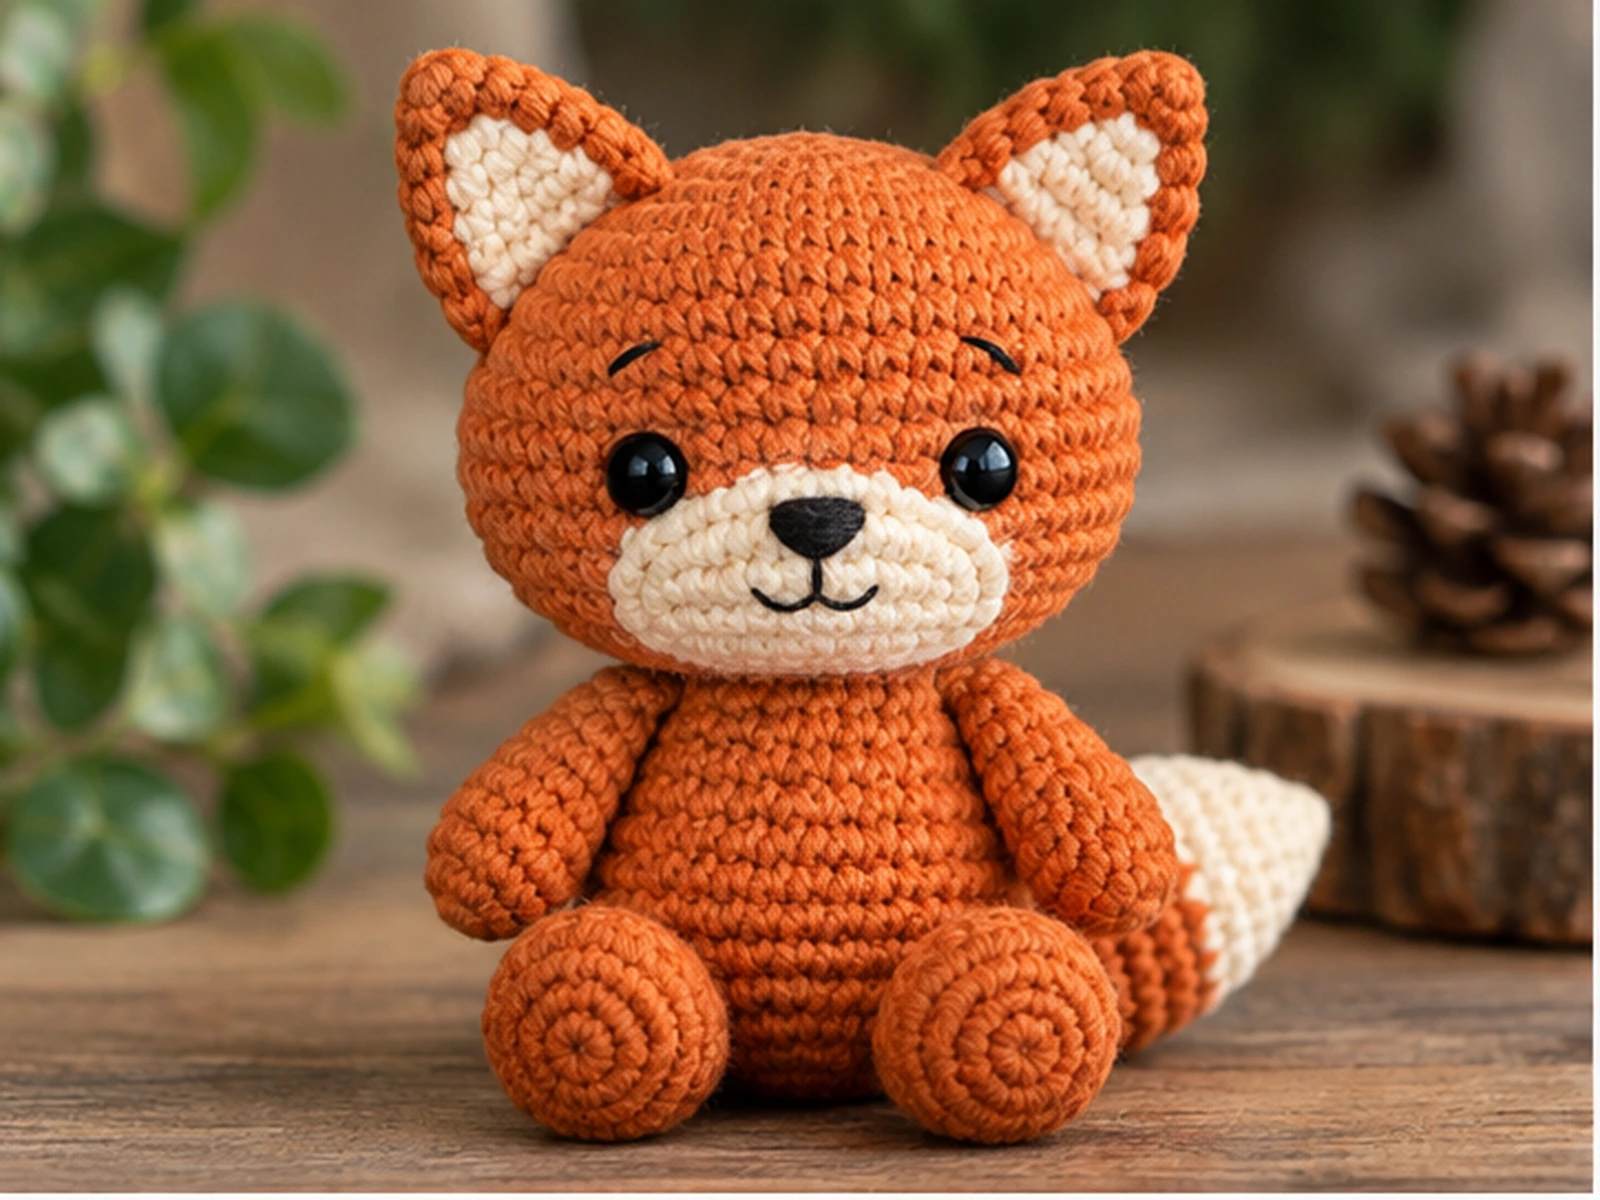
This tiny fox amigurumi features a rounded head, pointed ears, a cream muzzle, and a two-tone tail with a light tip. The fox is crocheted in separate pieces and then sewn together, with embroidered facial details completing the design.
The finished fox measures approximately 4–5 inches (10–13 cm). Final size can vary with yarn, hook size, tension, stuffing, and individual crochet technique.
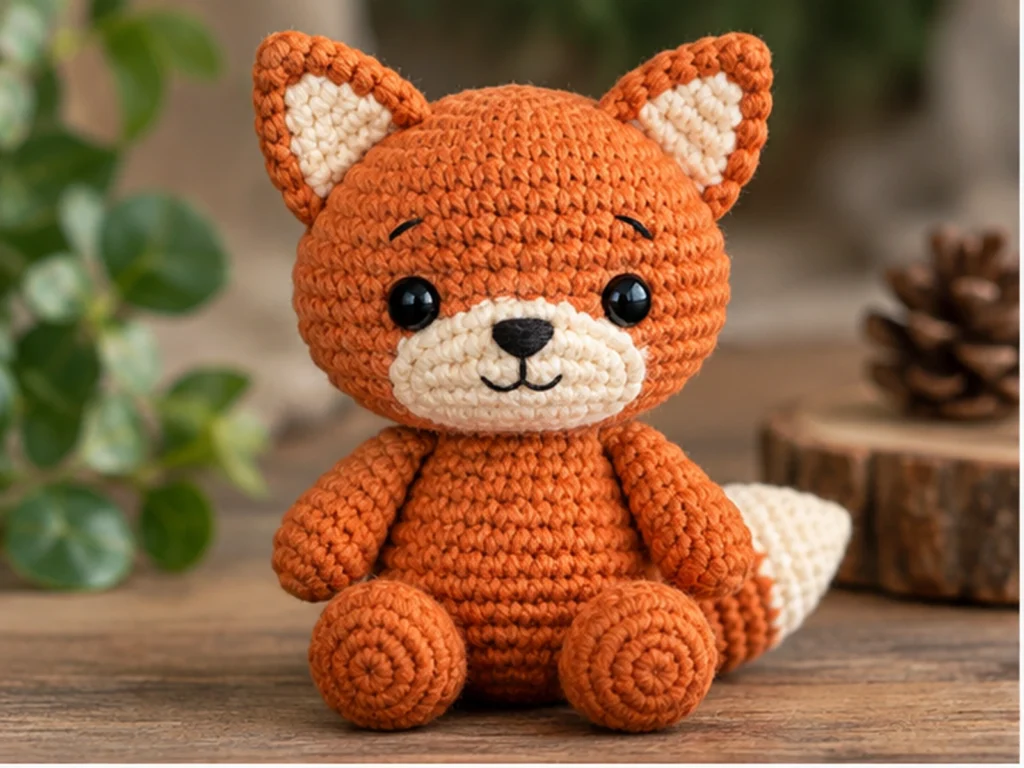
Pattern note: This pattern has been mathematically reviewed and constructionally checked, but it has not yet been physically crocheted and tested.
Project Overview
This tiny fox is made from a small collection of crocheted components that come together into a compact woodland-inspired amigurumi.
What You’ll Make
- 1 rounded head
- 1 compact body
- 2 arms
- 2 legs
- 2 pointed ears
- 1 cream muzzle
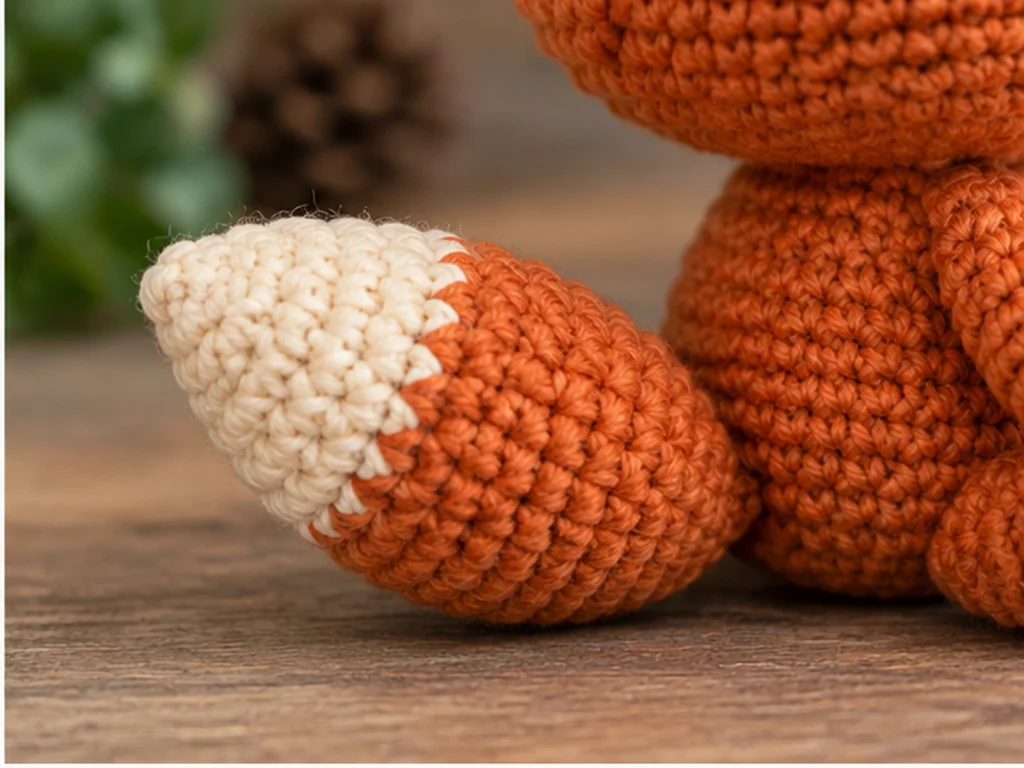
- 1 two-tone tail
- 2 safety eyes
- Embroidered nose and optional mouth
The main pieces are worked in continuous rounds and assembled after crocheting.
Project Details
- Technique: Amigurumi crochet
- Yarn: DK / #3 weight
- Main color: Rust orange
- Accent color: Cream
- Hook: 2.75 mm
- Eyes: 6 mm safety eyes
- Filling: Polyester fiberfill
- Finished size: Approximately 4–5 inches (10–13 cm)
- Construction: Separate crocheted pieces with sewn assembly
Materials & Tools
- DK / #3 weight yarn in rust orange
- A small amount of cream DK yarn
- A small amount of black embroidery thread
- 2.75 mm crochet hook
- 2 × 6 mm safety eyes
- Polyester fiberfill
- Tapestry needle
- Scissors
- Stitch marker
Safety Note
Safety eyes can present a choking hazard and are not appropriate for children under 3. This pattern does not claim that the finished amigurumi is baby-safe or child-safe.
Crochet Abbreviations
This pattern uses standard US crochet terminology.
| Abbreviation | Meaning |
|---|---|
| MR | Magic ring |
| sc | Single crochet |
| inc | Increase — 2 sc in the same stitch |
| dec | Decrease — sc 2 together |
| FO | Fasten off |
Before You Start
Work in Continuous Rounds
The crocheted components are worked in continuous rounds unless noted otherwise. Do not join each round with a slip stitch.
Use a stitch marker to identify the beginning of each round and move it upward as you work.
Count Your Stitches
Check the stitch count at the end of every round. The counts included in the pattern provide useful checkpoints and can help you catch mistakes before they affect later rounds.
Stuff as You Go
Add fiberfill gradually rather than filling each piece all at once. The head and body should hold their shape without stretching the stitches.
The arms, legs, and tail need only light stuffing, while the ears are left unstuffed.
Shape Before Sewing
Before attaching any part permanently, look at the piece from more than one angle. This is especially useful for the ears, arms, legs, tail, and facial details.
Construction Order
The fox is crocheted in separate pieces:
- Head
- Body
- Arms
- Legs
- Ears
- Muzzle
- Tail
- Facial details
- Assembly
- Finishing
Tiny Fox Amigurumi Crochet Pattern
Head — Make 1
Work in rust orange.
Round 1: 6 sc in MR. (6)
Round 2: 6 inc. (12)
Round 3: (sc, inc) × 6. (18)
Round 4: (2 sc, inc) × 6. (24)
Round 5: (3 sc, inc) × 6. (30)
Round 6: sc around. (30)
Round 7: sc around. (30)
Round 8: sc around. (30)
Round 9: sc around. (30)
Round 10: (3 sc, dec) × 6. (24)
Round 11: (2 sc, dec) × 6. (18)
Round 12: (sc, dec) × 6. (12)
Round 13: sc around. (12)
Fasten off, leaving a long sewing tail.
Begin stuffing after Round 9 and shape the head gradually. Keep the 12-stitch opening available for attaching the head to the body.
Body — Make 1
Work in rust orange.
Round 1: 6 sc in MR. (6)
Round 2: 6 inc. (12)
Round 3: (sc, inc) × 6. (18)
Round 4: (2 sc, inc) × 6. (24)
Round 5: sc around. (24)
Round 6: sc around. (24)
Round 7: sc around. (24)
Round 8: sc around. (24)
Round 9: sc around. (24)
Round 10: (2 sc, dec) × 6. (18)
Round 11: sc around. (18)
Round 12: (sc, dec) × 6. (12)
Round 13: sc around. (12)
Fasten off, leaving a long sewing tail.
Stuff the body gradually and keep the upper opening available for sewing to the head.
Arms — Make 2
Work in rust orange.
Round 1: 6 sc in MR. (6)
Round 2: (sc, inc) × 3. (9)
Round 3: sc around. (9)
Round 4: sc around. (9)
Round 5: sc around. (9)
Round 6: sc around. (9)
Round 7: sc around. (9)
Round 8: (sc, dec) × 3. (6)
Round 9: sc around. (6)
Fasten off with a long sewing tail.
Lightly stuff each arm without overfilling the opening.
Legs — Make 2
Work in rust orange.
Round 1: 6 sc in MR. (6)
Round 2: 6 inc. (12)
Round 3: (3 sc, inc) × 3. (15)
Round 4: sc around. (15)
Round 5: (3 sc, dec) × 3. (12)
Round 6: sc around. (12)
Round 7: (2 sc, dec) × 3. (9)
Round 8: sc around. (9)
Fasten off with a long sewing tail.
Lightly stuff each leg and leave the opening ready for attachment.
Ears — Make 2
Work in rust orange.
Round 1: 6 sc in MR. (6)
Round 2: 6 inc. (12)
Round 3: (3 sc, inc) × 3. (15)
Round 4: sc around. (15)
Round 5: (3 sc, dec) × 3. (12)
Round 6: (2 sc, dec) × 3. (9)
Round 7: (sc, dec) × 3. (6)
Round 8: 3 dec. (3)
Fasten off.
Do not stuff the ears. Flatten the base gently before sewing them to the head.
Muzzle — Make 1
Work in cream.
Round 1: 6 sc in MR. (6)
Round 2: 6 inc. (12)
Round 3: sc around. (12)
Fasten off, leaving a sewing tail.
Lightly shape the muzzle into a shallow raised piece. Fold the open edge inward as you prepare to sew it onto the head so the edge is kept neat during attachment.
Tail — Make 1
Start with cream.
Round 1: 6 sc in MR. (6)
Round 2: sc around. (6)
Round 3: (sc, inc) × 3. (9)
Round 4: sc around. (9)
Change to rust orange.
Round 5: sc around. (9)
Round 6: sc around. (9)
Round 7: sc around. (9)
Round 8: sc around. (9)
Round 9: (2 sc, inc) × 3. (12)
Round 10: sc around. (12)
Round 11: sc around. (12)
Round 12: sc around. (12)
Round 13: (3 sc, inc) × 3. (15)
Round 14: sc around. (15)
Round 15: sc around. (15)
Fasten off with a long sewing tail.
Lightly stuff the tail and leave the opening available for attaching it to the body.
Add the Facial Details
Insert the 6 mm safety eyes symmetrically on the head. Before permanently securing them, view the head from the front and both sides to check the placement.
Sew a small black triangular nose onto the upper center of the cream muzzle.
You can also add a small curved mouth beneath the nose with black embroidery thread.
Assembly
Step 1: Attach the Head
Align the 12-stitch opening of the head with the 12-stitch opening at the top of the body.
Sew around the opening, keeping the head centered over the body.
Before completing the final stitches, check the fox from the front to make sure the head is sitting straight.
Step 2: Attach the Ears
Place the two ears on the upper sides of the head.
Flatten each ear base and sew it securely into place.
Compare both ears from the front and side views before finishing the second attachment.
Step 3: Attach the Muzzle
Center the cream muzzle on the lower front of the head.
Sew around the outer edge, keeping the piece evenly positioned while catching the folded edge as you work.
Once the muzzle is secure, finish the embroidered nose and optional mouth.
Step 4: Attach the Arms
Place one arm on each side of the body.
Keep the arms at approximately the same height and compare both sides before completing the sewing.
Step 5: Attach the Legs
Position the legs toward the lower front of the body.
Check that the feet sit at matching heights so the finished fox keeps a balanced shape.
Step 6: Attach the Tail
Sew the tail to the back of the body.
Angle it slightly outward so it remains visible from the side, with the cream section at the tip.
Finishing
- Weave in all yarn ends.
- Trim excess yarn.
- Add or redistribute small amounts of stuffing if needed.
- Gently shape the head, body, and tail.
- Check the ears, arms, and legs for symmetry.

Helpful Tips
Keep the Stuffing Balanced
Too little stuffing can leave the head or body looking loose, while too much can stretch the stitches. Add fiberfill in small amounts and shape the piece as you work.
Check Symmetry Before Sewing
Place both paired pieces against the project before permanently attaching either one. This makes it easier to adjust an ear, arm, or leg.
Keep Track of Every Round
Because the pieces are worked in continuous rounds, losing the beginning of a round can quickly lead to an incorrect stitch count.
Shape Before the Final Stitches
Look at the project from several angles before completing an attachment. Small positioning changes are easier to make before the last stitches are secured.
Troubleshooting
My Stitch Count Is Off. What Should I Do?
Stop before continuing to the next round. Recount the stitches in the current round and check every increase or decrease group.
The round-end counts are intentional checkpoints, so finding an error early is much easier than correcting it several rounds later.
The Stuffing Is Showing Through the Stitches
Remove a small amount of stuffing and reshape the piece. Overstuffing can push the stitches apart and make the fiberfill visible.
My Ears Don’t Look Symmetrical
Place both ears against the head before sewing them permanently. Compare their height and angle, then adjust as needed.
The Head Looks Crooked After Assembly
Check the position of the body and head openings before tightening the final sewing stitches. Loosening a few stitches and repositioning the head may correct the alignment.
My Tail Feels Too Heavy
Use less stuffing. The tail only needs enough fiberfill to hold its shape while remaining flexible enough to position against the body.
Customization Ideas
Try Different Fox Colors
Swap the rust orange for another warm shade while keeping the cream accents for contrast.
Change the Expression
The embroidered mouth can be adjusted to create a slightly different expression without changing the head or muzzle construction.
Create a Character
A small accessory or a different color palette can give your fox its own personality while keeping the original body structure intact.
Adjust the Scale
Changing yarn weight and hook size can change the final dimensions. Keep in mind that the resulting size will also depend on your tension and stuffing.
Care
Because the finished piece contains sewn components, embroidery, and safety eyes, handle it gently and check the attachments periodically for signs of loosening.
Do not treat the finished piece as a child-safe or baby-safe toy.
Frequently Asked Questions
How big is the finished tiny fox?
The finished fox is approximately 4–5 inches (10–13 cm). The final size can vary depending on yarn, hook size, tension, stuffing, and individual technique.
What crochet terms does this pattern use?
The pattern uses standard US terminology, including magic ring, single crochet, increase, decrease, and fasten off.
Is this fox worked in continuous rounds?
Yes. The main crocheted pieces are worked in continuous rounds, with a stitch marker used to identify the beginning of each round.
Does the fox require sewing?
Yes. The individual pieces are crocheted separately and then assembled with a tapestry needle and yarn tails.
Can I change the yarn color?
Yes. Color changes can be made while keeping the same stitch structure, although changing yarn weight can also change the finished size.
Can I use a different hook size?
You can, but the finished dimensions and stitch appearance may change. The approximate size given in this pattern assumes the specified yarn and hook.
Can I use embroidered eyes instead of safety eyes?
The pattern specifies 6 mm safety eyes, but embroidered facial details can be considered as a design variation. Any alternative should be evaluated for the intended use of the finished piece.

Final Thoughts
This tiny fox amigurumi combines a rounded head and body with pointed ears, a cream muzzle, and a distinctive two-tone tail.
Work through each component carefully, use the stitch counts as checkpoints, and compare paired pieces before sewing them permanently. Those small checks help maintain a balanced, symmetrical finished fox.