
Tiny Ghost – Free Crochet Pattern
This Tiny Ghost crochet pattern creates a small, rounded ghost…
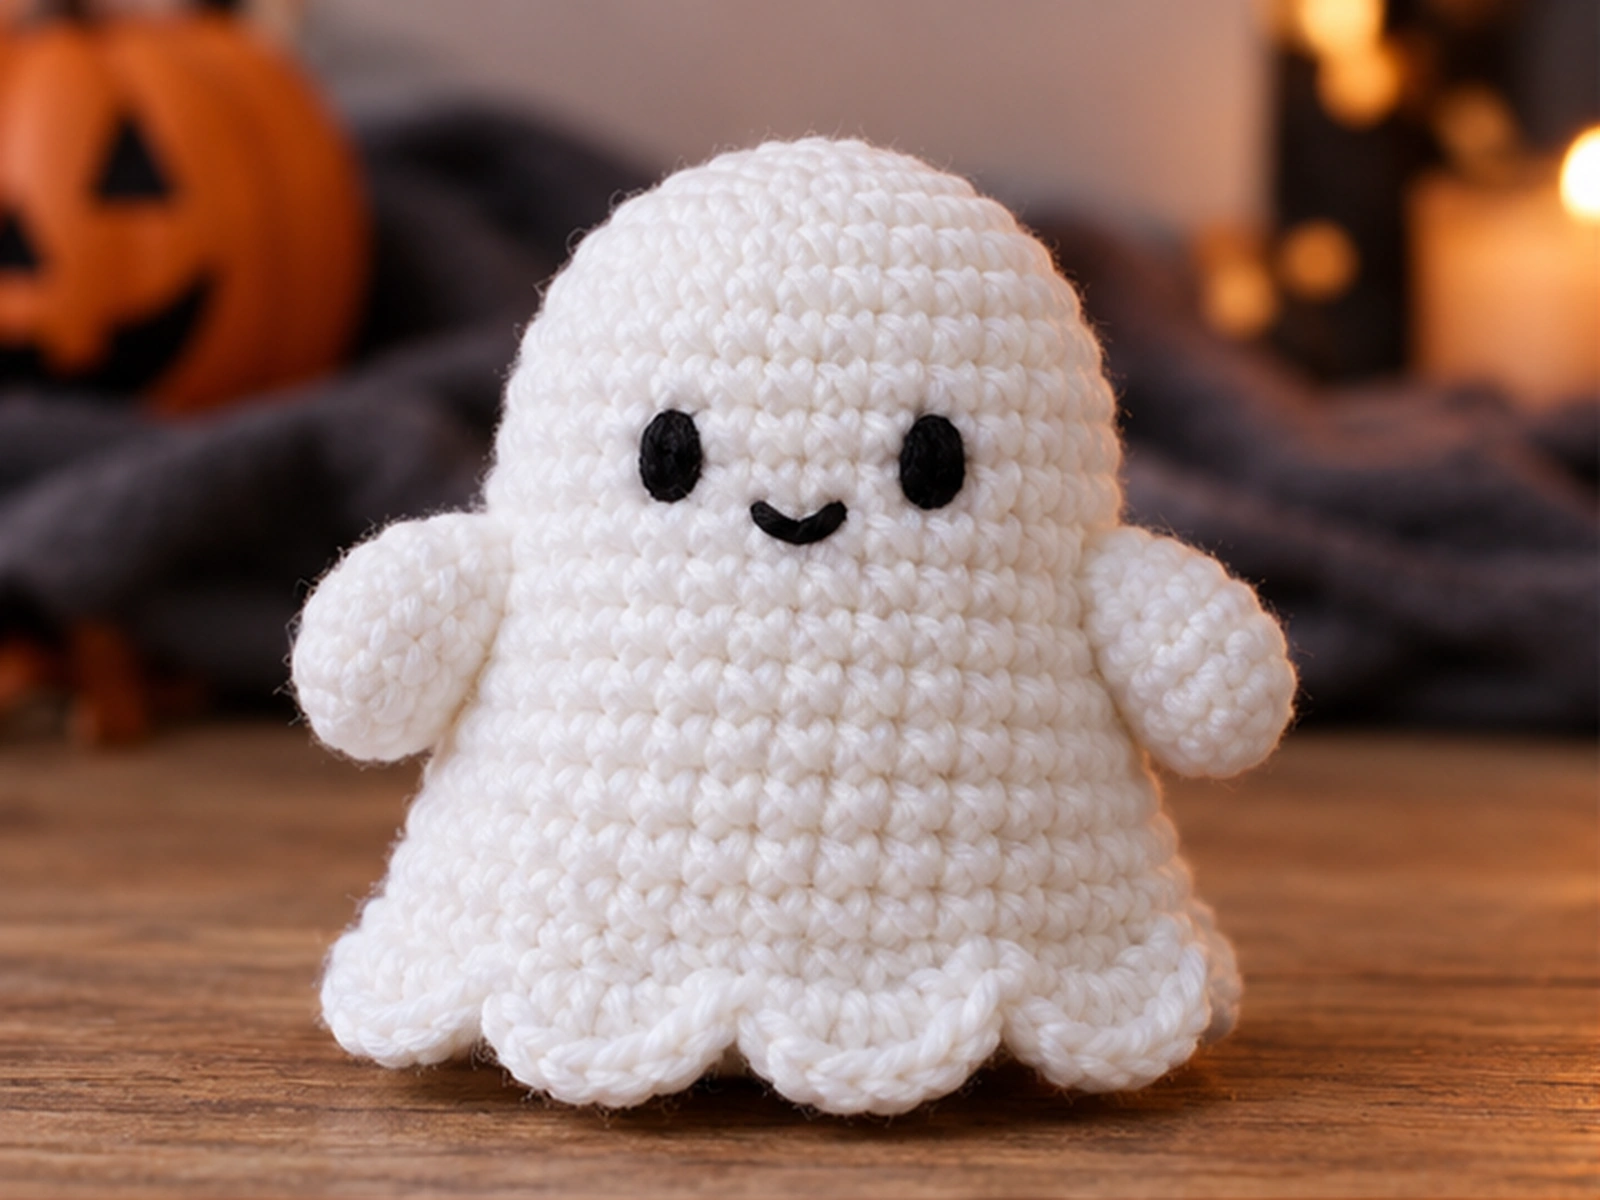
This Tiny Ghost crochet pattern creates a small, rounded ghost with a softly scalloped hem, simple embroidered facial features, and two little arms. The body is worked from the bottom up in continuous rounds, while the decorative hem is added around the lower edge after the main body is complete.
The finished ghost is approximately 3.5–4.5 inches tall when made with the specified yarn and hook, although the final size can vary with yarn, tension, stuffing, and individual crochet technique.
Project Overview
What You’ll Make
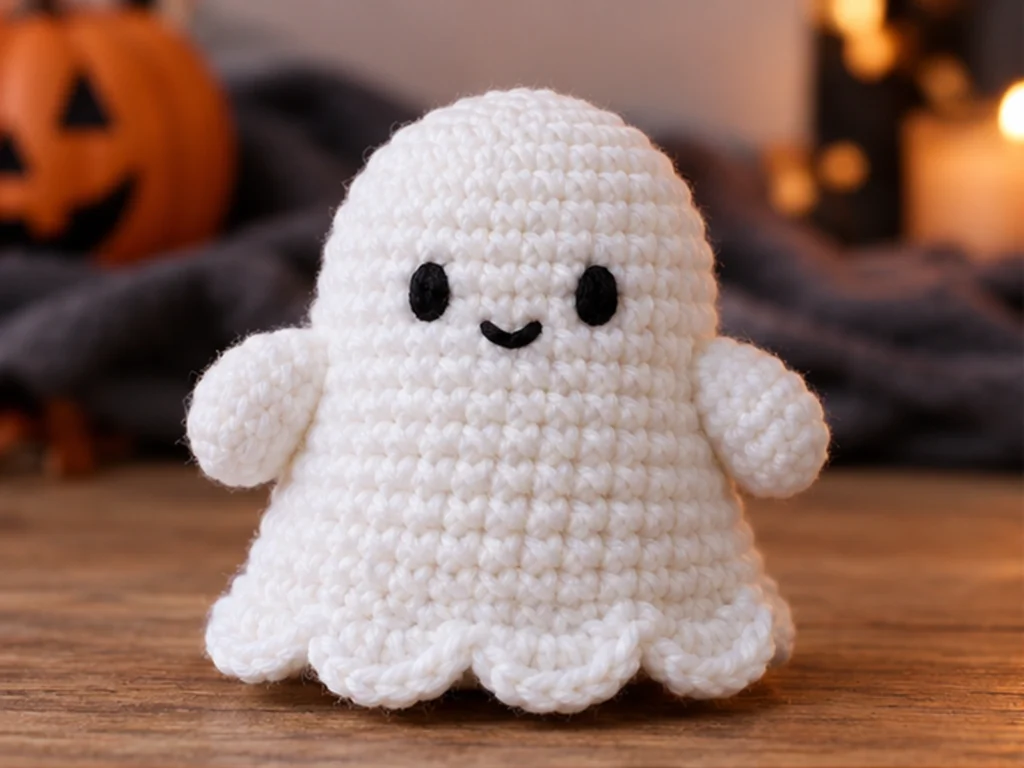
You’ll crochet one main ghost body, add a seven-scallop hem around the lower edge, embroider a simple face, and finish the project with two matching arms.
The design has:
- A wider lower body
- A rounded upper section
- A seven-scallop decorative hem
- Two separate arms
- Embroidered black facial features
- A bottom-up continuous-round construction
Project Details
| Detail | Information |
|---|---|
| Project | Tiny Ghost |
| Approximate finished size | 3.5–4.5 inches tall |
| Yarn | DK / light #3 yarn |
| Main color | White |
| Accent color | Black |
| Crochet hook | 2.75 mm |
| Filling | Polyester fiberfill |
| Face | Embroidered |
| Construction | Bottom-up body with separate arms |
| Crochet terminology | US terminology |
The pattern has been mathematically reviewed and constructionally checked, but it has not been physically crocheted and tested yet.
Materials & Tools
Yarn
- White DK / light #3 yarn for the body and arms
- A small amount of black yarn for the embroidered face
The pattern does not specify an exact yarn quantity.
Crochet Hook
- 2.75 mm crochet hook
Other Supplies
- Polyester fiberfill
- Tapestry or yarn needle
- Scissors
- Stitch marker
No safety eyes are required for this version because the facial features are embroidered.
Abbreviations
- MR — magic ring
- sc — single crochet
- inc — increase, 2 sc in the same stitch
- dec — decrease, sc 2 stitches together
- dc — double crochet
- FLO — front loop only
- BLO — back loop only
- sl st — slip stitch
- FO — fasten off
Before You Start
Work in Continuous Rounds
The main body is worked in continuous rounds rather than joined rounds. A stitch marker is recommended to keep track of the beginning of each round.
Count Your Stitches
The stitch count at the end of each round is an important checkpoint. When your count does not match the number shown in the pattern, correct the mistake before continuing.
Stuff Gradually
Add polyester fiberfill gradually as the body develops. This gives you better control over the shape and helps prevent the stitches from stretching.
Shape Before Closing
The facial embroidery should be completed before the body is fully stuffed and closed. This makes it easier to position the face cleanly and keep the stitches neat.
Construction Order
The main body is crocheted first. The scalloped hem is then worked into the unused front loops from Round 7. The face is embroidered before final stuffing and closure, and the two arms are completed separately and sewn to the body afterward.
Tiny Ghost Crochet Pattern
Main Body
Using white DK/light #3 yarn and a 2.75 mm crochet hook.
Work in continuous rounds and use a stitch marker to identify the beginning of each round.
Round 1
6 sc in MR. (6)
Round 2
6 inc. (12)
Round 3
(sc, inc) × 6. (18)
Round 4
(2 sc, inc) × 6. (24)
Round 5
(3 sc, inc) × 6. (30)
Round 6
(4 sc, inc) × 6. (36)
Round 7
(5 sc, inc) × 6. (42)
Round 8
BLO sc around. (42)
Round 9
Sc around. (42)
Round 10
Sc around. (42)
Round 11
(6 sc, inc) × 6. (48)
Round 12
Sc around. (48)
Round 13
Sc around. (48)
Round 14
Sc around. (48)
Round 15
Sc around. (48)
Round 16
(6 sc, dec) × 6. (42)
Round 17
Sc around. (42)
Round 18
(5 sc, dec) × 6. (36)
Round 19
Sc around. (36)
Round 20
(4 sc, dec) × 6. (30)
Round 21
Sc around. (30)
Round 22
Sc around. (30)
Round 23
Sc around. (30)
Round 24
Sc around. (30)
Round 25
(3 sc, dec) × 6. (24)
Round 26
(2 sc, dec) × 6. (18)
Round 27
(sc, dec) × 6. (12)
Round 28
6 dec. (6)
Fasten off, leaving a long yarn tail.
Scalloped Ghost Hem
The decorative hem is worked into the unused front loops from Round 7.
Hold the lower edge so the exposed FLOs are easy to access.
Join white yarn with a sl st in any exposed FLO from Round 7.
Ch 1. The chain does not count as a stitch.
Repeat the following sequence 7 times:
sc in next 2 FLO, 4 dc in next FLO, sc in next 3 FLO
Each repeat uses 6 front loops.
After 7 repeats, all 42 exposed FLOs from Round 7 will have been used.
Join with a sl st to the first sc.
Fasten off and weave in the end.
This creates seven rounded scallops around the lower edge of the ghost.

Embroidered Face
Complete the facial embroidery before fully stuffing and closing the body.
Eyes
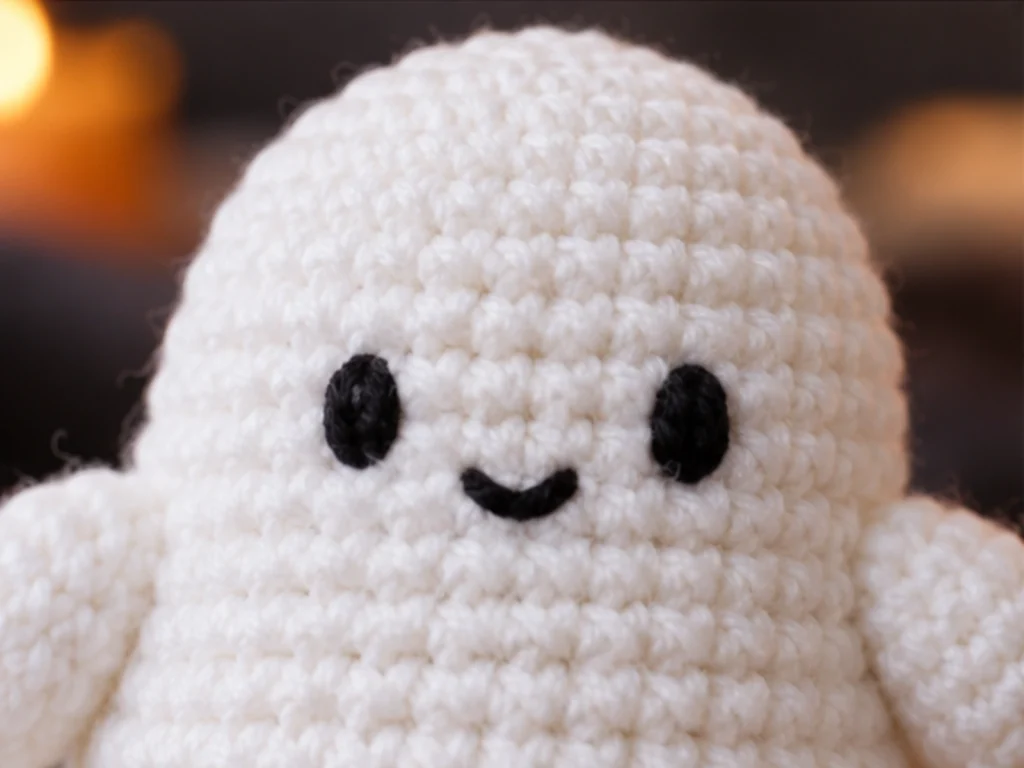
Using black yarn, embroider two small eyes on the front of the ghost around Rounds 21–23.
Use the body’s centerline to guide the placement:
- Place the first eye.
- Check its vertical position.
- Use the center of the body to position the second eye symmetrically.
- Compare both sides before securing the embroidery.
Mouth
Embroider a small curved or oval mouth between the eyes, approximately one round below their center.
Keep the facial details compact so they remain clear on the small upper section of the body.
Stuff and Close the Body
Once the facial embroidery is complete, add polyester fiberfill gradually.
Shape the body as you stuff it so the lower section remains wider and the upper section stays rounded.
Avoid overstuffing. The crochet fabric should hold its shape without becoming stretched or distorted.
When the body has the desired shape, use the remaining yarn tail and a yarn needle to close the final opening.
Arms — Make 2
Make two identical arms using white yarn.
Round 1
6 sc in MR. (6)
Round 2
6 inc. (12)
Round 3
Sc around. (12)
Round 4
Sc around. (12)
Round 5
Sc around. (12)
Round 6
(4 sc, dec) × 2. (10)
Round 7
Sc around. (10)
Fasten off, leaving a long yarn tail for sewing.
Lightly stuff the arm.
Flatten the opening so the arm forms a simple tapered shape, then sew the opening closed through both layers.
Repeat for the second arm.
Assembly
Step 1: Prepare the Finished Pieces
Make sure the body is closed, the scalloped hem is finished, the face is embroidered, and both arms are completed.
Step 2: Position the Arms
Lay the ghost upright and identify the front.
Place the first arm along one side of the body, with its upper attachment area around the transition between the wider middle section and the upper section, approximately around Rounds 15–18.
Position the second arm on the opposite side.
Step 3: Check Symmetry
Before sewing, compare both arms from the front.
Check that:
- They sit at similar heights.
- They have a similar angle.
- The overall silhouette looks balanced.
Step 4: Sew the Arms
Sew each arm securely to the body using the remaining yarn tails.
Weave in and trim the ends.
Finishing
Give the completed ghost a gentle final shaping pass.
Check that:
- The lower body remains wider than the upper section.
- The upper section stays rounded.
- The scalloped hem remains clearly defined.
- The face is centered.
- Both arms have a similar orientation.
- No stuffing is visibly pushing through the stitches.
Avoid overstuffing, especially near the upper section, because excessive stuffing can stretch the stitches and change the shape.

Helpful Tips
Keep Your Stitch Count Consistent
The ghost’s shaping depends on the stitch counts at each transition. If your count differs from the pattern, find the mistake before continuing.
Use a Stitch Marker
Because the main body is worked in continuous rounds, a stitch marker makes it easier to identify the beginning of each round.
Stuff Gradually
Small amounts of stuffing give you more control than adding a large amount at once.
Don’t Overstuff
The finished body should hold its shape without pulling the crochet fabric apart.
Check the Face Before Final Closure
Taking a moment to check the embroidered features before the body is completely stuffed and closed makes it easier to adjust the placement.
Compare Both Arms Before Sewing
Position both arms first, compare them from the front, and sew them only after you’re happy with the balance.
Troubleshooting
My Stitch Count Is Off
Stop at the end of the round and recount the stitches. Check the increase or decrease section carefully before continuing.
The Ghost Looks Too Wide or Too Narrow
Check your stitch count, yarn weight, hook size, and tension. These factors all influence the final shape.
The Body Looks Lumpy
Add stuffing gradually and distribute it evenly throughout the body instead of filling one section too firmly.
The Stitches Look Stretched
The body may be overstuffed. Remove or redistribute a small amount of stuffing until the fabric relaxes.
The Arms Don’t Look Even
Position both arms before sewing them permanently. Use the front of the ghost as your visual reference and compare both sides.
The Scalloped Hem Looks Uneven
Check that each repeat uses the correct six exposed front loops from Round 7. The seven repeats should use all 42 available FLOs.
Customization Ideas
Change the Color
White creates the classic ghost appearance, but other colors can give the same silhouette a completely different character.
Change the Expression
Because the face is embroidered, you can experiment with different eye and mouth shapes before permanently securing the yarn.
Experiment With Size
A different yarn weight and appropriately matched hook can change the overall scale.
Keep in mind that changing the yarn and hook also changes stitch definition, proportions, and finished dimensions.
Adjust the Arm Position
The arms can be positioned slightly upward or outward during assembly for a different silhouette.
Care
Because the finished ghost contains embroidered details and polyester stuffing, handle it gently and keep it clean according to the care instructions appropriate for the yarn used.
Avoid treating the finished piece as a certified toy or assuming it is suitable for young children.
Frequently Asked Questions
How big is the Tiny Ghost?
The finished ghost is approximately 3.5–4.5 inches tall with the specified materials. Actual dimensions vary with yarn, hook size, tension, stuffing, and individual crochet technique.
What yarn should I use?
The pattern is designed around DK/light #3 yarn. Changing yarn weight will affect the finished size and proportions.
What crochet hook size is used?
Use a 2.75 mm crochet hook.
Is the pattern worked in continuous rounds?
Yes. The main body is worked in continuous rounds, so a stitch marker is recommended.
Does this pattern use safety eyes?
No. The eyes and mouth are embroidered with black yarn.
When should I embroider the face?
Embroidery should be completed before the body is fully stuffed and closed. This makes it easier to position and adjust the facial features.
How is the scalloped bottom made?
The hem is worked into the unused front loops from Round 7. Seven repeats use all 42 exposed front loops.
Can I make the ghost larger?
You can experiment with a different yarn weight and appropriately sized hook, but the finished scale and proportions will change.
Why does my ghost look different from the expected shape?
Check the stitch counts first, then consider yarn weight, hook size, tension, and stuffing. All of these can affect the final silhouette.
Can I change the face?
Yes. The facial features are embroidered, so you can adjust the expression before securing the final stitches.
Final Thoughts
This Tiny Ghost crochet pattern is built around a simple ghost silhouette, rounded shaping, a seven-scallop hem, and an embroidered face.
Keep your stitch counts consistent, stuff the body gradually, and compare both arms before sewing them into place. Small adjustments in tension, stuffing, and facial placement can give your finished ghost its own personality.
Pattern status: This original design has been mathematically reviewed and constructionally checked, but it has not been physically crocheted and tested yet.