
Tiny Pumpkin Crochet Pattern
This tiny crochet pumpkin has a rounded body, six softly…

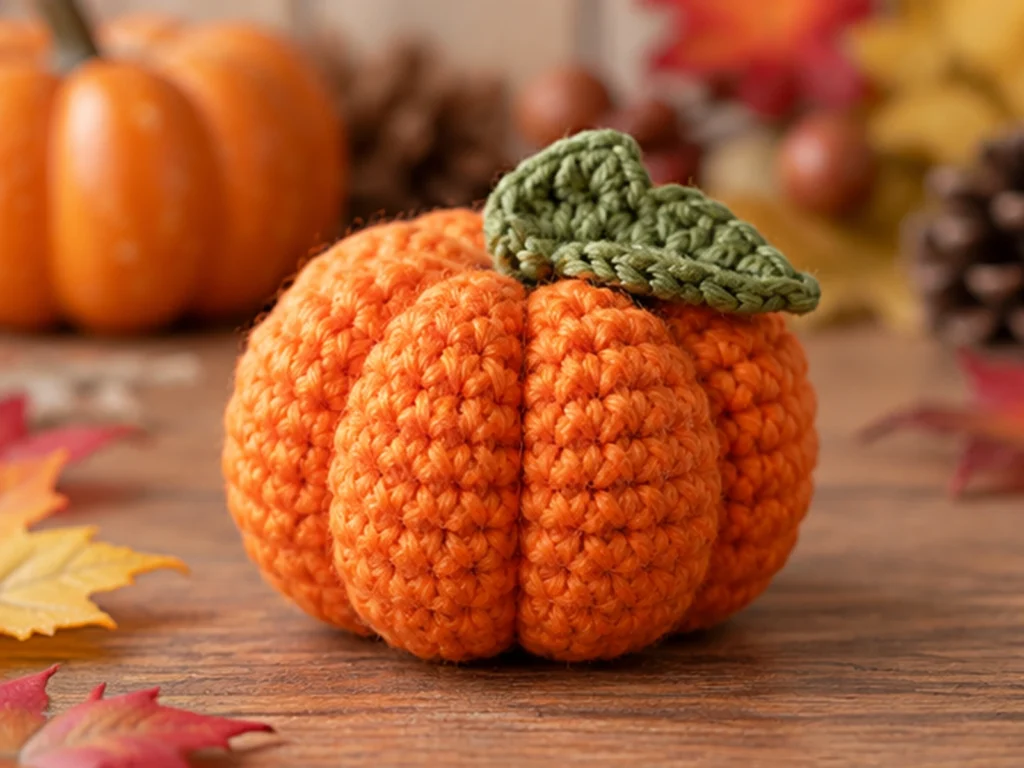
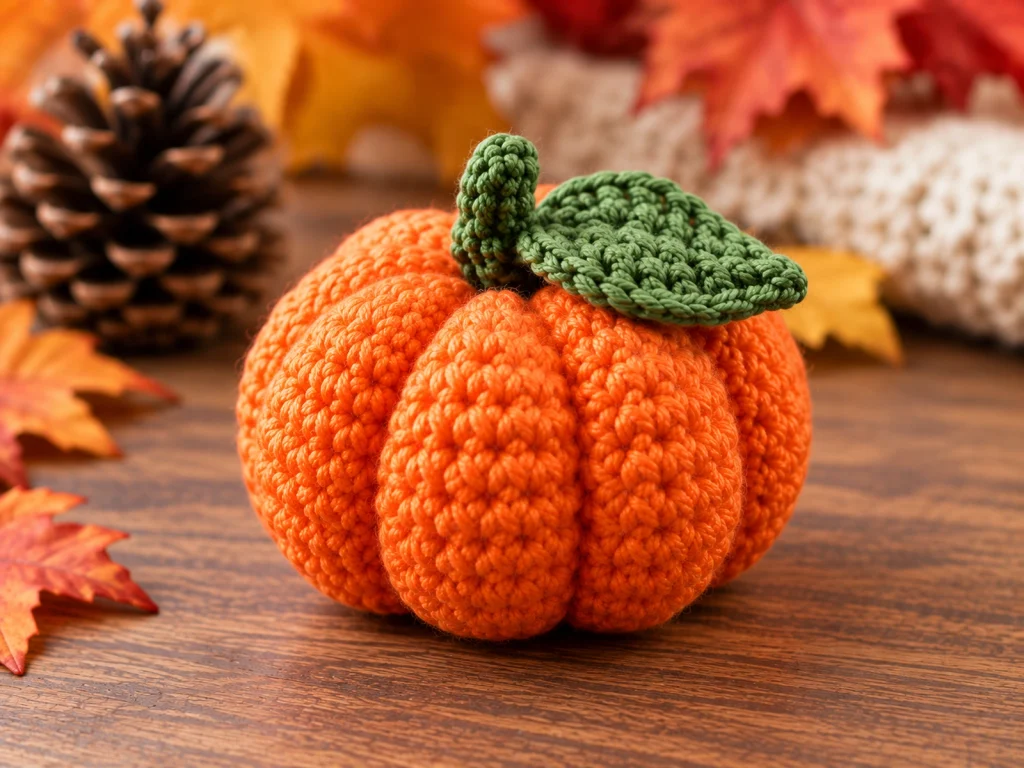
This tiny crochet pumpkin has a rounded body, six softly sculpted sections, and a simple green leaf attached at the top. The pumpkin is worked in continuous rounds, then shaped with yarn sculpting to create its classic segmented look.
The finished pumpkin is approximately 2–2.5 inches tall, making it a compact seasonal project for a fall display or a handmade crochet collection.
Project Overview
What You’ll Make
You’ll crochet:
- One stuffed pumpkin body in orange
- One small green leaf
- Six sculpted sections on the finished pumpkin
The pumpkin body is crocheted in continuous rounds and gradually decreases toward the top. After the body is stuffed and closed, yarn sculpting creates the pumpkin’s six sections.
Project Details
- Project: Tiny Pumpkin
- Approximate finished size: 2–2.5 inches tall
- Yarn: DK/light worsted yarn
- Hook: 2.75 mm crochet hook
- Main color: Orange
- Accent color: Green
- Filling: Polyester fiberfill
- Construction: One crocheted pumpkin body and one crocheted leaf
- Crochet terminology: US terms
The finished size is approximate and can vary depending on yarn, hook, tension, stuffing, and individual crochet technique.
Materials & Tools
- DK/light worsted yarn in orange
- DK/light worsted yarn in green
- 2.75 mm crochet hook
- Polyester fiberfill
- Yarn needle
- Stitch marker
- Scissors
Abbreviations
- MR — magic ring
- ch — chain
- sc — single crochet
- inc — increase
- dec — decrease
- hdc — half double crochet
- dc — double crochet
- sl st — slip stitch
Before You Start
Work in Continuous Rounds
The pumpkin body is worked in continuous rounds rather than joined rounds. Use a stitch marker to identify the beginning of each round and move it as you work.
Count Your Stitches
Keep track of the stitch count at the end of every round. The increases and decreases shape the pumpkin, so an incorrect count can affect the final form.
Stuff as You Go
Begin adding polyester fiberfill during Round 10. Add stuffing gradually and adjust it as you work through the final decrease rounds.
Avoid overstuffing. The pumpkin needs enough filling to hold its rounded shape while still allowing the sculpting yarn to create the sections.
Shape Before Finishing
The pumpkin’s segmented appearance comes from yarn sculpting after the crocheted body is finished. Pull the sculpting yarn gradually so the grooves stay even and the body remains rounded.
Construction Order
Complete the pumpkin body first, then close and sculpt it. Crochet the leaf separately and attach it to the top of the finished pumpkin.
Tiny Pumpkin Crochet Pattern
Pumpkin Body
Make 1 in orange yarn.
Work in continuous rounds.
Round 1
6 sc in MR. (6)
Round 2
6 inc. (12)
Round 3
(sc, inc) × 6. (18)
Round 4
(2 sc, inc) × 6. (24)
Round 5
(3 sc, inc) × 6. (30)
Round 6
sc around. (30)
Round 7
sc around. (30)
Round 8
sc around. (30)
Round 9
(3 sc, dec) × 6. (24)
Round 10
(2 sc, dec) × 6. (18)
Begin adding polyester fiberfill. Add enough stuffing to support the pumpkin shape without making it overly firm.
Round 11
(sc, dec) × 6. (12)
Add or adjust the stuffing as needed.
Round 12
6 dec. (6)
Fasten off, leaving a long yarn tail.
Use a yarn needle to close the remaining opening.
Pumpkin Leaf
Make 1 in green yarn.
Foundation: Ch 7.
Row 1
Starting in the 2nd ch from the hook, sl st, sc, hdc, dc, hdc, sc. (6)
Row 2
Ch 1, turn. sc, inc, sc, sc, inc, sc. (8)
Row 3
Ch 1, turn. sc across. (8)
Row 4
Ch 1, turn. dec, sc, sc, sc, sc, dec. (6)
Row 5
Ch 1, turn. dec, sc, dec. (4)
Row 6
Ch 1, turn. dec, dec. (2)
Row 7
Ch 1, turn. dec. (1)
Fasten off, leaving a sewing tail.
Shape the Pumpkin
Once the pumpkin body is closed, use a long strand of matching orange yarn to create the six sections.
- Thread the yarn onto a yarn needle.
- Anchor the yarn securely at the bottom center of the pumpkin.
- Bring the needle through the pumpkin and out at the top center.
- Pull gently to create a shallow groove from top to bottom.
- Repeat around the pumpkin until you have six evenly spaced sections.
- Adjust the tension gradually until the sections look balanced.
- Secure the sculpting yarn at the bottom and hide the remaining end.
Pull gently rather than tightening the yarn sharply. The goal is to define the sections while keeping the pumpkin rounded.

Attach the Pumpkin Leaf
Position the finished leaf at the top center of the pumpkin.
- Place the wider part of the leaf against the pumpkin.
- Keep the pointed end facing outward.
- Check the placement visually before sewing.
- Use the leaf’s sewing tail to attach the base securely.
- Weave in the remaining yarn ends.
The leaf should rest naturally across the top of the pumpkin.
Finishing
After the leaf is attached, check the entire pumpkin from several angles.
Make sure:
- The stuffing is evenly distributed.
- The six sculpted sections are balanced.
- The leaf is securely attached.
- No stuffing is visible through the stitches.
- All loose yarn ends are woven in securely.
Helpful Tips
Keep Your Tension Consistent
Consistent tension helps the pumpkin maintain an even shape and keeps the stitches compact enough to contain the stuffing.
Use a Stitch Marker
Because the pumpkin is worked in continuous rounds, a stitch marker makes it easier to identify the beginning of each round.
Add Stuffing Gradually
Small amounts of fiberfill are easier to distribute evenly than one large amount added at once.
Sculpt Slowly
Make small adjustments to the sculpting yarn instead of pulling each section tightly right away. This makes it easier to keep the pumpkin sections balanced.
Check the Leaf Before Sewing
Take a moment to view the pumpkin from different angles before permanently attaching the leaf.
Troubleshooting
My Stitch Count Is Off
Stop at the end of the round where the count changed and check your increases or decreases. Correcting a counting mistake before continuing is easier than compensating in a later round.
The Stuffing Is Showing
Try using slightly less stuffing and check your tension. Overly firm stuffing can push fiberfill toward the surface.
My Pumpkin Looks Too Flat
Check that the body is stuffed evenly and that the sculpting yarn has not been pulled too tightly. The grooves should define the sections without flattening the entire pumpkin.
The Sections Look Uneven
Adjust the sculpting yarn gradually and compare the grooves around the entire pumpkin rather than tightening one section too much.
The Leaf Is Sitting Incorrectly
Reposition the leaf so its base rests near the top center of the pumpkin. Check the angle from several sides before sewing it permanently.
Customize Your Tiny Pumpkin
Try Different Colors
Orange gives the pumpkin a traditional seasonal look, but different colors can create a variety of fall-inspired styles.
Crochet a Small Collection
Make several pumpkins in complementary colors and group them together as a coordinated handmade display.
Change the Leaf Color
A lighter or darker green can create a different look while keeping the same basic construction.
Frequently Asked Questions
How big is the finished crochet pumpkin?
The pumpkin is approximately 2–2.5 inches tall. The final size can vary based on yarn, hook, tension, stuffing, and individual crochet technique.
What yarn is used for this tiny pumpkin?
The pattern uses DK/light worsted yarn. Orange is used for the pumpkin body and green for the leaf.
What crochet hook size do I need?
Use a 2.75 mm crochet hook.
When do I add the stuffing?
Begin stuffing during Round 10, then adjust the amount through the remaining decrease rounds.
Does the pumpkin require assembly?
Yes. The pumpkin body and leaf are crocheted separately. The leaf is sewn to the top of the finished pumpkin, and the body is shaped with yarn sculpting after it is closed.
Can I use different colors?
Yes. Different yarn colors can be used while keeping the same basic construction and stitch sequence.
More Crochet Patterns
Explore more Tiny Yarn Tales crochet projects as you build your handmade collection and try new seasonal designs.
Final Notes
This tiny pumpkin combines a compact crocheted body, a simple leaf, and gentle yarn sculpting to create its rounded segmented shape. For the best result, focus on even tension, gradual stuffing, and careful sculpting.
This pattern has been mathematically reviewed and constructionally checked, but it has not been physically crocheted and tested yet. The finished size should therefore be treated as approximate and may vary with materials and technique.
