Waffle Amigurumi Crochet Pattern
This waffle amigurumi turns a breakfast favorite into a cute…
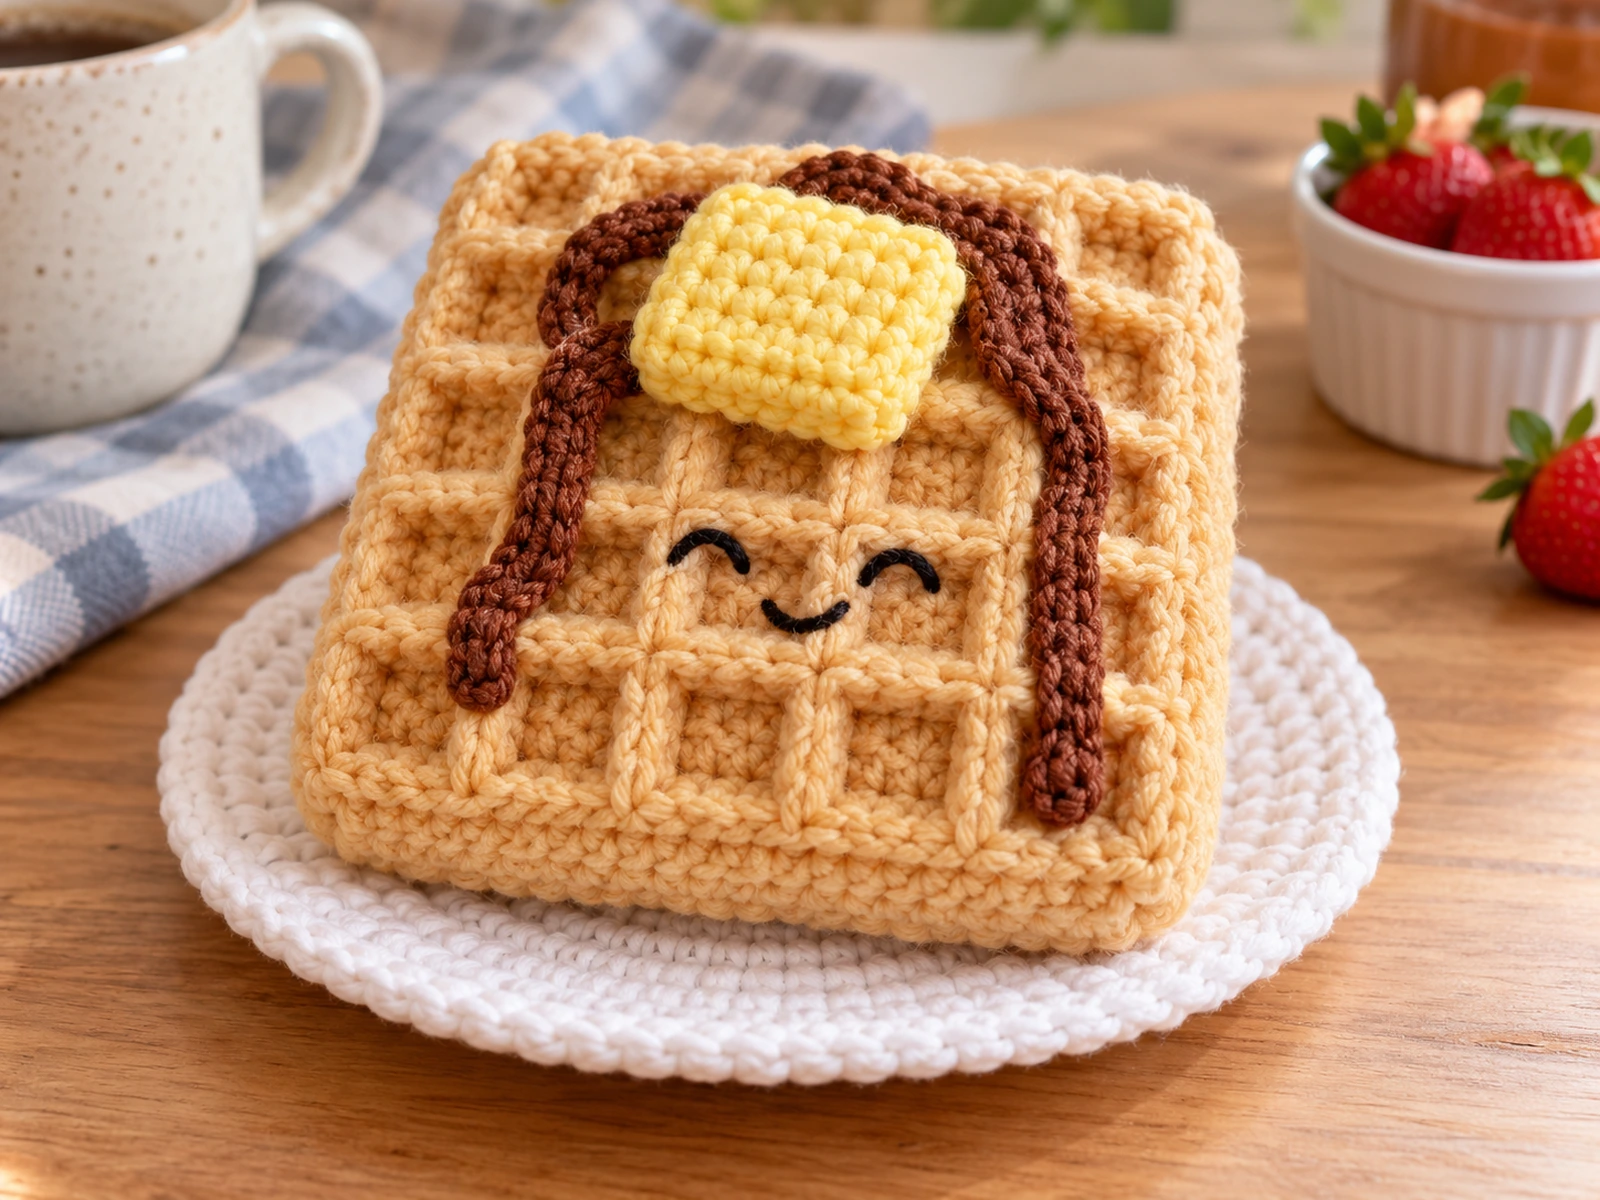
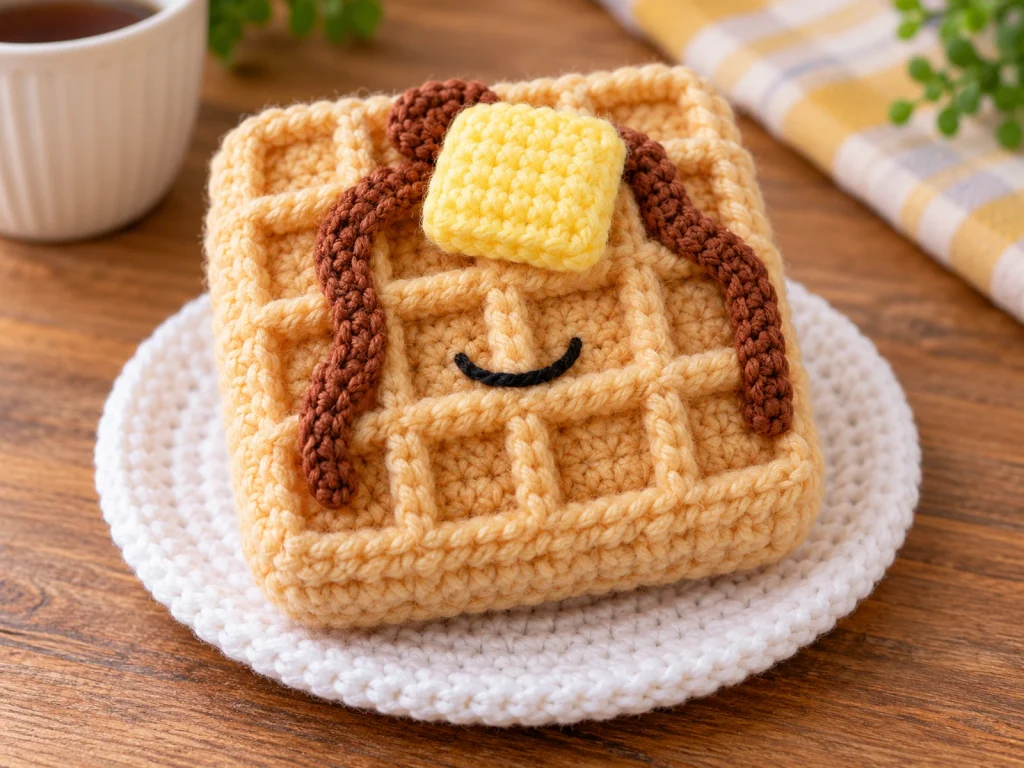
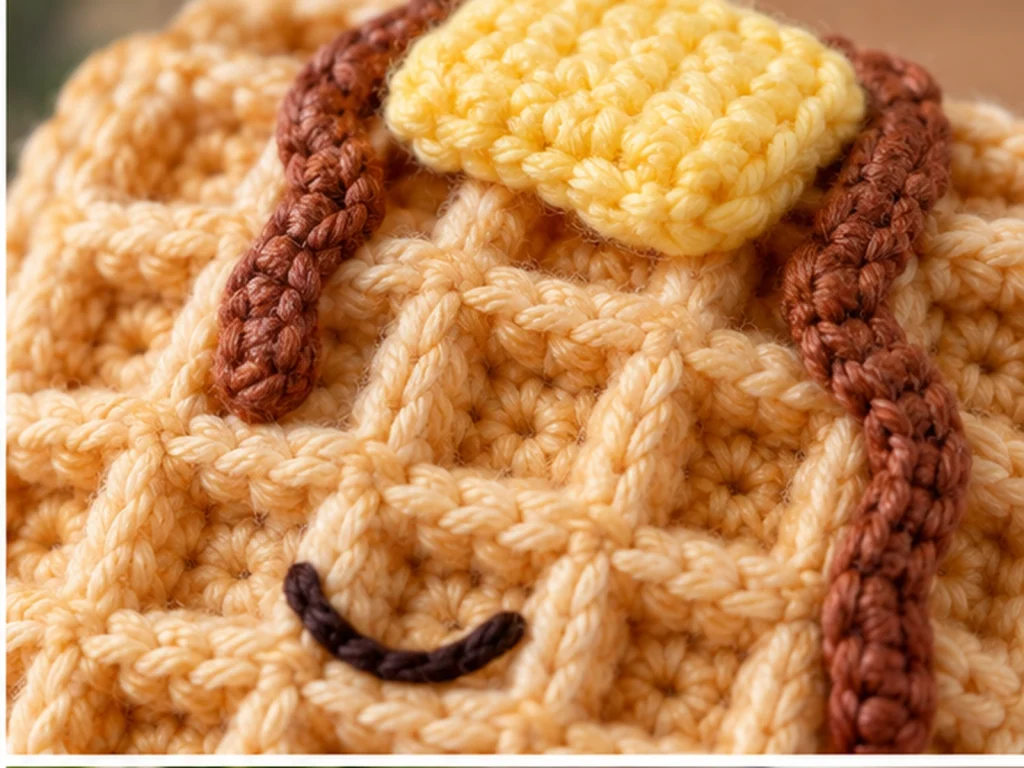
This waffle amigurumi turns a breakfast favorite into a cute crocheted piece with a raised waffle-grid texture, a small pat of butter, brown syrup drizzle, and a simple embroidered smile. The main waffle is made from two square panels that are joined and lightly stuffed before the decorative details are added.
The waffle texture is created with front post double crochet, while the optional crochet plate gives the finished piece a simple presentation base.
About This Waffle Amigurumi
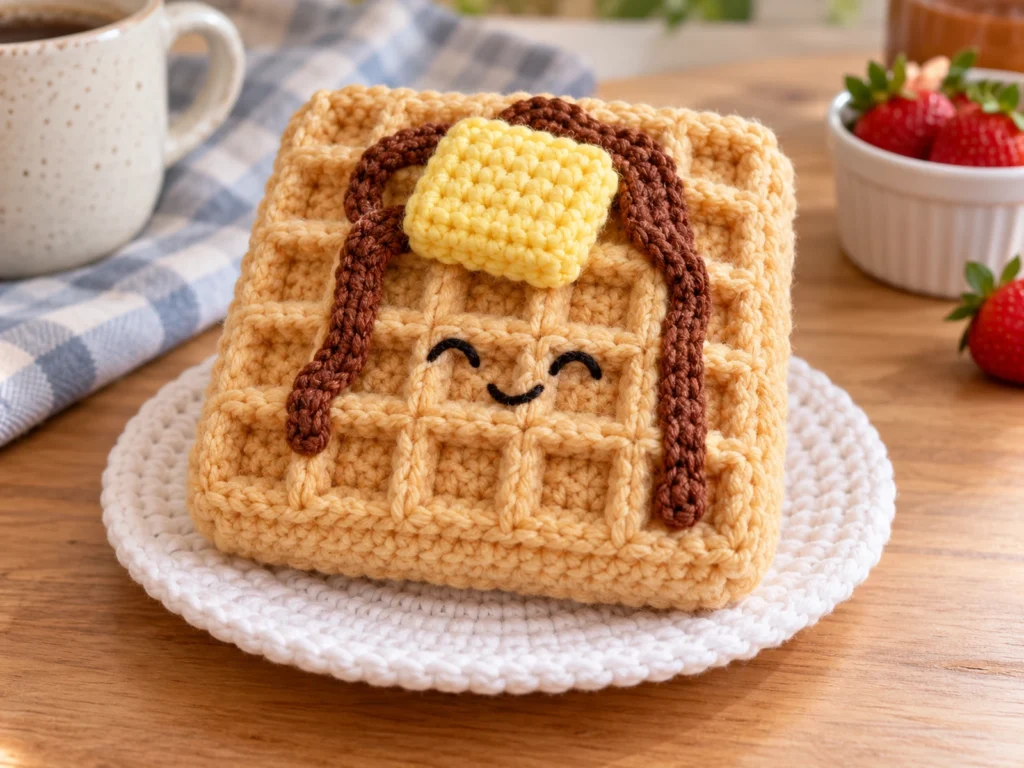
The finished waffle is approximately 4–5 inches square, although the final size can vary with yarn, hook size, tension, stuffing, and individual crochet technique.
The project includes:
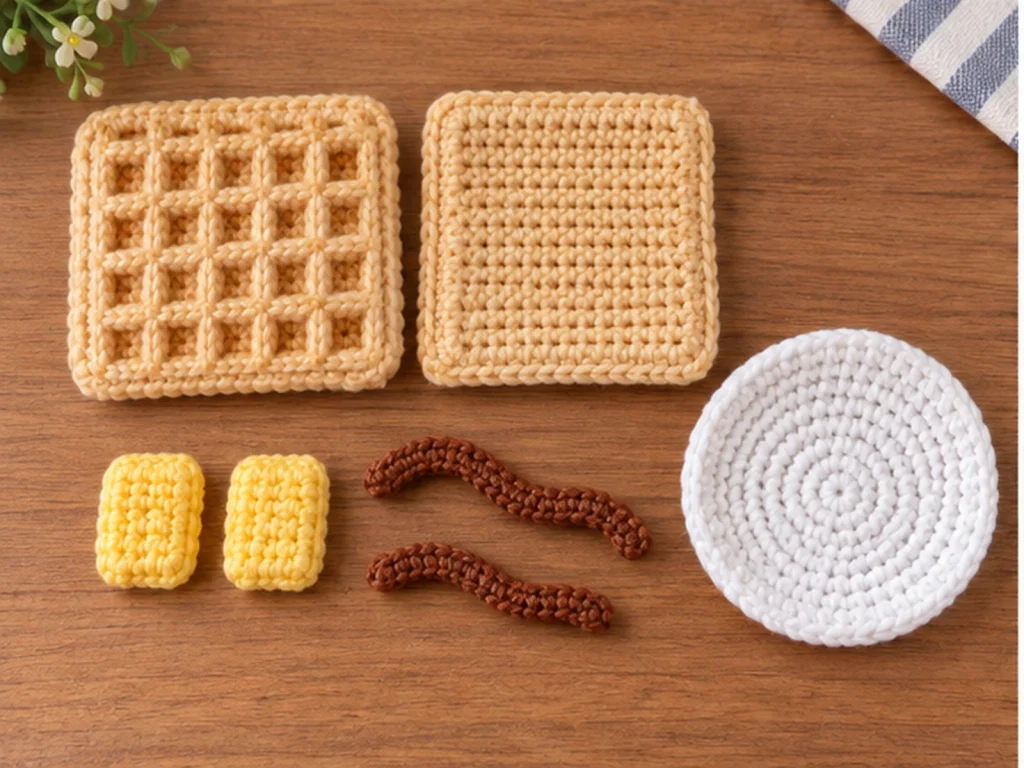
- One textured front waffle panel
- One plain back panel
- Two small butter panels
- Two brown syrup strands
- An embroidered smile
- An optional crochet plate
The front panel uses two alternating stitch arrangements to create the raised waffle pattern.
Pattern note: This pattern has been mathematically reviewed and constructionally checked, but it has not been physically crocheted and tested yet.
Materials and Tools
Yarn
- Worsted-weight cream yarn
- Yellow yarn
- Brown yarn
- Black embroidery thread
- White yarn for the optional plate
Tools
- 4.0 mm crochet hook
- Tapestry needle
- Stitch marker
- Scissors
- Polyester fiberfill
Abbreviations
The pattern uses standard US crochet terminology.
- MR — magic ring
- ch — chain
- sc — single crochet
- dc — double crochet
- fpdc — front post double crochet
- inc — increase
- sl st — slip stitch
- FO — fasten off
Before You Start
Turning Chains
Turning chains do not count as stitches unless otherwise noted.
This is especially important for the waffle panels, where each row is maintained at 19 stitches.
Working the Waffle Texture
The raised sections are created with front post double crochet. Work the hook around the post of the indicated stitch rather than through the top two loops.
Keep your tension reasonably even so the raised texture remains defined without pulling the fabric too tightly.
Stuffing
Stuff the main waffle moderately. Too much filling can make the square shape look rounded.
The butter should only receive a small amount of stuffing so it remains a low-profile topping.
How to Make a Front Post Double Crochet
A front post double crochet is worked around the vertical post of the stitch instead of through the stitch’s top loops.
- Yarn over.
- Insert the hook from front to back around the post of the stitch below.
- Bring the hook back toward the front.
- Complete the double crochet normally.
The resulting stitch sits forward on the fabric and creates the raised texture used throughout the waffle panel.
Crochet Waffle Amigurumi Pattern
Textured Front Waffle Panel
Make 1 in cream.
Row 1
Ch 21.
Dc in the 3rd ch from hook and in each ch across.
19 stitches
Row 2
Ch 2, turn.
*(Dc, fpdc, fpdc) × 6, dc.
19 stitches
Row 3
Ch 2, turn.
*(Fpdc, fpdc, dc) × 6, dc.
19 stitches
Row 4
Repeat Row 2.
19 stitches
Row 5
Repeat Row 3.
19 stitches
Row 6
Repeat Row 2.
19 stitches
Row 7
Repeat Row 3.
19 stitches
Row 8
Repeat Row 2.
19 stitches
Row 9
Repeat Row 3.
19 stitches
Row 10
Repeat Row 2.
19 stitches
Row 11
Repeat Row 3.
19 stitches
Row 12
Repeat Row 2.
19 stitches
Row 13
Repeat Row 3.
19 stitches
Row 14
Repeat Row 2.
19 stitches
Row 15
Repeat Row 3.
19 stitches
Row 16
Repeat Row 2.
19 stitches
Row 17
Repeat Row 3.
19 stitches
Row 18
Repeat Row 2.
19 stitches
Row 19
Repeat Row 3.
19 stitches
Fasten off, leaving a long tail for sewing.
Back Waffle Panel
Make 1 in cream.
Row 1
Ch 21.
Dc in the 3rd ch from hook and across.
19 stitches
Rows 2–19
Ch 2, turn.
Dc across.
19 stitches
Fasten off, leaving a long sewing tail.
Butter
Make 2 in yellow.
Row 1
Ch 8.
Sc in the 2nd ch from hook and across.
7 stitches
Row 2
Ch 1, turn. Sc across.
7 stitches
Row 3
Ch 1, turn. Sc across.
7 stitches
Row 4
Ch 1, turn. Sc across.
7 stitches
Row 5
Ch 1, turn. Sc across.
7 stitches
Fasten off, leaving a sewing tail.
Butter Assembly
Place the two yellow pieces together.
Whip stitch around the edges, adding a small amount of fiberfill before completely closing the butter.
Keep the finished piece fairly flat.
Syrup
Make 2 in brown.
Syrup Strand 1
Ch 20.
Fasten off, leaving a long tail.
Syrup Strand 2
Ch 13.
Fasten off, leaving a long tail.
Smile
Using black embroidery thread, add a small curved smile to the front of the waffle.
Position it below the butter while keeping the face visually centered on the front panel.
Optional Plate
Make 1 in white.
Round 1
6 sc in MR.
6 stitches
Round 2
6 inc.
12 stitches
Round 3
*(Sc, inc) × 6.
18 stitches
Round 4
*(2 sc, inc) × 6.
24 stitches
Round 5
*(3 sc, inc) × 6.
30 stitches
Round 6
*(4 sc, inc) × 6.
36 stitches
Round 7
Sc around.
36 stitches
Round 8
Sc around.
36 stitches
Sl st to finish and fasten off.
Weave in the end.
Assembly
Step 1: Join the Waffle Panels
Place the textured front panel and plain back panel together with the outer surfaces facing outward.
Align the corners and side edges.
Using cream yarn, whip stitch around three sides.
Step 2: Add the Stuffing
Add a moderate amount of polyester fiberfill through the open side.
Work the stuffing evenly into the corners and across the center without packing the piece too firmly.
Step 3: Close the Waffle
Once the waffle has the desired shape, sew the final side closed.
Weave in the yarn ends and trim the excess.
Step 4: Add the Smile
Add the embroidered smile once the waffle has its final shape so you can judge the placement more easily.
Step 5: Attach the Butter
Place the butter toward the upper-central area of the waffle.
Sew it securely through its base so it stays flat against the textured surface.
Step 6: Add the Syrup
Arrange the brown strands in loose curves around the butter.
Secure them at several points so the drizzle stays in place while keeping its curved appearance.
Step 7: Add the Optional Plate
Place the completed waffle on the crochet plate when using the plate as a presentation piece.
Finishing
After assembly:
- Secure and weave in loose yarn ends.
- Trim excess yarn carefully.
- Redistribute the stuffing if any area looks uneven.
- Check that the butter and syrup are securely attached.
- Gently reshape the waffle so the corners remain defined.
Helpful Tips
Keep the stitch count consistent
The textured front panel stays at 19 stitches per row. The back panel also remains at 19 stitches per row.
Keep the texture consistent
The front panel alternates between:
(Dc, fpdc, fpdc) × 6, dc(Fpdc, fpdc, dc) × 6, dc
Keeping these two row patterns in the correct sequence creates the shifting raised texture.
Do not overstuff
Moderate stuffing is enough to give the waffle shape while keeping the square silhouette.
Shape the corners while stuffing
Add a little fiberfill to each corner instead of concentrating all the stuffing in the middle.
Troubleshooting
Why does my waffle texture look flat?
Make sure your FPDC stitches are worked around the post of the stitch rather than through the top loops. Also check that your tension is not overly loose.
Why is my waffle becoming rounded?
Too much stuffing can push the edges outward. Remove some filling and reshape the corners before closing the final side.
Why don’t my panels line up?
Lay both panels flat and compare the corners and edges before sewing. Both panels should have the same 19-stitch width and 19-row height.
Why does my butter look too puffy?
Use less fiberfill. The butter is intended to remain a small, relatively flat accent.
Why does my syrup move around?
Secure the brown strands at several points along each curve instead of leaving long sections completely unattached.
Customization Ideas
Change the waffle color
Try a warmer cream, beige, or golden shade to create a different waffle-inspired look.
Customize the butter
A brighter or softer yellow can change the overall mood without changing the construction.
Change the smile
The embroidered smile can be made slightly wider, smaller, or more curved for a different expression.
Arrange the syrup differently
The two syrup strands can be placed in different curves to create a more natural-looking drizzle.
Skip the plate
The plate is optional, so the waffle can be displayed on its own.
Frequently Asked Questions
What stitch creates the waffle texture?
The raised texture is created with front post double crochet (FPDC). Two alternating row patterns shift the raised stitches across the surface.
How big is the finished waffle?
The finished waffle is approximately 4–5 inches square. Actual size can vary depending on yarn, hook size, tension, stuffing, and individual crochet technique.
Can I change the colors?
Yes. The cream waffle, yellow butter, brown syrup, and white plate are design choices, so you can adjust them to suit your preferred color palette.
Does the waffle need to be stuffed firmly?
No. Moderate stuffing is recommended so the piece holds its shape without becoming overly rounded.
Is the plate required?
No. The crochet plate is optional.
Is this pattern physically tested?
Not yet. The pattern has been mathematically reviewed and constructionally checked, but it has not been physically crocheted and tested yet.
Final Notes
This waffle amigurumi is designed around its raised waffle-grid texture, with butter, syrup, and a simple embroidered smile adding the finishing details.
Because the written pattern has not yet been physically tested, make a prototype before treating the finished dimensions, texture, and component fit as confirmed. Yarn choice, hook size, tension, and stuffing can all affect the final result.