
Crochet Cactus Pattern – Potted Amigurumi Project
This crochet cactus pattern creates a small potted amigurumi with…
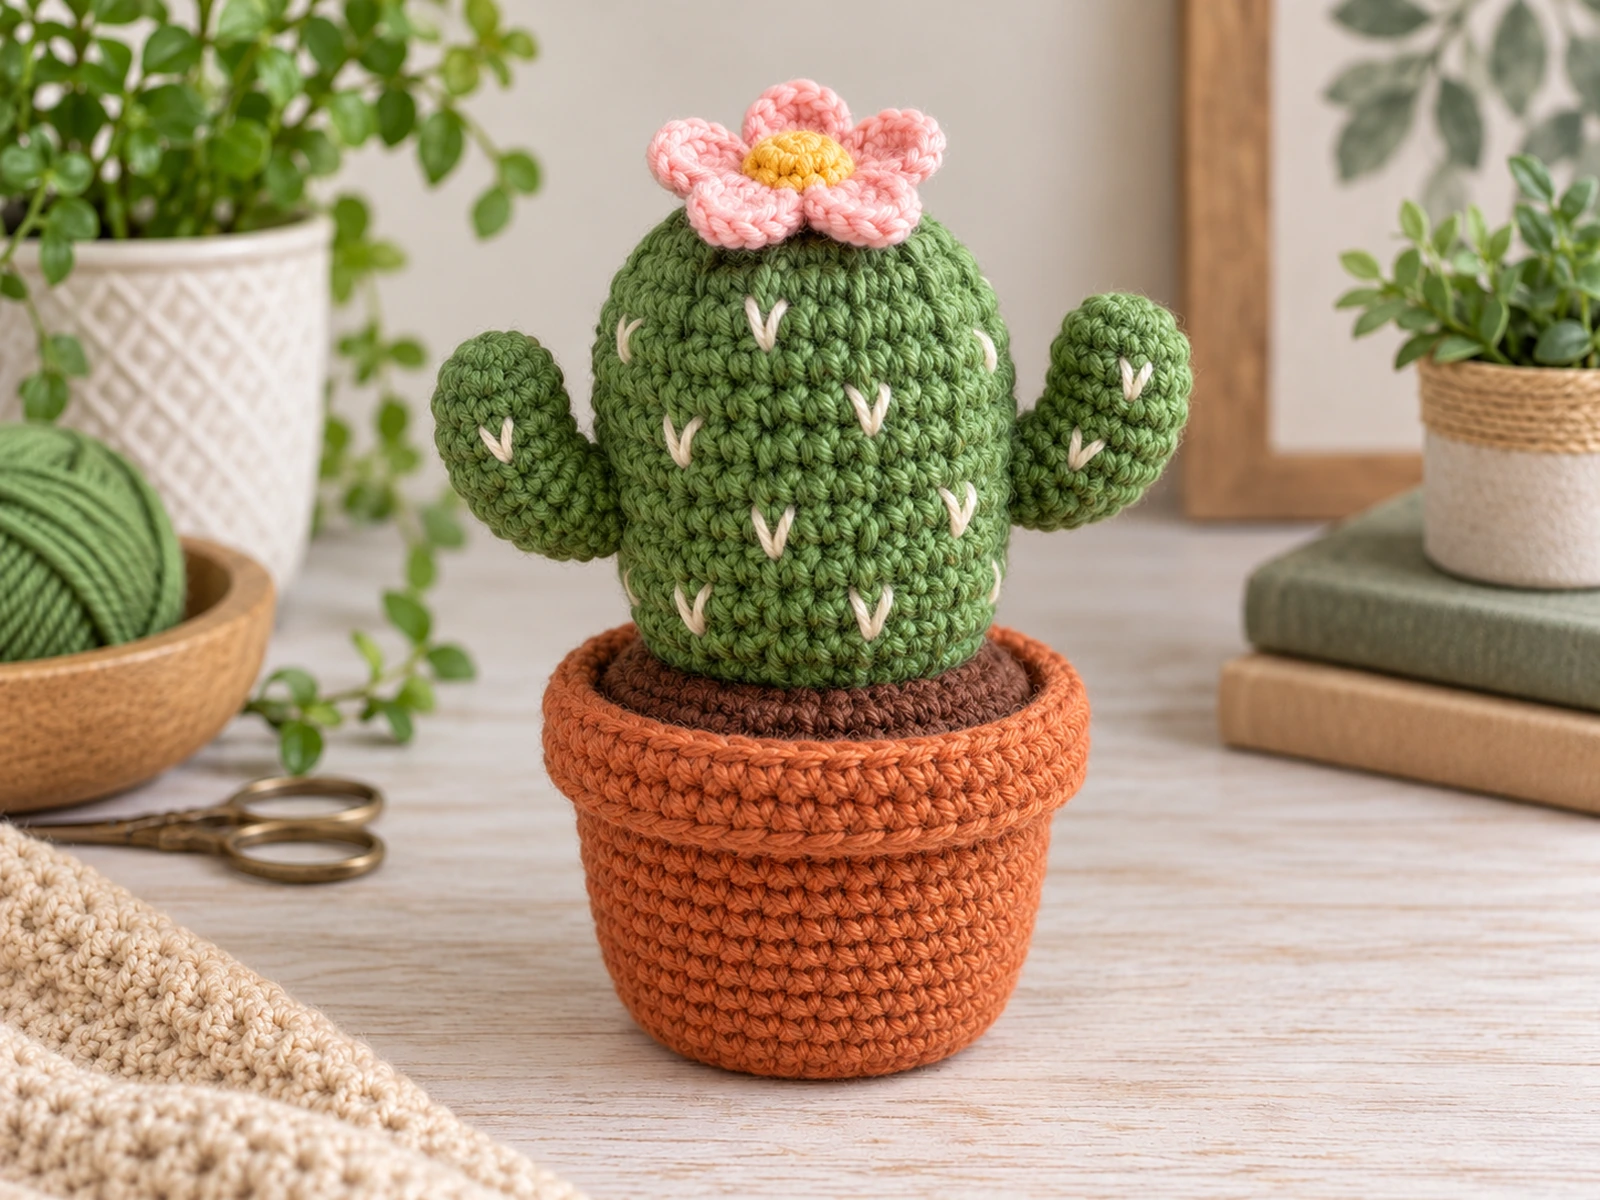
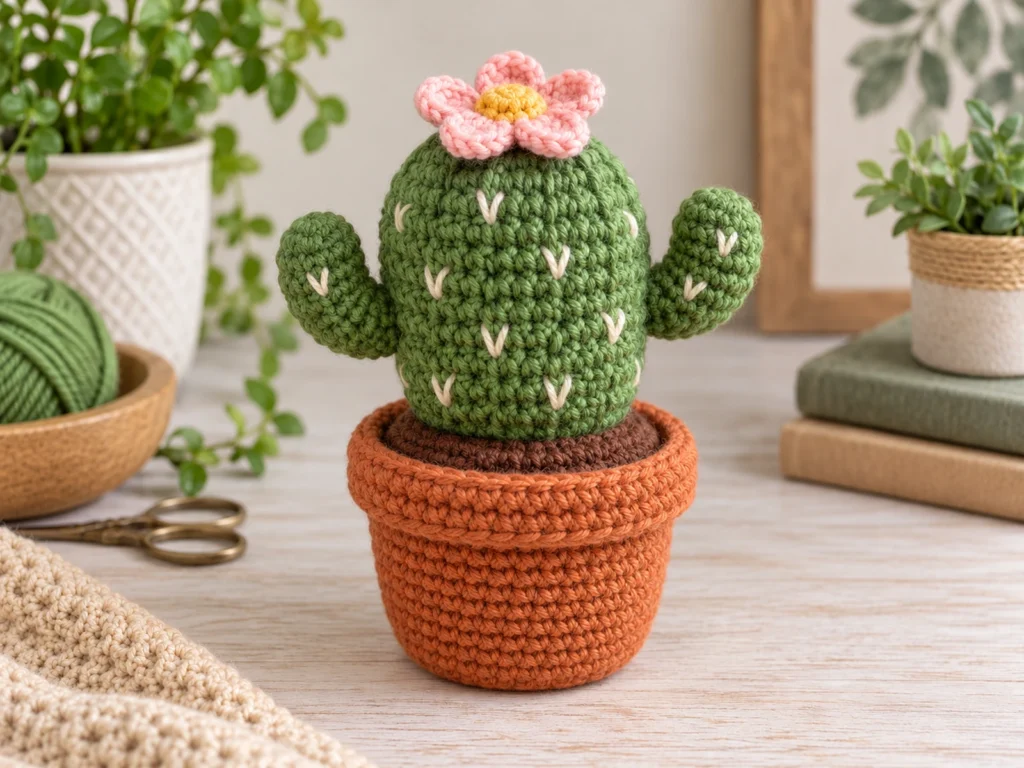
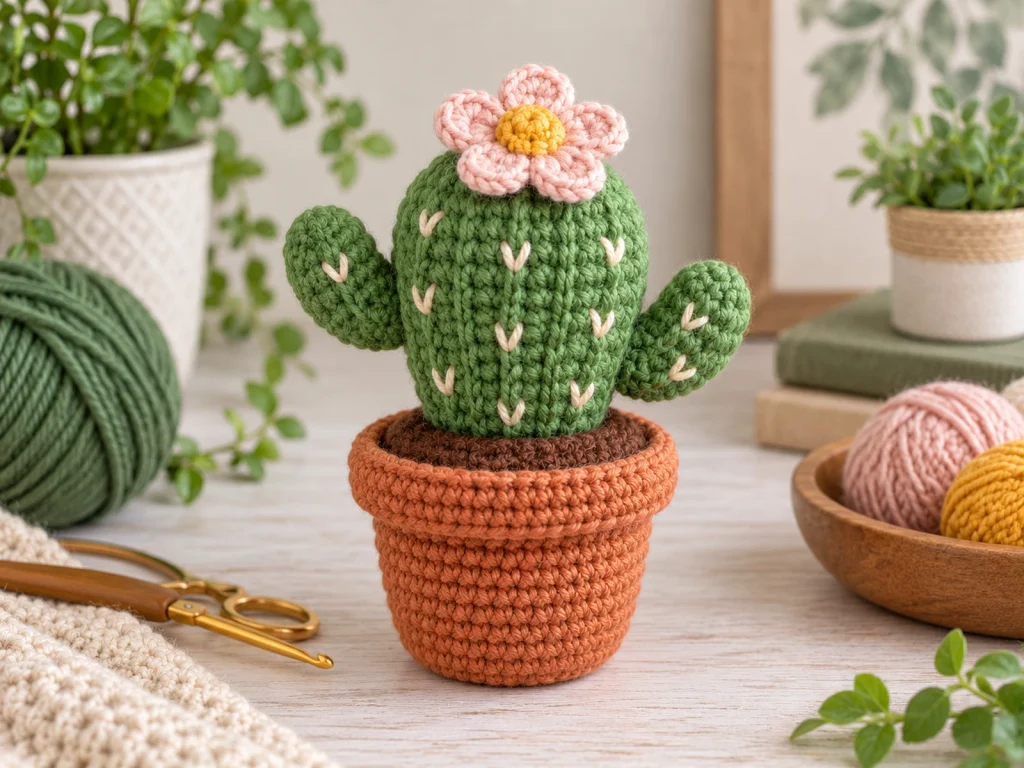
This crochet cactus pattern creates a small potted amigurumi with a rounded cactus body, two little side arms, embroidered spine details, and a five-petal flower on top. The cactus sits in a crocheted terracotta-style pot with a separate brown soil insert for a finished planted look.
The pattern is worked mainly in continuous rounds using US crochet terms. A little stuffing gives the cactus and arms their shape, while the soil insert creates a neat transition between the plant and the pot.
The finished cactus is approximately 5–6 inches (12.5–15 cm) tall, depending on your yarn, hook, tension, stuffing, and individual crochet technique.
Project Overview
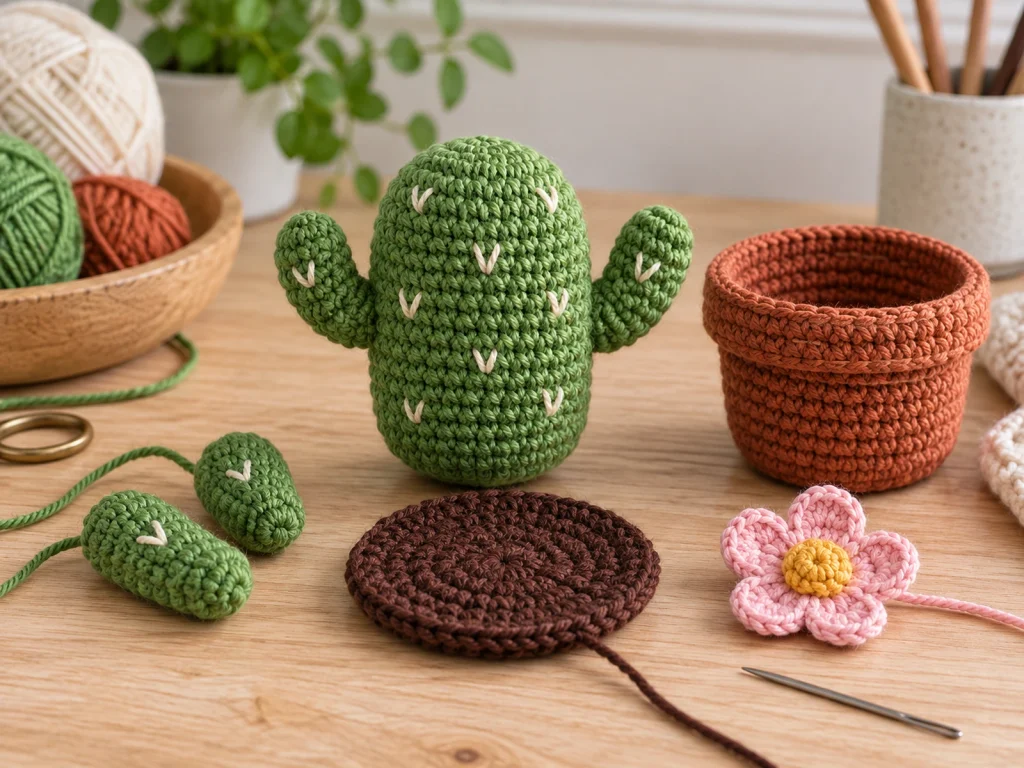
This potted crochet cactus is made from several separate pieces that are assembled at the end.
You will make:
- One rounded cactus body
- Two side arms
- One crocheted pot
- One flat soil insert
- One five-petal flower
- One small flower center
- Embroidered cactus spine details
The cactus body and pot are worked in continuous rounds. The flower is made separately and attached after the cactus has been shaped.
No facial features are used in this design, so the embroidered spine marks and flower provide the main decorative details.
Project Details
- Technique: Amigurumi crochet
- Yarn: Worsted-weight (#4)
- Hook: 3.5 mm
- Finished size: Approximately 5–6 inches (12.5–15 cm)
- Filling: Polyester fiberfill
- Construction: Separate cactus, arms, pot, soil, and flower components
The finished size is approximate and will vary with yarn, hook size, tension, stuffing, and individual crochet technique.
Testing Note
The pattern has been mathematically reviewed and constructionally checked, but it has not been physically crocheted and tested yet.
Materials & Tools
Yarn
Use worsted-weight (#4) yarn in these colors:
- Green for the cactus and arms
- Terracotta for the pot
- Dark brown for the soil
- Blush pink or cream for the flower
- Golden yellow for the flower center
- Cream for the embroidered spine marks
Exact yarn quantities are not established for this design.
Tools
You will also need:
- 3.5 mm crochet hook
- Polyester fiberfill
- Yarn needle
- Stitch marker
- Scissors
Abbreviations
This pattern uses standard US crochet terminology.
- MR — magic ring
- sc — single crochet
- inc — increase
- dec — decrease
- sl st — slip stitch
- ch — chain
- dc — double crochet
- BLO — back loop only
- FO — fasten off
Before You Start
Work in Continuous Rounds
The cactus, arms, pot, and soil are worked in continuous rounds unless otherwise noted. Use a stitch marker to keep track of the beginning of each round.
Count Your Stitches
The number in parentheses at the end of each round is the total stitch count for that round. Check your count regularly, especially after increases and decreases.
Stuff as You Go
Add fiberfill gradually instead of filling the piece all at once. The goal is a firm, rounded shape without stretching the stitches enough to expose the stuffing.
Compare the Arms Before Sewing
The two arms use the same pattern. Their mirrored appearance comes from how they are positioned on the cactus body, so compare both sides before attaching them permanently.
Construction Order
The main construction sequence is:
- Crochet the cactus body and arms.
- Complete the embroidered details.
- Crochet and attach the flower.
- Crochet the pot and soil insert.
- Attach the cactus to the soil.
- Attach the soil insert to the pot.
Crochet Cactus Pattern
Cactus Body
Color: Green
Work in continuous rounds.
Round 1
6 sc in MR. (6)
Round 2
6 inc. (12)
Round 3
(sc, inc) × 6. (18)
Round 4
(2 sc, inc) × 6. (24)
Round 5
24 sc. (24)
Round 6
24 sc. (24)
Round 7
24 sc. (24)
Round 8
24 sc. (24)
Round 9
24 sc. (24)
Round 10
24 sc. (24)
Round 11
24 sc. (24)
Round 12
24 sc. (24)
Round 13
24 sc. (24)
Round 14
24 sc. (24)
Round 15
24 sc. (24)
Round 16
(2 sc, dec) × 6. (18)
Round 17
18 sc. (18)
Round 18
(sc, dec) × 6. (12)
Round 19
6 dec. (6)
Begin adding stuffing around Rounds 12–13. Continue stuffing gradually as you work toward the top.
Fasten off, leaving a long tail. Thread the tail through the remaining 6 stitches, pull the opening closed, secure the yarn, and hide the end.
Cactus Arms
Make 2 in Green
Each arm is worked the same way.
Round 1
6 sc in MR. (6)
Round 2
6 sc. (6)
Round 3
6 sc. (6)
Round 4
(2 sc, inc) × 2. (8)
Round 5
8 sc. (8)
Round 6
8 sc. (8)
Round 7
8 sc. (8)
Round 8
(2 sc, dec) × 2. (6)
Round 9
6 sc. (6)
Round 10
6 sc. (6)
Add a small amount of stuffing to each arm.
Fasten off, leaving a sewing tail. Gently flatten the open end so it can be attached securely to the cactus body.
Crochet Pot
Color: Terracotta
Round 1
6 sc in MR. (6)
Round 2
6 inc. (12)
Round 3
(sc, inc) × 6. (18)
Round 4
(2 sc, inc) × 6. (24)
Round 5
24 sc. (24)
Round 6
24 sc. (24)
Round 7
24 sc. (24)
Round 8
24 sc. (24)
Round 9
(3 sc, inc) × 6. (30)
Round 10
30 sc. (30)
Round 11
30 sc. (30)
Round 12
30 sc. (30)
Round 13
30 sc BLO. (30)
Round 14
30 sc. (30)
Round 15
30 sc. (30)
Round 16
30 sl st around. (30)
Fasten off and weave in the yarn end.
Soil Insert
Color: Dark Brown
Round 1
6 sc in MR. (6)
Round 2
6 inc. (12)
Round 3
(sc, inc) × 6. (18)
Round 4
(2 sc, inc) × 6. (24)
Round 5
(4 sc, inc) × 6. (30)
Fasten off, leaving a long sewing tail.
Do not stuff the soil insert.
Crochet Flower
Color: Blush pink or cream
Round 1
5 sc in MR. (5)
Round 2
(sc in next stitch, ch 2) × 5. Join with a sl st to the first sc.
You should now have 5 sc and 5 chain-2 spaces.
Round 3
In each ch-2 space, work (sc, 3 dc, sc). Repeat around.
Each petal contains 5 stitches, giving you 25 stitches total across the five petals.
Fasten off, leaving a sewing tail.
Flower Center
Color: Golden yellow
Round 1
6 sc in MR. (6)
Fasten off, leaving a sewing tail.
Sew the yellow center over the middle of the flower.
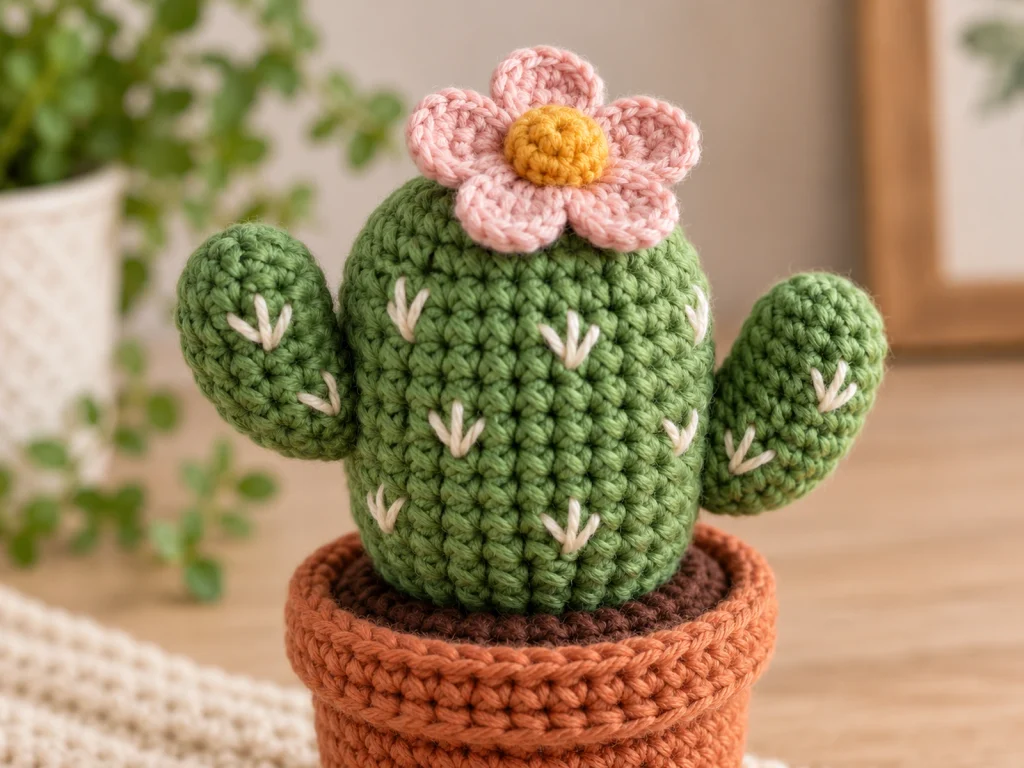
Cactus Spine Details
Use cream yarn and a yarn needle to embroider small spine marks over the cactus.
Keep the marks short and distribute them across the front-facing area rather than placing them in rigid, evenly spaced rows.
Add one or two small marks to each arm as well.
Because the placement is decorative, you can adjust the spacing slightly to suit the shape of your finished cactus.
Assembly
Step 1: Attach the Cactus Arms
Place one arm on each side of the cactus body.
Angle the tips slightly upward and compare both sides before sewing. Once the placement looks balanced, stitch the flattened arm openings securely to the body.
Step 2: Add the Embroidered Details
It is easiest to add the spine marks after the arms are attached so you can judge their placement against the final silhouette.
Step 3: Attach the Flower
Center the finished flower over the top of the cactus.
Sew through the flower base and into the top of the cactus until it feels secure.
Step 4: Attach the Cactus to the Soil
Place the base of the cactus in the center of the brown soil insert.
The cactus base is 24 stitches wide while the soil insert measures 30 stitches, leaving a small border of visible soil around the plant.
Sew the cactus securely to the center of the soil.
Step 5: Add the Soil to the Pot
Place a small amount of stuffing into the pot to give it body without making it too firm.
Position the soil insert across the 30-stitch opening and sew around its edge to the pot.
The finished result should look like the cactus is planted directly into the crocheted soil.
Finishing
Check the finished cactus from all sides and make any small adjustments needed to the flower, arm angle, or embroidered details.
Weave in any remaining yarn ends and trim them neatly.
Gently shape the cactus and pot with your hands so the pieces sit naturally together.
Helpful Tips
Keep the Cactus Evenly Stuffed
Adding small amounts of fiberfill as you crochet makes it easier to control the shape. If the stitches begin to look stretched, reduce the stuffing rather than forcing more inside.
Use a Stitch Marker
Continuous rounds can be difficult to count without a marker. Marking the first stitch of each round makes it easier to confirm that your stitch counts stay on track.
Compare Both Arms Before Sewing
Since both arms use the same pattern, their symmetry depends on placement. Lay them against the cactus first and adjust their angle before sewing.
If the Cactus Looks Too Narrow
Check your tension and stuffing. A tighter-than-expected tension can make the finished piece smaller, while too much stuffing can distort the shape.
Troubleshooting
If the Soil Does Not Sit Flat
Make sure the soil insert has been crocheted to the full 30 stitches and has not been stretched unevenly during finishing.
If You Can See the Stuffing
This usually means the fabric is being stretched too far or the piece has been overstuffed. Reduce the stuffing slightly and check your tension.
If the Cactus Arms Look Uneven
Place both arms side by side before sewing and compare their angle and height against the cactus body. Small placement adjustments can make a noticeable difference.
Customization Ideas
Change the Cactus Color
Try a brighter green, muted sage, or another plant-inspired shade.
Create a Different Pot
Terracotta gives the project a classic plant-pot look, but another contrasting color can completely change the finished style.
Switch the Flower Color
The five-petal flower can become a soft pastel accent or a brighter statement detail.
Change the Spine Embroidery
Use more or fewer embroidered marks depending on the texture you want. You can also alter their arrangement to create a more playful or minimalist finish.
Care
For the best results, keep the finished crochet cactus away from excessive moisture and handle the embroidered details gently.
Spot-cleaning is preferable to soaking the finished piece, especially because the project contains stuffing and separately sewn components.
Frequently Asked Questions
How big is the finished crochet cactus?
The finished cactus is approximately 5–6 inches (12.5–15 cm) tall, but the final size varies with yarn, hook size, tension, stuffing, and individual crochet technique.
What crochet terminology does this pattern use?
The pattern uses standard US crochet terms, including single crochet, increase, decrease, slip stitch, chain, and double crochet.
Does the cactus need to be stuffed?
Yes. The main cactus body and arms are stuffed to create their three-dimensional shape. The soil insert is left unstuffed.
How are the cactus arms attached?
The two arms are crocheted separately and sewn to the sides of the finished cactus body. Their final angle is determined during assembly.
Can I change the colors?
Yes. The cactus, pot, soil, flower, and flower center are separate color sections, so they can be customized easily.
Is the flower part of the finished design?
Yes. The five-petal flower and its center are included as decorative components of this cactus design.
More Crochet Projects to Explore
Once you’ve finished your cactus, explore more crochet and amigurumi projects from Tiny Yarn Tales for your next handmade creation.
Final Thoughts
This crochet cactus combines a rounded amigurumi shape, simple side arms, a crocheted pot, and a five-petal flower into one compact decorative project.
The most important part of the pattern is maintaining your stitch counts and shaping the cactus gradually as you work. Take your time with the stuffing and arm placement, then use the embroidered spine details and flower to give the finished piece its character.
Once assembled, you have a small potted crochet cactus that can be customized with different yarn colors and decorative details while keeping the same basic construction.