
Crochet Pothos Plant Pattern
Bring a little trailing greenery to your space with this…
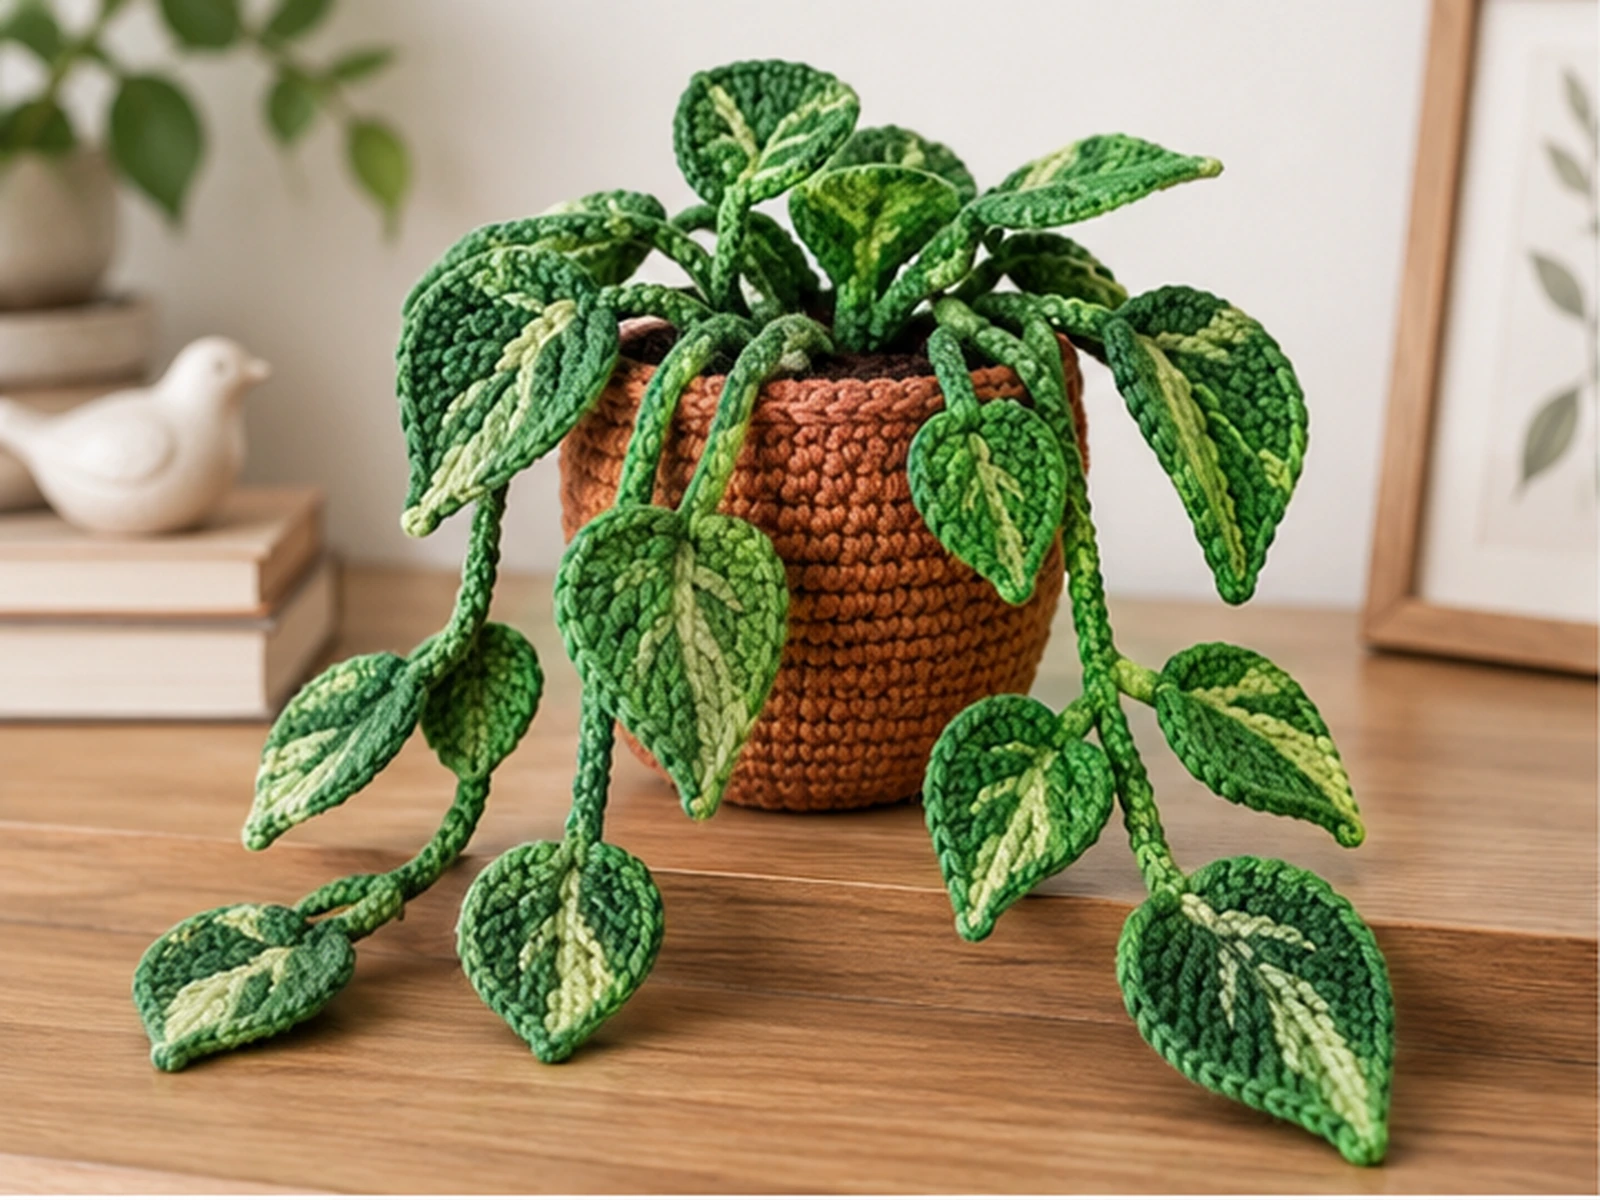
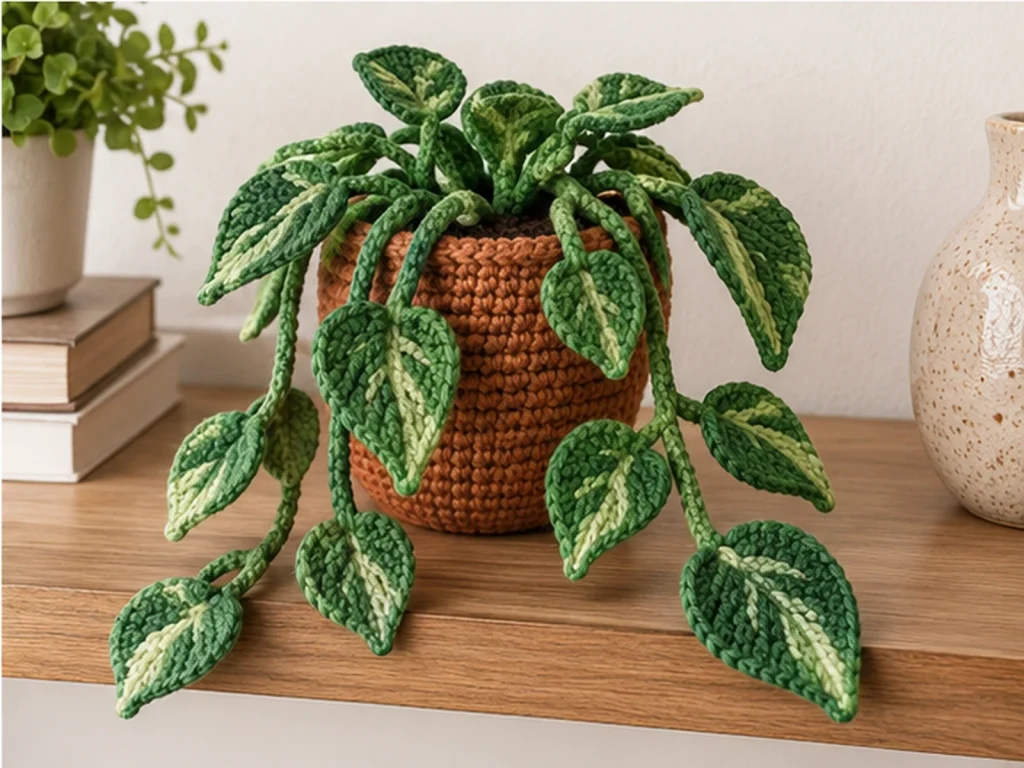
Bring a little trailing greenery to your space with this original crochet pothos plant pattern. This design combines a crocheted pot, a flat soil disk, three trailing vines, and nine leaves in three different sizes for a layered pothos-inspired plant.
The finished project is designed as decorative crochet rather than a functional container. The approximate finished height is 7–10 inches (18–25 cm), depending on yarn, hook size, tension, stuffing, and individual technique.
Project Overview
What You’ll Make
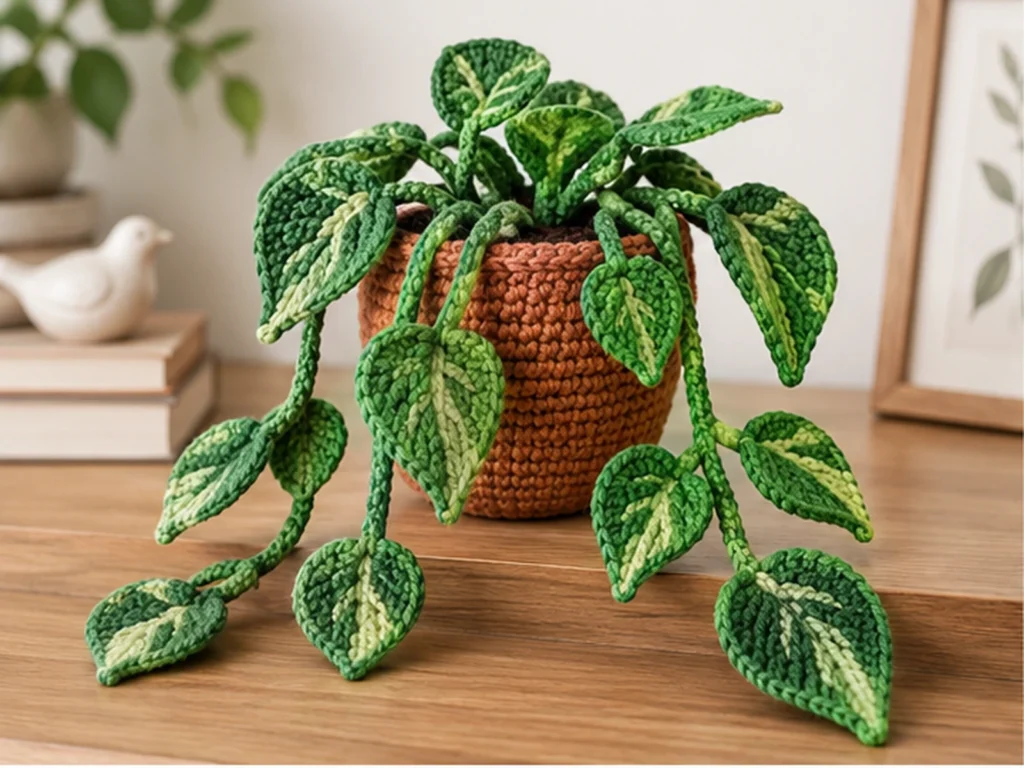
This crochet pothos is assembled from separate components so the foliage can be arranged into a natural trailing shape.
The project includes:
- 1 crocheted pot
- 1 soil disk
- 3 trailing vines
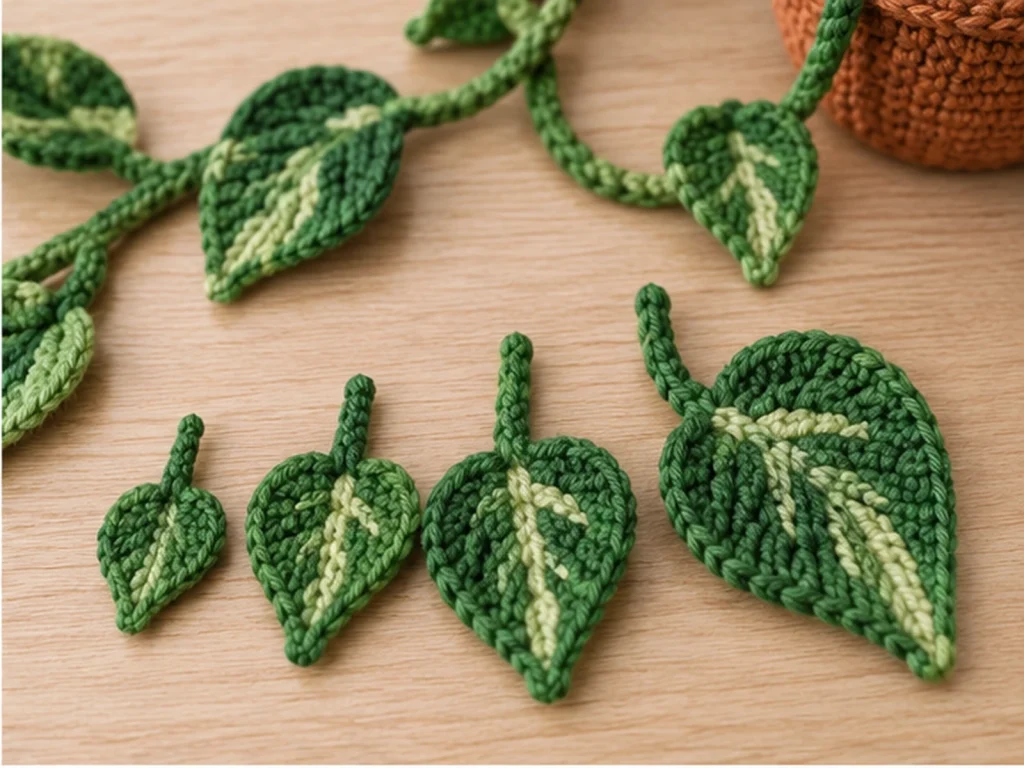
- 3 small leaves
- 3 medium leaves
- 3 large leaves
The three vines have different lengths, while the leaves increase in size toward the pot to create a fuller, layered silhouette.
Project Details
- Technique: Crochet
- Yarn: #4 medium/worsted-weight yarn
- Hook: 3.5 mm crochet hook
- Foliage color: Green
- Pot color: Terracotta or warm brown
- Soil color: Dark brown
- Optional accent: Pale green
- Stuffing: Polyester fiberfill
- Approximate finished size: 7–10 inches (18–25 cm)
The finished size is approximate and can vary with yarn, hook size, tension, stuffing, and individual technique.
Materials & Tools
Yarn
Use #4 medium/worsted-weight yarn in the following colors:
- Green for the leaves and vines
- Terracotta or warm brown for the pot
- Dark brown for the soil
- Pale green for optional leaf veins
Exact yarn quantities have not been established.
Crochet Hook
- 3.5 mm crochet hook
Other Supplies
- Polyester fiberfill
- Tapestry needle
- Scissors
Abbreviations
This pattern uses standard US crochet terminology.
- MR — magic ring
- ch — chain
- sc — single crochet
- hdc — half double crochet
- dc — double crochet
- tr — treble crochet
- sl st — slip stitch
- inc — increase; 2 sc in the same stitch
- BLO — back loop only
- FO — fasten off
Before You Start
Keep Track of Your Stitch Counts
The pot and soil disk rely on consistent stitch counts, so a stitch marker can be helpful when working the rounds.
Construction Order
For the smoothest workflow, complete the project in this order:
- Crochet the pot.
- Crochet the soil disk.
- Make the leaves.
- Make the vines.
- Attach the leaves to the vines.
- Lightly stuff the pot.
- Anchor the vines.
- Sew the soil disk to the pot.
- Arrange the finished foliage.
Crochet Pothos Pattern
Pot
Use terracotta or warm brown yarn.
Round 1
8 sc in MR. (8)
Round 2
8 inc. (16)
Round 3
(sc, inc) × 8. (24)
Round 4
BLO sc around. (24)
Round 5
sc around. (24)
Round 6
sc around. (24)
Round 7
sc around. (24)
Round 8
sc around. (24)
Round 9
(2 sc, inc) × 8. (32)
Round 10
sc around. (32)
Round 11
sc around. (32)
Round 12
BLO sc around. (32)
Round 13
sc around. (32)
FO and leave a long tail for sewing.
Soil Disk
Use dark brown yarn.
Round 1
8 sc in MR. (8)
Round 2
8 inc. (16)
Round 3
(sc, inc) × 8. (24)
Round 4
(2 sc, inc) × 8. (32)
Round 5
sc around. (32)
FO and leave a long sewing tail.
Small Leaf — Make 3
Use green yarn.
Row 1
Ch 7.
Starting in the 2nd chain from the hook:
- sc in next chain
- hdc in next chain
- dc in next chain
- dc in next chain
- hdc in next chain
- 3 sc in the last chain
Continue along the opposite side of the foundation chain:
- sc in next chain
- hdc in next chain
- dc in next chain
- dc in next chain
- hdc in next chain
Sl st into the first foundation chain.
13 leaf stitches, plus the joining slip stitch.
Petiole
Ch 4.
Sl st in the 2nd ch from hook, then sl st in each of the next 2 chains.
Sl st into the base of the leaf.
FO, leaving a long sewing tail.
Medium Leaf — Make 3
Use green yarn.
Row 1
Ch 9.
Starting in the 2nd chain from the hook:
- sc in next chain
- hdc in next chain
- dc in next chain
- tr in next chain
- dc in next chain
- hdc in next chain
- 3 sc in the last chain
Continue along the opposite side:
- sc in next chain
- hdc in next chain
- dc in next chain
- tr in next chain
- dc in next chain
- hdc in next chain
- sc in next chain
Sl st into the first foundation chain.
16 leaf stitches, plus the joining slip stitch.
Petiole
Ch 4.
Sl st in the 2nd ch from hook, then sl st in each of the next 2 chains.
Sl st into the leaf base.
FO, leaving a long sewing tail.
Large Leaf — Make 3
Use green yarn.
Row 1
Ch 11.
Starting in the 2nd chain from the hook:
- sc in next chain
- hdc in next chain
- dc in next chain
- dc in next chain
- tr in next chain
- dc in next chain
- dc in next chain
- hdc in next chain
- 3 sc in the last chain
Continue along the opposite side:
- sc in next chain
- hdc in next chain
- dc in next chain
- dc in next chain
- tr in next chain
- dc in next chain
- dc in next chain
- hdc in next chain
- sc in next chain
Sl st into the first foundation chain.
20 leaf stitches, plus the joining slip stitch.
Petiole
Ch 4.
Sl st in the 2nd ch from hook, then sl st in each of the next 2 chains.
Sl st into the leaf base.
FO, leaving a long sewing tail.
Short Vine
Use green yarn.
Row 1
Ch 22.
Sl st in the 2nd chain from the hook and in each chain across.
21 slip stitches.
FO and leave a long tail at the anchor end.
Leaf Placement
Working from the free end of the vine:
- Small leaf: around stitch 5
- Medium leaf: around stitch 11
- Large leaf: around stitch 17
Wrap each leaf petiole around the vine and sew securely.
Medium Vine
Use green yarn.
Row 1
Ch 28.
Sl st in the 2nd chain from the hook and in each chain across.
27 slip stitches.
FO and leave a long tail at the anchor end.
Leaf Placement
Working from the free end:
- Small leaf: around stitch 6
- Medium leaf: around stitch 15
- Large leaf: around stitch 24
Sew each leaf securely to the vine.
Long Vine
Use green yarn.
Row 1
Ch 34.
Sl st in the 2nd chain from the hook and in each chain across.
33 slip stitches.
FO and leave a long tail at the anchor end.
Leaf Placement
Working from the free end:
- Small leaf: around stitch 7
- Medium leaf: around stitch 18
- Large leaf: around stitch 29
Sew each leaf securely to the vine.
Assembly
Step 1: Prepare the Finished Pieces
Complete all three vines and all nine leaves before beginning the final assembly.
Attach the leaves to their assigned positions on each vine and secure the petioles firmly with the yarn tails.
Step 2: Add Optional Leaf Veins
Using pale green yarn, add a simple stitched line down the center of each leaf.
Keep the decorative vein slightly shorter than the full leaf.
This step is optional and does not change the crochet structure.
Step 3: Prepare the Pot
Add light-to-moderate polyester fiberfill to the crocheted pot.
Avoid overstuffing so the pot keeps its shape without distorting the opening.
Step 4: Anchor the Vines
Place the anchor ends of the three completed vines underneath the soil disk.
Arrange them as a loose grouping rather than stacking all three attachment points in exactly the same place.
Secure the vine ends with several sewing passes.
Step 5: Attach the Soil Disk
Position the soil disk over the stuffed pot.
The pot opening and soil disk both finish at 32 stitches, allowing them to be matched around the circumference.
Sew the soil disk to the pot, matching the stitches around the entire opening.
Check periodically that the soil remains centered as you sew.
Step 6: Arrange the Foliage
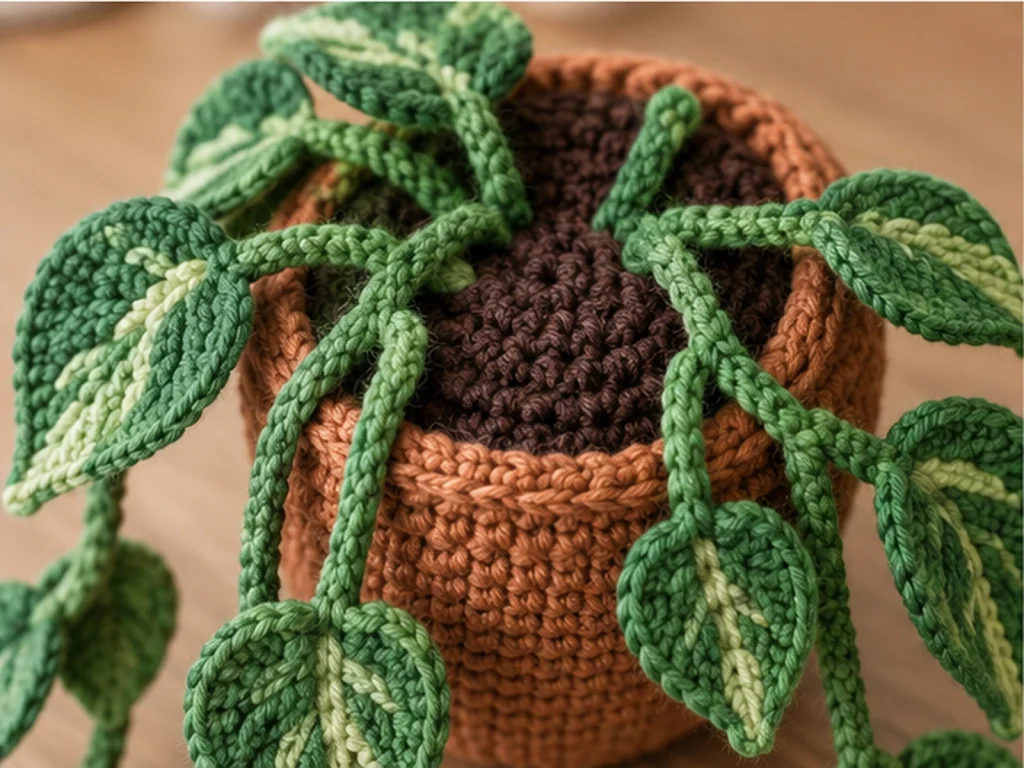
Once the soil disk is secure, arrange the vines so they trail naturally over the sides.
A simple arrangement is:
- Short vine toward one side
- Medium vine toward the opposite side
- Long vine toward the center or back
Rotate individual leaves slightly so the foliage does not appear perfectly aligned.
Step 7: Finish and Weave in Ends
Check every attachment point.
Once everything is secure, weave in the remaining yarn tails and trim the excess.
Finishing
Take a final look at the plant from different angles.
Adjust the vines and rotate individual leaves until the foliage has a balanced, trailing appearance.
Avoid pulling the leaves too tightly against the vines, since a little freedom of movement helps the finished plant look more natural.
Helpful Tips
Keep the Pot Lightly Stuffed
The pot needs enough stuffing to hold its shape, but too much can distort the opening and make the soil disk harder to attach.
Check Leaf Orientation Before Sewing
Before making the final stitches, rotate each leaf slightly and compare it with the surrounding foliage.
Spread the Vines
The three different vine lengths are designed to create variation. Give each vine enough space to remain visually distinct.
Match the Soil Disk Carefully
Because the pot opening and soil disk both have 32 stitches, matching the stitches evenly around the circumference will help keep the top centered.
Troubleshooting
My Pot Looks Too Loose or Floppy
Check your tension first. Looser tension can make the fabric softer and larger. Light stuffing can help give the pot more body without overfilling it.
My Soil Disk Does Not Sit Correctly
Confirm that both the pot opening and soil disk finish at 32 stitches. Differences in tension can also affect their finished size.
My Leaves Look Uneven
Check that each leaf follows the same sequence and that the petiole is attached near the center of the leaf base.
My Vines Do Not Hang the Way I Expected
Before permanently securing the vine anchors, try several arrangements and choose the one that gives the best balance.
My Leaves Point in the Same Direction
Rotate the leaves slightly before completing their attachment. Small changes in orientation can make the finished foliage look much less rigid.
My Plant Looks Too Crowded
Spread the three vine anchors farther apart beneath the soil disk and rotate the leaves in different directions.
Customization Ideas
Change the Pot Color
Try terracotta, warm brown, cream, charcoal, or another shade that complements your space.
Adjust the Foliage Colors
The leaves can be worked in different shades of green for a more varied botanical look.
Add Leaf Veins
Use pale green yarn to add optional center veins for extra visual definition.
Change the Vine Arrangement
The three vines can be positioned closer together for a fuller look or spread apart for a more open silhouette.
Create Different Display Styles
The completed plant can be styled on a desk, shelf, bookcase, or another decorative surface.
Major changes to yarn weight, hook size, or construction may change the final size and proportions.
Frequently Asked Questions
What yarn is used for this crochet pothos pattern?
The design is written for #4 medium/worsted-weight yarn with a 3.5 mm crochet hook.
How many leaves does the pothos have?
The pattern includes nine leaves: three small, three medium, and three large.
How many vines are included?
There are three vines: one short, one medium, and one long.
Is the pot stuffed?
Yes. The pot is lightly to moderately stuffed before the soil disk is attached.
Does this pattern use safety eyes?
No. This crochet pothos has no facial features or safety eyes.
Can I change the colors?
Yes. The pot, soil, foliage, and optional decorative veins can all be customized with different color combinations.
Is the finished size exact?
No. The 7–10 inch size is approximate. Yarn, tension, hook size, stuffing, and personal technique can affect the final dimensions.
Has this crochet pothos pattern been physically tested?
Not yet. The pattern has been mathematically reviewed and constructionally reasoned, but it has not been physically crocheted and tested.
Final Thoughts
This crochet pothos pattern combines three trailing vines, nine leaves in different sizes, and a crocheted pot to create a layered botanical decoration.
The modular construction makes it easy to work through the project piece by piece before bringing everything together during assembly.
Because the pattern has not yet been physically prototyped, treat the finished measurements and final visual proportions as approximate while testing your first sample.