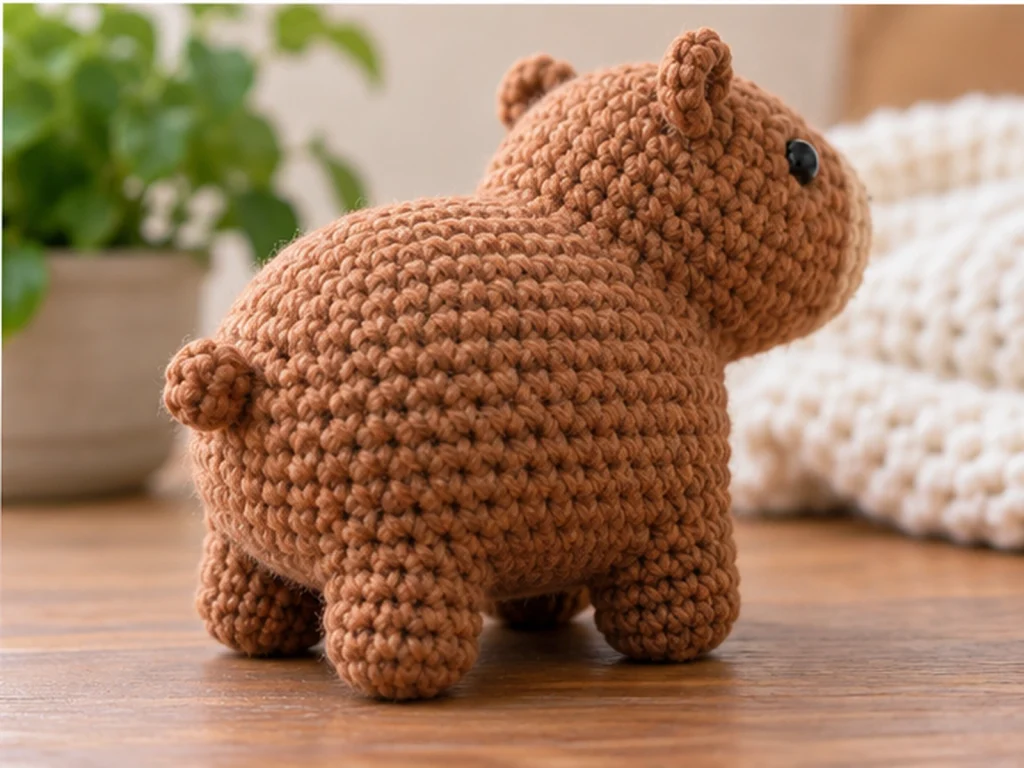
Pocket Capybara Crochet Pattern: A Step-by-Step Amigurumi Tutorial
This Pocket Capybara crochet pattern creates a compact amigurumi with…
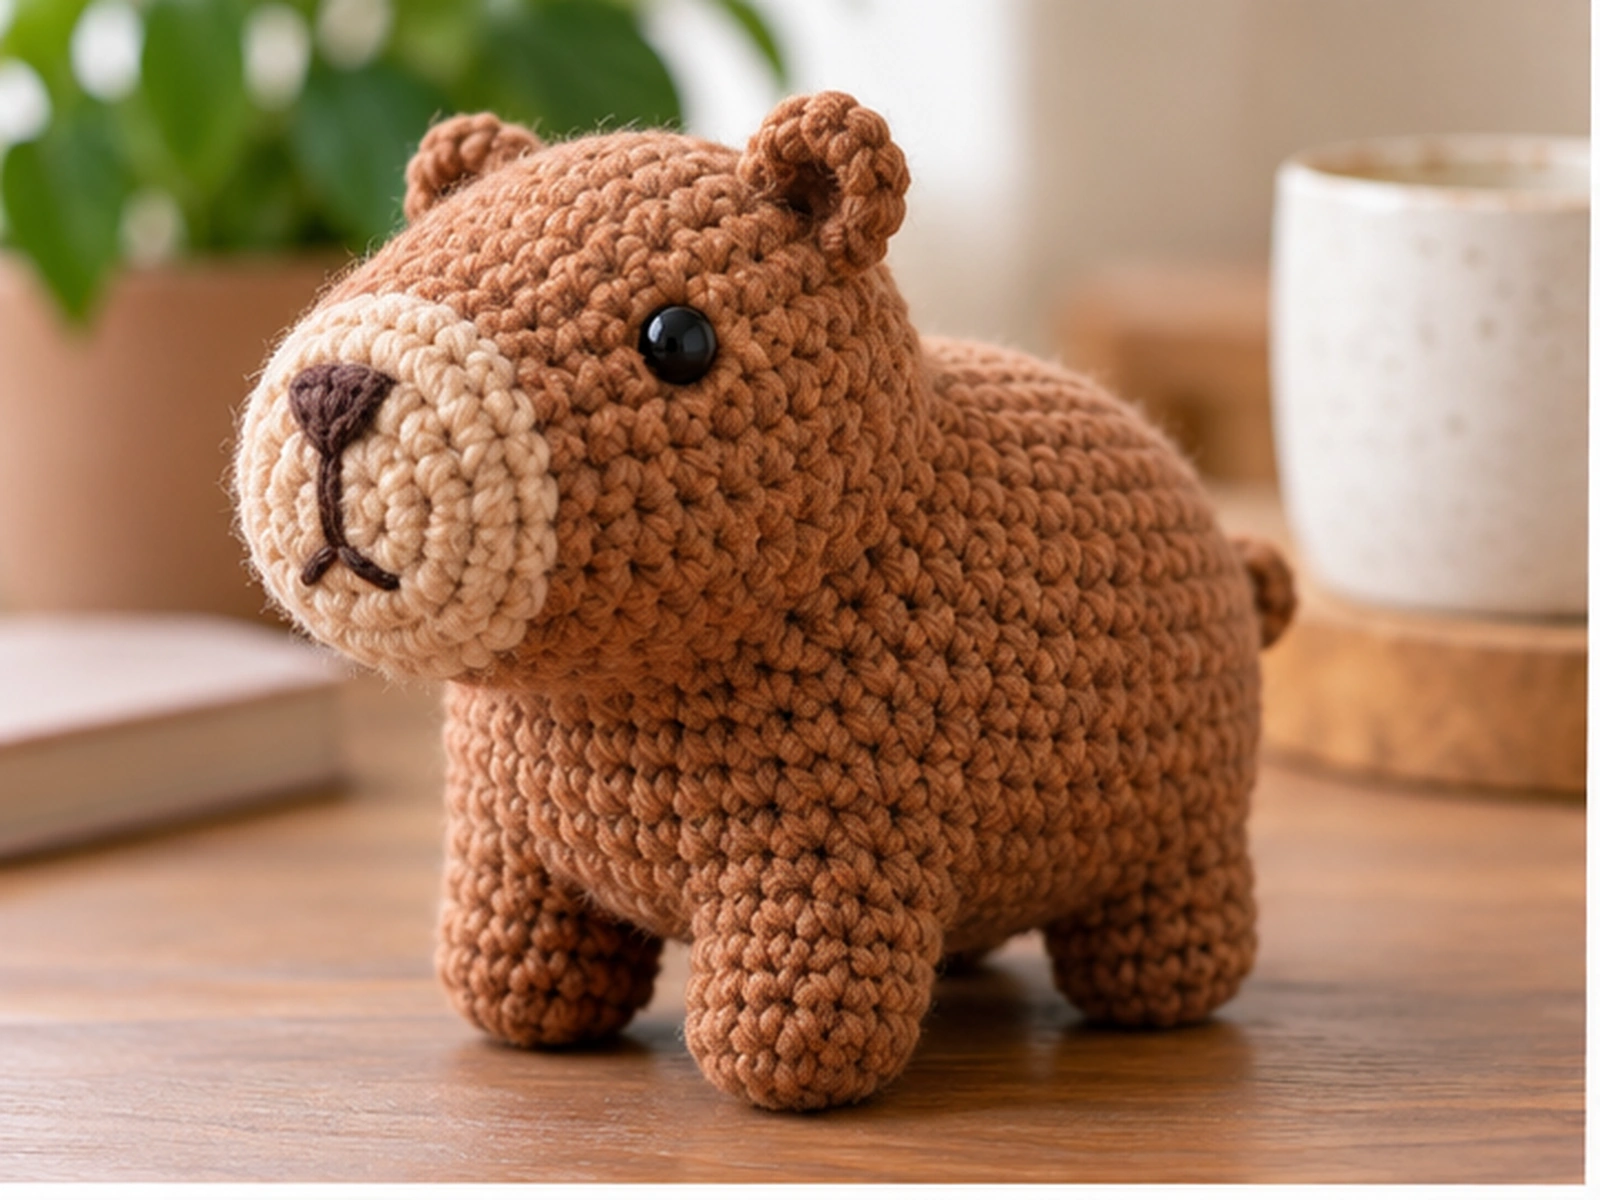
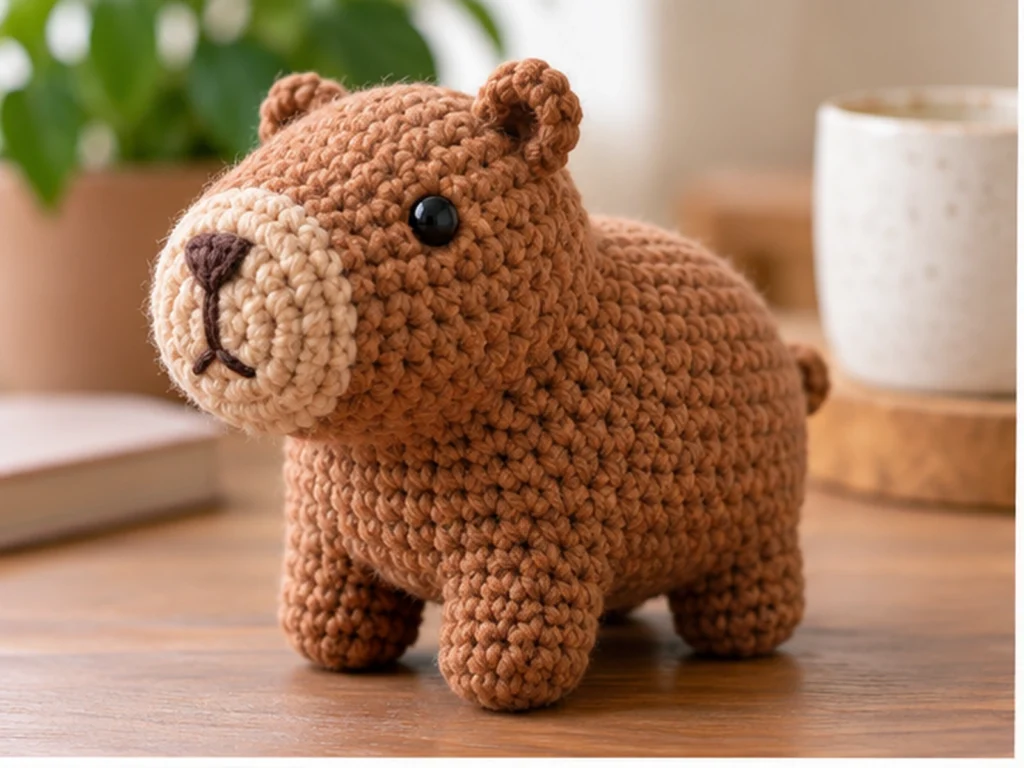
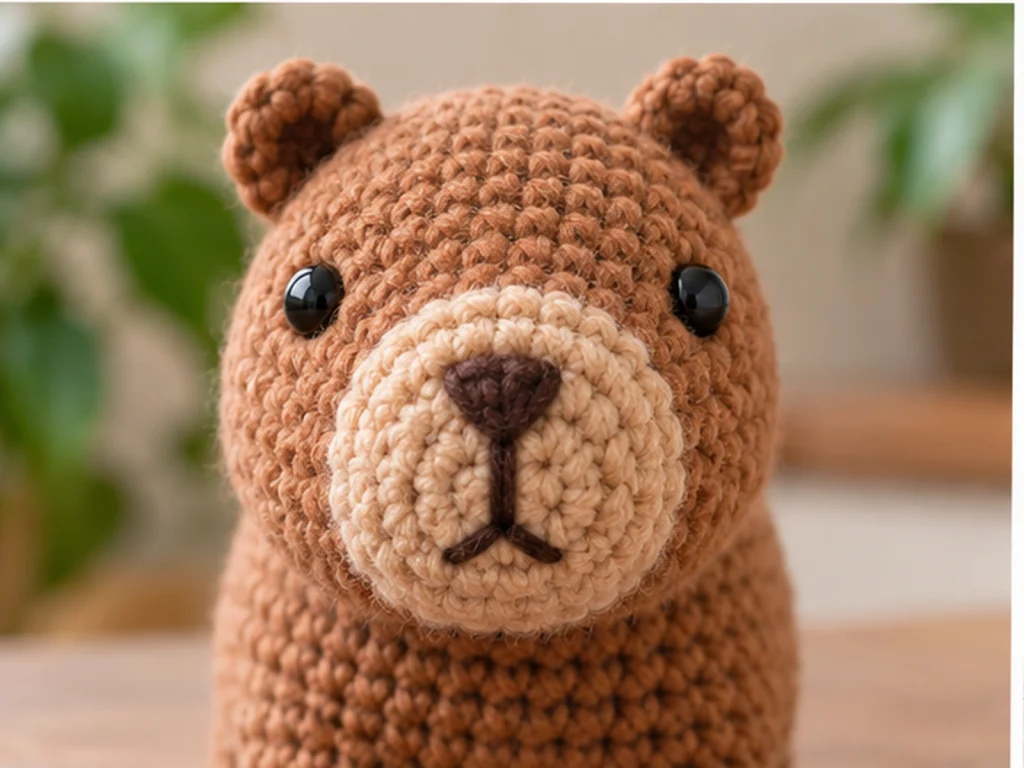
This Pocket Capybara crochet pattern creates a compact amigurumi with a broad, rounded body, small ears, short legs, a soft tan muzzle, and a tiny tail. The pieces are crocheted separately and then assembled to create the finished capybara.
The approximate finished size is 5.5–6.5 inches (14–16.5 cm), depending on yarn, hook size, tension, stuffing, and individual technique.
Project Overview
What You’ll Make
You’ll crochet a small capybara amigurumi from separate body, head, leg, ear, muzzle, and tail pieces. The finished design uses a warm brown main color with a tan muzzle and simple embroidered facial details.
Project Details
- Project: Pocket Capybara
- Approximate finished size: 5.5–6.5 in (14–16.5 cm)
- Yarn: Medium/Worsted-weight yarn
- Main color: Warm brown
- Accent color: Soft tan
- Hook: 4.0 mm
- Eyes: 8 mm safety eyes or embroidered eyes
- Stuffing: Polyester fiberfill
- Construction: Separate crocheted pieces assembled with sewing
- Skill requirements: Comfort with basic amigurumi stitches and simple sewing
The finished size is an approximate design target rather than a physically tested measurement.
Materials & Tools
Yarn
You’ll need:
- Medium/Worsted-weight yarn in warm brown
- A small amount of tan yarn for the muzzle
- A small amount of dark brown or black yarn for the facial details
Crochet Hook & Tools
- 4.0 mm crochet hook
- Yarn needle
- Scissors
- Stitch marker
- Removable marker for assembly reference
Eyes & Stuffing
- 8 mm safety eyes, or embroidery yarn for embroidered eyes
- Polyester fiberfill
Safety Note
Safety eyes can present a choking hazard and are not appropriate for children under 3. Embroidered eyes can be used instead.
Abbreviations
This pattern uses standard US crochet terminology.
- MR — magic ring
- sc — single crochet
- inc — increase; work 2 sc in the same stitch
- dec — decrease; single crochet 2 stitches together
- FO — fasten off
Before You Start
Work in Continuous Rounds
The pieces are worked in continuous rounds unless otherwise noted. Use a stitch marker to identify the first stitch of each round and move it upward as you crochet.
Count Your Stitches
Each round includes a stitch count in parentheses. Check the count at the end of every round, especially after increases and decreases.
Stuff as You Go
Add stuffing gradually to the larger pieces rather than waiting until the final round. This makes it easier to control the shape and avoid overstuffing.
Keep Paired Pieces Symmetrical
The ears and legs use matching construction. Before sewing them permanently into place, compare both sides and adjust the placement visually.
Construction Order
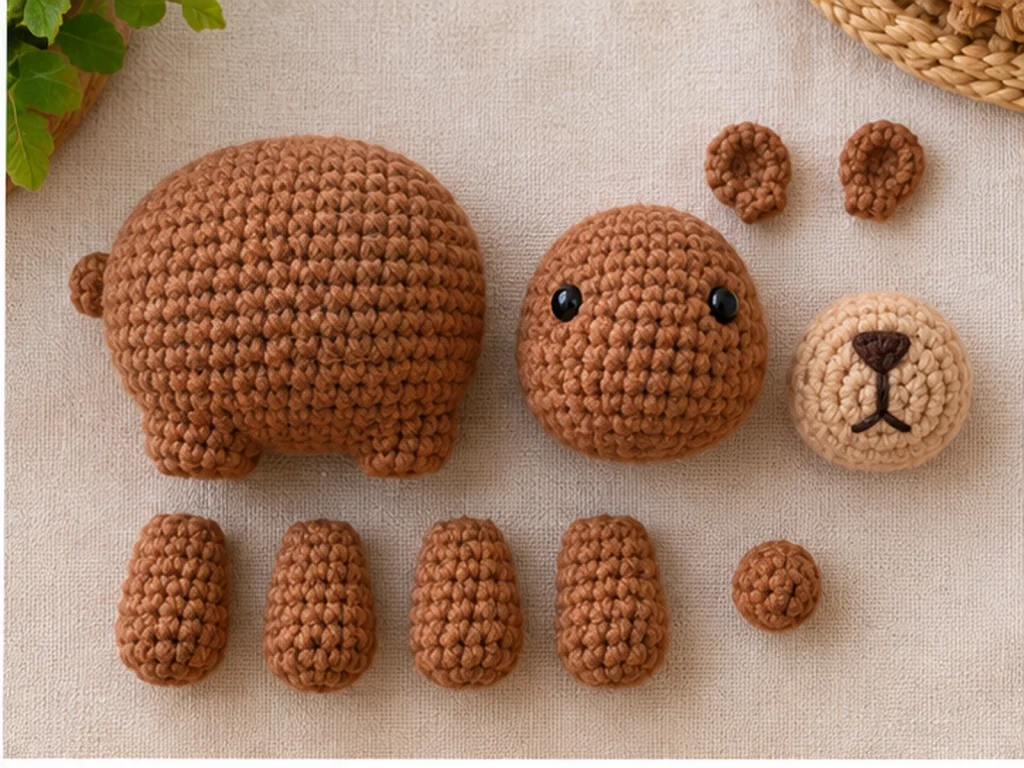
Crochet all of the main pieces first, then assemble the body, head, ears, muzzle, facial details, and tail.
Pocket Capybara Crochet Pattern
Head
Use warm brown yarn.
Round 1
6 sc in MR. (6)
Round 2
6 inc. (12)
Round 3
(sc, inc) x 6. (18)
Round 4
(2 sc, inc) x 6. (24)
Round 5
(3 sc, inc) x 6. (30)
Round 6
30 sc. (30)
Round 7
30 sc. (30)
Round 8
30 sc. (30)
Round 9
30 sc. (30)
Round 10
30 sc. (30)
Round 11
(3 sc, dec) x 6. (24)
Round 12
24 sc. (24)
Round 13
(2 sc, dec) x 6. (18)
Round 14
18 sc. (18)
Round 15
(sc, dec) x 6. (12)
Round 16
12 sc. (12)
Begin stuffing the head during the later rounds. Keep the face rounded and firm without overstuffing.
Fasten off, leaving a long sewing tail, and close the opening.
Muzzle
Use tan yarn.
Round 1
6 sc in MR. (6)
Round 2
6 inc. (12)
Round 3
12 sc. (12)
Round 4
(sc, dec) x 4. (8)
Round 5
4 dec. (4)
Add a small amount of stuffing if desired for a gently rounded shape.
Fasten off, close the opening, and leave a sewing tail.
Ears — Make 2
Use warm brown yarn.
Round 1
6 sc in MR. (6)
Round 2
6 inc. (12)
Round 3
12 sc. (12)
Round 4
(sc, dec) x 4. (8)
Round 5
8 sc. (8)
Fasten off and leave a sewing tail.
Do not heavily stuff the ears. Flatten them gently before assembly.
Body
Use warm brown yarn.
Round 1
6 sc in MR. (6)
Round 2
6 inc. (12)
Round 3
(sc, inc) x 6. (18)
Round 4
(2 sc, inc) x 6. (24)
Round 5
(3 sc, inc) x 6. (30)
Round 6
(4 sc, inc) x 6. (36)
Round 7
36 sc. (36)
Round 8
36 sc. (36)
Round 9
36 sc. (36)
Round 10
36 sc. (36)
Round 11
36 sc. (36)
Round 12
36 sc. (36)
Round 13
36 sc. (36)
Round 14
36 sc. (36)
Round 15
36 sc. (36)
Round 16
36 sc. (36)
Round 17
(4 sc, dec) x 6. (30)
Round 18
30 sc. (30)
Round 19
(3 sc, dec) x 6. (24)
Round 20
24 sc. (24)
Round 21
(2 sc, dec) x 6. (18)
Round 22
18 sc. (18)
Begin adding polyester fiberfill around the middle of the body and continue stuffing gradually as you work.
When the body is evenly filled, fasten off and leave a long yarn tail for closing and finishing. Close the remaining opening neatly.
Legs — Make 4
Use warm brown yarn.
Round 1
6 sc in MR. (6)
Round 2
6 inc. (12)
Round 3
12 sc. (12)
Round 4
12 sc. (12)
Round 5
12 sc. (12)
Round 6
12 sc. (12)
Round 7
12 sc. (12)
Add a light amount of stuffing.
Fasten off and leave a long sewing tail. Keep the opening available for sewing the leg to the body.
Tail
Use warm brown yarn.
Round 1
6 sc in MR. (6)
Round 2
6 sc. (6)
Round 3
(sc, dec) x 2. (4)
Round 4
2 dec. (2)
The tail may remain unstuffed or receive only a tiny amount of stuffing.
Fasten off and use the remaining yarn tail for attachment.
Assembly
Step 1: Attach the Head
Position the head on the upper-front section of the body.
The head should sit slightly forward rather than directly over the center of the torso. This helps create a recognizable capybara silhouette.
Sew securely around the lower edge of the head. Check the shape from the front and both sides before completing the attachment.
Step 2: Attach the Legs
Place two legs toward the front half of the body and two toward the rear half.
Before sewing them permanently:
- Compare the left and right sides.
- Check that the feet sit at similar heights.
- Make sure the body remains visually balanced.
- Adjust the placement as needed.
Use visual symmetry rather than an unverified exact measurement.
Step 3: Attach the Ears
Flatten the ears gently.
Place them on the upper sides of the head, slightly toward the rear.
Compare both ears from the front before sewing them permanently.
Step 4: Attach the Muzzle
Center the tan muzzle on the front of the head.
Position it below the eye line and leave enough surrounding facial space for the eyes, nose, and mouth to remain distinct.
Sew securely around the edge of the muzzle.
Step 5: Add the Facial Details
If using safety eyes, place them symmetrically above and slightly to either side of the muzzle.
Check both sides before permanently securing them.
For embroidered features, use dark brown or black yarn to add a small rounded nose in the center of the muzzle, followed by a short mouth beneath it.
Step 6: Attach the Tail
Place the tiny tail on the lower rear portion of the body.
Keep it close to the body silhouette and sew it securely.
Facial Details
The face is intentionally simple so the rounded muzzle remains the main feature.
Eyes
Use 8 mm safety eyes or embroider the eyes with yarn.
Before securing safety eyes, check both sides carefully so they appear balanced.
Nose
Embroider a small rounded nose in the center of the muzzle using dark brown or black yarn.
Mouth
Add a short embroidered mouth beneath the nose.
Keep the facial details compact for a soft, simple expression.
Finishing
Once all pieces are attached:
- Check that the head is secure.
- Make sure the ears sit evenly.
- Confirm the four legs are balanced visually.
- Check that the muzzle is centered.
- Secure the embroidered facial details.
- Weave in and trim loose yarn ends.
- Shape the stuffed pieces gently with your fingers.
Avoid overstuffing. Excessive stuffing can stretch the stitches and change the intended proportions.
Helpful Tips
Keep the Body Firm but Flexible
Use enough stuffing to support the shape without stretching the stitches apart.
Check Symmetry Before Sewing
Temporarily position paired pieces before securing them permanently. This is especially helpful for the ears and legs.
Step Back From the Face
Facial details can look centered when viewed very closely but appear uneven from a normal viewing distance. Check the whole face periodically as you work.
Correct Stitch-Count Mistakes Early
If your count is off, stop and recount the previous round before continuing. It is much easier to correct a mistake immediately than several rounds later.
Troubleshooting
My Stitch Count Is Off
Recount the stitches from the previous round and compare your work with the written sequence. Pay particular attention to increase and decrease rounds.
The Body Looks Too Round
Check your stuffing density first. Overstuffing can make the torso wider than intended.
My Head Looks Uneven
Before changing the crochet piece, check the muzzle and eye placement. Small assembly adjustments can make a noticeable difference.
The Ears Don’t Match
Lay both ears side by side and compare their shapes. Since they use the same written sequence, visible differences may come from tension or shaping.
The Legs Don’t Line Up
Temporarily position all four legs before sewing. View the body from the front and side, then adjust the placement until the silhouette looks balanced.
I Can See the Stuffing
The piece may be overstuffed or the tension may be too loose. Remove a small amount of stuffing and reshape the piece rather than adding more.
Customization Ideas
Change the Brown Shade
Try a lighter tan-brown or a deeper chocolate shade for a different look while keeping the same construction.
Embroider the Eyes
Embroidered eyes offer an alternative to safety eyes and can create a softer expression.
Change the Expression
A different embroidered mouth or eye style can give the capybara a more curious, sleepy, or cheerful look.
Experiment With Yarn
Changing yarn weight or hook size can alter the finished scale and fabric. Because these variations have not been physically tested, the resulting size should be treated as an experiment rather than a guaranteed measurement.
Frequently Asked Questions
What yarn is used for this capybara crochet pattern?
The design uses medium/worsted-weight yarn. Warm brown is the main color, with tan for the muzzle and a small amount of dark yarn for the facial details.
What crochet hook size do I need?
The design uses a 4.0 mm crochet hook.
How big is the finished capybara?
The approximate target size is 5.5–6.5 inches (14–16.5 cm). Final size can vary with yarn, hook size, tension, stuffing, and individual technique.
What crochet stitches are used?
The pattern uses a magic ring, single crochet, increases, and decreases, along with fastening off.
Is the capybara made from one piece?
No. The body, head, ears, legs, muzzle, and tail are crocheted separately and then assembled.
Does the pattern use safety eyes?
It can. The design uses 8 mm safety eyes, but embroidered eyes are also an option.
Safety eyes can present a choking hazard and are not appropriate for children under 3.
Can I change the colors?
Yes. You can change the yarn colors while keeping the same basic construction.
Can I make the capybara larger or smaller?
Changing yarn weight or hook size can change the finished scale, but the resulting size and proportions have not been physically tested.
Testing Note
This pattern has been mathematically reviewed and constructionally checked, but it has not been physically crocheted and tested yet. The approximate finished size, final silhouette, stability, and real-world ease of assembly may therefore vary in an actual crocheted sample.
More Animal Amigurumi
Explore more original crochet animal projects from Tiny Yarn Tales as you build your handmade collection.