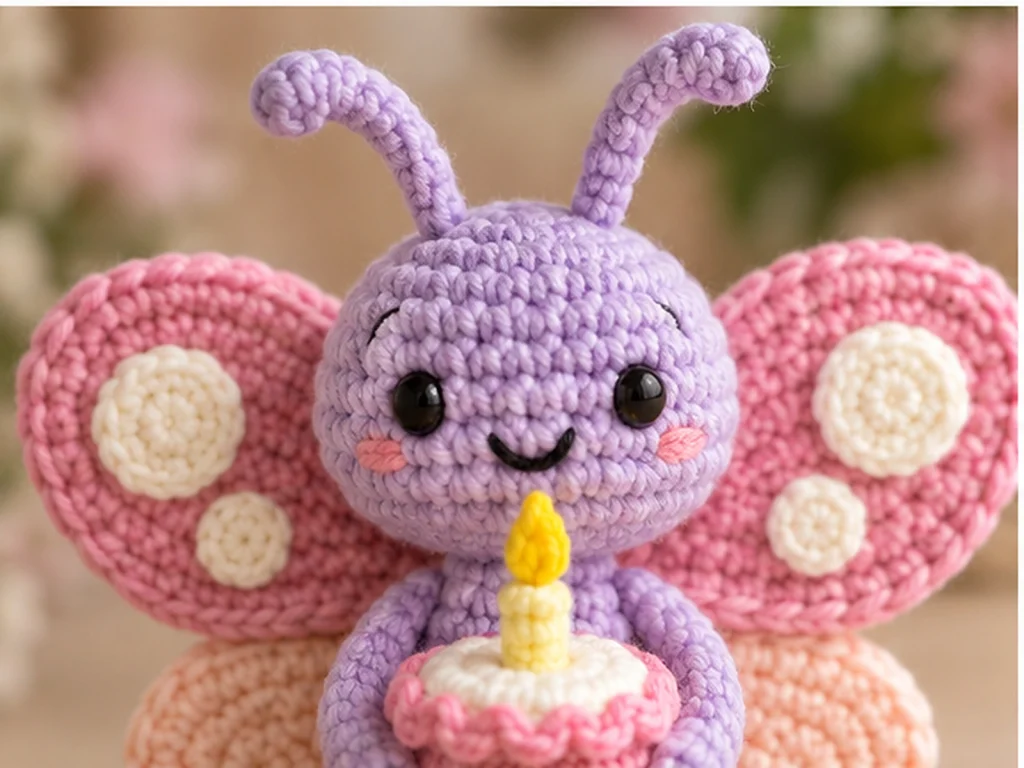
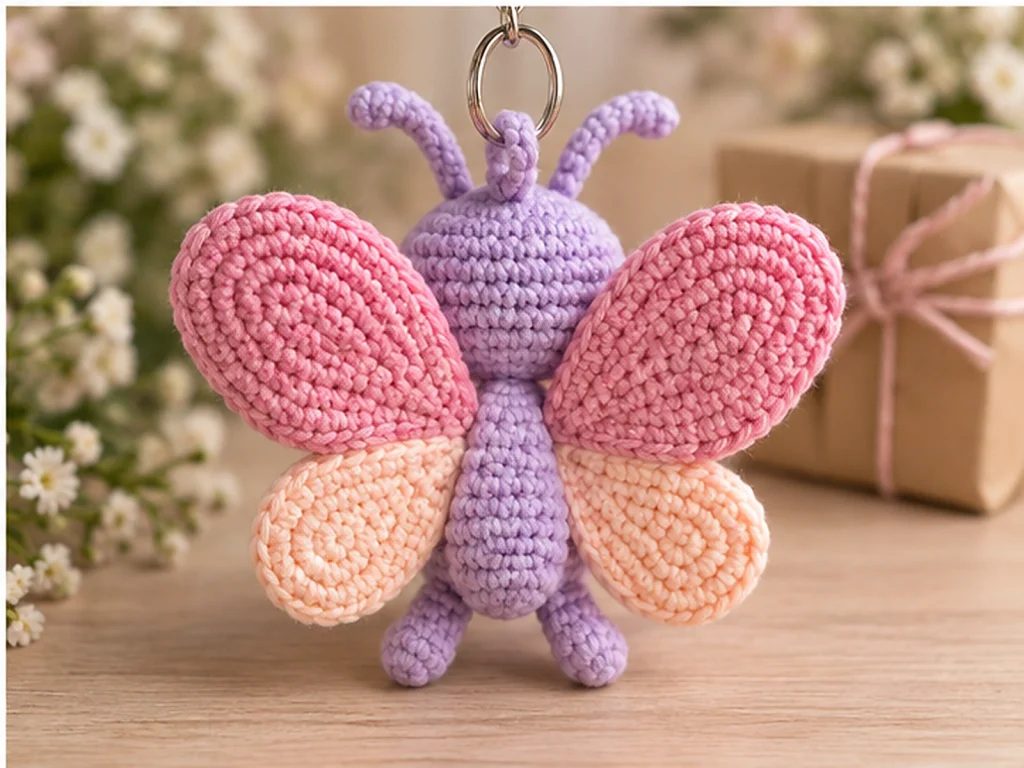
Crochet Butterfly Keychain Pattern with a Mini Birthday Cake
This crochet butterfly keychain combines a sweet butterfly design with…
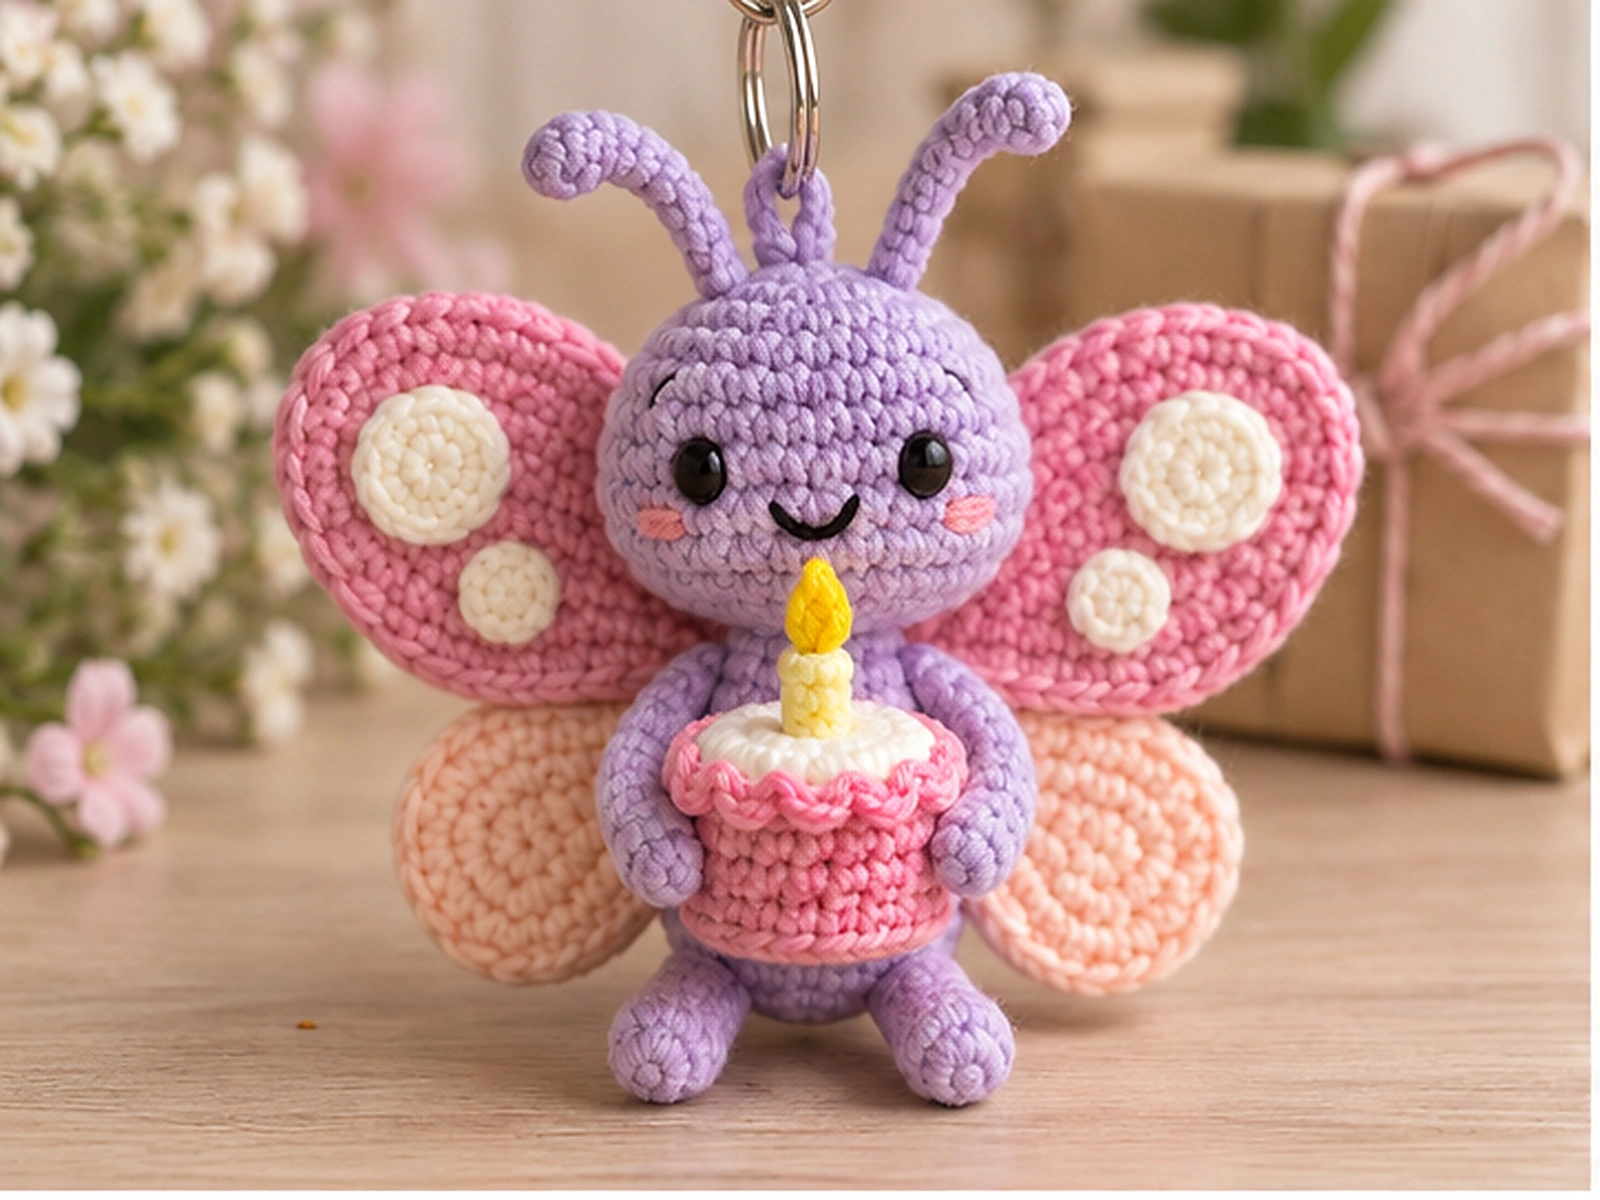
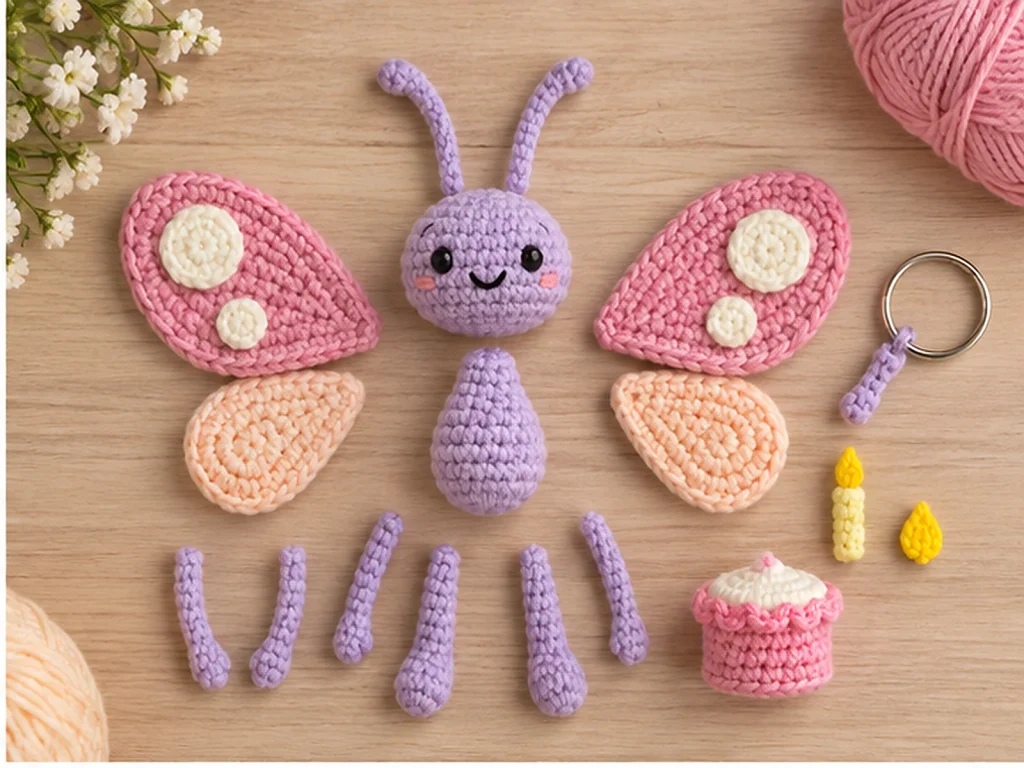
This crochet butterfly keychain combines a sweet butterfly design with a tiny birthday cake. It features layered wings, embroidered facial details, a miniature cake with a candle, and a crocheted hanging loop for attaching a keychain ring.
The project is made in separate pieces and assembled at the end, making it easy to work through one component at a time.
Pattern note: This design has been mathematically reviewed and constructionally checked, but it has not been physically crocheted and tested yet. Final size and appearance may vary with yarn, hook, tension, stuffing, and individual crochet technique.
Project Overview
What You’ll Make
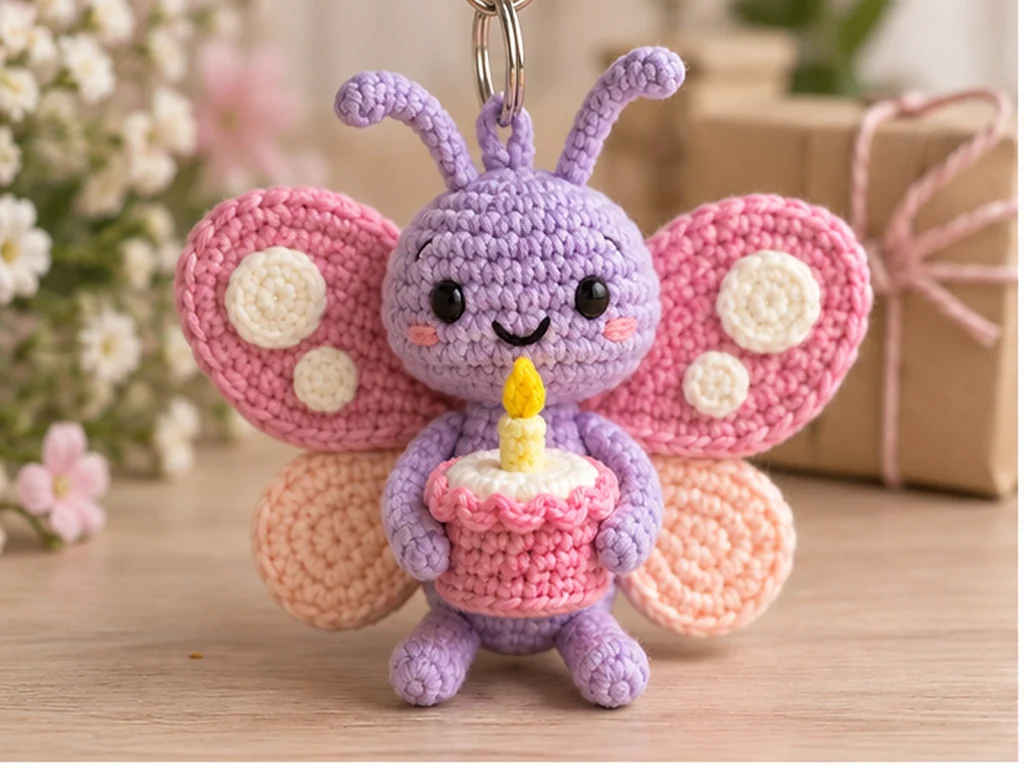
You’ll crochet a small butterfly with:
- A lavender head and body
- Dusty pink upper wings
- Pale peach lower wings
- Cream wing spots
- Embroidered eyes and smile
- A miniature birthday cake
- A candle and flame
- A reinforced hanging loop for a keychain ring
The wings are worked flat, while the head, body, and cake base are crocheted in rounds.
Project Details
- Technique: Amigurumi-style crochet
- Yarn: DK or light worsted (#3)
- Hook: 2.5 mm crochet hook
- Main colors: Soft lavender, dusty pink, pale peach, cream, warm pink, soft coral/pink, yellow, and golden yellow
- Filling: Polyester fiberfill
- Face: Embroidered
- Approximate size: About 3.5–4.5 inches across the wings and 2.75–3.5 inches tall
The finished size is approximate and can change with yarn, hook size, tension, stuffing, and individual technique.
Materials & Tools
Yarn
Use approximately DK or light worsted (#3) yarn in:
- Soft lavender
- Dusty pink
- Pale peach
- Cream
- Warm pink
- Soft coral or pink
- Yellow
- Golden yellow
- Black embroidery yarn or floss
Tools
- 2.5 mm crochet hook
- Tapestry needle
- Scissors
- Polyester fiberfill
- Keychain ring or similar hardware
Abbreviations
This pattern uses standard US crochet terminology.
| Abbreviation | Meaning |
|---|---|
| MR | Magic ring |
| ch | Chain |
| sc | Single crochet |
| inc | 2 sc in the same stitch |
| dec | Single crochet 2 stitches together |
| sl st | Slip stitch |
| BLO | Back loop only |
| FO | Fasten off |
Before You Start
Work in Continuous Rounds
The head, body, wing spots, cake, frosting, and candle are worked in continuous rounds unless otherwise noted.
Use a stitch marker to keep track of the beginning of each round.
Count Your Stitches
Check the stitch count at the end of every round or row. This is especially important after increases and decreases.
Stuff as You Go
Add fiberfill gradually to the stuffed pieces. The goal is to create a firm shape without stretching the crochet fabric.
The wings, spots, cake top, and other flat decorative pieces do not require stuffing.
Leave Sewing Tails
Whenever a piece will be attached later, leave a useful yarn tail for sewing.
Construction Order
The basic workflow is:
- Crochet the butterfly pieces.
- Crochet the birthday cake.
- Add the wing details.
- Assemble the body and wings.
- Attach the cake and arms.
- Add the facial details.
- Secure the keychain hanging loop.
Crochet Butterfly Keychain Pattern
Head — Make 1
Color: Soft lavender
Work in continuous rounds.
Round 1
6 sc in MR. (6)
Round 2
6 inc. (12)
Round 3
(sc, inc) × 6. (18)
Round 4
18 sc. (18)
Round 5
18 sc. (18)
Round 6
18 sc. (18)
Round 7
(sc, dec) × 6. (12)
Round 8
12 sc. (12)
Round 9
6 dec. (6)
Stuff firmly enough for the head to hold its shape without overfilling it.
FO, leaving a long sewing tail.
Body — Make 1
Color: Soft lavender
Work upward from the lower end.
Round 1
6 sc in MR. (6)
Round 2
6 inc. (12)
Round 3
12 sc. (12)
Round 4
12 sc. (12)
Round 5
12 sc. (12)
Round 6
12 sc. (12)
Round 7
(sc, dec) × 4. (8)
Round 8
8 sc. (8)
Round 9
(dec, 2 sc) × 2. (6)
Round 10
6 sc. (6)
Stuff moderately as you work, keeping the tapered neck area compact.
FO, leaving a long sewing tail.
Upper Wings — Make 2
Color: Dusty pink
These pieces are worked flat in rows.
Foundation
Chain 8.
Row 1
sc in 2nd ch from hook and across. (7)
Row 2
inc, 5 sc, inc. (9)
Row 3
9 sc. (9)
Row 4
inc, 7 sc, inc. (11)
Row 5
11 sc. (11)
Row 6
inc, 9 sc, inc. (13)
Row 7
13 sc. (13)
Row 8
dec, 9 sc, dec. (11)
Row 9
11 sc. (11)
Row 10
dec, 7 sc, dec. (9)
Row 11
dec, 5 sc, dec. (7)
Row 12
7 sc. (7)
Row 13
dec, 3 sc, dec. (5)
Row 14
dec, sc, dec. (3)
Row 15
dec. (2)
Row 16
dec. (1)
FO, leaving a sewing tail.
Lower Wings — Make 2
Color: Pale peach
Foundation
Chain 6.
Row 1
sc in 2nd ch from hook and across. (5)
Row 2
inc, 3 sc, inc. (7)
Row 3
7 sc. (7)
Row 4
inc, 5 sc, inc. (9)
Row 5
9 sc. (9)
Row 6
dec, 5 sc, dec. (7)
Row 7
7 sc. (7)
Row 8
dec, 3 sc, dec. (5)
Row 9
dec, sc, dec. (3)
Row 10
dec. (2)
Row 11
dec. (1)
FO, leaving a sewing tail.
Large Wing Spots — Make 2
Color: Cream
Round 1
6 sc in MR. (6)
Round 2
6 inc. (12)
FO and flatten the pieces slightly.
Small Wing Spots — Make 2
Color: Cream
Round 1
6 sc in MR. (6)
FO and flatten slightly.
Antennae — Make 2
Color: Soft lavender
Foundation
Chain 7.
Starting in the second chain from the hook, work 6 sl st back along the chain.
FO, leaving a sewing tail.
Arms — Make 2
Color: Soft lavender
Foundation
Chain 6.
Starting in the second chain from the hook, work 5 sl st back along the chain.
FO, leaving a sewing tail.
These arms are designed as flexible cords so they can curve around the birthday cake.
Legs — Make 2
Color: Soft lavender
Foundation
Chain 6.
Starting in the second chain from the hook, work 5 sl st back along the chain.
FO, leaving a sewing tail.
Mini Birthday Cake
Cake Base — Make 1
Color: Warm pink
Work in continuous rounds.
Round 1
6 sc in MR. (6)
Round 2
6 inc. (12)
Round 3
12 sc BLO. (12)
Round 4
12 sc. (12)
Round 5
12 sc. (12)
Round 6
12 sc. (12)
Round 7
6 dec. (6)
Stuff lightly so the cake keeps its shape without becoming bulky.
FO and close the opening.
Cake Top — Make 1
Color: Cream
Round 1
6 sc in MR. (6)
Round 2
6 inc. (12)
Round 3
12 sc. (12)
FO, leaving a sewing tail.
Do not stuff.
Sew the cake top over the upper opening of the cake base.
Frosting Ruffle — Make 1
Color: Soft coral or pink
Round 1
6 sc in MR. (6)
Round 2
(sc, inc) × 6. (18)
FO, leaving a sewing tail.
Sew the ruffle around the upper cake seam to create the frosting edge.
Candle — Make 1
Color: Yellow
Round 1
4 sc in MR. (4)
Round 2
4 sc. (4)
FO.
Avoid heavy stuffing. Shape the tiny piece with the yarn tail before sewing it upright onto the cake.
Flame — Make 1
Color: Golden yellow
Foundation
Chain 3.
Sl st in the second chain from hook and sl st in the next chain.
FO, leaving a small sewing tail.
Sew the flame to the top of the candle.
Assemble the Butterfly Keychain
Step 1: Join the Head and Body
Center the head over the tapered neck of the body.
Sew around the connection and check the silhouette from the front and side before fully tightening the stitches.
Step 2: Attach the Upper Wings
Place the upper wings behind the body.
The wider portions should extend outward, while the narrower ends angle downward and outward.
Sew along the inner/base area.
Before finishing the second wing, compare both sides so the pair remains visually symmetrical.
Step 3: Add the Lower Wings
Place one lower wing beneath each upper wing.
The lower wings should sit slightly lower and more inward than the upper pair.
Sew around the inner attachment area while leaving the outer portions flexible.
Step 4: Add the Wing Spots
Sew one large cream spot and one small cream spot onto each upper wing.
Treat the two sides as mirror images so the butterfly has a balanced appearance.
Step 5: Add the Antennae
Sew the antennae to the top/back of the head.
Keep them at similar heights and angles.
Step 6: Attach the Legs
Sew one leg to each lower side of the body.
Allow the legs to angle slightly outward.
Step 7: Finish the Birthday Cake
Before attaching the cake, make sure the:
- Cake base is closed
- Cake top is attached
- Frosting ruffle is in place
- Candle is centered
- Flame is secured
Step 8: Attach the Cake
Center the cake on the lower front of the butterfly body.
Sew it securely into place.
Keep the cake below the face so the butterfly’s expression stays visible.
Step 9: Position the Arms
Attach the upper ends of the arms to the body.
Curve the remaining portions around the sides of the cake so they give the appearance of holding it.
Avoid pulling the arms tightly enough to distort the body.
Step 10: Add the Face
Using black embroidery yarn or floss, embroider:
- Two small matching eyes
- A small curved smile
Check that the eyes sit level with one another before securing the embroidery ends.
Step 11: Make the Hanging Loop
Color: Soft lavender
Foundation
Chain 10.
Bring the chain together and sl st into the first chain to create a small loop.
FO, leaving a long sewing tail.
Sew the base of the loop firmly to the upper back of the head.
Reinforce the attachment with several passes of yarn before adding the keychain ring.
Finishing
Once all the pieces are attached, gently shape the wings with your fingers.
Check the butterfly from the front, back, and side to spot any uneven placement or shifted attachments.
Weave in the remaining ends securely and trim the excess yarn only after the attachment stitches are stable.
For a keychain project, pay particular attention to the hanging loop. The connection should be firmly sewn before the hardware is added.
Helpful Tips
- Use a stitch marker to track continuous rounds.
- Count stitches after every increase and decrease round.
- Add stuffing gradually rather than packing it tightly.
- Compare paired wings before making the final sewing stitches.
- Keep the cake below the face so the butterfly’s expression remains visible.
- Reinforce the hanging loop before attaching the keychain ring.
- Check the final shape from multiple angles before trimming your sewing tails.
Troubleshooting
My wings don’t look symmetrical.
Lay the butterfly flat and compare both sides. Small differences can often be corrected by adjusting the sewing position instead of altering the crocheted wing.
The butterfly looks too soft.
The head or body may need slightly more fiberfill. Add it gradually so the crochet fabric does not become stretched.
The cake looks bulky.
Remove a small amount of stuffing from the cake base and reshape it before closing. The cake is intended as a compact accent rather than the main body of the project.
The cake is covering the face.
Move it slightly lower on the body before sewing it permanently. The face should remain visually clear.
The keychain loop feels loose.
Remove the ring and reinforce the sewn base with additional passes of yarn. The loop should be secured to the stronger upper head/body area rather than to a wing.
Customization Ideas
Change the Butterfly Colors
Try different combinations such as:
- Lavender and yellow
- Blue and pink
- Coral and cream
- Mint and peach
Using contrasting colors for the upper and lower wings helps preserve the layered look.
Change the Birthday Colors
You can recolor the frosting or candle to create different birthday palettes while keeping the cake base and top neutral.
Use It as a Bag Charm
The same hanging-loop concept can also be used for a bag charm, provided the attachment is securely reinforced for the intended use.
Frequently Asked Questions
How big is the finished crochet butterfly keychain?
The design is approximately 3.5–4.5 inches across the wings and about 2.75–3.5 inches tall. Final size varies with yarn, hook, tension, stuffing, and individual technique.
What crochet terminology does this pattern use?
The pattern uses US crochet terminology, including single crochet, increase, decrease, slip stitch, chain, and magic ring.
Do the wings need to be stuffed?
No. The wing pieces are worked flat so they can keep their layered shape.
Are safety eyes required?
No. The eyes are embroidered with black yarn or floss.
How is the keychain attached?
A separate crocheted hanging loop is sewn securely to the upper back of the head. The keychain ring is then added through that loop.
Can I change the butterfly colors?
Yes. The design is well suited to color changes. Using contrasting shades for the upper and lower wings helps keep the layers visually distinct.
Can I use the butterfly as a bag charm?
The finished piece can be adapted as a bag charm. Make sure the hanging attachment is securely reinforced for the intended use.
More Crochet Animal Amigurumi
Explore more small crochet animal projects and amigurumi designs from Tiny Yarn Tales.