
Tiny Crochet Turtle Pattern — Pocket-Sized Amigurumi
This tiny crochet turtle features a rounded moss-green shell, a…
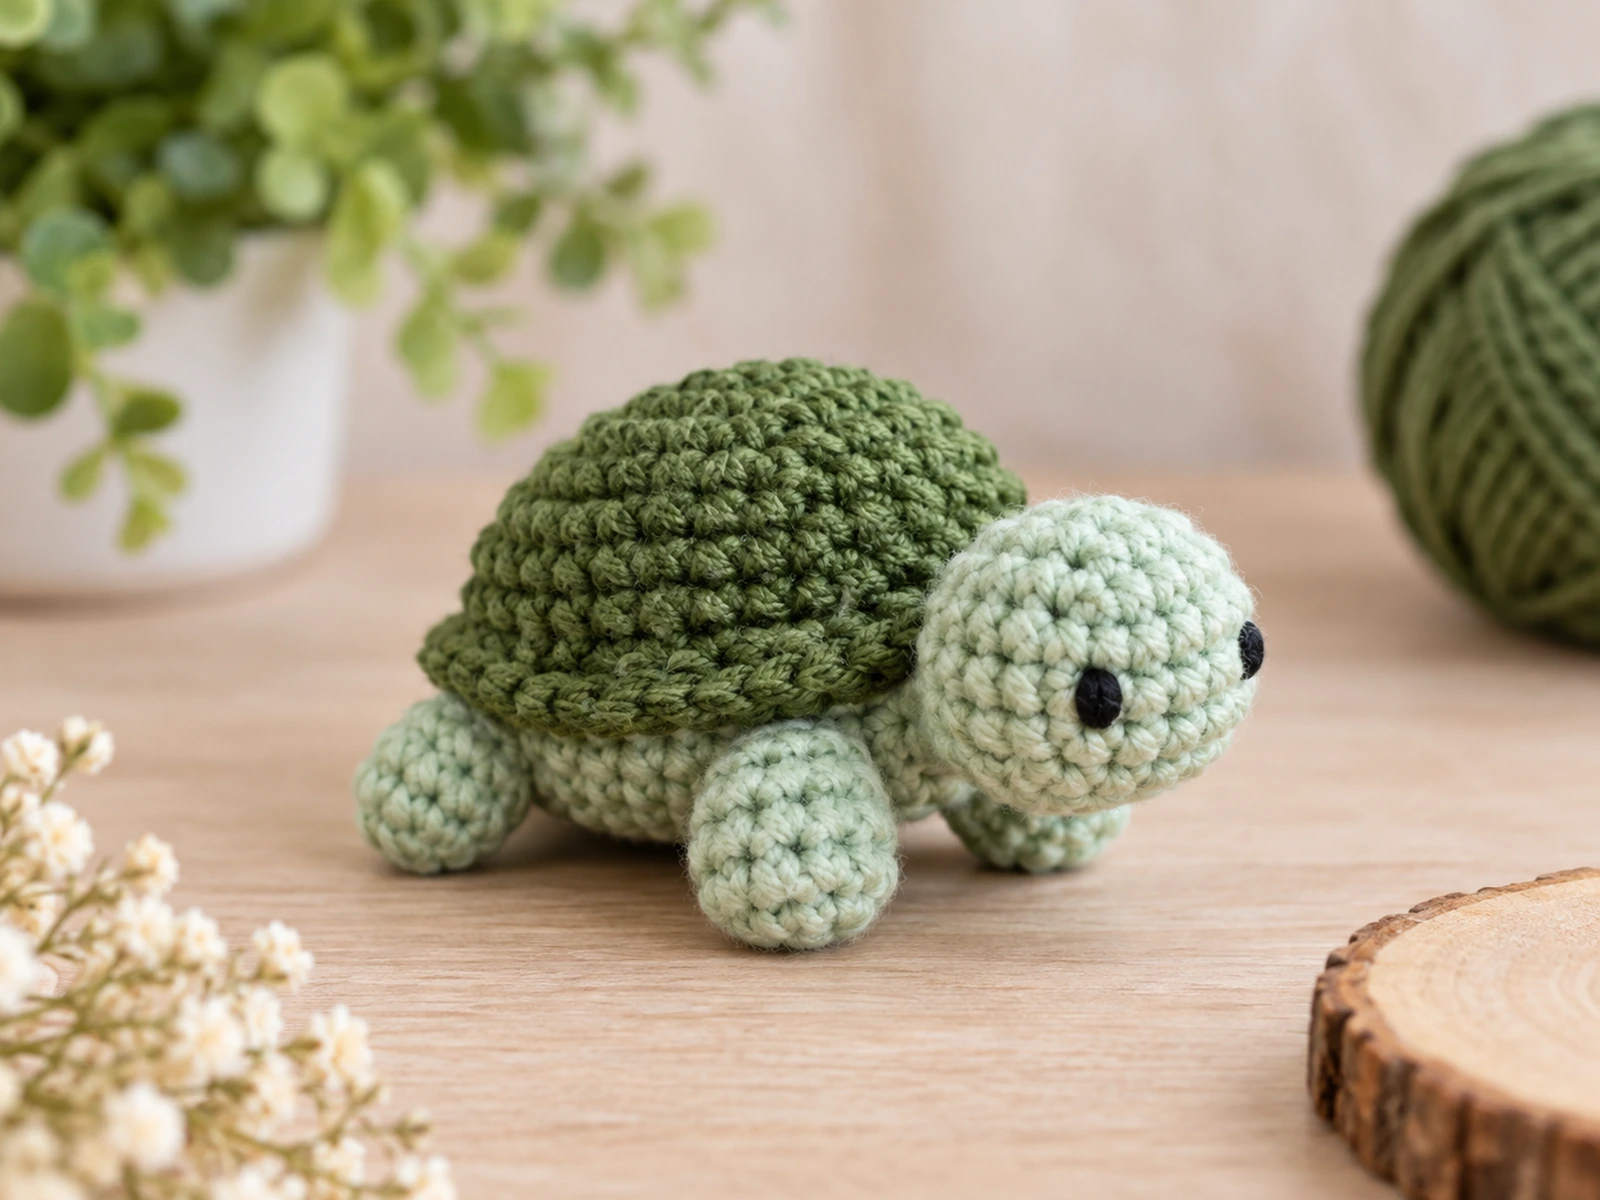
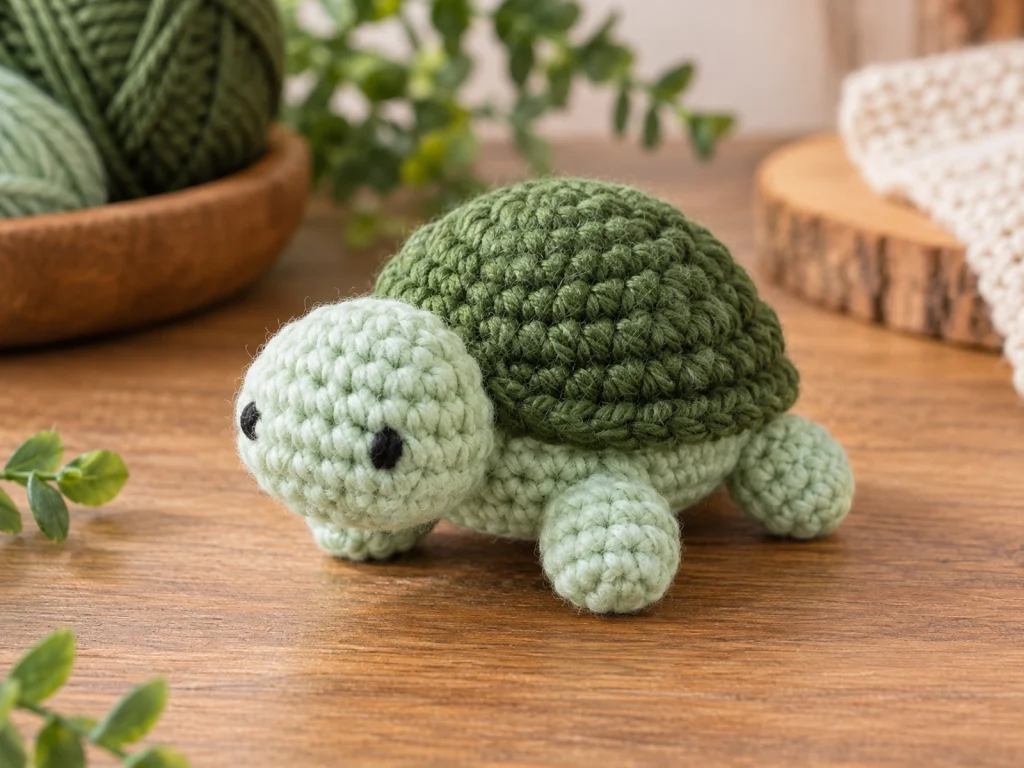
This tiny crochet turtle features a rounded moss-green shell, a soft seafoam body, four little legs, and a simple embroidered face. The project is made from separate pieces and finished with straightforward assembly and shaping.
The finished turtle is approximately 2.75–3.5 inches (7–9 cm) long, although the final size can vary with yarn, hook size, tension, stuffing, and individual technique.
Project Overview
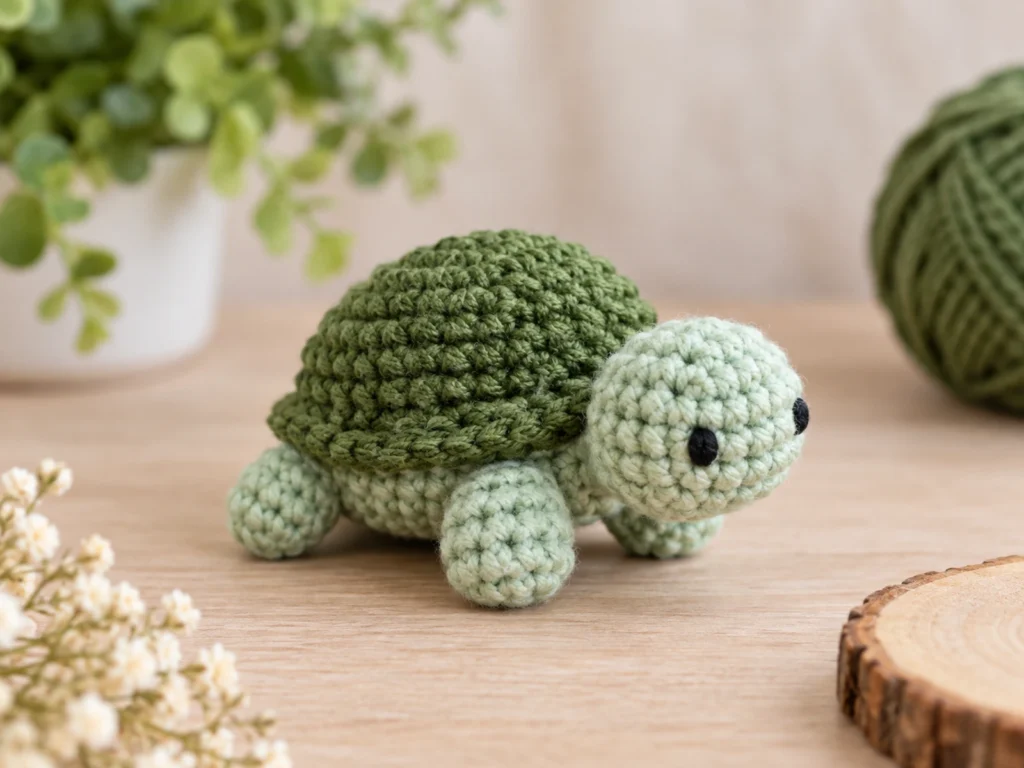
What You’ll Make
You’ll crochet:
- 1 shell
- 1 body
- 1 head
- 4 legs
- 2 embroidered eyes
The shell is shaped as a rounded oval, while the body and head are worked separately. The legs are short, unstuffed pieces that are sewn to the body.
Project Details
- Project: Tiny Pocket Turtle Amigurumi
- Approximate finished size: 2.75–3.5 inches long
- Yarn: DK/light worsted cotton
- Hook: 2.5 mm crochet hook
- Shell color: Moss green
- Body color: Seafoam green
- Eyes: Black embroidery
- Stuffing: Polyester fiberfill
- Construction: Separate crocheted pieces with sewn assembly
- Working method: Continuous rounds
This pattern has been mathematically reviewed and constructionally checked, but it has not been physically crocheted and tested yet.
Materials & Tools
Yarn
- DK/light worsted cotton yarn in moss green
- DK/light worsted cotton yarn in seafoam green
- Small amount of black embroidery thread
The exact amount of yarn has not been established, so make sure you have enough yarn available for all of the components before starting.
Tools
- 2.5 mm crochet hook
- Polyester fiberfill
- Yarn needle
- Stitch marker
- Scissors
Abbreviations
This pattern uses standard US crochet terminology.
- MR — magic ring
- sc — single crochet
- inc — increase; 2 sc in the same stitch
- dec — decrease; sc 2 stitches together
- sl st — slip stitch
- FO — fasten off
- st/sts — stitch/stitches
Before You Start
Work in Continuous Rounds
Work in continuous rounds unless otherwise noted. Use a stitch marker to keep track of the beginning of each round.
Count Your Stitches
The shaping depends on accurate stitch counts. Check the number at the end of each round before moving on.
Stuff as You Go
Add fiberfill gradually rather than filling each piece all at once. The body should be rounded and supported, while the shell should remain softer and slightly flatter.
Shape Before Sewing
Take a moment to shape each finished piece before assembly. This is especially helpful for the shell, which should have a slightly elongated front-to-back shape.
Construction Order
The easiest assembly order is:
- Finish the shell, body, head, and four legs.
- Attach the head.
- Attach the legs.
- Position and attach the shell.
- Add the embroidered eyes.
- Add optional shell detailing.
Tiny Crochet Turtle Pattern
Shell
Make 1 in moss green.
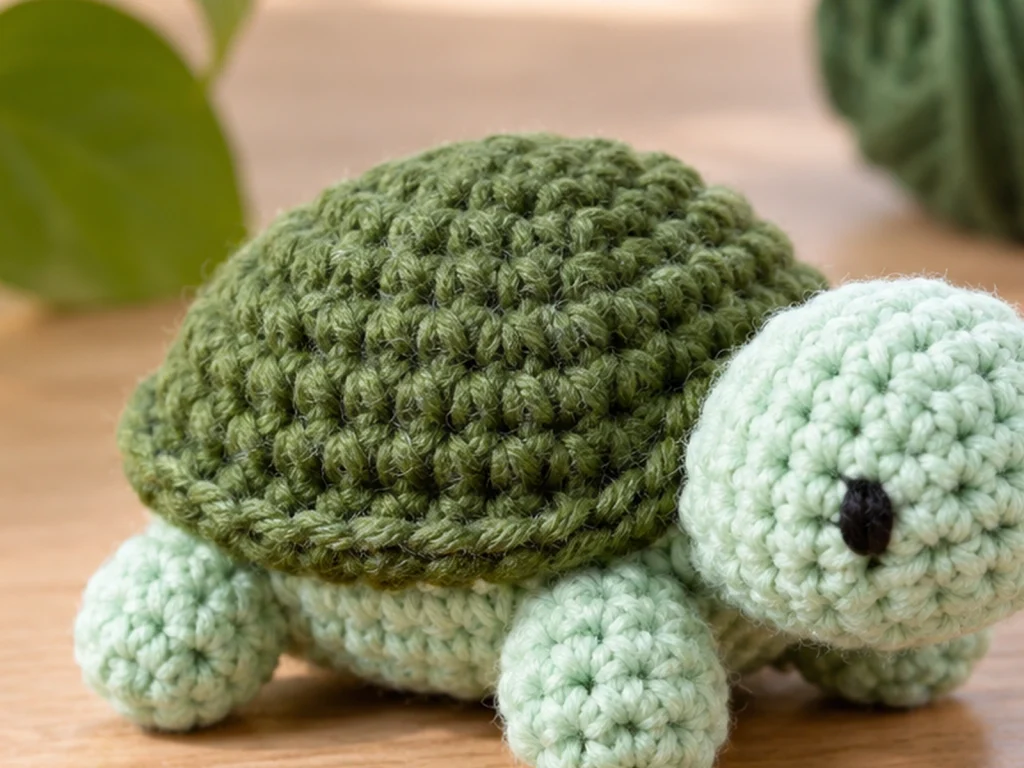
The shell is designed as a rounded oval with a slightly longer front-to-back shape.
Round 1
6 sc in MR. (6)
Round 2
6 inc. (12)
Round 3
(sc, inc) × 6. (18)
Round 4
(2 sc, inc) × 6. (24)
Round 5
(3 sc, inc) × 6. (30)
Round 6
30 sc. (30)
Round 7
30 sc. (30)
Round 8
7 sc, inc, 14 sc, inc, 7 sc. (32)
Round 9
7 sc, inc, 16 sc, inc, 7 sc. (34)
Round 10
34 sc. (34)
Round 11
34 sc. (34)
Round 12
8 sc, dec, 14 sc, dec, 8 sc. (32)
Round 13
7 sc, dec, 14 sc, dec, 7 sc. (30)
Round 14
30 sc. (30)
Begin adding a small amount of stuffing. Keep the shell softer and flatter than the body.
Round 15
(3 sc, dec) × 6. (24)
Round 16
(2 sc, dec) × 6. (18)
Adjust the stuffing so the shell stays rounded without becoming overly firm.
Round 17
(sc, dec) × 6. (12)
Round 18
6 dec. (6)
Fasten off, leaving a yarn tail for closing.
Use the yarn needle to close the remaining opening and weave in the end.
Shape the Shell
Gently flatten the shell between your fingers so its longer direction runs from the future head toward the back.
This creates the elongated turtle-shell silhouette.
Body
Make 1 in seafoam green.
Round 1
6 sc in MR. (6)
Round 2
6 inc. (12)
Round 3
(sc, inc) × 6. (18)
Round 4
(2 sc, inc) × 6. (24)
Round 5
(3 sc, inc) × 6. (30)
Round 6
30 sc. (30)
Round 7
30 sc. (30)
Round 8
30 sc. (30)
Round 9
30 sc. (30)
Begin stuffing gradually.
Round 10
(3 sc, dec) × 6. (24)
Round 11
(2 sc, dec) × 6. (18)
Add enough stuffing to create a rounded body without making it excessively firm.
Round 12
(sc, dec) × 6. (12)
Round 13
6 dec. (6)
Fasten off and close the opening. Weave in the end.
Head
Make 1 in seafoam green.
Round 1
6 sc in MR. (6)
Round 2
6 inc. (12)
Round 3
(sc, inc) × 6. (18)
Round 4
18 sc. (18)
Round 5
18 sc. (18)
Round 6
18 sc. (18)
Begin stuffing.
Round 7
(sc, dec) × 6. (12)
Finish stuffing lightly.
Round 8
6 dec. (6)
Fasten off and close the opening.
Leave a sewing tail long enough to attach the head to the body.
Legs
Make 4 in seafoam green.
The legs are intentionally left unstuffed so they stay compact and flexible.
Round 1
6 sc in MR. (6)
Round 2
(sc, inc) × 3. (9)
Round 3
9 sc. (9)
Round 4
9 sc. (9)
Fasten off, leaving a sewing tail.
Flatten the opening gently with your fingers to create a compact attachment area.
Repeat for all four legs.
Add the Face
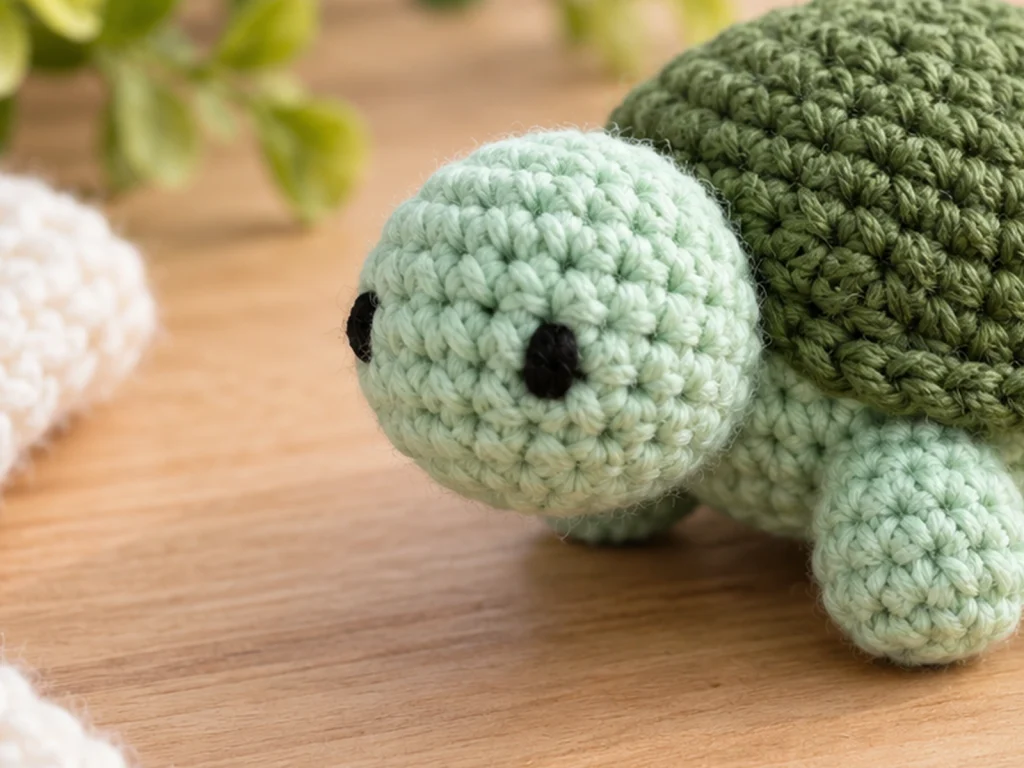
Use black embroidery thread for the eyes.
Place the two eyes on the front of the head and compare both sides before securing them.
For this design, embroidered eyes create a simple miniature look without adding plastic components.
Assemble the Turtle
Step 1: Attach the Head
Position the head at the front of the body.
The lower edge of the head should rest naturally against the upper-front portion of the body.
Before sewing, look at the turtle from the front and from above. Make sure the head is centered.
Sew around the lower edge of the head with small, secure stitches.
Hide the yarn tails inside the body.
Step 2: Attach the Legs
Arrange the legs in two pairs:
- Front left
- Front right
- Back left
- Back right
Place the front legs slightly behind the head and the rear legs farther toward the back.
Before permanently sewing the first pair, compare both sides so the placement remains balanced.
Sew each leg securely to the lower side of the body.
Check the turtle from above once all four legs are temporarily positioned.
Step 3: Attach the Shell
Place the shell over the upper part of the body.
Its longer axis should run from the head toward the back.
Center the shell so:
- the head remains clearly visible
- the legs extend below the shell
- the shell looks balanced from left to right
Temporarily hold or pin the shell in position before sewing.
Sew the shell to the upper body using small stitches around the contact area.
Keep the sewing tension even. Pulling too tightly can distort the shell.
Finishing
Optional Shell Detailing
The shell can be left plain for a clean miniature look.
For extra definition, add a few simple curved embroidered or surface-crochet lines across the shell.
Keep the detailing balanced and secure the yarn ends on the underside of the shell.
No exact spacing is required for this decorative step.
Final Shape Check
Before trimming and hiding the remaining yarn ends, inspect the turtle from several angles.
Check that:
- the head is centered
- both front legs look balanced
- both back legs look balanced
- the shell is centered over the body
- the body remains rounded
- no stuffing is visible
- the face is clearly visible
Make small adjustments before the final yarn ends are hidden.
Helpful Tips
Keep Your Tension Consistent
Amigurumi looks best when the stitches remain firm and even. Large changes in tension can affect the size and shape of the finished pieces.
Count Every Round
The shaping depends on consistent stitch counts. A missed increase or decrease can change the proportions of the turtle.
Stuff Gradually
Add small amounts of stuffing at a time and shape the piece as you go. This is especially important for the shell and body.
Compare Paired Pieces
When attaching the legs, compare the left and right sides before sewing permanently. Small differences become more noticeable on a miniature project.
Check the Silhouette
Look at the turtle from the front, side, and top before finishing. This makes it easier to spot a shell or leg that needs repositioning.
Troubleshooting
Why Is My Turtle Floppy?
A soft result can come from insufficient stuffing, loose tension, or both.
For the body and head, add stuffing gradually until the shape is supported without stretching the stitches. The shell should remain softer than the body, so some flexibility there is expected.
Why Can I See the Stuffing?
Visible stuffing usually means the crochet fabric is too loose for the yarn and hook combination, or the piece has been overstuffed.
Try using a slightly firmer tension and avoid packing the stuffing in too tightly.
Why Is My Shell Distorted?
Overstuffing or pulling the sewing stitches too tightly can change the shell’s shape.
Shape the shell gently before sewing it to the body and keep the attachment stitches even.
Why Do the Legs Look Uneven?
Temporarily position all four legs before sewing any of them permanently.
Compare the turtle from above and from the front, then adjust the positions until the two sides look balanced.
Customization Ideas
Try Different Color Combinations
Keep the basic construction the same while changing the shell and body colors.
A dark shell with a pale body creates strong contrast, while closer shades give the turtle a softer look.
Change the Facial Expression
You can personalize the embroidered face with subtle changes in the eye placement while keeping the overall face intentionally balanced.
Add Shell Details
A plain shell creates a clean miniature look. Simple surface details can add visual texture without changing the underlying pattern.
Consider a Keychain Adaptation
The turtle’s small size makes a keychain version an appealing idea, but this design has not been physically tested as a keychain.
Any hanging loop should be attached securely and tested for repeated handling before regular use.
Frequently Asked Questions
How Long Does This Crochet Turtle Take to Make?
A tested time estimate has not been established for this pattern. Total time will vary depending on your crochet speed, tension, sewing experience, and assembly pace.
Can I Make This Without a Magic Ring?
A different closed-center starting method can be used in crochet, but this pattern was drafted around the magic ring. Changing the starting method may affect the center of the first round, so check the resulting shape before continuing.
What Yarn Substitutes Can I Use?
The design specification uses DK/light worsted cotton with a 2.5 mm hook. A different yarn weight or hook can change the finished size and proportions, so substitutions should be treated as size-changing modifications.
Can I Make the Turtle in Different Colors?
Yes. The shell and body are separate pieces, so changing their colors is one of the simplest ways to customize the finished turtle.
Can I Turn It Into a Keychain?
The small size makes that possible as a modification, but the current design has not been physically tested as a keychain. Any attachment loop should be added securely and evaluated for durability before regular use.
Why Is My Turtle Floppy?
Check the stuffing, tension, and piece shape. The body should be supported by moderate stuffing, while the shell is intentionally softer.
Can I Sell a Turtle Made From This Pattern?
Commercial-use terms have not been established in the project information used for this pattern. Do not assume selling rights unless Tiny Yarn Tales publishes a clear policy for finished items made from the pattern.
Final Thoughts
This tiny crochet turtle is built around a simple silhouette: a rounded body, a slightly elongated shell, four compact legs, and an embroidered face.
Take your time with the assembly. On a small amigurumi project, careful positioning can make as much difference as the crochet itself.