Crochet Giraffe Amigurumi Pattern
This crochet giraffe amigurumi combines a rounded head, long neck,…
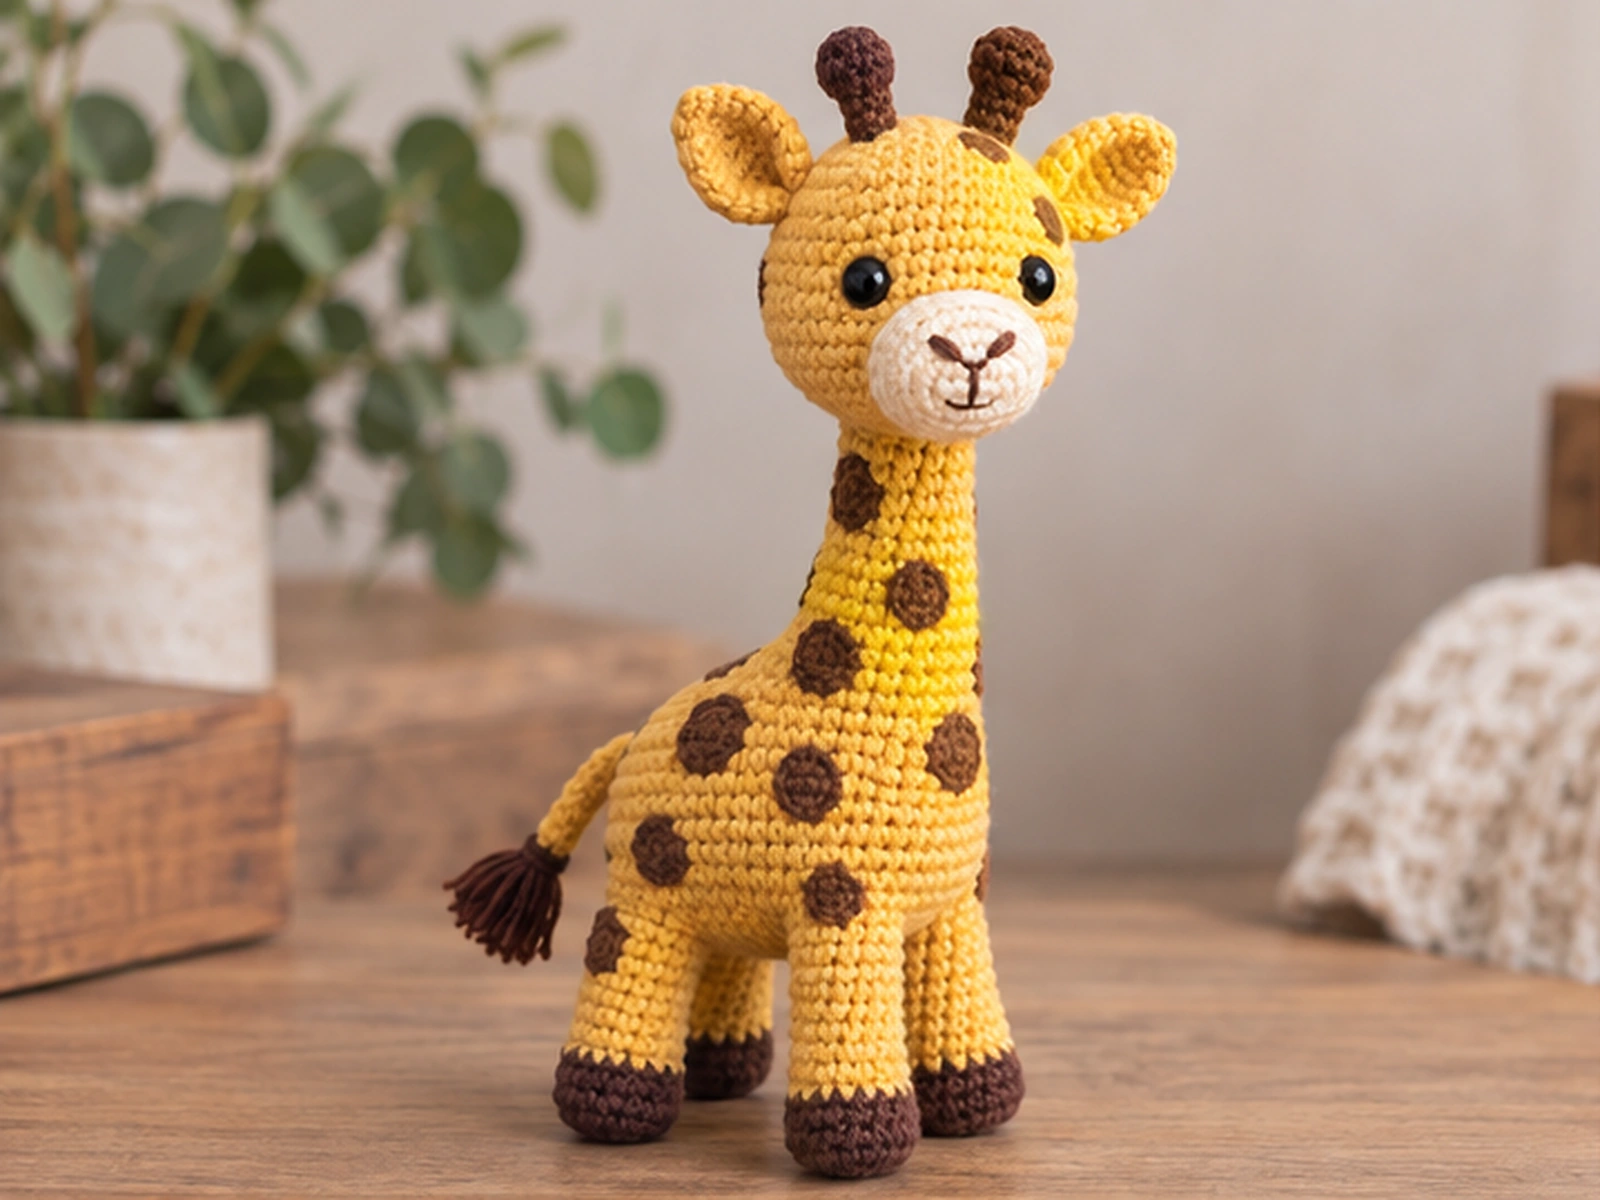
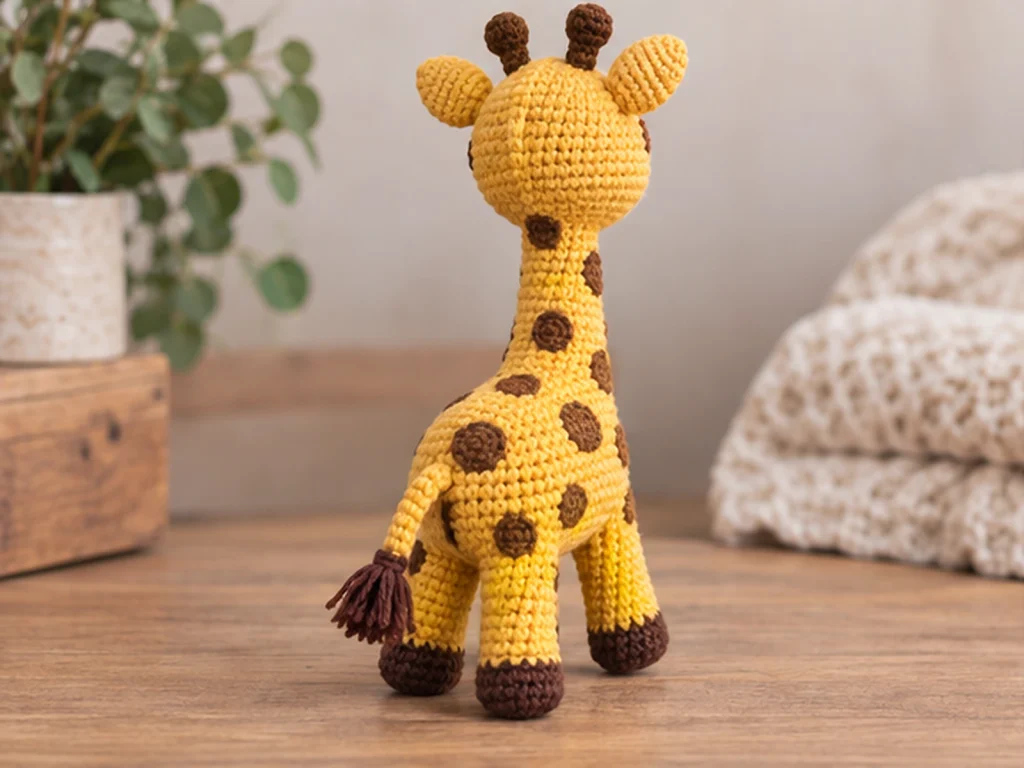
This crochet giraffe amigurumi combines a rounded head, long neck, little horns, a cream muzzle, four tiny legs, and playful brown spots for a recognizable handmade giraffe. The project is worked in separate stuffed pieces and finished with sewing, embroidery, and simple surface details.
The finished giraffe is designed to be approximately 9–11 inches tall. Final size can vary with yarn, hook size, tension, stuffing, and individual technique.
Project Overview
What You’ll Make
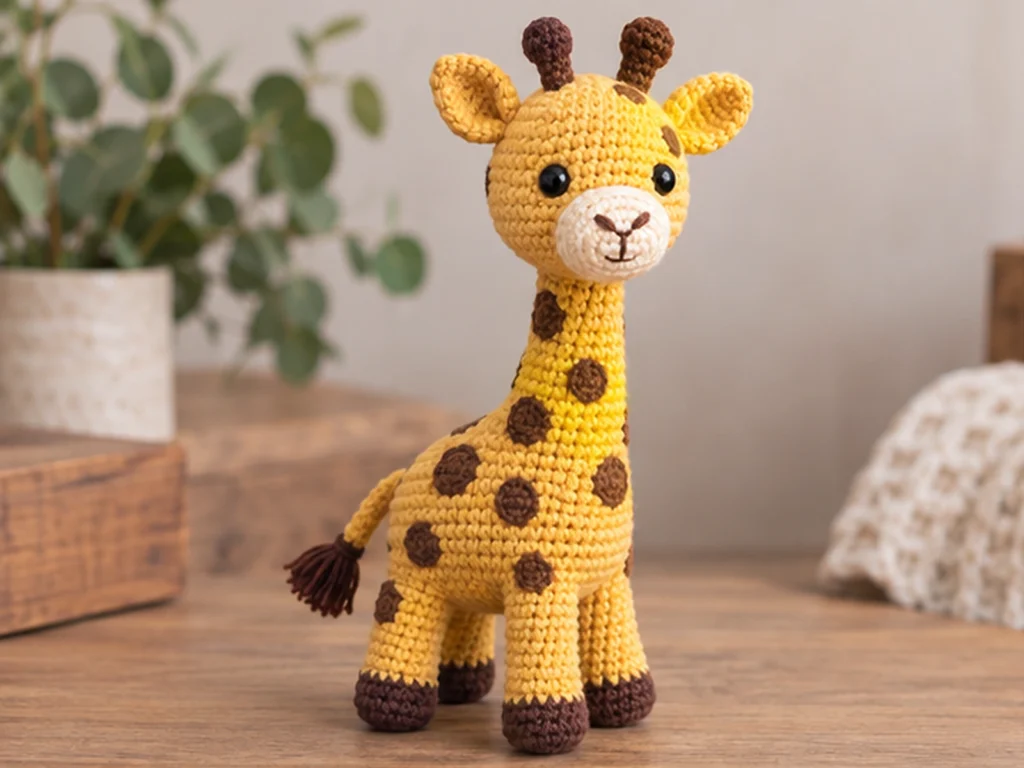
You’ll make a stuffed crochet giraffe with:
- A rounded golden-yellow head
- A cream muzzle
- Two ears and two small horns
- An elongated neck
- A rounded stuffed body
- Four matching legs with darker hooves
- A lightweight tail with a brown tuft
- Irregular brown giraffe spots
The pieces are crocheted separately and then sewn together to create the finished shape.
Project Details
- Technique: Amigurumi crochet
- Yarn: Worsted-weight #4
- Main color: Golden or mustard yellow
- Accent color: Cream
- Detail color: Dark brown
- Hook: 3.25 mm
- Eyes: 10 mm safety eyes
- Filling: Polyester fiberfill
- Approximate finished size: 9–11 inches tall
The finished size is approximate and may vary depending on yarn, hook, tension, stuffing, and crochet technique.
This design has been mathematically reviewed and constructionally checked, but it has not been physically crocheted and tested yet.
Materials & Tools
Yarn
You’ll need worsted-weight #4 yarn in:
- Golden or mustard yellow
- Cream
- Dark brown
Exact yarn quantities have not been established, so no specific yardage is provided.
Crochet Hook
- 3.25 mm crochet hook
Other Supplies
- 10 mm safety eyes
- Polyester fiberfill
- Tapestry needle
- Scissors
- Stitch marker
- Optional pins for assembly
Safety Note
Safety eyes can present a choking hazard and are not appropriate for children under 3. Do not consider the finished amigurumi baby-safe or child-safe solely because safety eyes are installed.
Abbreviations
This pattern uses standard US crochet terminology.
- MR — magic ring
- sc — single crochet
- inc — increase; work 2 sc in the same stitch
- dec — decrease; sc 2 stitches together
- BLO — back loop only
- ch — chain
- sl st — slip stitch
- FO — fasten off
Work in continuous rounds unless otherwise noted.
Before You Start
Work in Continuous Rounds
Most of the pieces are worked continuously rather than joined at the end of each round. Use a stitch marker to identify the beginning of each round.
Count Your Stitches
Each round includes a stitch count in parentheses. Check your count before moving into the next round, especially after increase and decrease rounds.
Stuff as You Go
Add polyester fiberfill gradually as the larger pieces are worked. Firm stuffing is suitable for the head, body, and neck, while the smaller pieces need much less.
Avoid packing the stuffing so tightly that it stretches the crochet fabric.
Shape Before Sewing
Before permanently attaching the pieces, place them together temporarily and check the shape from the front and side. This is especially helpful for the ears, horns, legs, neck, and head.
Construction Order
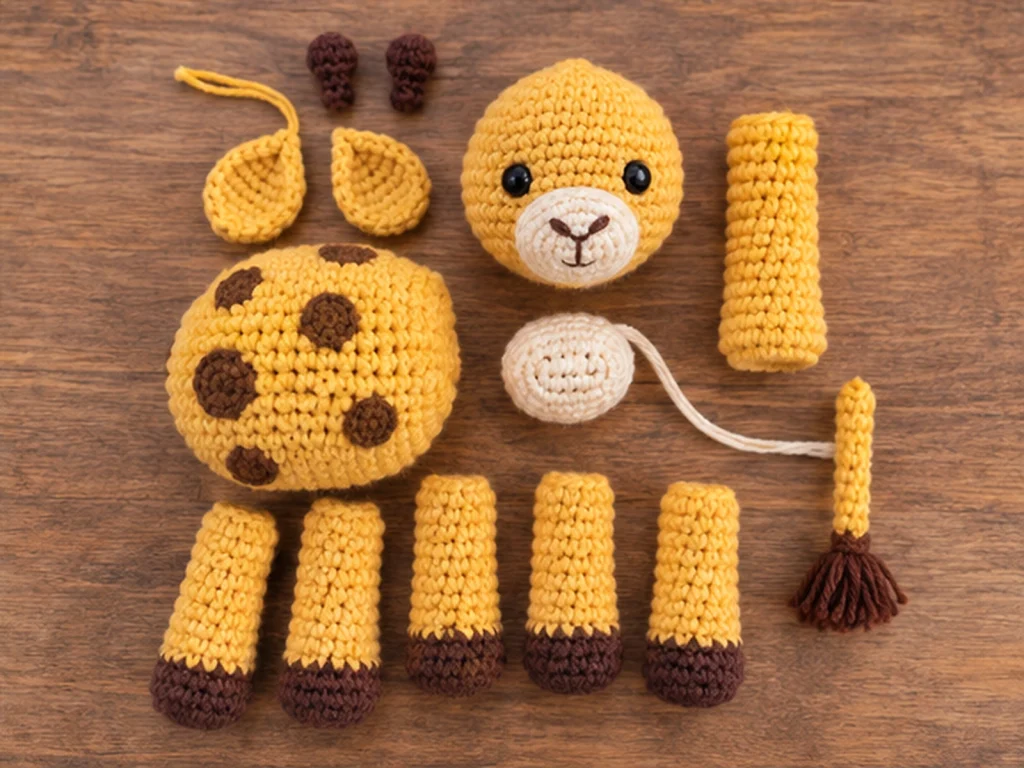
The giraffe is made from the following main components:
- Head
- Body
- Neck
- Muzzle
- Ears
- Horns
- Four legs
- Tail
- Brown surface-embroidered spots
Crochet Giraffe Amigurumi Pattern
Head — Make 1
Use golden yellow.
Round 1
6 sc in MR. (6)
Round 2
6 inc. (12)
Round 3
(sc, inc) × 6. (18)
Round 4
(2 sc, inc) × 6. (24)
Round 5
(3 sc, inc) × 6. (30)
Round 6
(4 sc, inc) × 6. (36)
Round 7
36 sc. (36)
Round 8
36 sc. (36)
Round 9
36 sc. (36)
Round 10
36 sc. (36)
Round 11
(4 sc, dec) × 6. (30)
Round 12
30 sc. (30)
Round 13
(3 sc, dec) × 6. (24)
Round 14
(2 sc, dec) × 6. (18)
Round 15
(sc, dec) × 6. (12)
Insert the 10 mm safety eyes before closing the head. Position them symmetrically and check them from the front.
Begin stuffing the head gradually.
Round 16
6 dec. (6)
Fasten off, close the remaining opening, and weave in the yarn end.
Body — Make 1
Use golden yellow.
Round 1
6 sc in MR. (6)
Round 2
6 inc. (12)
Round 3
(sc, inc) × 6. (18)
Round 4
(2 sc, inc) × 6. (24)
Round 5
(3 sc, inc) × 6. (30)
Round 6
(4 sc, inc) × 6. (36)
Round 7
36 sc. (36)
Round 8
36 sc. (36)
Round 9
36 sc. (36)
Round 10
36 sc. (36)
Round 11
36 sc. (36)
Round 12
(4 sc, dec) × 6. (30)
Round 13
30 sc. (30)
Round 14
(3 sc, dec) × 6. (24)
Round 15
24 sc. (24)
Round 16
(2 sc, dec) × 6. (18)
Stuff firmly enough for the body to hold its shape without stretching the stitches.
Round 17
6 dec. (12)
Round 18
6 dec. (6)
Fasten off, close the opening, and weave in the end.
Neck — Make 1
Use golden yellow.
Round 1
8 sc in MR. (8)
Round 2
8 sc. (8)
Round 3
(2 sc, inc) × 4. (12)
Round 4
12 sc. (12)
Round 5
12 sc. (12)
Round 6
12 sc. (12)
Round 7
12 sc. (12)
Round 8
12 sc. (12)
Round 9
12 sc. (12)
Round 10
12 sc. (12)
Round 11
12 sc. (12)
Round 12
12 sc. (12)
Round 13
12 sc. (12)
Round 14
12 sc. (12)
Round 15
12 sc. (12)
Stuff the neck firmly enough to keep it upright.
Fasten off with a long sewing tail. Keep the final opening available for attaching the neck to the head.
Muzzle — Make 1
Use cream.
Round 1
6 sc in MR. (6)
Round 2
6 inc. (12)
Round 3
(sc, inc) × 6. (18)
Round 4
18 sc. (18)
Round 5
18 sc. (18)
Round 6
(sc, dec) × 6. (12)
Round 7
12 sc. (12)
Add a light amount of stuffing.
Fasten off with a long sewing tail. Close the opening and gently flatten the piece into a low oval.
The muzzle will be sewn to the front of the head. After attaching it, embroider the nose and a small mouth line with dark brown yarn.
Ears — Make 2
Use golden yellow.
Round 1
6 sc in MR. (6)
Round 2
6 inc. (12)
Round 3
12 sc. (12)
Round 4
(sc, dec) × 4. (8)
Round 5
8 sc. (8)
Do not heavily stuff the ears.
Fasten off with a long sewing tail. Flatten the opening and shape the piece slightly for attachment.
Make the second ear to match.
Horns — Make 2
Use dark brown.
Round 1
6 sc in MR. (6)
Round 2
6 sc. (6)
Round 3
6 sc. (6)
Round 4
6 sc. (6)
Round 5
6 sc. (6)
Add only a small amount of stuffing.
Fasten off with a long sewing tail and close the opening.
Make the second horn to match.
Legs — Make 4
Begin with dark brown for the hoof.
Round 1
6 sc in MR. (6)
Round 2
6 inc. (12)
Round 3
12 sc BLO. (12)
Change to golden yellow.
Round 4
12 sc. (12)
Round 5
12 sc. (12)
Round 6
12 sc. (12)
Round 7
12 sc. (12)
Round 8
12 sc. (12)
Round 9
12 sc. (12)
Round 10
12 sc. (12)
Round 11
(sc, dec) × 4. (8)
Round 12
8 sc. (8)
Add light to moderate stuffing as you work.
Fasten off with a long sewing tail and close the opening neatly.
Make all four legs consistent in shape and length.
Tail — Make 1
Use golden yellow.
- Ch 12.
- Starting in the second chain from the hook, sl st across the remaining 11 chains.
- Fasten off and leave a sewing tail.
For the tuft, attach several short strands of dark-brown yarn to the tip and trim them into a small brush.
Giraffe Spots
Use dark-brown yarn for the spots.
Add irregular surface-embroidered spots across the:
- Body
- Neck
- Head
Vary the shapes rather than making every spot identical.
Avoid placing spots directly over the eyes, muzzle, or major attachment seams.
Assembly
Step 1: Attach the Legs
Lay the body flat and determine the front and back.
Position all four legs so the front pair and rear pair are balanced from side to side.
Temporarily pin the legs and compare both sides before sewing.
Once the placement looks even, sew the tops of the legs securely to the lower sides of the body.
Step 2: Attach the Tail
Place the tail at the center back of the body.
Sew it securely and check that the brown tuft hangs freely.
Step 3: Attach the Neck to the Body
Center the lower end of the stuffed neck at the top of the body.
Sew around the connection securely, working through the body fabric and the closed lower edge of the neck.
Before completing the seam, check that the neck remains upright.
Step 4: Attach the Head
Center the head over the upper end of the neck.
Check the position from the front and side before completing the seam.
Use the available sewing tail to attach the head securely to the neck.
Step 5: Attach the Muzzle
Center the cream muzzle on the lower front portion of the head.
Temporarily pin it in place, then sew around the edge.
Embroider the dark-brown nose and a small mouth line.
Step 6: Attach the Ears
Position the ears symmetrically on the upper sides of the head.
They should angle slightly outward rather than point straight down.
Compare both sides before permanently sewing them in place.
Step 7: Attach the Horns
Position the two horns between the ears.
Check their symmetry from the front and sew them securely to the head.
Step 8: Add the Giraffe Spots
Finish the character by adding irregular brown spots to the head, neck, and body.
Keep the placement varied while leaving the facial details and attachment seams clear.
Finishing
Before finishing the project, check for:
- Loose yarn ends
- Visible stuffing
- Loose safety eyes
- Uneven ears
- Crooked horns
- Uneven leg placement
- A leaning head
- Spots interfering with facial details
Weave in the remaining yarn ends and trim them neatly.
Give the finished giraffe a gentle shaping pass with your hands.
Facial Details
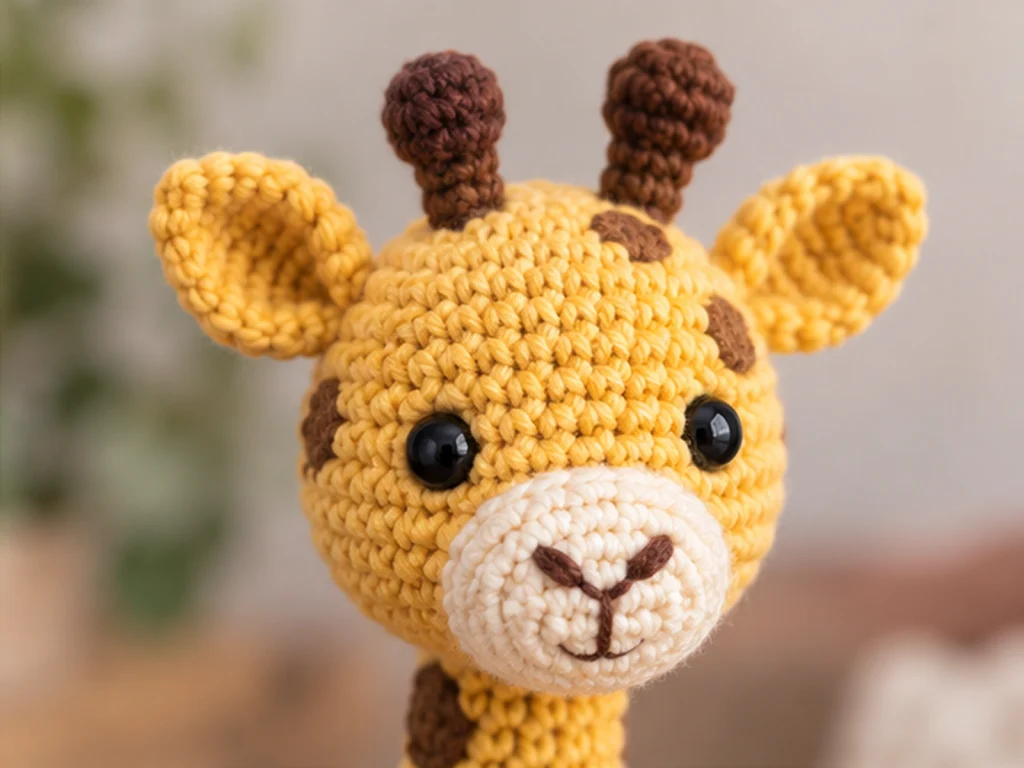
Eye Placement
The eyes should be placed symmetrically before the head is fully closed.
Check the face from the front before permanently securing the eye placement.
Nose
Use dark-brown yarn to embroider the nose on the cream muzzle.
Mouth
Add a small dark-brown mouth line beneath the nose.
Helpful Tips
Check Your Stitch Count Before Continuing
If a round does not match the stated stitch count, stop and recount before moving forward. Increase and decrease rounds are especially important to verify.
Stuff Gradually
Overstuffing can stretch the fabric and change the shape. Add fiberfill in small amounts and shape the piece as you work.
Compare Paired Pieces
Place both ears or both horns beside one another before sewing them on. Small differences in tension can change the finished shape.
Pin Before Sewing
Temporary pins make it easier to adjust the legs, tail, ears, horns, and other components before making the attachment permanent.
Troubleshooting
My Stitch Count Is Off
Stop and recount the current round. Check every increase and decrease rather than trying to force the project back to the expected number.
The Stuffing Is Showing
The fabric may be stretched too far by the stuffing or your stitches may be looser than intended. Remove a small amount of fiberfill and continue with even tension.
My Head Looks Crooked
Check the head from the front and side before permanently sewing it to the neck. Adjust the position while the seam is still easy to change.
My Ears or Horns Do Not Match
Compare the completed pieces side by side before attaching them. Matching tension helps keep paired pieces similar.
My Legs Look Uneven
Temporarily pin all four legs in place and compare them from both the front and side before sewing.
My Giraffe Looks Too Wide
Remember that final proportions can change with yarn, hook size, tension, and stuffing. Overstuffing can especially change the silhouette.
Customization Ideas
Change the Color Palette
Try different shades of yellow, gold, cream, or brown while keeping the basic giraffe construction.
Vary the Spots
Make the spots smaller, larger, rounder, or more irregular while keeping them concentrated on the body, neck, and head.
Change the Expression
The embroidered mouth can be adjusted slightly to create a different expression.
Experiment With Size
Different yarn weights and hook sizes can change the overall scale, but they can also change stitch definition, stuffing behavior, and proportions. Treat a resized version as a variation rather than an exact match to the stated dimensions.
Care
Care depends on the yarn and materials used. Follow the care instructions associated with your chosen yarn, and do not assume the finished amigurumi is washable or heat-safe unless the materials specifically support it.
Frequently Asked Questions
How big will this crochet giraffe be?
The design is intended to be approximately 9–11 inches tall. Final dimensions can vary with yarn, hook size, tension, stuffing, and individual technique.
What crochet terms does this pattern use?
The pattern uses standard US terminology, including sc, inc, dec, BLO, ch, sl st, and FO.
Can I use a different yarn?
Yes, but changing yarn can affect the final size, shape, stitch definition, and amount of stuffing needed.
Can I make the giraffe larger?
Changing yarn weight and hook size can increase the finished size, but the proportions may change as well. Test your tension and construction before committing to a fully resized version.
Are safety eyes suitable for young children?
Safety eyes can present a choking hazard and are not appropriate for children under 3. The finished project should not be treated as child-safe solely because safety eyes are installed.
Why should I pin pieces before sewing?
Temporary pinning lets you compare both sides and adjust placement before the attachment becomes permanent.
Can I change the colors?
Yes. The design uses golden yellow, cream, and dark brown, but the palette can be adapted while keeping the same general construction.