
Chef Mouse Crochet Pattern: A Step-by-Step Amigurumi Tutorial
This Chef Mouse amigurumi combines a rounded little mouse with…
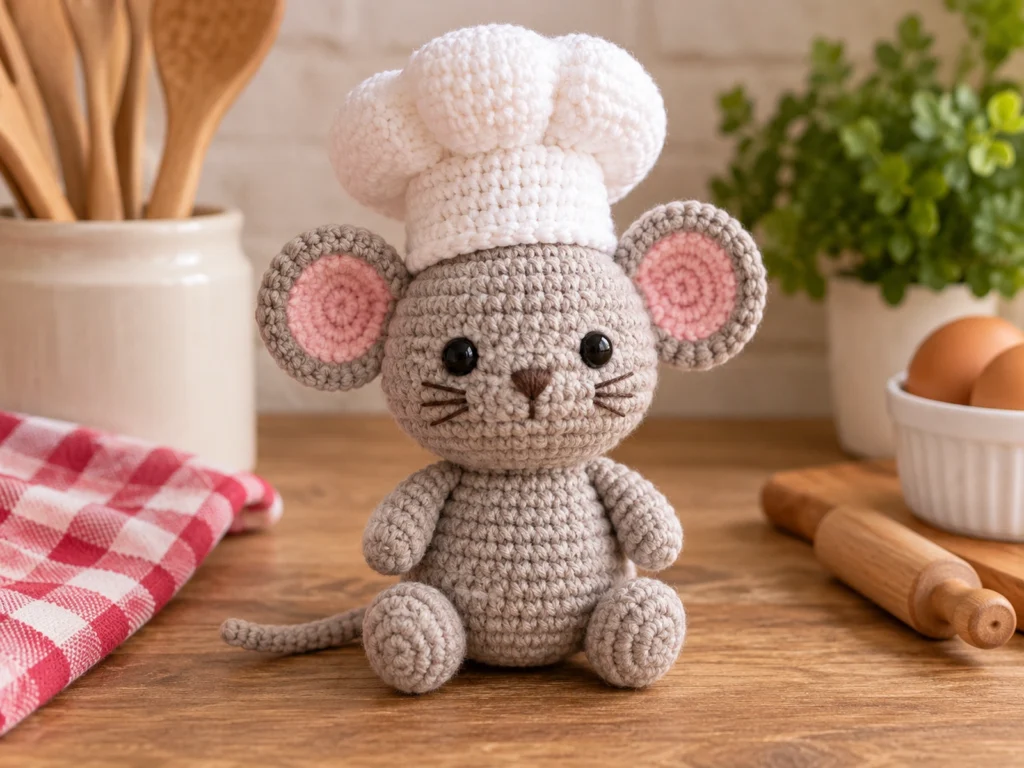
This Chef Mouse amigurumi combines a rounded little mouse with a playful chef-inspired look and a soft white chef hat. The design is worked in separate pieces, then stuffed, assembled, and finished with embroidered facial details.
Below you’ll find the materials, abbreviations, complete crochet pattern, assembly instructions, troubleshooting tips, and simple ways to customize your finished mouse.
Pattern note: This original pattern has been mathematically reviewed and constructionally checked, but it has not been physically crocheted and tested yet. The finished size and appearance may vary depending on yarn, hook size, tension, stuffing, and individual technique.
Project Overview
What You’ll Make
You’ll crochet a small mouse with:
- A rounded warm-gray head
- A compact matching body
- Two flat rounded ears with pink inner details
- Two arms and two legs
- A curved tail
- Embroidered nose and whiskers
- A two-piece white chef hat with a soft, puffy crown
The project is built from separate crocheted components so each part can be shaped and finished before assembly.
Project Details
| Detail | Pattern Information |
|---|---|
| Project | Chef Mouse Amigurumi |
| Approximate finished size | About 4–5 inches tall, including the chef hat |
| Yarn | #4 Medium/Worsted-weight yarn |
| Crochet hook | 3.5 mm |
| Main color | Warm gray |
| Accent colors | White, pink, black or dark brown |
| Eyes | 8 mm safety eyes |
| Stuffing | Polyester fiberfill |
| Construction | Separate crocheted components |
| Gauge | Not required |
| Crochet terms | US terms |
The finished size is approximate rather than guaranteed. Your final measurements can vary with yarn, hook size, tension, stuffing, and crochet technique.
Materials & Tools
You’ll need:
- #4 Medium/Worsted-weight yarn in warm gray
- White yarn for the chef hat
- Pink yarn for the inner-ear details
- Black or dark brown yarn for the embroidered nose and whiskers
- 3.5 mm crochet hook
- 8 mm safety eyes
- Polyester fiberfill
- Yarn needle
- Stitch marker
- Scissors
Safety Note
Safety eyes can present a choking hazard and are not appropriate for children under 3. Embroidered eyes can be used instead when appropriate.
Abbreviations
This pattern uses standard US crochet terminology.
- MR — magic ring
- sc — single crochet
- inc — increase; work 2 sc in the same stitch
- dec — single crochet decrease
- ch — chain
- BLO — back loop only
- FO — fasten off
Numbers in parentheses at the end of a round indicate the total stitch count for that round.
Before You Start
Work in Continuous Rounds
The stuffed amigurumi pieces are worked in continuous rounds unless otherwise noted. A stitch marker can help you keep track of the beginning of each round.
Count Your Stitches
The stitch counts control the shaping of each piece. When a round includes increases or decreases, check your count before moving to the next round.
Stuff as You Go
Add fiberfill gradually rather than filling a piece all at once. The goal is a firm, rounded shape without stretching the stitches so much that the stuffing becomes visible.
Compare Paired Pieces
Before permanently sewing on the ears, arms, or legs, compare both sides from the front and side. Small adjustments to angle and position can make the finished mouse look more balanced.
Construction Order
For the smoothest assembly:
- Crochet and finish all the individual pieces.
- Add the facial details to the head.
- Attach the ears.
- Join the head and body.
- Attach the arms, legs, and tail.
- Assemble the chef hat.
- Attach the finished hat.
- Weave in the remaining yarn ends and make final shaping adjustments.
Original Chef Mouse Crochet Pattern
Head
Color: Warm gray
Make: 1
Stuff: Yes
Round 1
6 sc in MR. (6)
Round 2
6 inc. (12)
Round 3
(sc, inc) × 6. (18)
Round 4
(2 sc, inc) × 6. (24)
Round 5
(3 sc, inc) × 6. (30)
Round 6
Sc around. (30)
Round 7
Sc around. (30)
Round 8
Sc around. (30)
Round 9
Sc around. (30)
Round 10
Sc around. (30)
Place the safety eyes symmetrically on the upper-middle area of the face before the head is completely stuffed.
Round 11
(3 sc, dec) × 6. (24)
Round 12
(2 sc, dec) × 6. (18)
Continue stuffing gradually while maintaining the rounded shape.
Round 13
(sc, dec) × 6. (12)
Round 14
6 dec. (6)
FO and close the remaining opening.
Embroider a small nose below the eyes and add short whiskers on both sides of the face.
Body
Color: Warm gray
Make: 1
Stuff: Yes
Round 1
6 sc in MR. (6)
Round 2
6 inc. (12)
Round 3
(sc, inc) × 6. (18)
Round 4
(2 sc, inc) × 6. (24)
Round 5
Sc around. (24)
Round 6
Sc around. (24)
Round 7
Sc around. (24)
Round 8
Sc around. (24)
Round 9
(2 sc, dec) × 6. (18)
Round 10
Sc around. (18)
Round 11
Sc around. (18)
Round 12
Sc around. (18)
Begin stuffing gradually as the body narrows.
Round 13
(sc, dec) × 6. (12)
Round 14
6 dec. (6)
FO, close the opening, and leave a yarn tail for assembly.
Ears — Make 2
Color: Warm gray
Stuff: No
Round 1
6 sc in MR. (6)
Round 2
6 inc. (12)
Round 3
(sc, inc) × 6. (18)
Round 4
Sc around. (18)
FO and leave a long sewing tail.
Gently flatten each ear. Do not stuff them.
Use a small amount of pink yarn to add the inner-ear detail.
Arms — Make 2
Color: Warm gray
Round 1
6 sc in MR. (6)
Round 2
(sc, inc) × 3. (9)
Round 3
Sc around. (9)
Round 4
Sc around. (9)
Round 5
Sc around. (9)
Round 6
Sc around. (9)
Lightly stuff the lower portion.
Round 7
(sc, dec) × 3. (6)
Round 8
Sc around. (6)
FO and leave a sewing tail.
Flatten the upper opening slightly before attaching each arm to the body.
Legs — Make 2
Color: Warm gray
Round 1
6 sc in MR. (6)
Round 2
6 inc. (12)
Round 3
Sc around. (12)
Round 4
Sc around. (12)
Round 5
(2 sc, dec) × 3. (9)
Round 6
Sc around. (9)
Round 7
Sc around. (9)
Round 8
Sc around. (9)
Stuff lightly to moderately, keeping the lower section supported.
FO and leave a sewing tail.
Tail
Color: Warm gray
Foundation
Ch 17.
Return Row
Starting in the second chain from the hook, sc across. (16)
FO and leave a long sewing tail.
Curve the tail gently during assembly rather than forcing it into a sharp bend.
Chef Hat
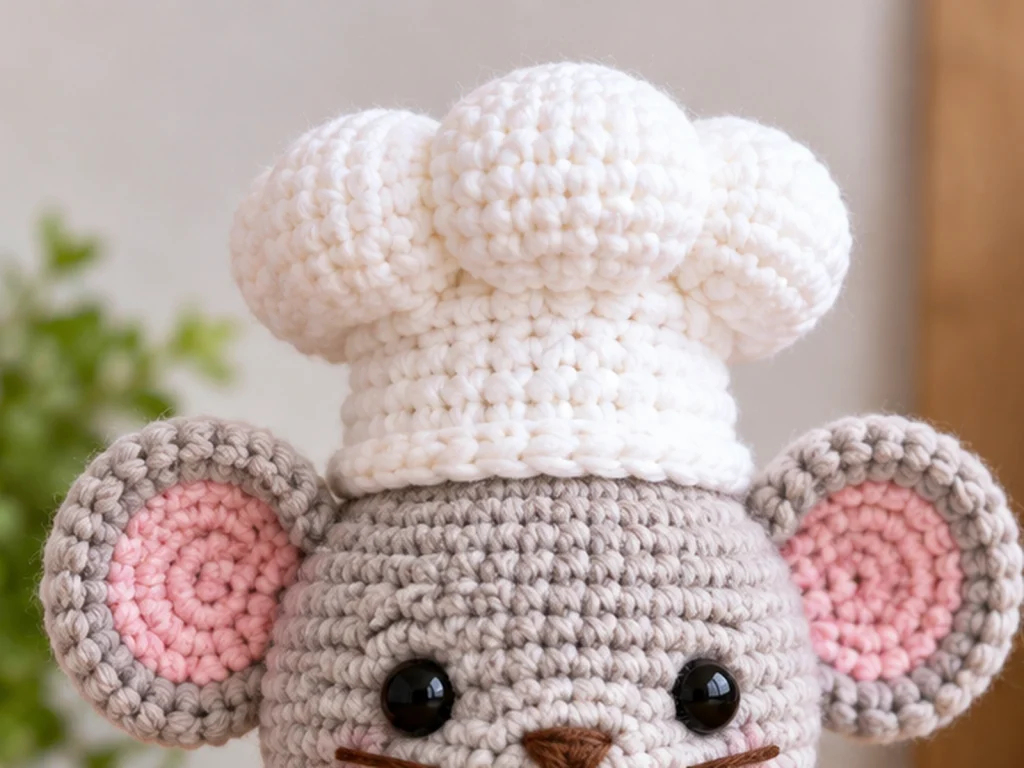
The chef hat is worked in two separate pieces: a rounded crown and a wider flat brim.
Hat Crown
Color: White
Make: 1
Stuff: Lightly
Round 1
6 sc in MR. (6)
Round 2
6 inc. (12)
Round 3
(sc, inc) × 6. (18)
Round 4
(2 sc, inc) × 6. (24)
Round 5
(3 sc, inc) × 6. (30)
Round 6
Sc around. (30)
Round 7
Sc around. (30)
FO and leave the lower edge open.
Add a small amount of fiberfill so the crown keeps a soft, puffy shape.
Hat Brim
Color: White
Make: 1
Round 1
6 sc in MR. (6)
Round 2
6 inc. (12)
Round 3
(sc, inc) × 6. (18)
Round 4
(2 sc, inc) × 6. (24)
Round 5
(3 sc, inc) × 6. (30)
Round 6
(4 sc, inc) × 6. (36)
Round 7
Sc around in BLO. (36)
FO and weave in the end.
Facial Details
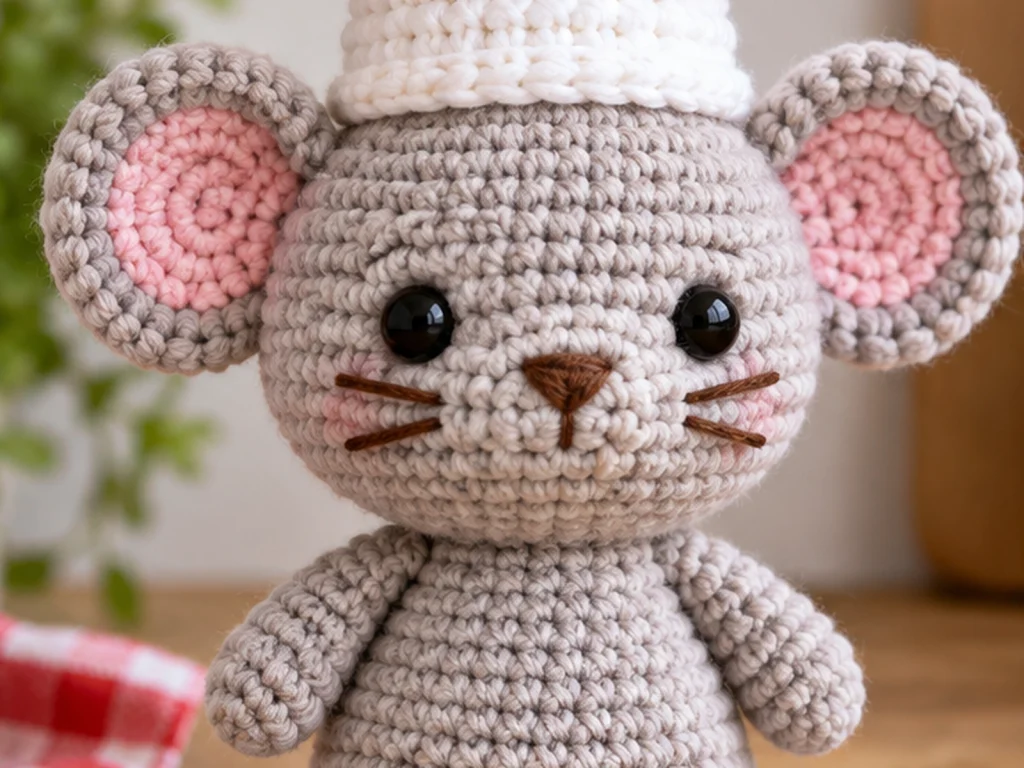
The face gives the mouse most of its personality, so take a moment to check the placement before making the finishing stitches permanent.
Eye Placement
Place the two 8 mm safety eyes symmetrically on the upper-middle area of the head.
Check the front view before completing the assembly.
Nose
Embroider a small nose centered below the eyes.
Whiskers
Add short whiskers on both sides of the nose, keeping the two sides visually balanced.
Assembly
Step 1: Prepare the Finished Pieces
Make sure all crocheted pieces are complete, stuffed where required, and finished with appropriate sewing tails.
Step 2: Attach the Ears
Place the two ears on the upper sides of the head.
Compare their position from the front and side before sewing them down completely.
Step 3: Prepare the Head and Body
Make sure the head is centered over the upper portion of the body.
Step 4: Attach the Head to the Body
Sew around the connection gradually, checking that the head remains centered as you work.
Step 5: Attach the Arms
Position one arm on each side of the body.
Check the height and angle of both arms before completing the attachment.
Step 6: Attach the Legs
Place the legs toward the lower front or sides of the body.
Compare both sides before sewing them permanently.
Step 7: Attach the Tail
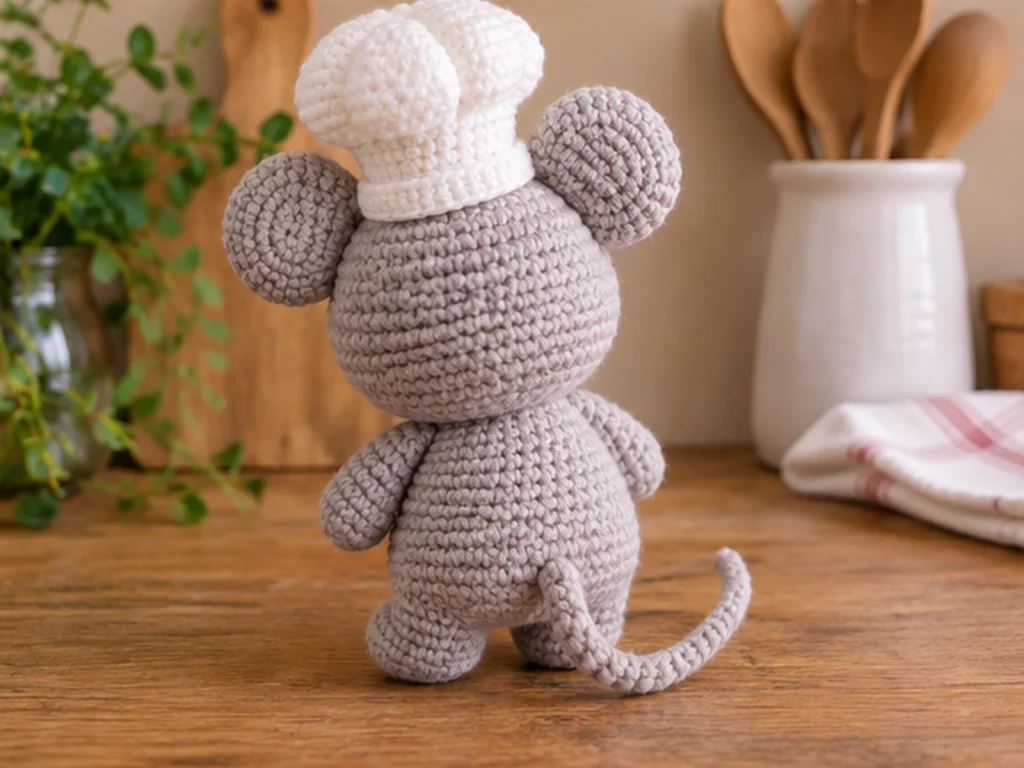
Sew the tail to the lower rear section of the body.
Shape it into a gentle curve while attaching it.
Step 8: Assemble the Chef Hat
Center the open bottom of the 30-stitch hat crown over the 36-stitch brim.
Because the brim is intentionally wider, distribute the crown evenly around the brim as you sew.
The goal is a balanced chef-hat silhouette rather than a rigid stitch-for-stitch alignment.
Step 9: Attach the Chef Hat
Place the finished hat centrally on top of the mouse’s head.
Check the front and side views, then sew the brim securely to the head.
Step 10: Complete the Final Details
Weave in all remaining yarn ends and make any small shaping adjustments needed to improve the finished silhouette.
Finishing
Take one final look at the completed mouse from the front and side.
Check that:
- The eyes look balanced.
- The ears sit at similar heights.
- The arms and legs are visually symmetrical.
- The tail has a natural curve.
- The chef hat is centered.
- No stuffing is visible through the stitches.
- All loose yarn ends are secured and trimmed.
Helpful Tips
Keep your tension consistent
Because the shape depends on the stitch counts, significant changes in tension can affect the appearance and finished size.
Stuff gradually
Small additions of fiberfill make it easier to maintain smooth shaping, especially around the head and body.
Check symmetry before sewing
Paired components such as the ears, arms, and legs are easier to correct before they are permanently attached.
Shape the hat gently
The hat crown only needs a small amount of stuffing to create its soft, rounded appearance.
Troubleshooting
My stitch count is off. What should I do?
Stop before continuing to the next round. Recount the current round and check the previous round, especially around increases and decreases.
The stuffing is showing through.
Remove a little stuffing and check your tension. Overstuffing can stretch the stitches and make the fiberfill more visible.
My ears look uneven.
Hold both ears in place and compare them from the front and side before completing the sewing.
My arms or legs don’t line up.
Temporarily position both pieces before sewing. Check the front view first, then the side view, and adjust as needed.
The chef hat looks flat.
Check the crown before attaching it. It should contain enough light stuffing to create a soft, raised shape without becoming firm or bulky.
The chef hat is off-center.
Before sewing the brim down, view the mouse from the front and side and rotate the hat until it sits naturally over the center of the head.
Customization Ideas
Change the mouse color
Try cream, brown, charcoal, or another warm neutral instead of the main gray.
Change the inner ears
Pink gives the mouse a classic look, but another soft accent color can create a different character.
Customize the chef hat
Keep the hat white for a traditional appearance or experiment with a contrasting accent color.
Change the expression
Small changes to the embroidered nose and whiskers can give the mouse a different personality while keeping the same main construction.
For the most predictable proportions, keep the same yarn weight and hook size when making color changes.
Frequently Asked Questions
What size is the finished Chef Mouse?
The design is intended to be approximately 4–5 inches tall, including the chef hat. This is an approximate size, and the final dimensions can vary with yarn, hook, tension, stuffing, and individual technique.
Do I need a specific yarn brand?
No specific yarn brand is established for this pattern. The design uses #4 Medium/Worsted-weight yarn.
Is a gauge swatch required?
No. The shape is based on the stitch counts and construction sequence rather than a separate gauge measurement.
Your tension can still affect the finished dimensions.
How much stuffing should I use?
Use enough polyester fiberfill to create a firm, rounded shape without stretching the stitches. The head and body can be filled more firmly than the ears, arms, or hat crown.
Should the ears be stuffed?
No. The ears are designed as flat crocheted pieces and should be gently flattened before attachment.
How are the facial details made?
The design uses 8 mm safety eyes, an embroidered nose, and embroidered whiskers.
Can I change the colors?
Yes. The mouse body, ear detail, and chef hat colors can be customized while keeping the original construction.
Is this pattern physically tested?
Not yet. The pattern has been mathematically reviewed and constructionally checked, but it has not been physically crocheted and tested.
Final Thoughts
This Chef Mouse combines a rounded little mouse with one distinctive character feature: a soft chef hat.
Take your time with stitch counting and assembly, especially when positioning paired pieces and centering the hat. Careful finishing and balanced placement will help bring the finished amigurumi together into one cohesive character.