
Crochet Cactus Amigurumi Pattern
This crochet cactus amigurumi combines a rounded green cactus, a…
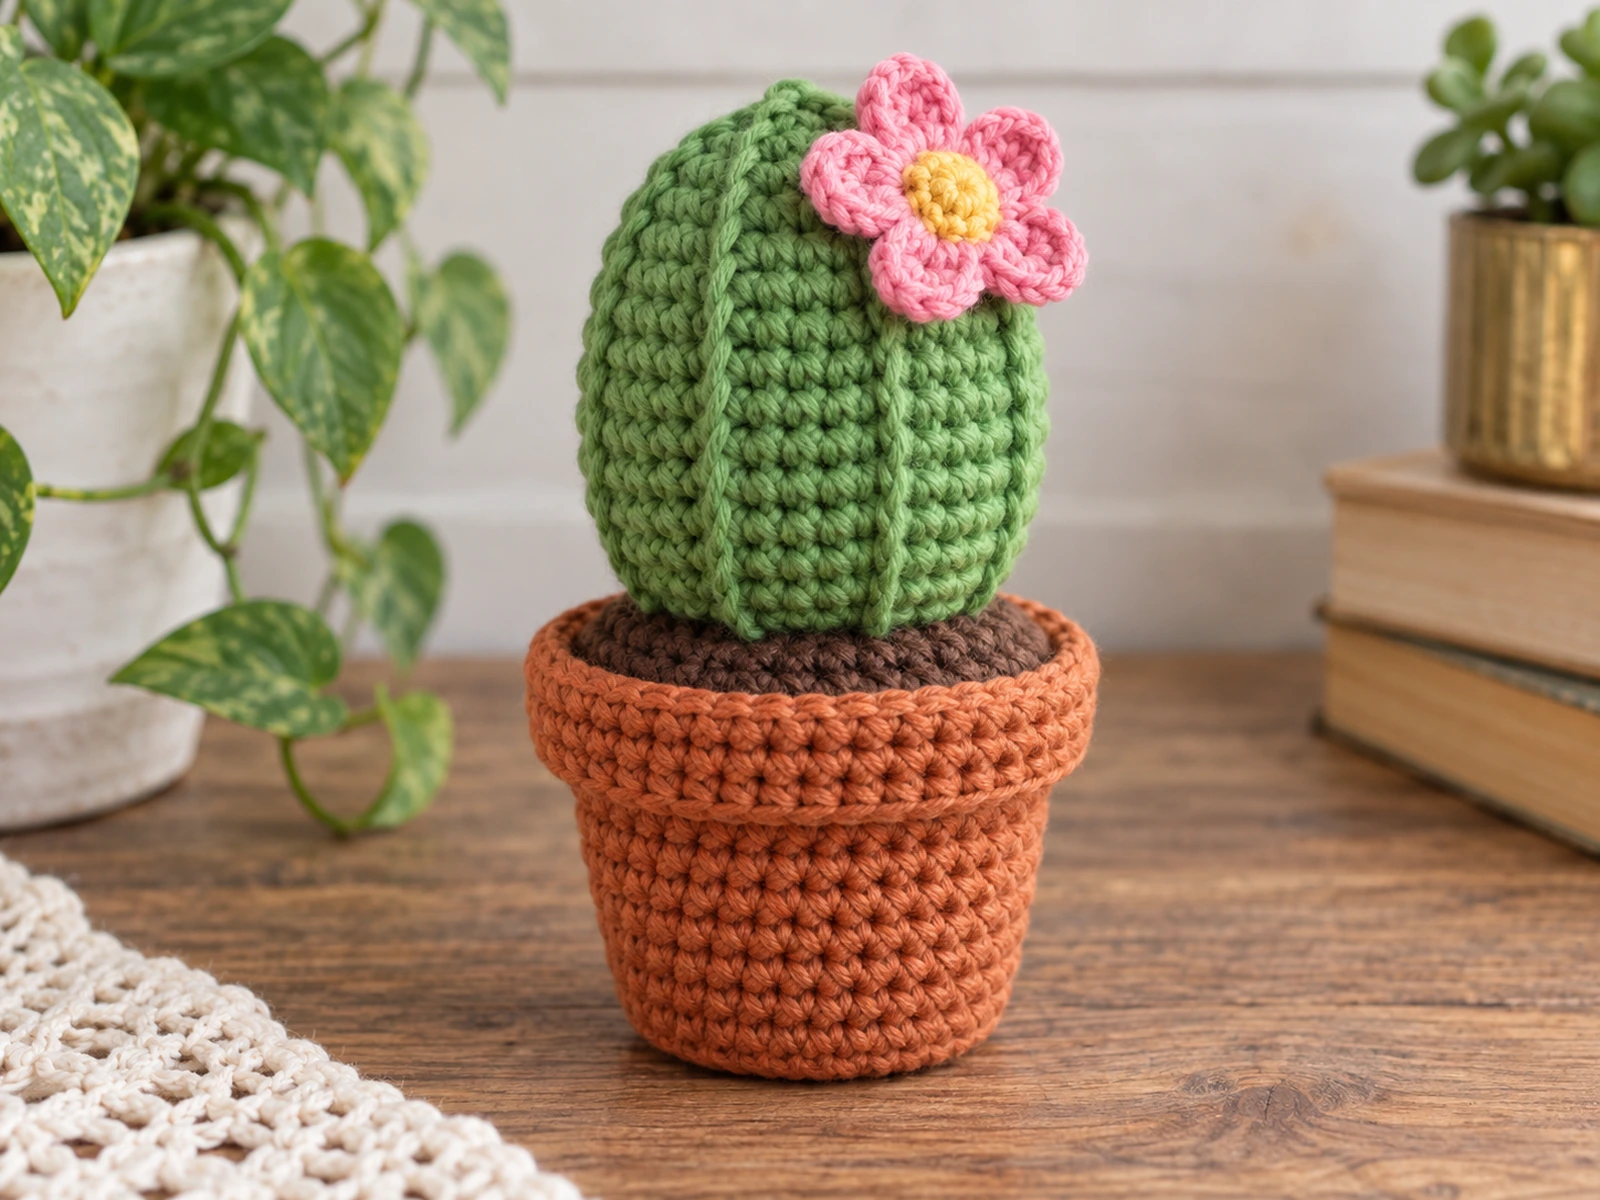
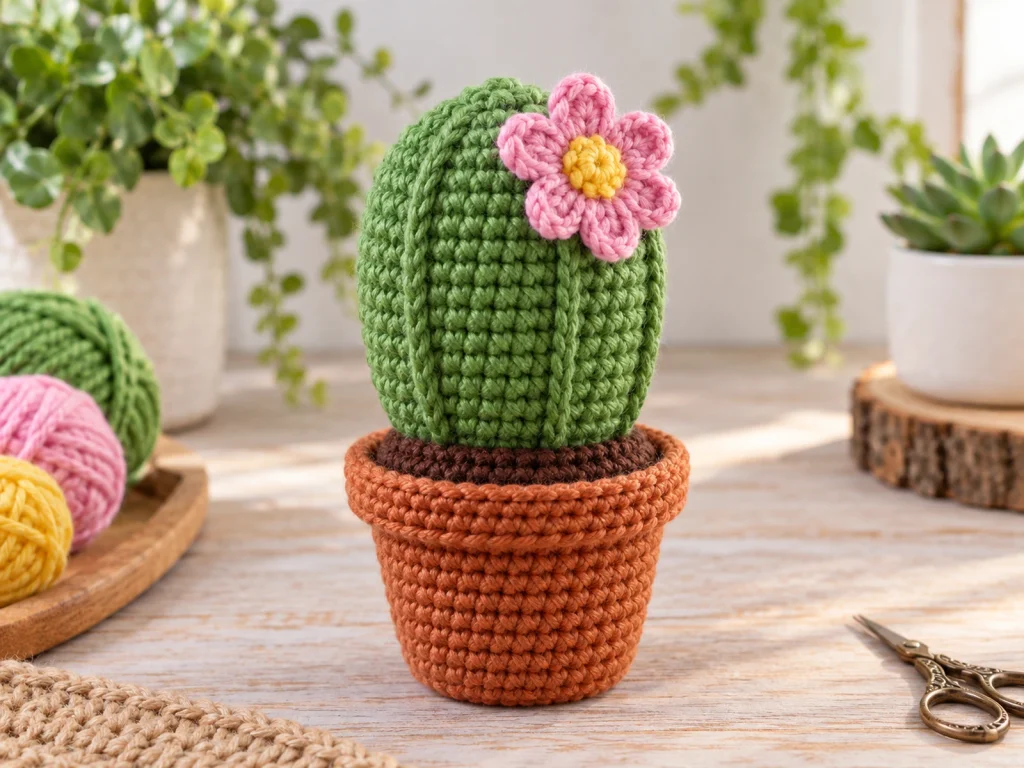
This crochet cactus amigurumi combines a rounded green cactus, a small six-petal flower, crocheted soil, and a flared terracotta-style pot. The cactus body is worked in continuous rounds, then finished with four raised surface ridges for a simple textured look.
The finished project is approximately 5–6 inches tall, depending on yarn, hook size, tension, stuffing, and individual crochet technique.
Project Overview
What You’ll Make
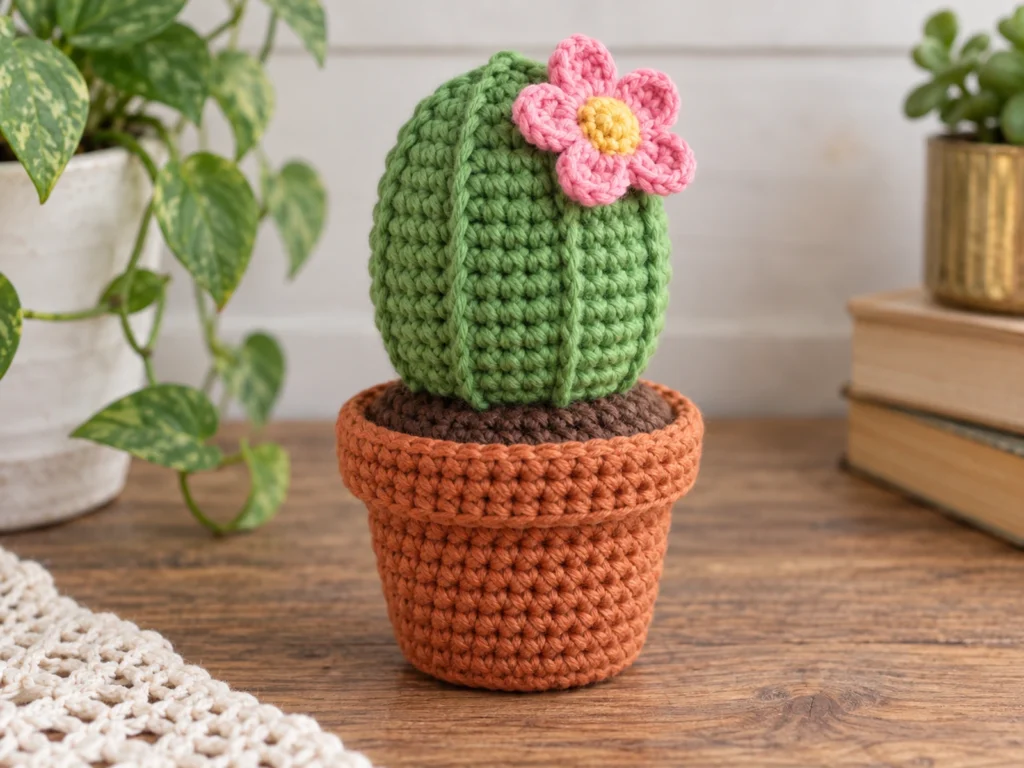
This pattern includes four main pieces:
- One cactus body
- One six-petal flower with a yellow center
- One crocheted soil disk
- One terracotta-style pot
The cactus is stuffed and shaped first, then the flower, soil, and pot are assembled to create the finished potted plant.
Project Details
- Project type: Crochet cactus amigurumi
- Approximate finished size: 5–6 inches tall
- Yarn: Medium/worsted-weight (#4)
- Hook: 3.5 mm crochet hook
- Cactus color: Green
- Flower colors: Pink and yellow
- Soil color: Dark brown
- Pot color: Terracotta
- Filling: Polyester fiberfill
- Construction: Continuous rounds with separate pot and soil
The finished size is approximate and may vary with yarn, hook, tension, stuffing, and individual technique.
Materials & Tools
Materials
- Medium/worsted-weight (#4) yarn in green
- Medium/worsted-weight (#4) yarn in pink
- Medium/worsted-weight (#4) yarn in yellow
- Medium/worsted-weight (#4) yarn in dark brown
- Medium/worsted-weight (#4) yarn in terracotta
- Polyester fiberfill
Tools
- 3.5 mm crochet hook
- Stitch marker
- Yarn needle
- Scissors
Abbreviations
This pattern uses standard US crochet terminology.
- MR — magic ring
- ch — chain
- sc — single crochet
- inc — increase; work 2 sc in the same stitch
- dec — single crochet decrease
- sl st — slip stitch
- dc — double crochet
- tr — treble crochet
- BLO — back loop only
- FO — fasten off
Before You Start
Work in Continuous Rounds
The cactus body, soil, and pot are worked in continuous rounds unless otherwise noted. Use a stitch marker to identify the first stitch of each round and move it as you work.
Count Your Stitches
Each round includes its final stitch count in parentheses. Check your count before moving to the next round, especially after increase and decrease rounds.
Stuff as You Go
Begin stuffing the cactus during the long straight section rather than waiting until the opening is almost closed. Add small amounts of fiberfill gradually so the body stays evenly shaped without stretching the stitches.
Construction Order
Complete the cactus body first. Add the decorative ridges and flower, then make the soil and pot before finishing the final assembly.
Crochet Cactus Pattern
Cactus Body
Color: Green
Work in continuous rounds.
Round 1
6 sc in MR. (6)
Round 2
6 inc. (12)
Round 3
(sc, inc) × 6. (18)
Round 4
(2 sc, inc) × 6. (24)
Round 5
(3 sc, inc) × 6. (30)
Round 6
(4 sc, inc) × 6. (36)
Round 7
36 sc. (36)
Round 8
36 sc. (36)
Round 9
36 sc. (36)
Round 10
36 sc. (36)
Round 11
36 sc. (36)
Round 12
36 sc. (36)
Round 13
36 sc. (36)
Round 14
36 sc. (36)
Round 15
36 sc. (36)
Round 16
36 sc. (36)
Begin adding polyester fiberfill gradually during this section.
Round 17
(4 sc, dec) × 6. (30)
Round 18
(3 sc, dec) × 6. (24)
Add the remaining stuffing before the opening becomes too small.
Round 19
(2 sc, dec) × 6. (18)
Round 20
(sc, dec) × 6. (12)
Round 21
6 dec. (6)
Fasten off, leaving a yarn tail. Thread the tail through the remaining front loops and pull gently to close the opening. Weave in the end securely.
Add the Cactus Ridges
Using green yarn, add four vertical surface slip-stitch lines from the lower portion of the cactus toward the top.
Space the four ridges evenly around the body. Keep the tension gentle so they add texture without pulling the cactus out of shape.
These ridges are decorative and do not change the cactus body’s stitch count.
Crochet Flower
Flower Center
Color: Yellow
Round 1
6 sc in MR. (6)
Round 2
6 inc. (12)
Fasten off, leaving a short tail for attaching and finishing.
Six-Petal Flower
Color: Pink
Join pink yarn to the edge of the yellow center.
Repeat the following sequence 6 times:
sl st in next st, then in next st work: (ch 2, dc, 2 tr, dc, ch 2, sl st)
This creates six petals around the 12-stitch flower center.
Fasten off and weave in the end.
Attach the Flower
Place the flower on the upper front portion of the cactus.
Use the flower center as your visual guide and keep the petals evenly distributed around it.
Sew through the flower center and into the cactus body with small, secure stitches. Avoid pulling so tightly that the cactus surface puckers.
Weave in the remaining ends.
Crochet Soil
Color: Dark brown
Work in continuous rounds.
Round 1
6 sc in MR. (6)
Round 2
6 inc. (12)
Round 3
(sc, inc) × 6. (18)
Round 4
(2 sc, inc) × 6. (24)
Round 5
(3 sc, inc) × 6. (30)
Round 6
(4 sc, inc) × 6. (36)
Round 7
36 sc BLO. (36)
Fasten off, leaving a long sewing tail.
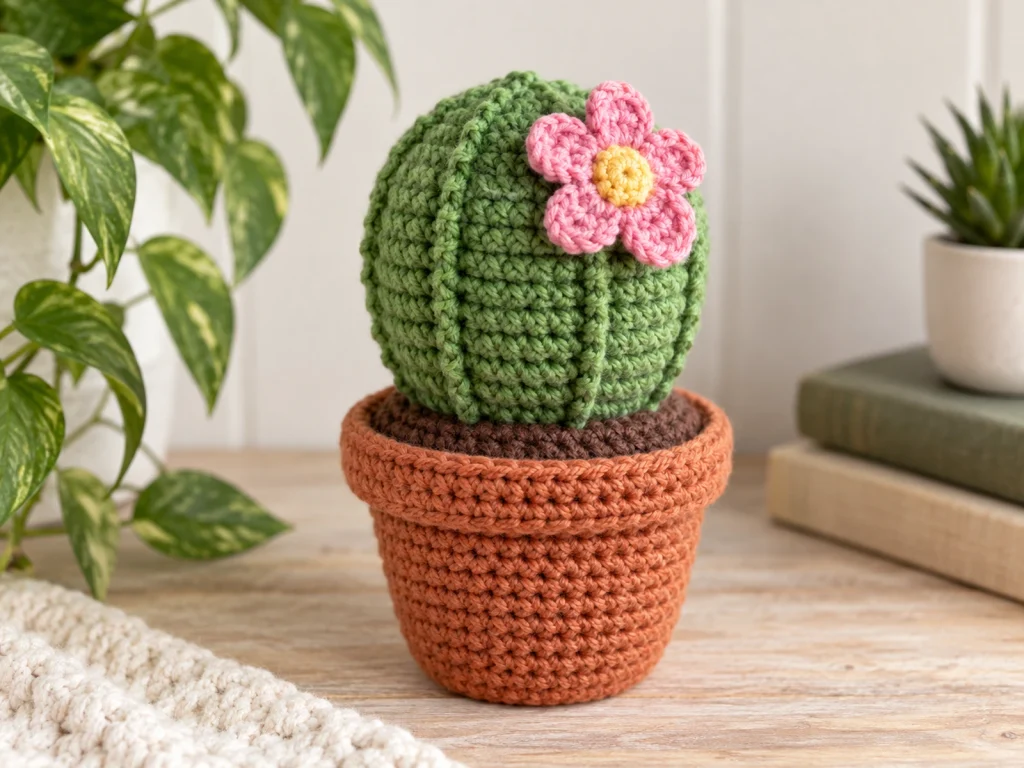
Keep the soil disk relatively flat so it sits neatly across the top of the pot.
Crochet Pot
Color: Terracotta
Work in continuous rounds.
Round 1
6 sc in MR. (6)
Round 2
6 inc. (12)
Round 3
(sc, inc) × 6. (18)
Round 4
(2 sc, inc) × 6. (24)
Round 5
(3 sc, inc) × 6. (30)
Round 6
30 sc. (30)
Round 7
30 sc. (30)
Round 8
(4 sc, inc) × 6. (36)
Round 9
36 sc. (36)
Round 10
36 sc. (36)
Round 11
36 sc. (36)
Round 12
36 sc. (36)
Fasten off and weave in the end.
The upper section expands to 36 stitches, giving the pot a subtle outward flare.
Assembly
Step 1: Attach the Cactus to the Soil
Place the finished cactus in the center of the brown soil disk.
Use the six stitches at the cactus base as the main sewing area.
Sew around the base evenly, checking that the cactus remains upright as you work.
Before tightening the final stitches, view the cactus from the front and sides and adjust its position if needed.
Step 2: Secure the Soil Inside the Pot
Place the soil disk over the opening of the terracotta pot.
The soil disk has a 36-stitch outer edge, matching the 36-stitch upper section of the pot.
Using the long brown yarn tail, sew the soil disk to the upper inside edge of the pot with small, even stitches.
Keep the soil level as you work so the finished top sits evenly.
Step 3: Final Shaping
Gently shape the cactus with your fingers.
Check that:
- the cactus sits upright,
- the flower faces forward,
- the four ridges look balanced,
- the soil sits evenly inside the pot,
- no stuffing is visible.
Finishing
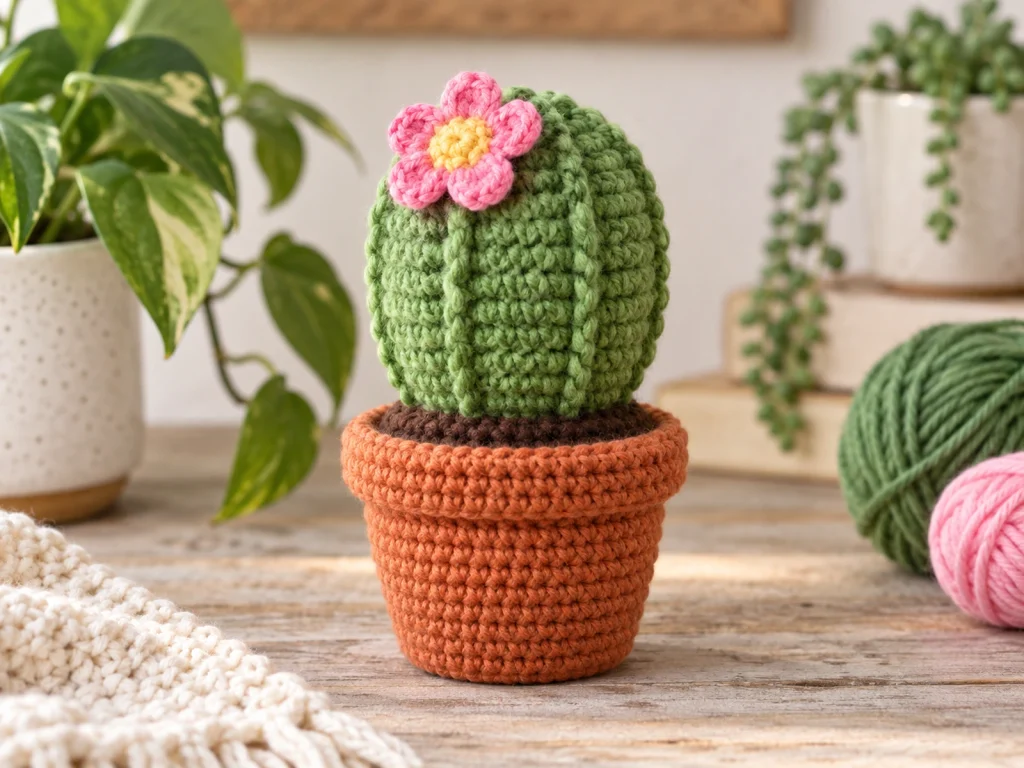
Take a final look at the finished cactus and gently adjust its shape.
Check that all yarn ends are woven in securely and that the flower, cactus, soil, and pot are firmly attached.
The pattern has been mathematically reviewed and constructionally checked, but it has not been physically crocheted and tested yet.
Helpful Tips
Keep Your Tension Even
Consistent tension helps the cactus maintain its rounded shape and keeps the stitches from becoming stretched when stuffing is added.
Check the Count Before Moving On
If a round does not contain the expected number of stitches, correct it before continuing. This is especially important after increase and decrease rounds.
Stuff Gradually
Small amounts of stuffing are easier to distribute evenly than one large amount. Add fiberfill a little at a time and shape the cactus as you go.
Check Placement Before Sewing Permanently
Before tightening the flower or cactus attachment, look at the project from more than one angle. Small placement adjustments are easier before the stitches are secured.
Troubleshooting
My Stitch Count Is Wrong
Stop and recount the current round and the previous round. Check the increase or decrease sequence before continuing.
My Cactus Looks Lumpy
The stuffing may not be distributed evenly. Gently reshape the body and redistribute the fiberfill.
My Stitches Look Stretched
Remove a small amount of stuffing if necessary. The cactus should be firm enough to hold its shape without forcing the stitches apart.
My Cactus Is Leaning
Check the cactus-to-soil attachment before completing the final stitches. Adjust the placement so the body sits upright.
My Flower Looks Crooked
Loosen the attachment stitches slightly, reposition the flower, and secure it again using the center as your main alignment point.
My Ridges Are Uneven
The surface ridges are decorative. Remove and reposition a ridge if necessary, aiming for balanced spacing around the cactus rather than an exact measurement.
Customization Ideas
Change the Cactus Color
Try different shades of green to create a softer or more unusual plant palette.
Change the Flower Color
The flower can be made in a different accent color while keeping the same six-petal construction.
Change the Pot Color
Terracotta gives the project a classic plant-pot appearance, but another earthy color can create a different finished look.
Frequently Asked Questions
How big is this crochet cactus?
The finished project is approximately 5–6 inches tall. Actual size can vary depending on yarn, hook size, tension, stuffing, and individual crochet technique.
Is the crochet cactus worked in continuous rounds?
Yes. The cactus body is worked in continuous rounds, and the soil and pot are also worked in continuous rounds unless otherwise noted.
Does this cactus need safety eyes?
No. This design does not have a face, so safety eyes are not used.
When should I stuff the cactus?
Begin stuffing during the long 36-stitch section of the cactus body and continue adding small amounts through the decrease rounds.
How do I keep the cactus upright?
Center the cactus carefully on the soil disk and check its position from multiple angles before completing the attachment stitches.
Can I change the colors?
Yes. The cactus, flower, soil, and pot can all be made in different colors while keeping the same basic construction.
Is the pattern physically tested?
No. The pattern has been mathematically reviewed and constructionally checked, but it has not been physically crocheted and tested with a prototype.
More Crochet Plant and Amigurumi Patterns
Explore more plant-inspired and amigurumi projects from Tiny Yarn Tales.
Final Thoughts
This crochet cactus combines a rounded amigurumi body with a flower, textured ridges, crocheted soil, and a flared pot. Working through each component separately keeps the project organized from the first round through final assembly.
Take your time with stuffing and placement, especially during the final assembly. Small adjustments before the last stitches are secured can make a noticeable difference in the finished shape.