
Crochet Hamburger Amigurumi Pattern
There’s something extra fun about turning a favorite comfort food…
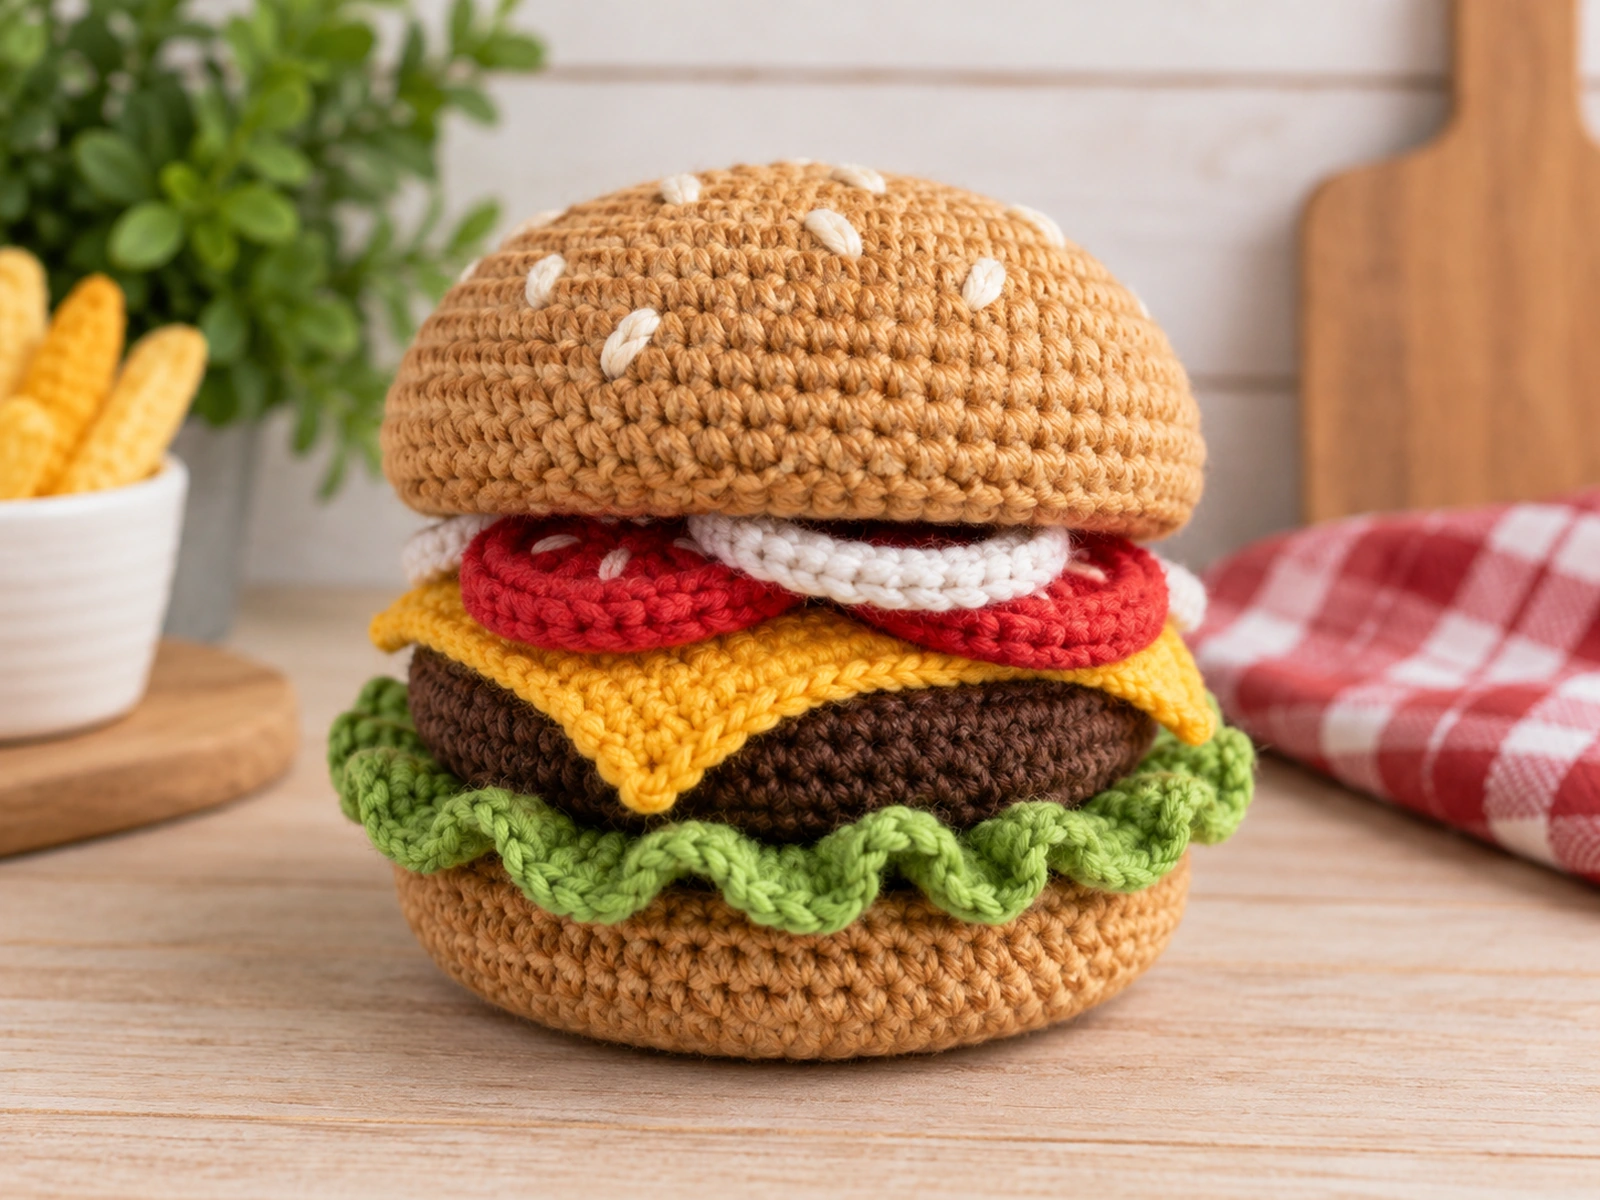
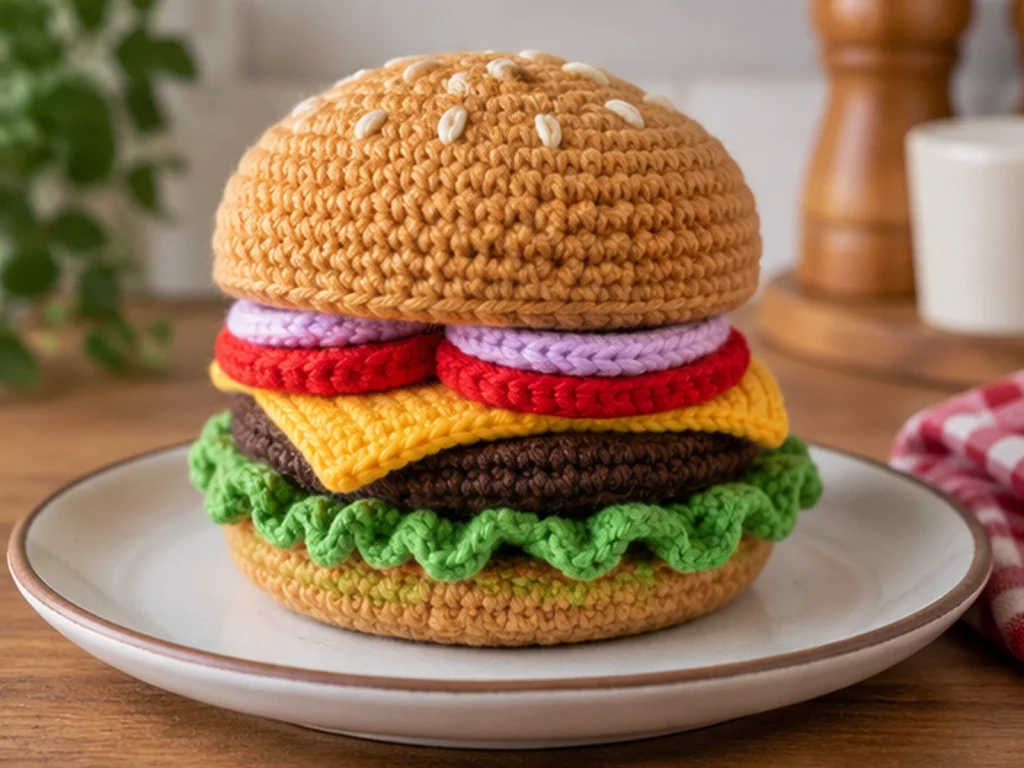
There’s something extra fun about turning a favorite comfort food into a tiny crochet project. This crochet hamburger amigurumi is built in layers, with a rounded golden bun, a chunky patty, a slice of cheese, ruffled lettuce, tomato slices, and open onion rings.
The design is made from separate crocheted components that are assembled into one compact burger. The finished piece is intended to be approximately 4.5–5 inches wide and about 3–3.5 inches tall, although the final size will vary with yarn, hook size, tension, stuffing, and individual technique.
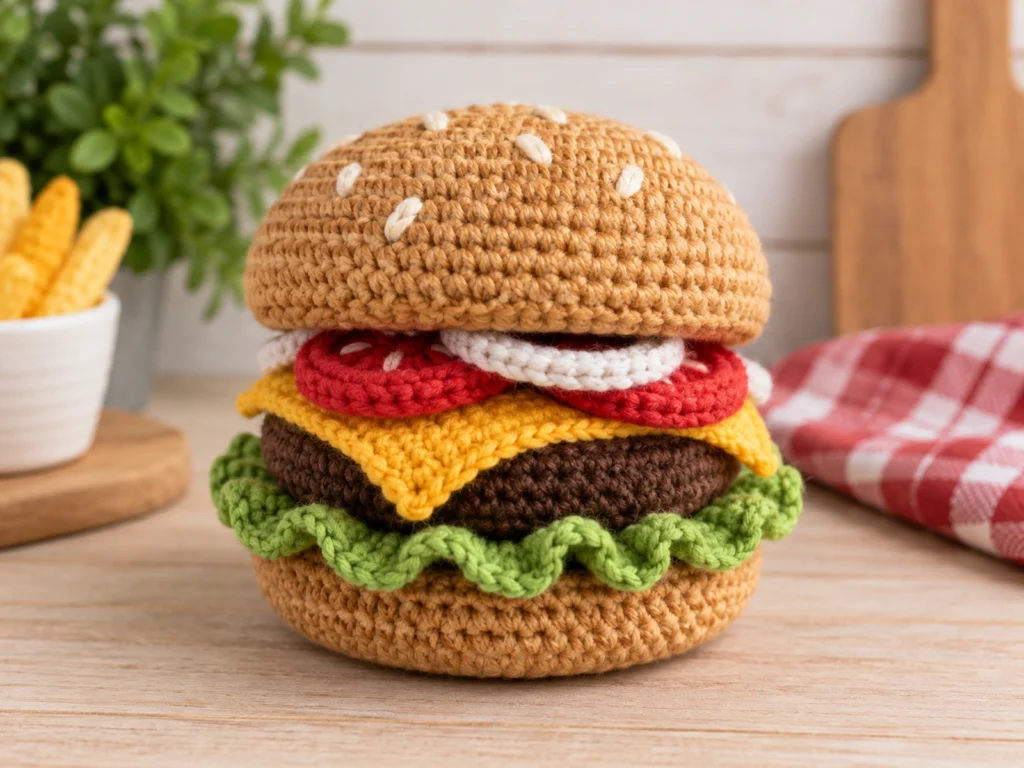
Project Overview
What You’ll Make
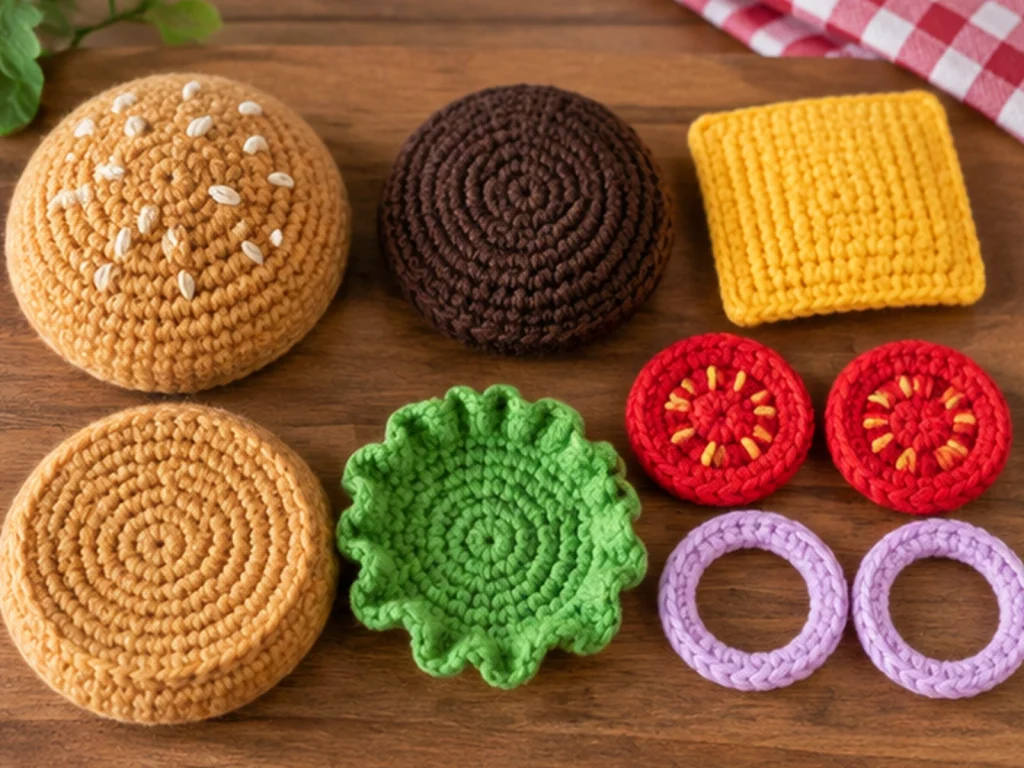
This crochet hamburger is made from several separate pieces that come together into a layered burger:
- 1 top bun
- 1 bottom bun
- 2 patty disks
- 1 cheese slice
- 1 lettuce piece
- 2 tomato slices
- 2 onion rings
- 8 embroidered sesame-seed details
The main assembly order is:
Bottom bun → lettuce → patty → cheese → tomato → onion → top bun
Project Details
- Project: Crochet Hamburger Amigurumi
- Technique: Amigurumi crochet
- Yarn: Medium #4 worsted-weight yarn
- Hook: 3.5 mm (US E/4)
- Stuffing: Polyester fiberfill
- Approximate finished size: 4.5–5 inches wide × 3–3.5 inches tall
- Construction: Separate crocheted components with final layered assembly
The finished size is approximate and can vary with yarn, hook size, tension, stuffing, and individual crochet technique.
Testing note: This pattern has been mathematically reviewed and constructionally reasoned, but it has not been physically crocheted and tested yet.
Materials & Tools
Yarn
Use medium #4 worsted-weight yarn in the following colors:
- Warm golden brown
- Dark brown
- Golden yellow
- Green
- Red
- White, cream, or pale purple
- Cream or off-white for sesame details
Other Supplies
- 3.5 mm (US E/4) crochet hook
- Polyester fiberfill
- Tapestry needle
- Scissors
- Stitch marker
No fixed gauge is required for this design.
Abbreviations
This pattern uses standard US crochet terminology.
| Abbreviation | Meaning |
|---|---|
| MR | Magic ring |
| ch | Chain |
| sc | Single crochet |
| inc | Increase — 2 sc in the same stitch |
| dec | Decrease — sc2tog |
| sl st | Slip stitch |
| BLO | Back loop only |
| FLO | Front loop only |
| FO | Fasten off |
Before You Start
Work in Continuous Rounds
The bun, patty, lettuce, and tomato pieces are worked in continuous rounds unless otherwise stated. A stitch marker can help you keep track of the beginning of each round.
Count Your Stitches
The number in parentheses at the end of each round or row shows the expected stitch count. Check your count before moving to the next round.
Stuff as You Go
The top and bottom buns are lightly stuffed near the end of their shaping. The patty is lightly stuffed between its two crocheted disks.
Avoid overstuffing, since too much filling can change the proportions of the finished burger.
Keep Flat Pieces Flat
The cheese, lettuce, tomato, and onion pieces are designed as flat or lightly textured layers and do not require stuffing.
Construction Order
Finish all of the components before assembling the hamburger. This makes it easier to check the proportions and position each topping before securing the layers.
Original Crochet Hamburger Pattern
Top Bun
Make 1 in golden-brown yarn.
Work in continuous rounds.
Round 1
6 sc in MR. (6)
Round 2
inc x6. (12)
Round 3
(sc, inc) x6. (18)
Round 4
(2 sc, inc) x6. (24)
Round 5
(3 sc, inc) x6. (30)
Round 6
(4 sc, inc) x6. (36)
Round 7
(5 sc, inc) x6. (42)
Round 8
(6 sc, inc) x6. (48)
Round 9
(7 sc, inc) x6. (54)
Round 10
54 sc. (54)
Round 11
54 sc. (54)
Round 12
(7 sc, dec) x6. (48)
Round 13
48 sc. (48)
Round 14
(6 sc, dec) x6. (42)
Round 15
(5 sc, dec) x6. (36)
Round 16
(4 sc, dec) x6. (30)
Round 17
(3 sc, dec) x6. (24)
Round 18
(2 sc, dec) x6. (18)
Lightly stuff the bun, keeping it rounded without overfilling.
Round 19
(sc, dec) x6. (12)
Round 20
dec x6. (6)
FO, leaving a yarn tail. Close the opening and weave in the end.
Add the Sesame Seeds
Using cream or off-white yarn and a tapestry needle, embroider 8 short seed-shaped stitches across the top of the bun.
Place them naturally rather than in a perfectly regular pattern.
Bottom Bun
Make 1 in golden-brown yarn.
Work in continuous rounds.
Round 1
6 sc in MR. (6)
Round 2
inc x6. (12)
Round 3
(sc, inc) x6. (18)
Round 4
(2 sc, inc) x6. (24)
Round 5
(3 sc, inc) x6. (30)
Round 6
(4 sc, inc) x6. (36)
Round 7
(5 sc, inc) x6. (42)
Round 8
(6 sc, inc) x6. (48)
Round 9
48 sc. (48)
Round 10
48 sc in BLO. (48)
Round 11
(6 sc, dec) x6. (42)
Round 12
(5 sc, dec) x6. (36)
Round 13
(4 sc, dec) x6. (30)
Round 14
(3 sc, dec) x6. (24)
Round 15
(2 sc, dec) x6. (18)
Lightly stuff the bun.
Round 16
(sc, dec) x6. (12)
Round 17
dec x6. (6)
FO and close the opening.
Hamburger Patty
Make 2 disks in dark-brown yarn.
Work each disk in continuous rounds.
Round 1
6 sc in MR. (6)
Round 2
inc x6. (12)
Round 3
(sc, inc) x6. (18)
Round 4
(2 sc, inc) x6. (24)
Round 5
(3 sc, inc) x6. (30)
Round 6
(4 sc, inc) x6. (36)
Round 7
(5 sc, inc) x6. (42)
Round 8
42 sc. (42)
FO the first disk.
Make the second disk in the same way.
Assemble the Patty
Place the two disks together with their outer edges aligned.
Using matching dark-brown yarn, sew around most of the outside edge. Add a small amount of stuffing between the disks before closing the remaining opening.
Finish sewing and secure the yarn.
The finished patty should remain low and rounded rather than becoming a thick cylinder.
Cheese Slice
Make 1 in golden-yellow yarn.
Work flat in rows.
Foundation
Ch 18.
Row 1
Sc in the 2nd ch from hook and across. (17)
Row 2
Ch 1, turn, 17 sc. (17)
Row 3
Ch 1, turn, 17 sc. (17)
Row 4
Ch 1, turn, 17 sc. (17)
Row 5
Ch 1, turn, 17 sc. (17)
Row 6
Ch 1, turn, 17 sc. (17)
Row 7
Ch 1, turn, 17 sc. (17)
Row 8
Ch 1, turn, 17 sc. (17)
Row 9
Ch 1, turn, 17 sc. (17)
Row 10
Ch 1, turn, 17 sc. (17)
Row 11
Ch 1, turn, 17 sc. (17)
Row 12
Ch 1, turn, 17 sc. (17)
Row 13
Ch 1, turn, 17 sc. (17)
Row 14
Ch 1, turn, 17 sc. (17)
Row 15
Ch 1, turn, 17 sc. (17)
Row 16
Ch 1, turn, 17 sc. (17)
Row 17
Ch 1, turn, 17 sc. (17)
Row 18
Ch 1, turn, 17 sc. (17)
FO and weave in the end.
Lettuce
Make 1 in green yarn.
Work in continuous rounds.
Round 1
6 sc in MR. (6)
Round 2
inc x6. (12)
Round 3
(sc, inc) x6. (18)
Round 4
(2 sc, inc) x6. (24)
Round 5
(3 sc, inc) x6. (30)
Round 6
(4 sc, inc) x6. (36)
Round 7
(5 sc, inc) x6. (42)
Round 8
Working in FLO, (sc, inc) x21. (63)
FO and weave in the end.
The final round expands beyond the 42-stitch base, creating the wider, lightly ruffled lettuce edge.
Tomato Slices
Make 2 in red yarn.
Work each slice in continuous rounds.
Round 1
6 sc in MR. (6)
Round 2
inc x6. (12)
Round 3
(sc, inc) x6. (18)
Round 4
(2 sc, inc) x6. (24)
Round 5
(3 sc, inc) x6. (30)
Round 6
30 sc. (30)
Round 7
30 sc. (30)
FO and weave in the end.
Add the Tomato Details
Using a slightly darker red or pink-red yarn, embroider a few small seed marks near the center of each tomato slice.
Do not stuff the tomato slices.
Onion Rings
Make 2 in white, cream, or pale-purple yarn.
For each ring:
Foundation
Ch 18. Join to the first chain with a sl st to form a ring.
Round 1
18 sc around the chain ring. (18)
Round 2
(2 sc, inc) x6. (24)
Round 3
24 sc. (24)
FO and weave in the end.
The center opening remains visible to create the onion-ring shape.
Assemble the Crochet Hamburger
Place the finished pieces in this order:
Bottom bun → lettuce → patty → cheese → tomato → onion → top bun
Step 1: Position the Lettuce
Place the lettuce directly over the bottom bun and center it as evenly as possible.
Step 2: Add the Patty
Set the finished patty over the lettuce.
Check the edges from several directions so it sits centrally.
Step 3: Position the Cheese
Lay the cheese over the patty and rotate it slightly so its corners extend beyond the sides of the patty.
Step 4: Add the Tomato
Place the two tomato slices on top of the cheese, positioning them apart from one another rather than directly stacking one over the other.
Step 5: Add the Onion
Place the two onion rings in open areas between the tomato slices.
Step 6: Finish With the Top Bun
Place the top bun over the toppings.
Before making permanent attachment stitches, check the burger from the front, back, left, and right sides.
Step 7: Stabilize the Layers
Using matching yarn and small discreet anchor stitches, stabilize the main layers around the side or back areas.
Avoid visible stitches across the centers of the cheese or tomato pieces.
Step 8: Shape the Finished Burger
Gently adjust the bun, lettuce, cheese, and toppings with your fingers so the layers remain visible and the finished hamburger keeps a compact, rounded silhouette.
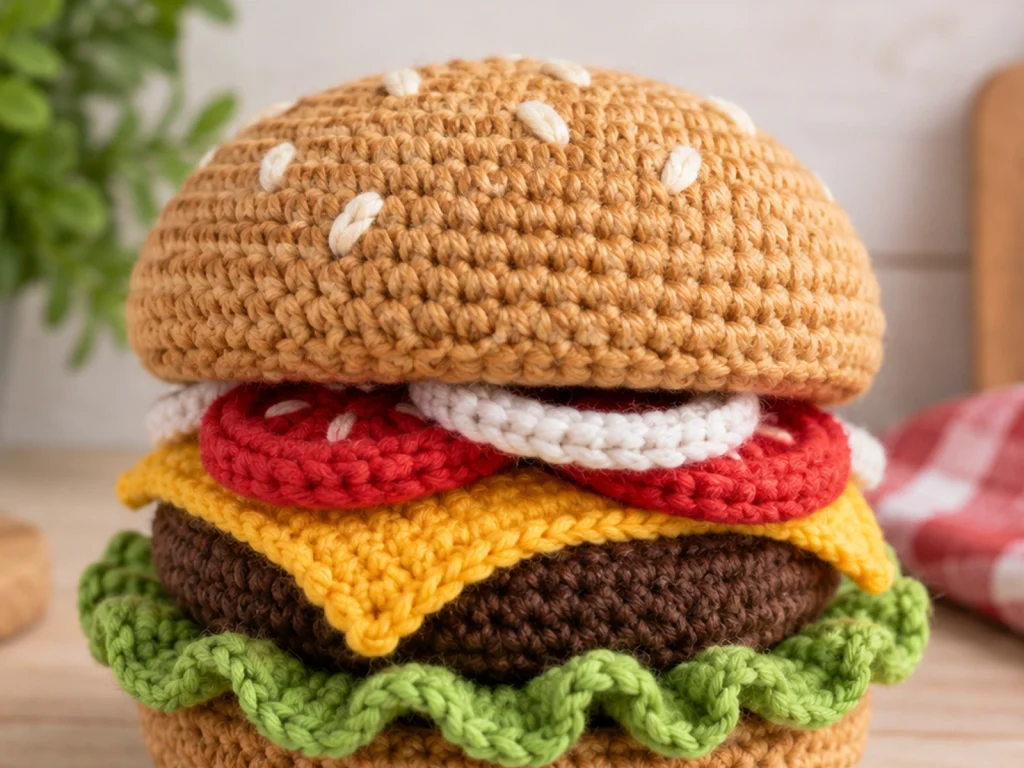
Finishing
After the hamburger has been assembled:
- Check that the layers sit evenly.
- Make sure the top bun is centered.
- Adjust the lettuce and cheese so their edges remain visible.
- Weave in any remaining loose ends.
- Give the finished burger a gentle final shaping.
Helpful Tips
Keep the stuffing moderate
Overstuffing can make the bun look too round and make the layers harder to stack. Use enough filling to hold the shape without making the piece overly firm.
Watch your stitch counts
If your count does not match the number shown at the end of a round, stop and check the previous round before continuing.
Check topping alignment before sewing
It is much easier to correct an uneven stack before adding permanent anchor stitches.
Let the lettuce extend slightly
The wider final lettuce round is intentional and helps create the leafy edge around the patty.
Rotate the cheese
Turning the finished cheese square slightly during assembly allows its corners to extend beyond the patty.
Keep flat toppings flat
The lettuce, cheese, tomato, and onion are designed as relatively flat layers, so they should not be overstuffed.
Troubleshooting
My stitch count is off. What should I do?
Stop at the end of the current round and compare your work with the written sequence. Check whether an increase or decrease was skipped or worked twice before continuing.
My bun looks too firm.
Use a little less stuffing and reshape the piece before completing the final decrease rounds.
My patty looks too thick.
The patty is meant to be a low, rounded layer. Use only a small amount of stuffing between the two disks.
My lettuce does not extend past the patty.
Check Round 8 and make sure it was worked in the FLO with all 21 increase repeats completed.
My burger layers keep shifting.
Temporarily stack all the pieces and inspect the burger from several directions before adding discreet anchor stitches to the main layers.
My cheese does not look diagonal.
Rotate the finished square during assembly so the corners point outward instead of aligning its sides with the patty.
Customization Ideas
Change the bun shade
Try a lighter or deeper brown to create a different toasted appearance.
Customize the onion
Use white, cream, or pale-purple yarn for the onion rings.
Change the topping arrangement
The tomato and onion pieces can be repositioned slightly to give each finished hamburger a different look.
Create a different color palette
Small color changes can make the finished project more playful while keeping the same basic construction.
Avoid changing stitch counts or component dimensions unless you recalculate how the individual pieces will fit together.
Frequently Asked Questions
How big is the finished crochet hamburger?
The design is intended to be approximately 4.5–5 inches wide and 3–3.5 inches tall. The actual finished size will vary depending on yarn, hook size, tension, stuffing, and individual crochet technique.
What yarn is used for this crochet hamburger?
The design uses medium #4 worsted-weight yarn in bun, patty, cheese, lettuce, tomato, onion, and sesame-detail colors.
Do the toppings need stuffing?
No. The cheese, lettuce, tomato, and onion are designed as flat or lightly textured pieces. Only the buns and patty receive stuffing.
How many tomato and onion pieces are included?
The pattern makes 2 tomato slices and 2 onion rings.
Can I change the colors?
Yes. Changing yarn colors is a simple way to customize the appearance while keeping the same stitch structure.
Is this crochet hamburger pattern physically tested?
Not yet. The pattern has been mathematically reviewed and constructionally reasoned, but it has not been physically crocheted and tested.
Can I make the hamburger larger or smaller?
Changing yarn weight, hook size, or tension will affect the overall size. Larger design changes should be approached carefully because the individual components need to remain proportionate enough to assemble together.
More Crochet Food & Amigurumi
Explore more crochet projects in the Tiny Yarn Tales collection, including other food-inspired amigurumi and small crochet designs.
Conclusion
This crochet hamburger brings together simple crocheted shapes to create a recognizable layered food amigurumi. The separate bun, patty, cheese, lettuce, tomato, and onion pieces make the construction easy to follow and leave room for small color and placement variations.
Keep your stitch counts consistent, avoid overstuffing the rounded components, and check the alignment of the layers before securing the finished burger.
The result is a compact crochet hamburger with colorful layers, soft texture, and plenty of handmade character.