
Crochet Otter Amigurumi Pattern: A Step-by-Step Tutorial
This crochet otter amigurumi pattern creates a rounded brown otter…
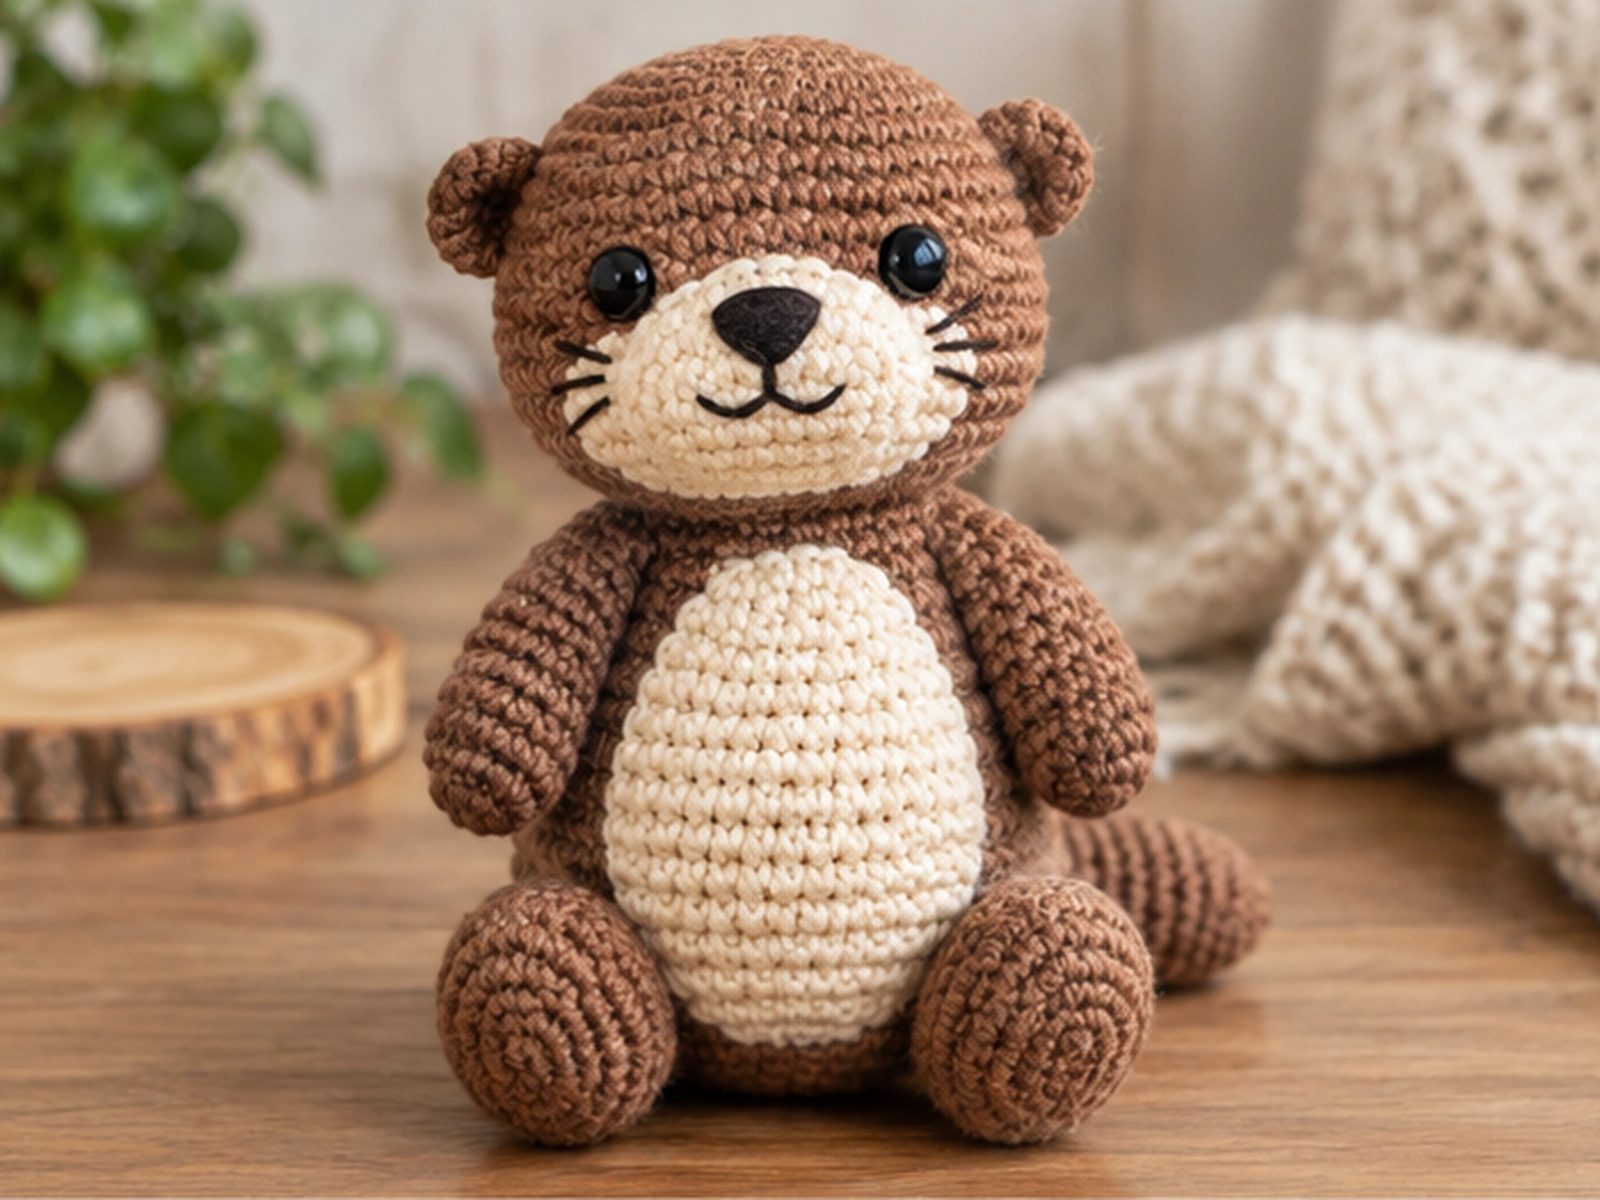
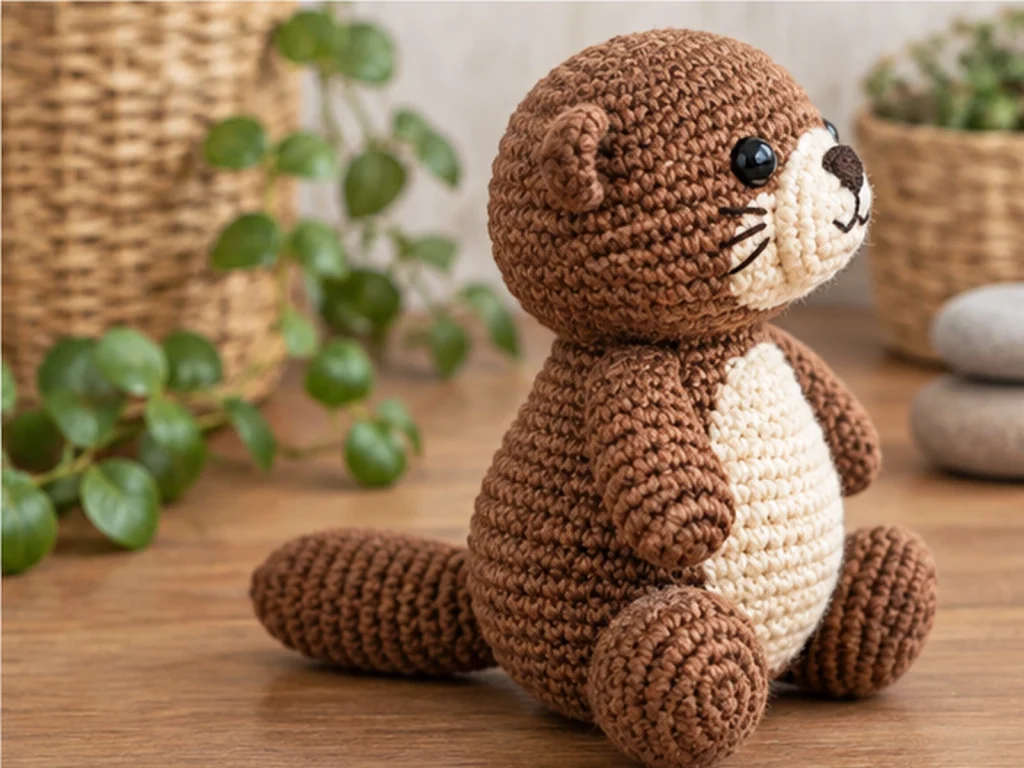
This crochet otter amigurumi pattern creates a rounded brown otter with a cream muzzle, a cream belly patch, small rounded ears, embroidered facial details, and a tapered paddle-style tail. The project is made from separate crocheted pieces and finished by sewing the components together.
The intended finished size is approximately 7–9 inches (18–23 cm), although the final size will vary with yarn, hook size, tension, stuffing, and individual crochet technique.
Project Overview
What You’ll Make
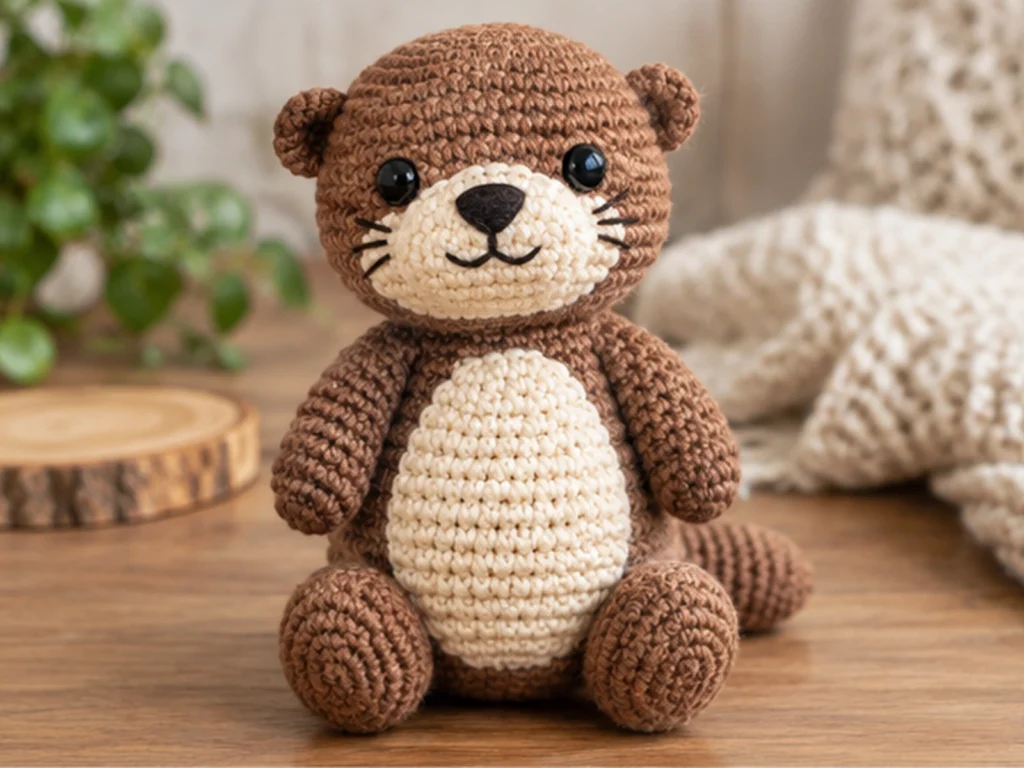
You’ll crochet an otter from individual components, then assemble the pieces into one finished amigurumi.
The design includes:
- A rounded head and body
- Two arms
- Two legs
- Two small ears
- A cream muzzle
- A cream belly patch
- A tapered paddle-style tail
- Embroidered facial details
Project Details
- Technique: Amigurumi crochet
- Yarn: Medium/worsted-weight (#4)
- Main color: Brown
- Accent color: Cream or warm beige
- Hook: 3.25 mm crochet hook
- Eyes: 10 mm black safety eyes or embroidered eyes
- Filling: Polyester fiberfill
- Approximate finished size: 7–9 inches (18–23 cm)
- Construction: Separate pieces sewn together
The finished size is approximate and can change with yarn, hook size, tension, stuffing, and crochet technique.
The pattern has been mathematically reviewed and constructionally checked, but it has not been physically crocheted and tested yet.
Materials & Tools
- Medium/worsted-weight (#4) brown yarn
- Small amount of cream or beige yarn
- Small amount of black embroidery floss
- 3.25 mm crochet hook
- 10 mm black safety eyes, or black embroidery thread for embroidered eyes
- Polyester fiberfill
- Tapestry or yarn needle
- Scissors
- Stitch marker
Safety Note
Safety eyes can present a choking hazard and are not appropriate for children under 3. Embroidered eyes are an alternative when you prefer stitched facial details.
This pattern does not establish the finished project as baby-safe, toddler-safe, or child-safe.
Abbreviations
This pattern uses standard US crochet terminology.
- MR — magic ring
- sc — single crochet
- inc — increase; 2 sc in the same stitch
- dec — decrease; single crochet 2 stitches together
- sl st — slip stitch
- FO — fasten off
Before You Start
Work in Continuous Rounds
Work in continuous rounds unless otherwise noted. Use a stitch marker to keep track of the beginning of each round.
Count Your Stitches
The number in parentheses at the end of each round is the total stitch count for that round.
Keeping track of your stitch count is especially important during increase and decrease rounds.
Stuff as You Go
Add stuffing gradually as the rounded pieces take shape. This makes it easier to control the final shape and helps prevent overstuffing.
Shape Before Sewing
For each finished component, take a moment to check its shape before attaching it. For paired pieces such as the arms, legs, and ears, compare both pieces so the finished otter stays balanced.
Construction Order
The main crocheted components are made separately and then assembled.
The general sequence is:
- Crochet the individual pieces.
- Stuff the pieces that require stuffing.
- Attach the belly patch and limbs.
- Join the head and body.
- Add the ears and muzzle.
- Add the facial embroidery.
- Attach the tail.
- Shape the finished otter and weave in the remaining ends.
Original Crochet Otter Pattern
Head — Make 1
Use brown yarn.
Round 1: 6 sc in MR. (6)
Round 2: 6 inc. (12)
Round 3: (sc, inc) × 6. (18)
Round 4: (2 sc, inc) × 6. (24)
Round 5: (3 sc, inc) × 6. (30)
Round 6: sc around. (30)
Round 7: sc around. (30)
Round 8: sc around. (30)
Round 9: sc around. (30)
At this stage, place the safety eyes around the Round 7–8 area. Check the placement from the front so both sides look balanced before securing them.
Round 10: (3 sc, dec) × 6. (24)
Round 11: (2 sc, dec) × 6. (18)
Round 12: (sc, dec) × 6. (12)
Begin stuffing the head. Add enough fiberfill to create a rounded shape without overfilling it.
Round 13: 6 dec. (6)
Fasten off and close the remaining opening. Weave in the yarn end.
Body — Make 1
Use brown yarn.
Round 1: 6 sc in MR. (6)
Round 2: 6 inc. (12)
Round 3: (sc, inc) × 6. (18)
Round 4: (2 sc, inc) × 6. (24)
Round 5: (3 sc, inc) × 6. (30)
Round 6: (4 sc, inc) × 6. (36)
Round 7: sc around. (36)
Round 8: sc around. (36)
Round 9: sc around. (36)
Round 10: sc around. (36)
Round 11: sc around. (36)
Round 12: sc around. (36)
Begin stuffing gradually as the body develops.
Round 13: (4 sc, dec) × 6. (30)
Round 14: (3 sc, dec) × 6. (24)
Round 15: sc around. (24)
Round 16: (2 sc, dec) × 6. (18)
Round 17: sc around. (18)
Round 18: (sc, dec) × 6. (12)
Round 19: sc around. (12)
Add the remaining stuffing needed to give the torso a rounded, firm shape.
Round 20: 6 dec. (6)
Fasten off and close the opening.
Arms — Make 2
Use brown yarn.
Round 1: 6 sc in MR. (6)
Round 2: 6 inc. (12)
Round 3: sc around. (12)
Round 4: (2 sc, dec) × 3. (9)
Round 5: sc around. (9)
Round 6: sc around. (9)
Round 7: sc around. (9)
Round 8: sc around. (9)
Round 9: sc around. (9)
Round 10: (sc, dec) × 3. (6)
Round 11: sc around. (6)
Lightly stuff the lower portion of the arm.
Fasten off, leaving a long yarn tail for sewing.
Repeat for the second arm.
Legs — Make 2
Use brown yarn.
Round 1: 6 sc in MR. (6)
Round 2: 6 inc. (12)
Round 3: (sc, inc) × 6. (18)
Round 4: sc around. (18)
Round 5: (sc, dec) × 6. (12)
Round 6: sc around. (12)
Round 7: sc around. (12)
Round 8: sc around. (12)
Round 9: (2 sc, dec) × 3. (9)
Round 10: sc around. (9)
Round 11: sc around. (9)
Round 12: sc around. (9)
Round 13: sc around. (9)
Round 14: sc around. (9)
Round 15: (sc, dec) × 3. (6)
Round 16: sc around. (6)
Lightly stuff the legs, placing a little more filling toward the lower portion.
Fasten off, leaving a long yarn tail for sewing.
Repeat for the second leg.
Ears — Make 2
Use brown yarn.
Round 1: 6 sc in MR. (6)
Round 2: 6 inc. (12)
Round 3: sc around. (12)
Do not stuff the ears. Flatten each one gently.
Fasten off, leaving a long yarn tail for sewing.
Repeat for the second ear.
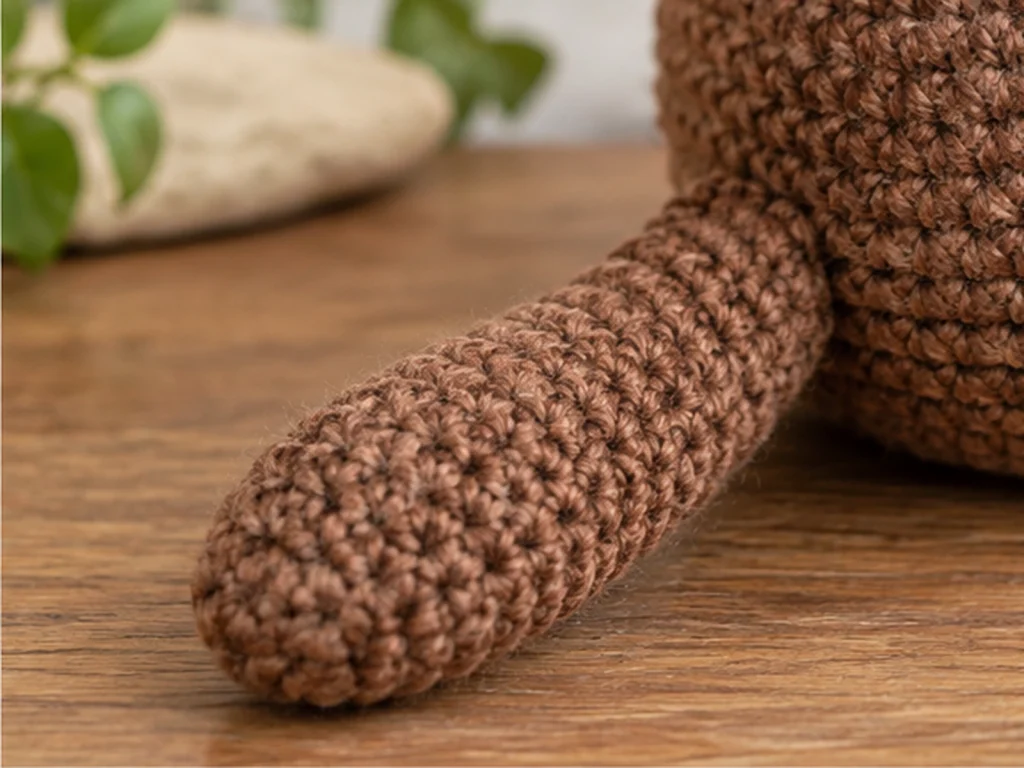
Tail — Make 1
Use brown yarn.
Round 1: 6 sc in MR. (6)
Round 2: 6 inc. (12)
Round 3: (sc, inc) × 6. (18)
Round 4: sc around. (18)
Round 5: (sc, dec) × 6. (12)
Round 6: sc around. (12)
Round 7: (2 sc, dec) × 3. (9)
Round 8: sc around. (9)
Round 9: (sc, dec) × 3. (6)
Round 10: sc around. (6)
Lightly stuff the tail without making it overly firm.
Flatten the wider section gently between your fingers to create a broader paddle-like shape.
Fasten off, leaving a long yarn tail for sewing.
Muzzle — Make 1
Use cream yarn.
Round 1: 6 sc in MR. (6)
Round 2: 6 inc. (12)
Round 3: (sc, inc) × 6. (18)
Round 4: sc around. (18)
Round 5: (sc, dec) × 6. (12)
Round 6: 6 dec. (6)
Add a small amount of stuffing so the muzzle keeps a softly rounded shape.
Fasten off, leaving a long yarn tail for sewing.
Belly Patch — Make 1
Use cream yarn.
Round 1: 6 sc in MR. (6)
Round 2: 6 inc. (12)
Round 3: (sc, inc) × 6. (18)
Round 4: (2 sc, inc) × 6. (24)
Round 5: sc around. (24)
Fasten off, leaving a long yarn tail.
The patch can be gently shaped into a slightly vertical oval during sewing.
Facial Details
Eye Placement
Place the safety eyes around the Round 7–8 area of the head.
Before securing them, look at the face straight on and compare both sides so the eyes are visually balanced.
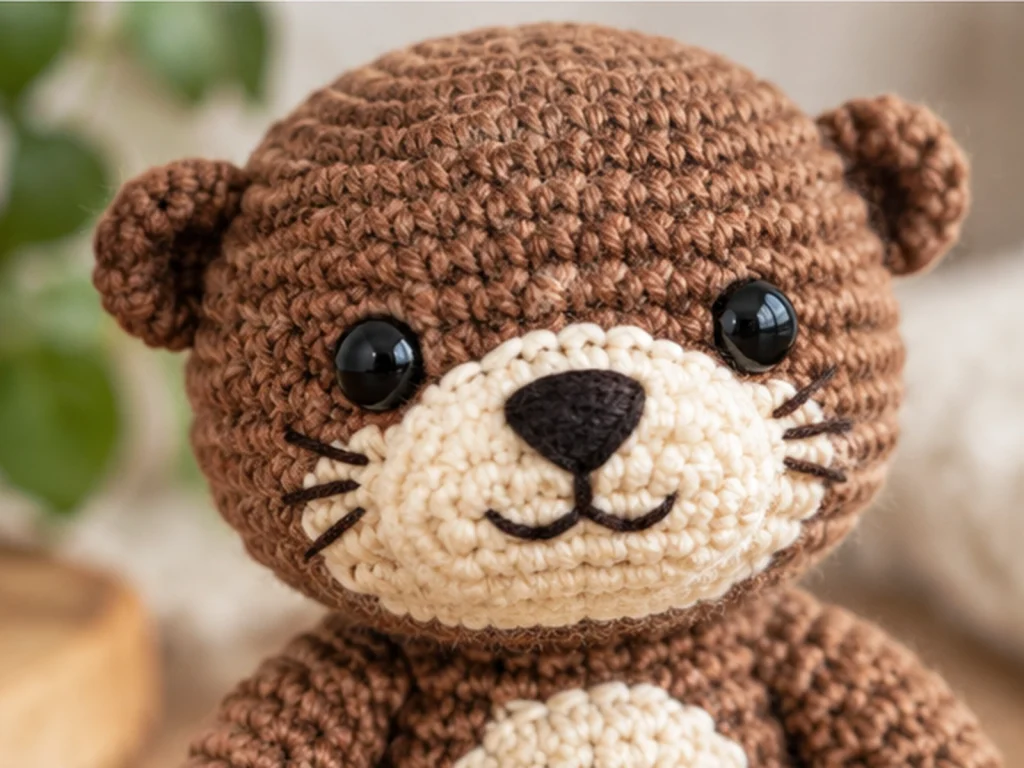
Nose
Using black embroidery floss, stitch a small nose near the upper center of the cream muzzle.
Mouth
Add a short mouth line below the nose.
Whiskers
Optional short embroidered whisker lines can be added on either side of the muzzle. Keep both sides visually balanced.
Assembly
Step 1: Attach the Belly Patch
Center the cream belly patch on the front of the body.
Hold it in place first and check that it sits vertically before sewing around the edge.
Step 2: Attach the Legs
Place the two legs on the lower front/sides of the body.
Compare their height and angle before permanently sewing the second leg.
Step 3: Attach the Head
Sew the head securely to the top of the body.
Check the front view while sewing so the head stays centered over the torso.
Step 4: Attach the Ears
Place one ear on each side of the upper head.
Compare their height and angle from the front before sewing them permanently.
Step 5: Attach the Muzzle
Center the cream muzzle on the front of the head, beneath and between the eyes.
Sew around its edge securely.
Step 6: Add the Facial Features
Using black embroidery floss, add the nose and mouth. Add the optional whiskers if desired.
Step 7: Attach the Arms
Place the arms on opposite sides of the upper-middle body.
Compare both sides from the front and back before completing the sewing.
Step 8: Attach the Tail
Center the tail on the lower back of the body.
Position the wider portion against the body and allow the narrower end to point downward and outward.
Sew the base securely without pulling the body out of shape.
Finishing
After all the pieces are attached, gently adjust the stuffing and smooth the crocheted fabric.
Check:
- Head alignment
- Ear symmetry
- Eye alignment
- Muzzle position
- Arm placement
- Leg placement
- Tail position
- Belly patch alignment
Weave in and trim the remaining yarn ends.
Helpful Tips
Keep Your Tension Consistent
Firm, even stitches help maintain the shape of the rounded head and body and reduce the chance of stuffing showing through.
Stuff Gradually
Adding small amounts of fiberfill as you work makes it easier to control the shape. Overstuffing can distort the stitches and make sewing the pieces together harder.
Compare Paired Pieces
Before sewing the second arm, leg, or ear into place, compare it with the first one. This helps keep the finished otter balanced.
Check Placement Before Sewing
For the belly patch, muzzle, ears, limbs, and tail, hold each piece in position first. Once sewn, moving a component can be much more difficult.
Keep the Tail Lightly Stuffed
The tail is meant to have a softer, broader paddle-like appearance. Too much stuffing can make the shape overly cylindrical.
Troubleshooting
My Stitch Count Is Off
Stop at the end of the round and recount your stitches before continuing. An incorrect count can affect every round that follows.
I Can See Stuffing Through the Stitches
Try using slightly smaller amounts of fiberfill and distribute it gradually. Make sure your stitches are firm enough to hold the stuffing inside.
My Ears or Limbs Are Uneven
Lay the finished pieces next to each other and compare their shape before sewing. During assembly, use the front and side views of the otter to check symmetry.
The Muzzle Looks Off-Center
Hold the muzzle beneath the eyes before sewing. Adjust it until the facial features look balanced from the front.
The Tail Is Losing Its Shape
Avoid overstuffing it. After sewing, gently flatten the wider section again to restore the intended paddle-like silhouette.
Customization Ideas
Try a Different Brown
A warmer brown, darker brown, or lighter neutral shade can give the otter a different look while keeping the same overall construction.
Change the Muzzle and Belly Contrast
The cream accent can be replaced with another light neutral color for a different visual effect.
Embroider the Eyes
Instead of safety eyes, use embroidered eyes for a softer stitched appearance.
Adjust the Expression
Small changes to the embroidered nose, mouth, and whiskers can create a more playful or more understated expression.
Create a Character Version
A simple color change or small stitched detail can turn the same base otter into a distinctive character.
Care
Because the finished item uses crocheted components, stuffing, embroidery, and potentially safety eyes, handle and clean it according to the materials used. Avoid presenting the finished project as baby-safe or child-safe.
Frequently Asked Questions
What yarn is used for this crochet otter?
The pattern is designed for medium/worsted-weight (#4) yarn, with brown as the main color and cream or beige for the accent pieces.
What crochet hook size is used?
A 3.25 mm crochet hook is specified for the pattern.
How big will the finished otter be?
The intended finished size is approximately 7–9 inches (18–23 cm), but the actual size will vary with yarn, tension, stuffing, and crochet technique.
Does this pattern use US crochet terminology?
Yes. The instructions use standard US terms such as single crochet, increase, and decrease.
Do the ears need stuffing?
No. The ears are crocheted as small flat pieces and are flattened before assembly.
Should the tail be stuffed firmly?
No. The tail is lightly stuffed so it can be shaped into a broader paddle-like form.
Can I use embroidered eyes instead of safety eyes?
Yes. The design allows for embroidered eyes as an alternative to 10 mm black safety eyes.
Are safety eyes child-safe?
Safety eyes can present a choking hazard and are not appropriate for children under 3. This pattern does not establish the finished project as baby-safe, toddler-safe, or child-safe.
Has this crochet otter pattern been physically tested?
Not yet. The pattern has been mathematically reviewed and constructionally checked, but it has not been physically crocheted and tested yet.
More Animal Amigurumi
If you enjoy making animal amigurumi, this otter can be a natural addition to a collection of crocheted animal projects.
Final Thoughts
This crochet otter amigurumi brings together simple rounded shapes with a few defining details: the cream muzzle, belly patch, rounded ears, embroidered face, and paddle-style tail.
Take your time with the stuffing and especially with the assembly. Checking each component before sewing it permanently will help keep the finished otter balanced and neatly shaped.