
Crochet Pizza Amigurumi Pattern
This crochet pizza amigurumi turns a classic pizza slice into…
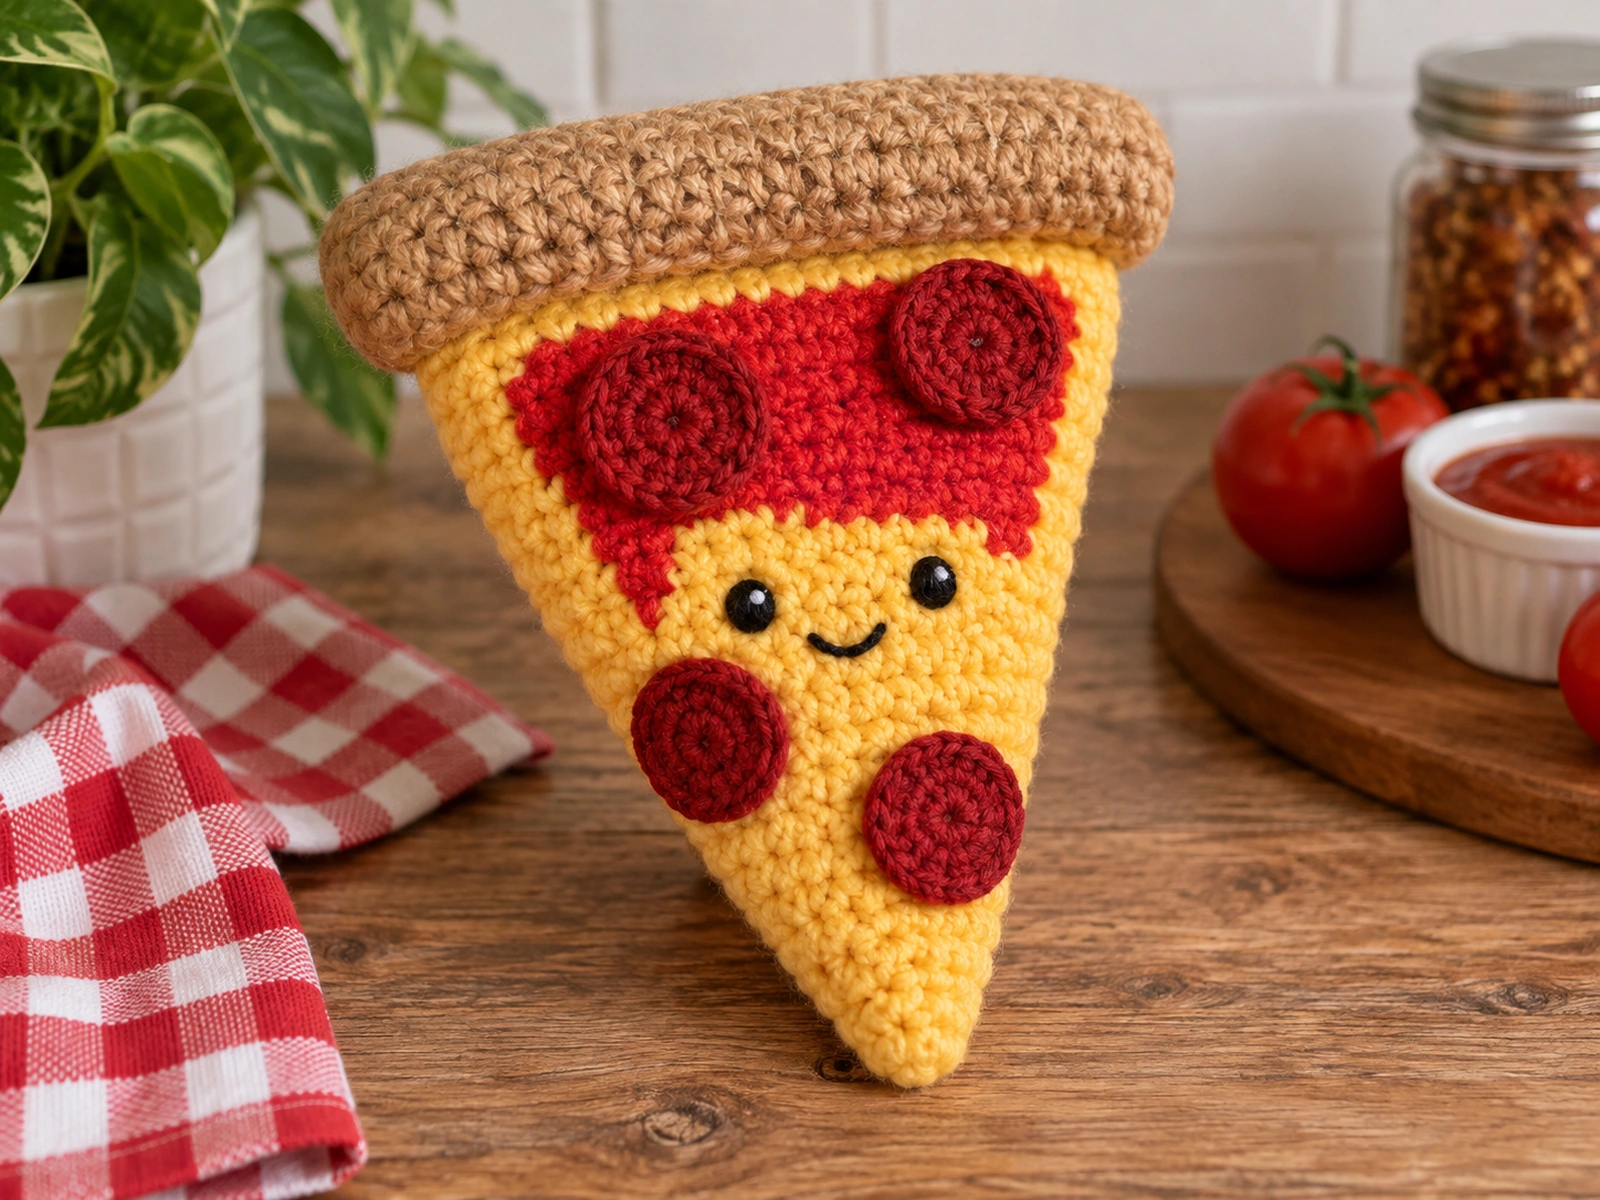
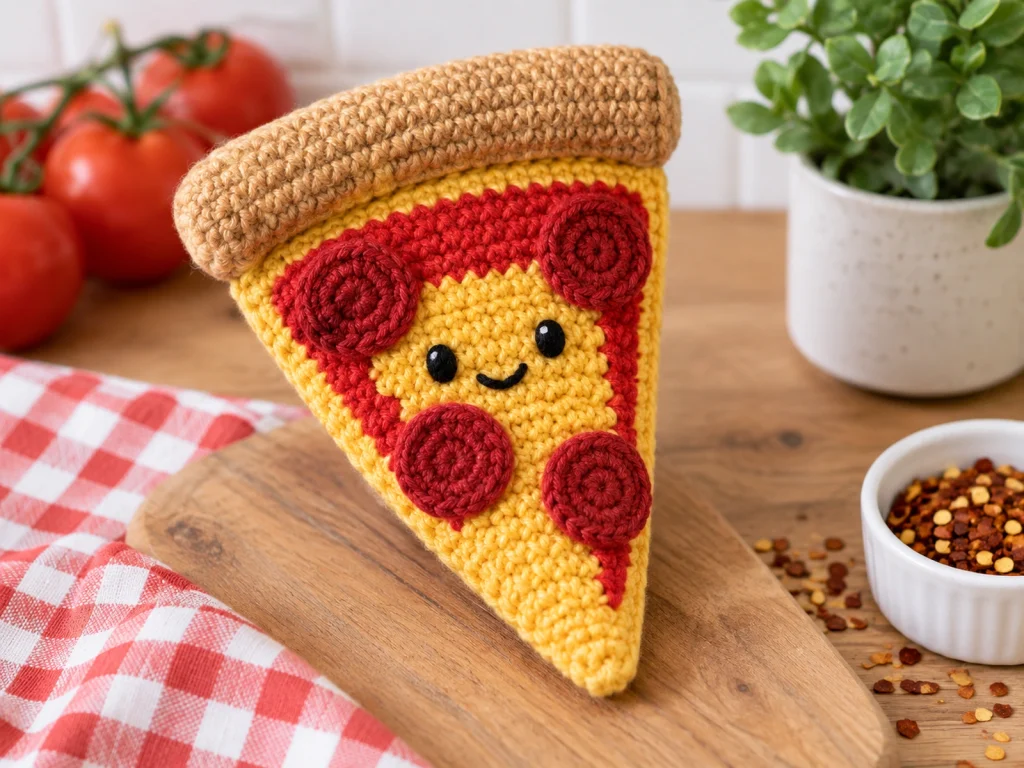
This crochet pizza amigurumi turns a classic pizza slice into a cute stuffed character with a golden-yellow cheese-colored base, red sauce, pepperoni toppings, a rounded crust, and an embroidered face.
The design is made from two matching triangular pizza panels, a smaller sauce panel, four flat pepperoni pieces, and a separate stuffed crust. You’ll decorate the front first, join the pizza panels, add stuffing, close the slice, and finish it with the crust.
The finished pizza is approximately 5–6 inches long when made with the specified yarn and hook. The final size can vary with yarn, tension, stuffing, and individual crochet technique.
Project Overview
What You’ll Make
This pizza amigurumi is built in layers to create a recognizable slice with a soft, slightly dimensional shape.
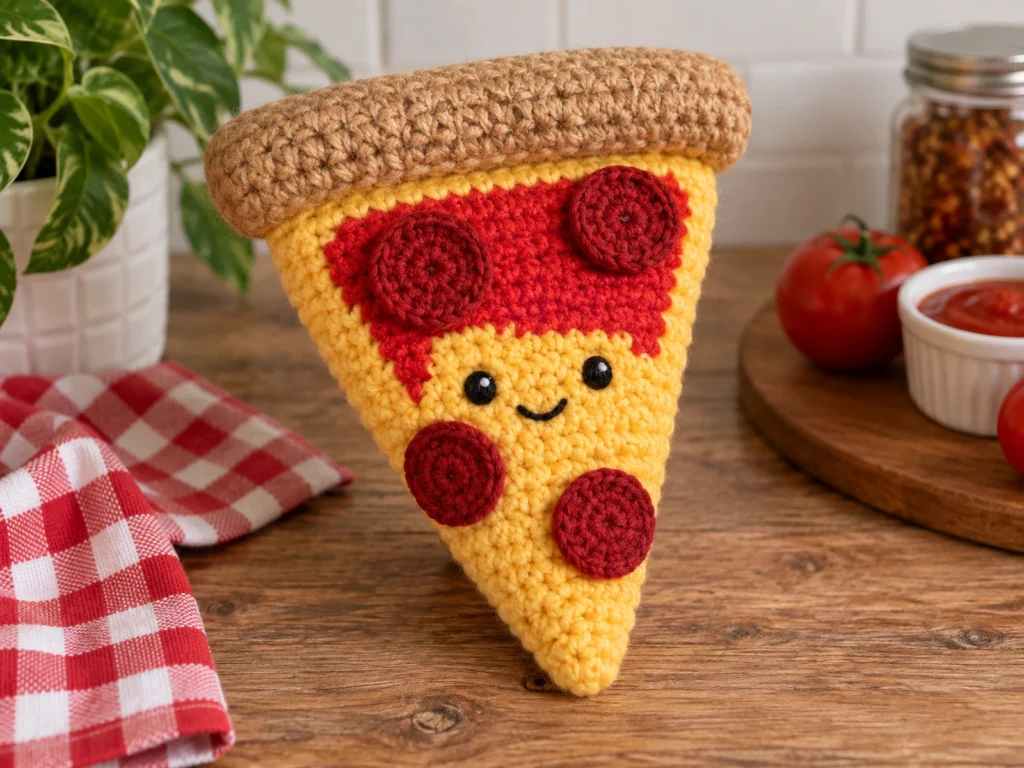
The main body uses two matching triangular panels. A smaller red sauce panel is attached to the front, followed by four deep-red pepperoni circles. The face is embroidered directly onto the cheese-colored surface.
A separate tan crust is made as a rectangular strip, folded into a tube, lightly stuffed, and sewn along the broad edge of the pizza.
Project Details
- Project: Pizza slice amigurumi
- Technique: Crochet and embroidery
- Yarn: #4 worsted-weight yarn
- Hook: 3.5 mm crochet hook
- Main colors: Golden yellow, red, deep red, and tan or light brown
- Face: Black embroidery thread
- Filling: Polyester fiberfill
- Approximate finished size: 5–6 inches long
The pattern has been mathematically reviewed and constructionally checked, but it has not been physically crocheted and tested yet.
Materials & Tools
Yarn
You’ll need #4 worsted-weight yarn in:
- Golden yellow for the pizza panels
- Red for the sauce
- Deep red for the pepperoni
- Tan or light brown for the crust
- Black embroidery thread for the face
No specific yarn brand or quantity is required by this pattern.
Crochet Hook
- 3.5 mm crochet hook
Other Supplies
- Polyester fiberfill
- Yarn needle
- Scissors
Abbreviations
This pattern uses standard US crochet terminology.
- MR — magic ring
- ch — chain
- sc — single crochet
- inc — increase; work 2 single crochets in the same stitch
- FO — fasten off
The turning chain is not counted as a stitch.
Before You Start
Keep Track of Your Rows
The pizza panels and sauce are worked in rows rather than continuous rounds. The chain 1 at the beginning of each row does not count as a stitch.
Check Your Stitch Counts
The triangular panels increase by one stitch on every row. Counting the stitches at the end of each row will help keep the shape consistent.
Decorate the Front First
Attach the sauce and pepperoni and embroider the face while the front pizza panel is still flat. This makes the decorative work easier to handle.
Stuff Gradually
Use a light amount of stuffing and add more gradually. Overstuffing can distort the triangular shape, especially near the pointed tip.
Construction Order
The general order is:
- Crochet the two pizza panels.
- Crochet the sauce and pepperoni.
- Decorate the front panel.
- Embroider the face.
- Join the pizza panels.
- Add stuffing.
- Close the broad edge.
- Make and attach the crust.
- Shape and finish.
Original Crochet Pizza Amigurumi Pattern
Pizza Panels — Make 2
Color: Golden yellow
These two identical triangular panels form the front and back of the pizza.
Front Panel
Row 1: Ch 2, sc in 2nd ch from hook. (1)
Row 2: Ch 1, inc in the first stitch. (2)
Row 3: Ch 1, inc in the first stitch, sc in the next stitch. (3)
Row 4: Ch 1, inc in the first stitch, sc in the next 2 stitches. (4)
Row 5: Ch 1, inc in the first stitch, sc in the next 3 stitches. (5)
Row 6: Ch 1, inc in the first stitch, sc in the next 4 stitches. (6)
Row 7: Ch 1, inc in the first stitch, sc in the next 5 stitches. (7)
Row 8: Ch 1, inc in the first stitch, sc in the next 6 stitches. (8)
Row 9: Ch 1, inc in the first stitch, sc in the next 7 stitches. (9)
Row 10: Ch 1, inc in the first stitch, sc in the next 8 stitches. (10)
Row 11: Ch 1, inc in the first stitch, sc in the next 9 stitches. (11)
Row 12: Ch 1, inc in the first stitch, sc in the next 10 stitches. (12)
Row 13: Ch 1, inc in the first stitch, sc in the next 11 stitches. (13)
Row 14: Ch 1, inc in the first stitch, sc in the next 12 stitches. (14)
Row 15: Ch 1, inc in the first stitch, sc in the next 13 stitches. (15)
Row 16: Ch 1, inc in the first stitch, sc in the next 14 stitches. (16)
Row 17: Ch 1, inc in the first stitch, sc in the next 15 stitches. (17)
Row 18: Ch 1, inc in the first stitch, sc in the next 16 stitches. (18)
Row 19: Ch 1, inc in the first stitch, sc in the next 17 stitches. (19)
Row 20: Ch 1, inc in the first stitch, sc in the next 18 stitches. (20)
Row 21: Ch 1, inc in the first stitch, sc in the next 19 stitches. (21)
Row 22: Ch 1, inc in the first stitch, sc in the next 20 stitches. (22)
Row 23: Ch 1, inc in the first stitch, sc in the next 21 stitches. (23)
Row 24: Ch 1, inc in the first stitch, sc in the next 22 stitches. (24)
FO and leave a sewing tail if desired.
Back Panel
Repeat Rows 1–24 exactly as written above in golden yellow.
FO.
Sauce Panel — Make 1
Color: Red
The sauce is smaller than the main pizza panel so a golden-yellow border remains visible.
Row 1: Ch 2, sc in 2nd ch from hook. (1)
Row 2: Ch 1, inc in the first stitch. (2)
Row 3: Ch 1, inc in the first stitch, sc in the next stitch. (3)
Row 4: Ch 1, inc in the first stitch, sc in the next 2 stitches. (4)
Row 5: Ch 1, inc in the first stitch, sc in the next 3 stitches. (5)
Row 6: Ch 1, inc in the first stitch, sc in the next 4 stitches. (6)
Row 7: Ch 1, inc in the first stitch, sc in the next 5 stitches. (7)
Row 8: Ch 1, inc in the first stitch, sc in the next 6 stitches. (8)
Row 9: Ch 1, inc in the first stitch, sc in the next 7 stitches. (9)
Row 10: Ch 1, inc in the first stitch, sc in the next 8 stitches. (10)
Row 11: Ch 1, inc in the first stitch, sc in the next 9 stitches. (11)
Row 12: Ch 1, inc in the first stitch, sc in the next 10 stitches. (12)
Row 13: Ch 1, inc in the first stitch, sc in the next 11 stitches. (13)
Row 14: Ch 1, inc in the first stitch, sc in the next 12 stitches. (14)
Row 15: Ch 1, inc in the first stitch, sc in the next 13 stitches. (15)
Row 16: Ch 1, inc in the first stitch, sc in the next 14 stitches. (16)
Row 17: Ch 1, inc in the first stitch, sc in the next 15 stitches. (17)
Row 18: Ch 1, inc in the first stitch, sc in the next 16 stitches. (18)
Row 19: Ch 1, inc in the first stitch, sc in the next 17 stitches. (19)
Row 20: Ch 1, inc in the first stitch, sc in the next 18 stitches. (20)
FO and leave a sewing tail.
Attach the Sauce
Place the sauce on the front pizza panel.
Align the sauce tip around Row 5 of the cheese panel. Along the broad edge, center the sauce so its 20 stitches sit inside the 24-stitch edge of the pizza panel, leaving approximately two stitches of golden-yellow border on each side.
Sew the sauce securely to the front panel using red yarn.
Pepperoni — Make 4
Color: Deep red
Round 1
Work 6 sc into an MR. (6)
Round 2
6 inc. (12)
FO and leave a sewing tail.
Flatten each circle gently and sew it to the sauce.
Repeat to make 4 pepperoni pieces.
Pepperoni Placement
Arrange the four pieces with balanced but slightly varied spacing.
A simple arrangement is:
- one toward the upper-left area
- one toward the upper-right area
- one near the center
- one toward the lower-middle area
Keep the central face area open.
Embroidered Face
Color: Black embroidery thread
Embroider two small eyes on the cheese-colored area and add a small curved smile beneath them.
Because the finished shape can vary, use visual balance rather than fixed measurements when positioning the face.
Keep the face away from the pepperoni pieces so the features remain easy to see.
Crust — Make 1
Color: Tan or light brown
Foundation
Ch 25.
Row 1
Ch 1, turn, sc across. (24)
Row 2
Ch 1, turn, sc across. (24)
Row 3
Ch 1, turn, sc across. (24)
Row 4
Ch 1, turn, sc across. (24)
Row 5
Ch 1, turn, sc across. (24)
Row 6
Ch 1, turn, sc across. (24)
Row 7
Ch 1, turn, sc across. (24)
Row 8
Ch 1, turn, sc across. (24)
Row 9
Ch 1, turn, sc across. (24)
Row 10
Ch 1, turn, sc across. (24)
Row 11
Ch 1, turn, sc across. (24)
Row 12
Ch 1, turn, sc across. (24)
FO and leave a long sewing tail.
Shape the Crust
Bring the long edges of the rectangle together and whipstitch the long seam to create a tube.
Add a small amount of stuffing, then gather and close both ends.
Shape the crust gently so it remains rounded rather than flattened.
Facial Details
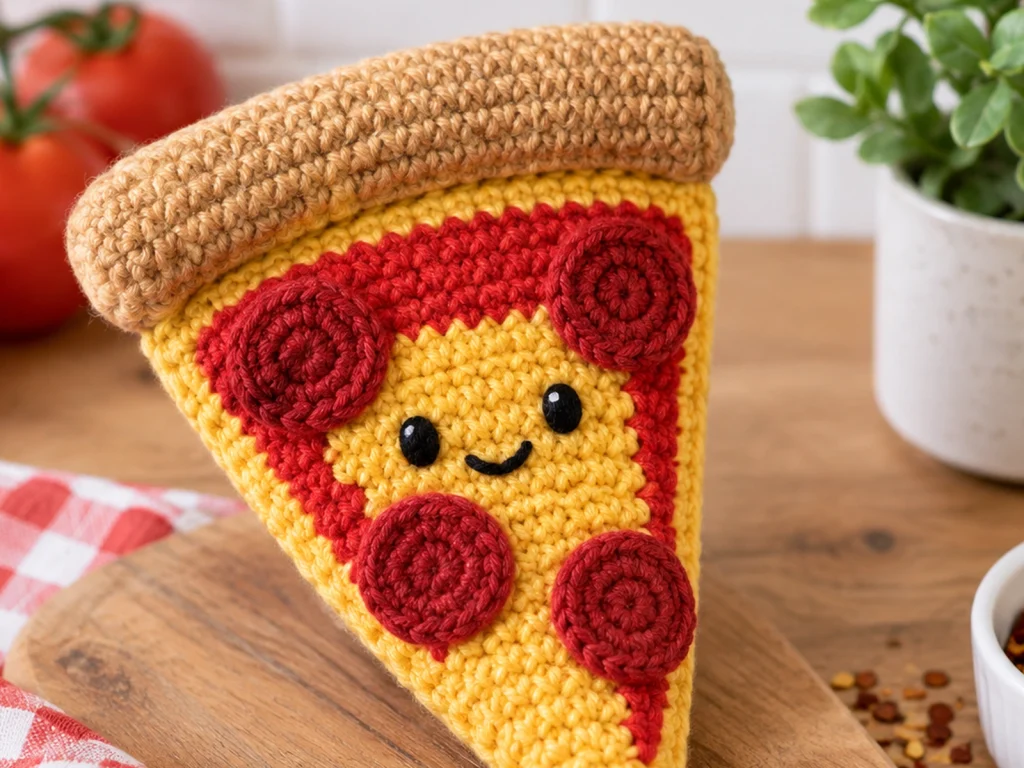
The face is added directly to the golden-yellow front panel before the pizza is assembled.
Embroider:
- two small eyes
- one small curved smile
Use visual balance rather than fixed stitch measurements when positioning the face.
Assembly
Step 1: Prepare the Finished Pieces
Make sure the following pieces are complete:
- 2 pizza panels
- 1 sauce panel
- 4 pepperoni pieces
- 1 crust
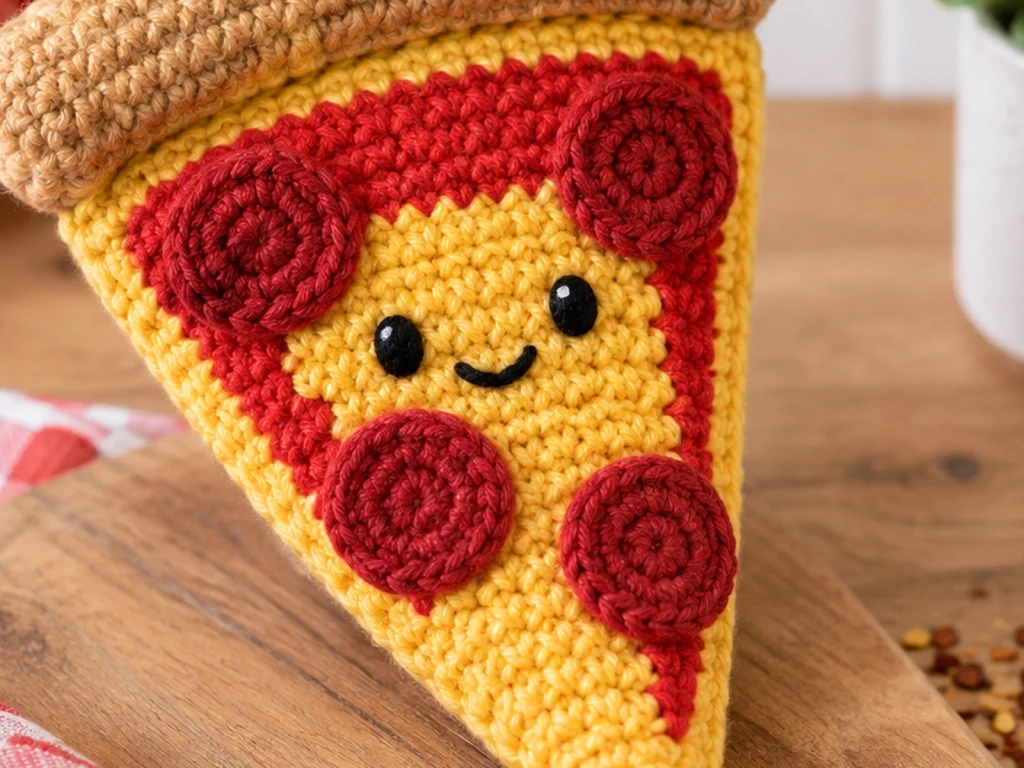
The sauce, pepperoni, and embroidered face should already be attached to the front panel.
Step 2: Join the Pizza Panels
Place the front and back panels together with the right sides facing outward.
Using golden-yellow yarn, whipstitch the two slanted sides together.
Leave the broad crust edge open.
Step 3: Add the Stuffing
Insert polyester fiberfill gradually.
Work the stuffing from the wide end toward the tip.
Use enough stuffing to create a soft, slightly dimensional slice without making it overly firm.
Step 4: Close the Broad Edge
Once the slice has the desired shape, whipstitch the broad edge closed with golden-yellow yarn.
Step 5: Attach the Crust
Center the stuffed crust tube along the broad edge.
Sew it securely along the closure seam.
Compare both ends before finishing so the crust sits evenly across the slice.
Step 6: Final Shaping
Gently shape:
- the pizza tip
- the side edges
- the crust
Make any final internal stuffing adjustments before weaving in the remaining yarn ends.
Finishing
Check the finished pizza carefully before trimming the remaining yarn ends.
Make sure:
- the sauce sits neatly inside the yellow border
- the pepperoni pieces are secure
- the face is visually centered
- the crust is attached evenly
- the stuffing is distributed without obvious gaps
- the triangular shape remains visible
Weave in loose ends securely and trim the excess yarn.
Helpful Tips
Keep the triangular shape consistent
Check your stitch count at the end of each row. Each pizza-panel row should increase by exactly one stitch, beginning with one stitch and ending with 24 stitches on Row 24.
Leave a visible cheese border
Center the smaller sauce panel carefully before sewing so the golden-yellow edge remains visible around it.
Stuff gradually
Adding the fiberfill a little at a time makes it easier to control the shape and avoid an overly firm slice.
Shape the crust after stuffing
The crust should look rounded rather than flat. Adjust the stuffing before closing the ends completely.
Troubleshooting
My pizza panel doesn’t look triangular.
Check the stitch count at the end of each row. The panel should grow from 1 stitch on Row 1 to 24 stitches on Row 24.
The sauce looks too close to the edge.
Center the sauce before sewing. The design is intended to leave a visible yellow border around the smaller sauce panel.
My pizza feels too firm.
Remove a little stuffing and reshape the slice. The finished pizza is intended to be soft and slightly dimensional.
The crust looks flat.
Add a little more stuffing before closing the ends, then gently round the tube with your fingers.
The face looks off-center.
Because exact face placement is not fixed by measurement, you can adjust the embroidery visually. Position the eyes first, compare them, and then add the smile.
Customization Ideas
Change the topping colors
The four small topping circles can be made in different colors for a different pizza-inspired look.
Change the expression
Try a wider smile, a smaller smile, or a different embroidered eye style while keeping the same basic construction.
Adjust the topping arrangement
Move the four toppings into a different balanced arrangement while leaving enough open space for the face.
Any size modification should be treated as a separate design adjustment rather than an automatically validated version of this pattern.
Frequently Asked Questions
What yarn is used for this pizza amigurumi?
The pattern is designed for #4 worsted-weight yarn.
What crochet hook size should I use?
Use a 3.5 mm crochet hook for the crocheted components.
How big is the finished pizza?
The finished pizza is approximately 5–6 inches long, although the final result can vary with yarn, hook, tension, stuffing, and individual technique.
Does the pizza use safety eyes?
No. The face is embroidered with black embroidery thread.
How many pepperoni pieces does the pattern make?
The pattern makes 4 pepperoni circles.
How is the crust made?
The crust is crocheted as a rectangular strip, folded into a tube, lightly stuffed, closed at the ends, and sewn to the broad edge of the pizza.
Is this pattern physically tested?
Not yet. The pattern has been mathematically reviewed and constructionally checked, but it has not been physically crocheted and tested.
Conclusion
This crochet pizza amigurumi is built from two triangular pizza panels, a smaller sauce layer, four pepperoni toppings, an embroidered face, and a separate rounded crust.
The key to a clean result is keeping the triangular panel stitch counts consistent, decorating the front before assembly, and adding the stuffing gradually so the finished slice keeps its shape.
Take your time with the placement of the toppings and face, and compare both sides before permanently sewing the final pieces in place.