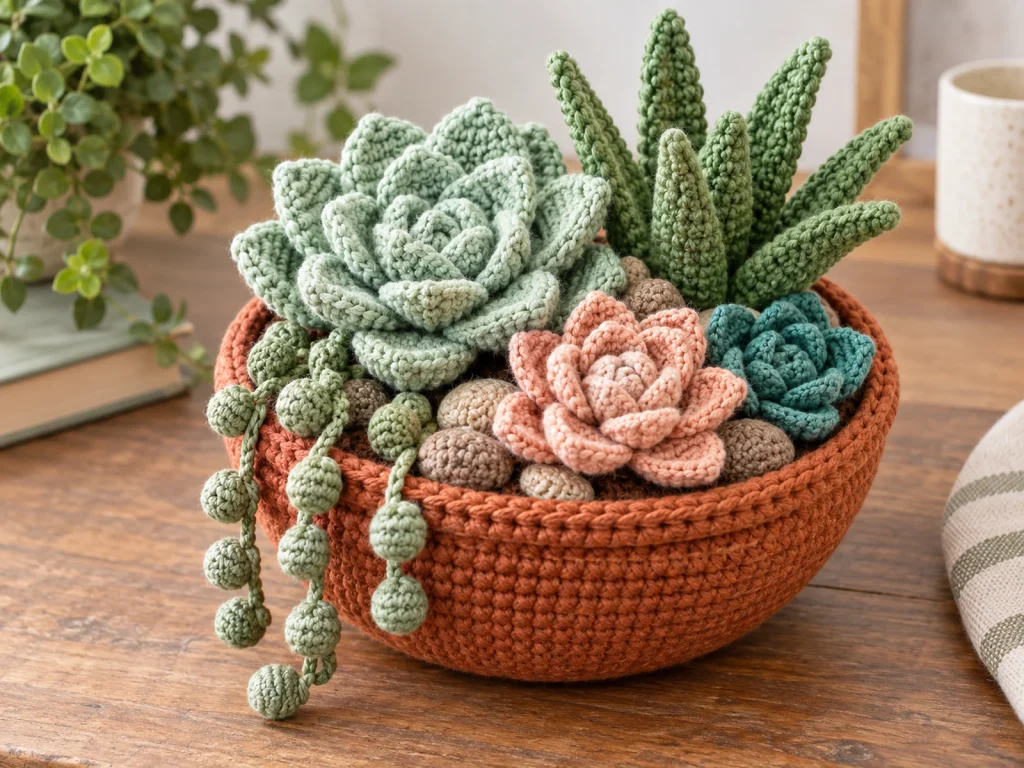
Crochet Succulent Garden Bowl Pattern
Create a miniature garden in yarn with this crochet succulent…
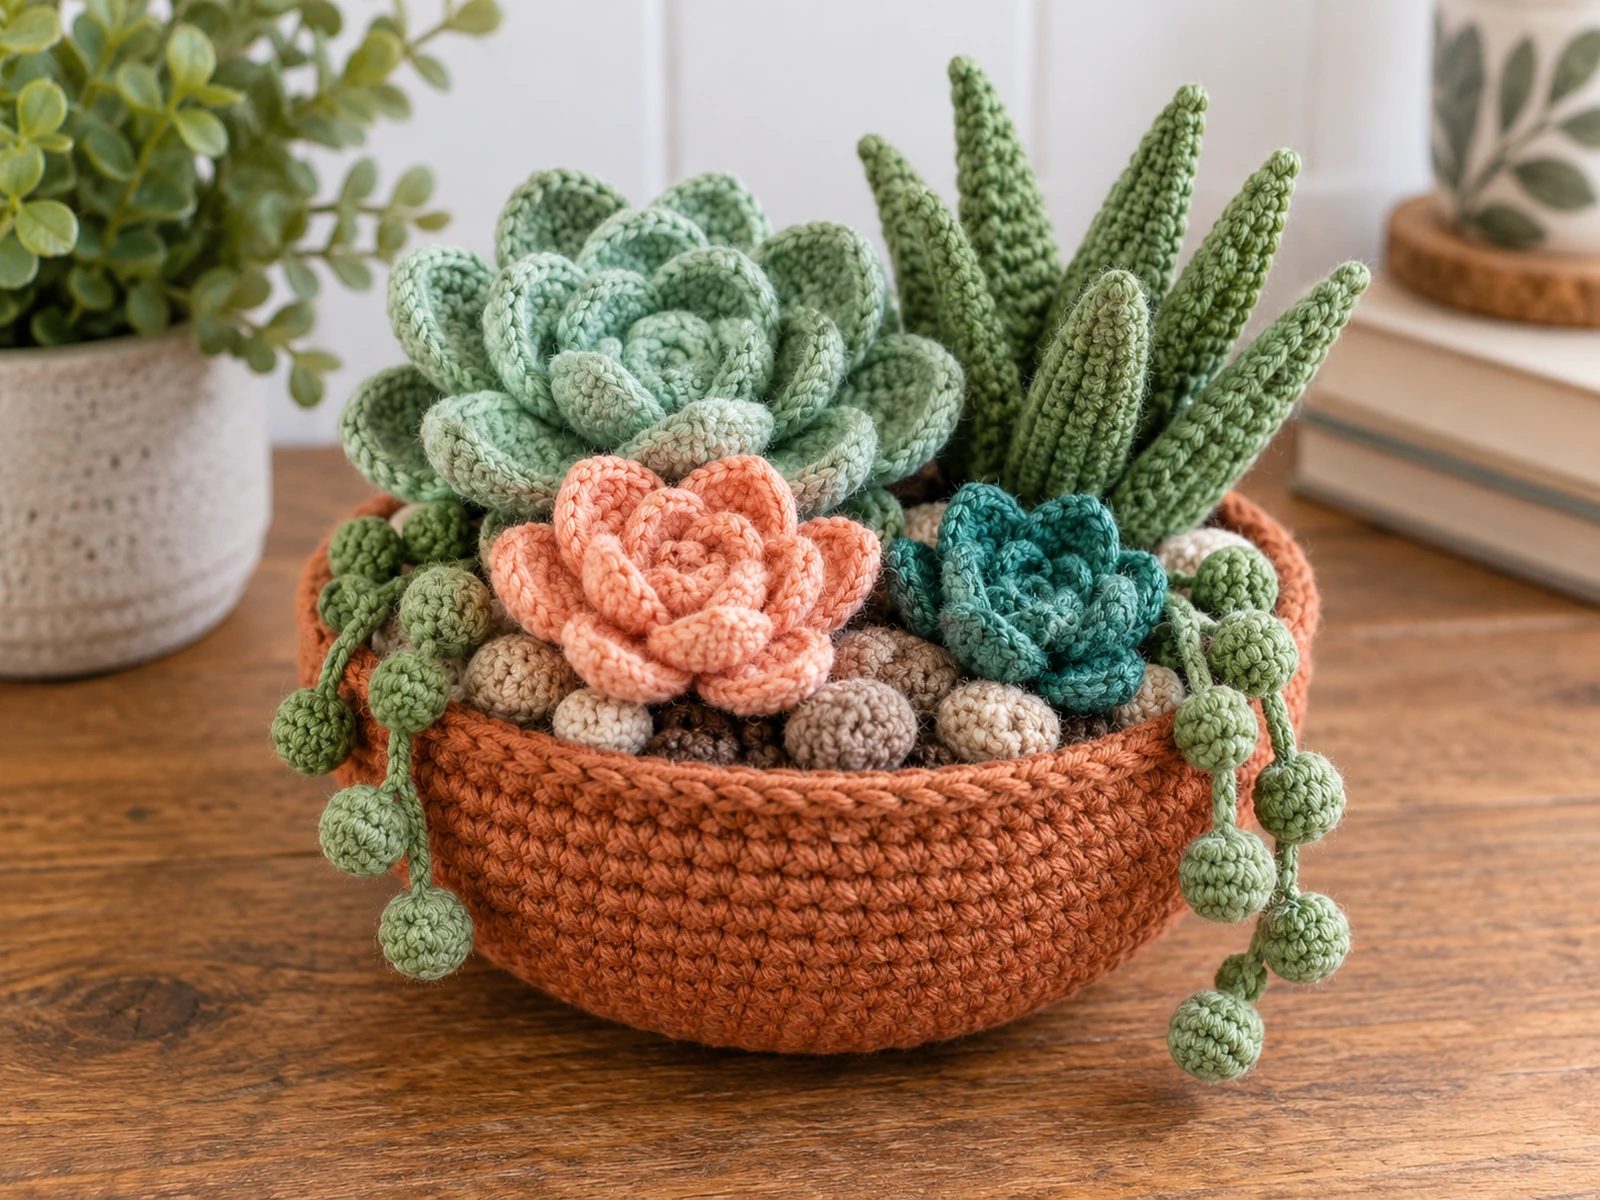
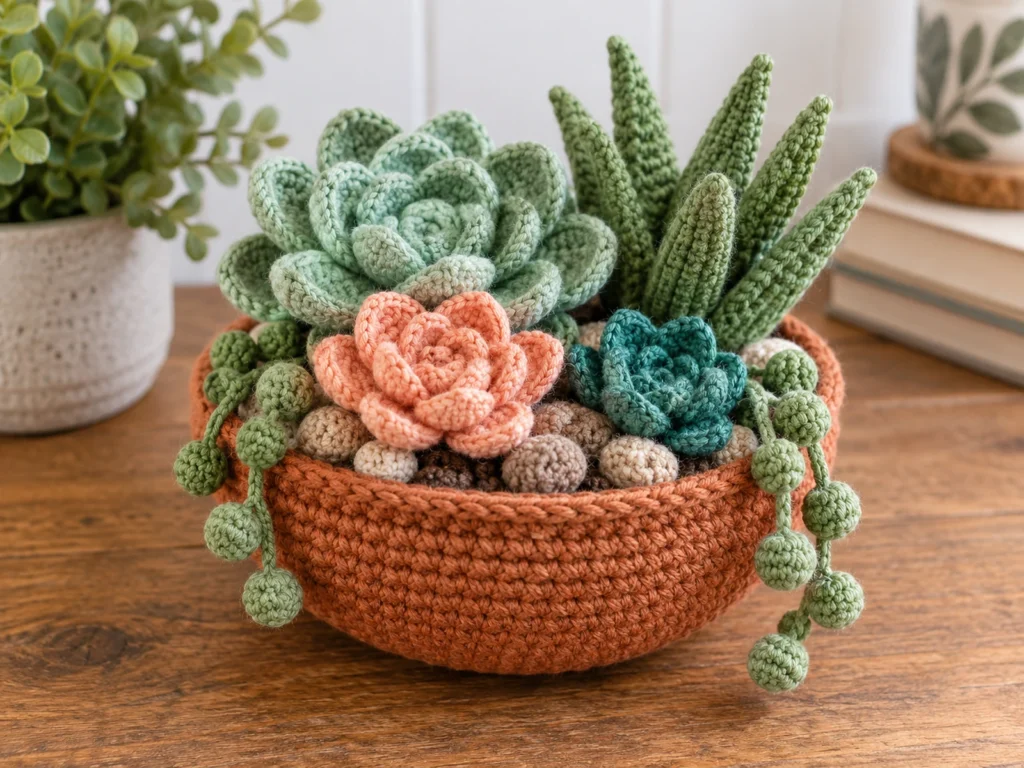
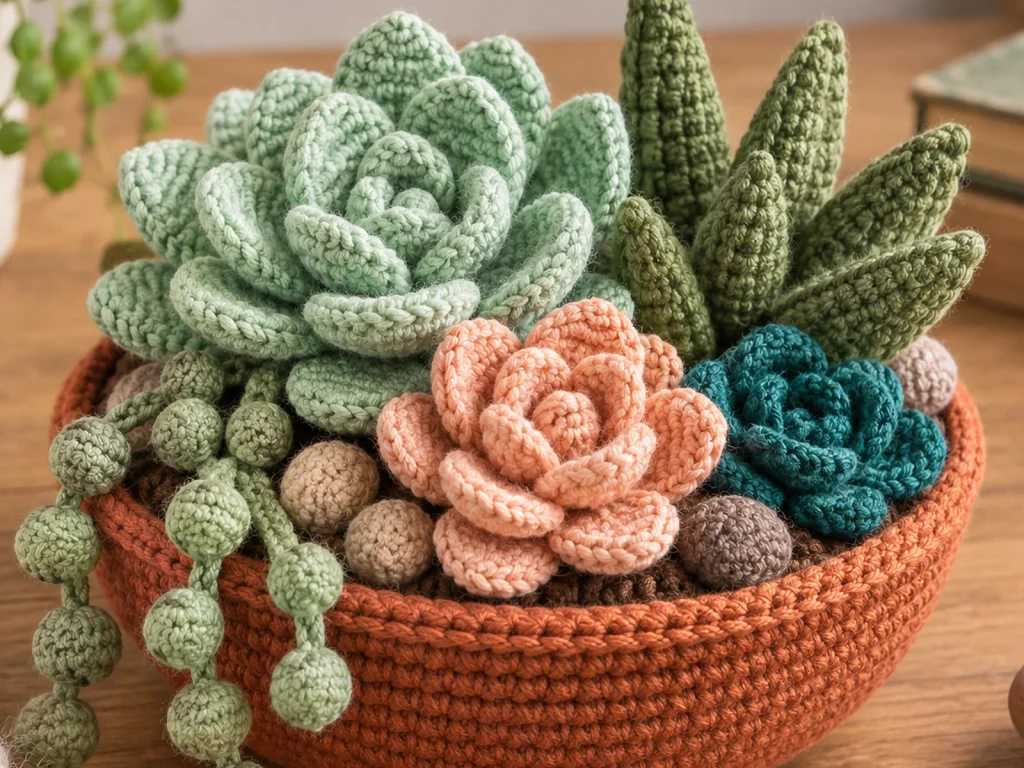
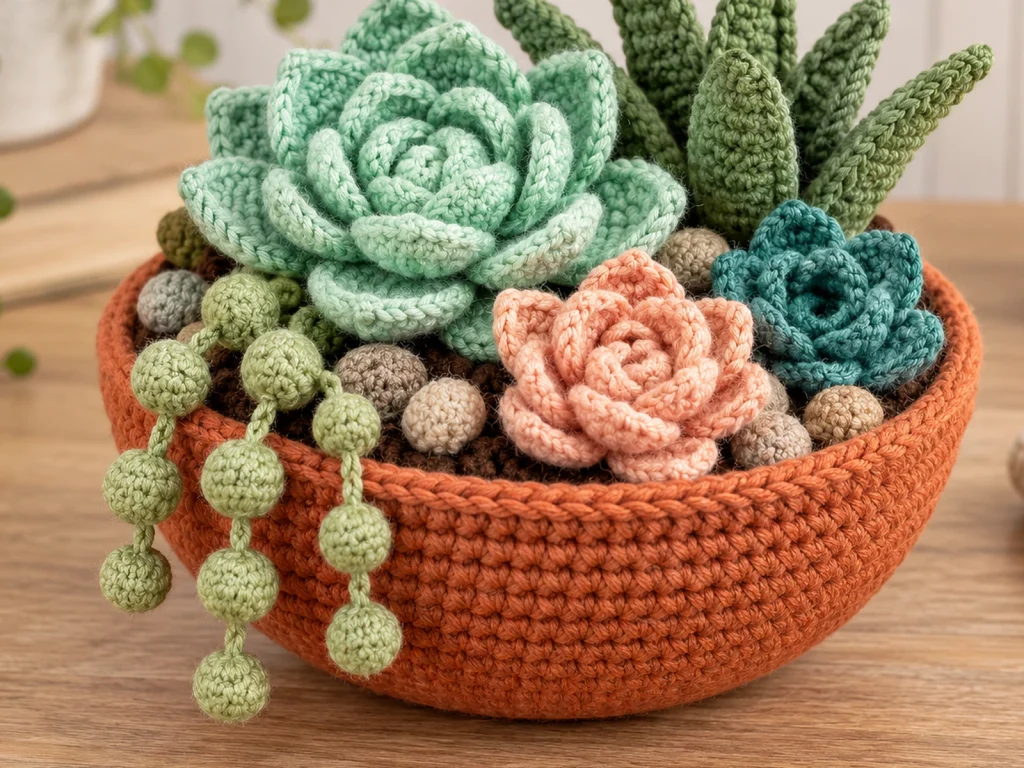
Create a miniature garden in yarn with this crochet succulent garden bowl pattern. The finished arrangement combines a large mint rosette, a peach rosette, an upright aloe cluster, a small teal rosette, trailing pearl strands, and tiny crochet pebbles inside a terracotta-style bowl.
Each element is made separately, then brought together during the final assembly. The result is a colorful botanical decoration with plenty of room for personal color choices and arrangement changes.
Pattern note: This pattern has been mathematically reviewed and constructionally reasoned, but it has not been physically crocheted and tested yet. Final size and shaping may vary with yarn, hook size, tension, stuffing, and individual technique.
Project Overview
What You’ll Make
This crochet succulent garden includes:
- 1 terracotta-style bowl
- 1 dark brown soil insert
- 1 large mint rosette
- 1 medium peach rosette
- 7 aloe leaves
- 2 trailing pearl strands
- 10 pearl spheres
- 1 small teal rosette
- 5 small teal petals
- 15–20 crochet pebbles in tan and taupe shades
The large mint rosette acts as the main focal point. The aloe adds height, the smaller rosettes add color, the pearl strands create a trailing element, and the pebbles fill the open spaces around the plants.
Project Details
Yarn: Medium/#4 worsted-weight yarn
Hook: 3.5 mm crochet hook
Approximate finished size: 6–7.5 inches wide and 4–5.5 inches tall
These dimensions are approximate design targets, not physically tested measurements.
Construction
The bowl and soil insert are crocheted separately. The succulent pieces are also made individually, then sewn into the final arrangement.
The bowl is worked in continuous rounds. The rosette petals and aloe leaves are worked separately as flat pieces. The pearl spheres and pebbles are lightly stuffed.
Materials & Tools
Yarn
Use medium/#4 worsted-weight yarn in these color groups:
- Terracotta
- Dark brown
- Mint green
- Light mint and/or darker mint
- Peach
- Aloe green
- Soft sage
- Teal
- Tan
- Taupe
You can use coordinating shades within the same color family to create more depth and contrast.
Other Supplies
- 3.5 mm crochet hook
- Polyester fiberfill
- Tapestry needle
- Scissors
- Stitch marker
Abbreviations
This pattern uses standard US crochet terminology.
| Abbreviation | Meaning |
|---|---|
| MR | Magic ring |
| ch | Chain |
| sc | Single crochet |
| hdc | Half double crochet |
| dc | Double crochet |
| sl st | Slip stitch |
| inc | Increase: 2 sc in the same stitch |
| dec | Decrease: sc 2 stitches together |
| BLO | Back loop only |
| FO | Fasten off |
Before You Start
Work in Continuous Rounds
The bowl and circular components are worked in continuous rounds unless otherwise noted.
Use a stitch marker to identify the first stitch of each round.
Count Your Stitches
Check your stitch count at the end of every round. This is especially important on increase and decrease rounds.
Keep Your Tension Consistent
Consistent tension helps maintain the intended proportions between the bowl, soil insert, and plant components.
Leave Sewing Tails
When a piece will be attached later, leave a longer yarn tail rather than weaving it in immediately.
Stuff Lightly
Only the pearl spheres and crochet pebbles are stuffed. Use enough fiberfill to create a rounded shape without making these pieces overly firm.
Construction Order
For the smoothest workflow, finish the bowl and soil insert first, then make the plant components, pearl strands, and pebbles before beginning final assembly.
Original Crochet Succulent Garden Pattern
Crochet the Terracotta Bowl
Color: Terracotta
Make 1
The bowl is worked from the center outward and then upward.
Round 1
6 sc in MR. (6)
Round 2
6 inc. (12)
Round 3
(sc, inc) × 6. (18)
Round 4
(2 sc, inc) × 6. (24)
Round 5
(3 sc, inc) × 6. (30)
Round 6
(4 sc, inc) × 6. (36)
Round 7
(5 sc, inc) × 6. (42)
Round 8
(6 sc, inc) × 6. (48)
Round 9
(7 sc, inc) × 6. (54)
Round 10
(8 sc, inc) × 6. (60)
Round 11
60 sc in BLO. (60)
Round 12
60 sc. (60)
Round 13
60 sc. (60)
Round 14
60 sc. (60)
Round 15
60 sc. (60)
Round 16
60 sc. (60)
Round 17
60 sc in BLO. (60)
Round 18
60 sl st around. (60)
FO and weave in the end.
Do not stuff the bowl.
Make the Soil Insert
Color: Dark brown
Make 1
Round 1
6 sc in MR. (6)
Round 2
6 inc. (12)
Round 3
(sc, inc) × 6. (18)
Round 4
(2 sc, inc) × 6. (24)
Round 5
(3 sc, inc) × 6. (30)
Round 6
(4 sc, inc) × 6. (36)
Round 7
(5 sc, inc) × 6. (42)
Round 8
(6 sc, inc) × 6. (48)
Round 9
(7 sc, inc) × 6. (54)
FO, leaving a long sewing tail.
Set aside for assembly.
Make the Large Mint Rosette
The large mint rosette is the main focal point of the garden.
Large Rosette Center
Color: Mint green
Make 1
Round 1
6 sc in MR. (6)
Round 2
6 inc. (12)
Round 3
(sc, inc) × 6. (18)
Round 4
(2 sc, inc) × 6. (24)
Round 5
(3 sc, inc) × 6. (30)
FO, leaving a sewing tail.
Large Inner Petals
Color: Light mint
Make 6
Ch 7.
Starting in the 2nd chain from the hook:
sc, hdc, dc, dc, hdc, 3 sc in the last chain.
Continue along the underside:
hdc, dc, dc, hdc, sc, sl st at the base.
Worked stitches: 13, plus the joining slip stitch.
FO, leaving a sewing tail.
Repeat 6 times.
Large Outer Petals
Color: Mint or darker mint
Make 8
Ch 9.
Starting in the 2nd chain from the hook:
sc, hdc, dc, dc, dc, hdc, sc, 3 sc in the last chain.
Continue along the underside:
sc, hdc, dc, dc, dc, hdc, sc, sl st at the base.
Worked stitches: 17, plus the joining slip stitch.
FO, leaving a sewing tail.
Repeat 8 times.
Assemble the Large Rosette
Arrange the 6 inner petals evenly around the center disk.
Sew only the bases of the petals to the center.
Place the 8 outer petals behind the inner layer, offsetting them so the outer petals sit between the inner petals.
Sew their bases securely, then gently curve the petals upward.
Keep the petal bodies loose enough to retain their shape.
Make the Medium Peach Rosette
Medium Rosette Center
Color: Peach
Make 1
Round 1
6 sc in MR. (6)
Round 2
6 inc. (12)
Round 3
(sc, inc) × 6. (18)
Round 4
(2 sc, inc) × 6. (24)
FO, leaving a sewing tail.
Medium Petals
Color: Peach
Make 7
Ch 8.
Starting in the 2nd chain from the hook:
sc, hdc, dc, dc, hdc, sc, 3 sc in the last chain.
Continue along the underside:
sc, hdc, dc, dc, hdc, sc, sl st at the base.
Worked stitches: 15, plus the joining slip stitch.
FO, leaving a sewing tail.
Repeat 7 times.
Assemble the Medium Rosette
Arrange the 7 petals around the center disk.
Sew the bases securely while leaving the petal bodies loose enough to cup upward.
Make the Aloe Plant
Aloe Leaf
Color: Aloe green
Make 7
Ch 13.
Starting in the 2nd chain from the hook:
sc, sc, hdc, hdc, dc, dc, dc, hdc, hdc, sc, sc, 3 sc in the last chain.
Continue along the underside:
sc, sc, hdc, hdc, dc, dc, dc, hdc, hdc, sc, sc, sl st at the base.
Worked stitches: 25, plus the joining slip stitch.
FO, leaving a sewing tail.
Repeat 7 times.
Assemble the Aloe
Arrange the 7 leaves into an upright cluster.
Place a few leaves toward the back and layer the others between them.
Sew the leaf bases together while keeping the bodies free.
Gently spread the leaves so the finished plant has a fuller, upright shape.
Make the Trailing String of Pearls
Make 2 strands.
Pearl Cord
Color: Soft sage
Make 2
Ch 30.
Starting in the 2nd chain from the hook, sl st across all 29 chains.
Stitch count: 29 sl sts.
FO, leaving tails for assembly.
Pearl Sphere
Color: Soft sage
Make 10 total
Round 1
6 sc in MR. (6)
Round 2
6 inc. (12)
Round 3
(sc, inc) × 6. (18)
Round 4
18 sc. (18)
Round 5
(sc, dec) × 6. (12)
Add a small amount of stuffing.
Round 6
6 dec. (6)
Adjust the stuffing before closing.
FO and cinch the opening closed.
Weave in the end.
Assemble Each Pearl Strand
Attach 5 pearl spheres to each cord.
Leave a small amount of visible cord between neighboring pearls.
Sew each sphere securely around the cord.
A little variation in spacing helps the strands look more natural.
Make the Small Teal Rosette
Small Rosette Center
Color: Teal
Make 1
Round 1
6 sc in MR. (6)
Round 2
6 inc. (12)
Round 3
(sc, inc) × 6. (18)
FO, leaving a sewing tail.
Small Petals
Color: Teal
Make 5
Ch 7.
Starting in the 2nd chain from the hook:
sc, hdc, dc, dc, hdc, 3 sc in the last chain.
Continue along the underside:
hdc, dc, dc, hdc, sc, sl st at the base.
Worked stitches: 13, plus the joining slip stitch.
FO, leaving a sewing tail.
Repeat 5 times.
Assemble the Small Rosette
Arrange the 5 petals around the center disk.
Sew the bases securely and gently cup the petals upward.
Make the Crochet Pebbles
Colors: Tan and taupe
Make 15–20
Round 1
6 sc in MR. (6)
Round 2
6 inc. (12)
Round 3
(sc, inc) × 6. (18)
Round 4
18 sc. (18)
Round 5
(sc, dec) × 6. (12)
Add a small amount of stuffing.
Round 6
6 dec. (6)
Close the opening firmly.
FO and weave in the end.
For a more natural look, gently flatten some pebbles while leaving others rounded.
Assemble the Crochet Succulent Garden
Step 1: Attach the Soil Insert
Place the dark brown soil disk inside the terracotta bowl.
Center it so a visible terracotta rim remains around the edge.
Using the long sewing tail, attach the soil insert around its perimeter.
Avoid pulling the seam too tightly, which can make the disk buckle.
Step 2: Position the Large Rosette
Place the large mint rosette toward the rear-center of the soil.
Sew the center securely to the soil insert.
Keep the outer petals free so they can be shaped.
Step 3: Add the Aloe Cluster
Position the aloe slightly to one side of the large rosette.
Sew the leaf bases securely to the soil.
Spread the leaves so they rise upward and add height to the arrangement.
Step 4: Add the Peach Rosette
Place the medium peach rosette toward the front side of the garden.
Sew its center securely to the soil.
Keep the petals visible rather than hiding them behind the larger rosette.
Step 5: Add the Teal Rosette
Place the small teal rosette toward the opposite front side.
Its smaller scale helps balance the larger mint rosette.
Step 6: Attach the Pearl Strands
Sew the upper end of each pearl cord to the soil area or nearby garden base.
Let the strands curve naturally toward the bowl rim.
Keep the two trails at slightly different positions so they do not overlap.
Step 7: Add the Pebbles
Scatter the tan and taupe pebbles around the plant bases.
Fill open spaces and help cover attachment points while leaving some of the dark soil visible.
Where additional stability is needed, lightly tack or sew individual pebbles in place.
Step 8: Final Finishing
Check the overall arrangement before trimming or weaving in the last loose ends.
Make sure:
- the bowl rim remains visible
- the rosette petals are not flattened
- the aloe leaves remain upright
- the pearl strands have a natural curve
- the pebbles stay securely in place
- no stuffing is visible
- all loose yarn ends are woven in
Helpful Tips
Keep the Plant Layers Distinct
The large mint rosette works best as the visual anchor. The other components should support it rather than cover it.
Shape Before Final Sewing
Before securing each component permanently, arrange it and look at the garden from several angles.
Small changes in placement can make a big difference in the final silhouette.
Let the Petals Move
The rosette petals are sewn mainly at their bases. Avoid pulling them flat against the center.
Use Light Stuffing
The pearl spheres and pebbles only need enough stuffing to hold their shape.
Overstuffing can make the pieces too firm and change their proportions.
Troubleshooting
My Stitch Count Is Off
Stop at the end of the round and recount before continuing.
For an increase round such as (3 sc, inc) × 6, each group creates 5 stitches, so six groups create 30 stitches.
My Bowl Is Curling
Check your tension and make sure every increase has been completed correctly.
Circular crochet pieces can curl when the tension becomes too tight.
My Soil Insert Buckles
The soil disk should sit inside the bowl rather than being pulled tightly against the bowl wall.
Distribute the attachment points evenly around the perimeter.
My Rosette Looks Flat
Make sure you are sewing only the petal bases.
The petal bodies should remain loose enough to curve upward.
My Aloe Looks Too Flat
Try changing the angle of the individual leaves before tightening the shared base.
A few leaves should sit slightly forward or backward rather than all on one plane.
My Pearl Spheres Feel Too Firm
Use less stuffing.
The spheres only need enough fiberfill to hold their rounded shape.
My Garden Looks Crowded
Start by adjusting the smaller components.
Use the large mint rosette as the main focal point, then reposition the peach rosette, teal rosette, aloe, and trailing strands around it.
Customization Ideas
Change the Bowl Color
Try a neutral cream, beige, stone, or another earthy shade instead of terracotta.
Create a New Rosette Palette
Use deeper greens, soft pinks, coral, lavender, or blue-green tones for a different garden feel.
Try a Monochromatic Garden
Keep the plants within one color family for a quieter look, using different shades to separate the individual pieces.
Add More Trailing Strands
Additional pearl strands can create a fuller cascading effect and change the balance of the arrangement.
Mix the Pebble Colors
Combining several tan and taupe shades keeps the filler from looking overly uniform.
Frequently Asked Questions
What yarn weight is used for this crochet succulent garden?
The pattern is designed around medium/#4 worsted-weight yarn with a 3.5 mm crochet hook.
Is this one crochet piece or several separate pieces?
It is a multi-component project. The bowl, soil insert, rosettes, aloe leaves, pearl strands, pearl spheres, and pebbles are made separately and assembled at the end.
Does the bowl need to be stuffed?
No. The bowl is worked as a structured crochet container and is not stuffed.
Which parts are stuffed?
The pearl spheres and crochet pebbles use a small amount of polyester fiberfill. The flat plant components do not require stuffing.
Can I change the colors?
Yes. The design is naturally suited to color changes, so you can customize the bowl, rosettes, aloe, trailing strands, and pebbles.
How do I keep the final arrangement balanced?
Use the large mint rosette as your main focal point. Place the taller aloe around it, then use the smaller rosettes, trailing strands, and pebbles to fill the remaining visual gaps.
How large will the finished succulent bowl be?
The design target is approximately 6–7.5 inches wide and 4–5.5 inches tall. Final dimensions can vary with yarn, hook size, tension, stuffing, and individual technique.
Can the plants be rearranged?
Yes. The components are assembled individually, so their placement can be customized during final assembly. Use visual balance rather than fixed measurements.
Final Thoughts
This crochet succulent garden bowl brings several small botanical pieces together into one handmade arrangement. The layered rosettes add color and texture, the aloe adds height, the pearl strands create a trailing detail, and the crochet pebbles help complete the miniature garden.
Take your time with the final assembly. The individual pieces are only part of the project—their placement is what gives the finished garden its overall shape and balance.
Happy crocheting!