
Free Crochet Strawberry Penguin Amigurumi Pattern
This adorable crochet strawberry penguin combines a classic amigurumi penguin…
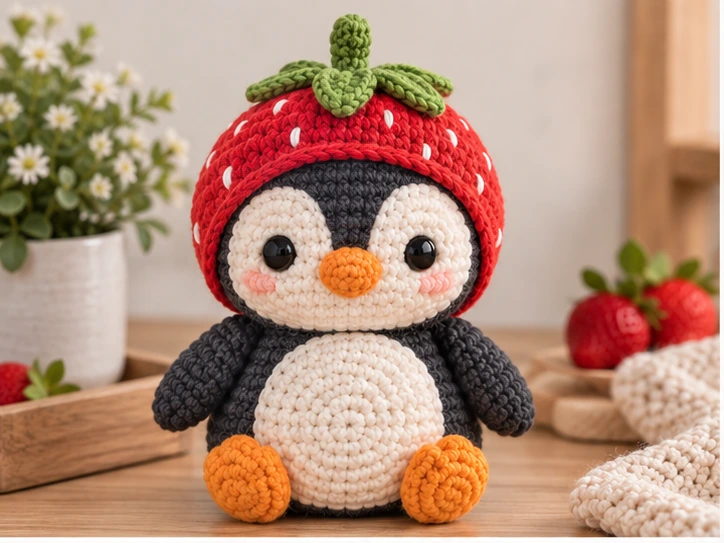
This adorable crochet strawberry penguin combines a classic amigurumi penguin shape with a playful strawberry-inspired cap and green calyx. The finished character features a dark penguin body, light face and belly details, orange feet and beak, and a red strawberry cap that is permanently attached to the penguin.
The pattern is designed as an original crochet project for makers who enjoy creating cute animal amigurumi with a fun themed detail.
Why You’ll Love This Crochet Project
This strawberry penguin has a simple character-focused design with several small pieces that come together into one finished amigurumi.
The combination of:
- a classic penguin silhouette
- a contrasting face and belly
- embroidered black eyes
- orange feet and beak
- a red strawberry cap
- a green strawberry calyx
gives the finished piece its distinctive look.
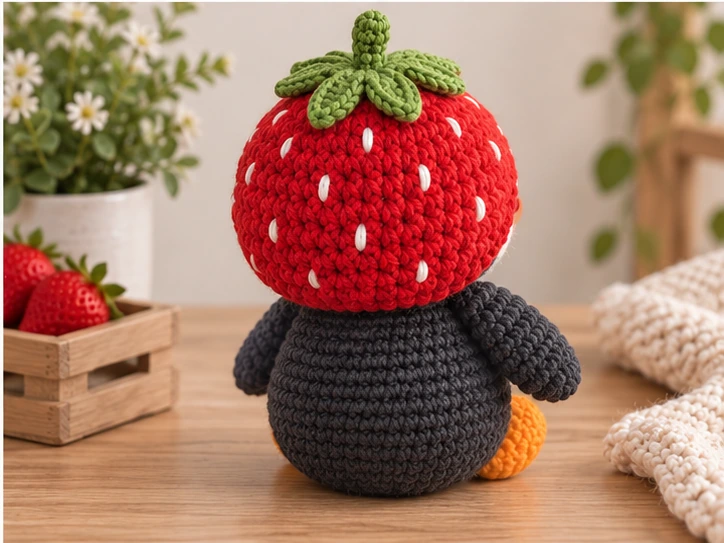
The strawberry cap is permanently attached to the penguin, making it part of the completed character rather than a separate accessory.
Skill Level
No specific skill level has been established for this pattern. Before beginning, make sure you are comfortable with the basic US crochet stitches used in the instructions, working amigurumi in rounds, stuffing crocheted pieces, and sewing finished pieces together.
Materials and Supplies You’ll Need
Yarn Type
Use medium/worsted-weight (#4) yarn in the following colors:
- Charcoal or black
- White or cream
- Red
- Green
- Orange
Hook Size
- 3.5 mm crochet hook
Extra Tools
- Polyester fiberfill
- Yarn needle
- Stitch marker
- Scissors
- Black yarn or embroidery thread for the eyes
The pattern does not establish an exact yarn quantity or gauge.
Abbreviations
The pattern uses standard US crochet terminology:
- MR — magic ring
- ch — chain
- sc — single crochet
- inc — increase; work 2 sc in the same stitch
- dec — decrease; work sc2tog
- sl st — slip stitch
- FO — fasten off
- hdc — half double crochet
Before You Start
Work in Continuous Rounds
The main amigurumi pieces are worked in rounds. Use a stitch marker to identify the beginning of each round and move it as you progress.
Count Your Stitches
Stitch counts are included at the end of the rounds. Check your count regularly, especially after increase and decrease rounds.
Stuff Gradually
Add polyester fiberfill gradually as the body takes shape. Work the stuffing into the form evenly rather than adding a large amount all at once.
Avoid overstuffing, which can distort the crocheted fabric.
Compare Paired Pieces
The wings and feet are made in pairs. Compare the two finished pieces before sewing them onto the penguin so they remain as symmetrical as possible.
Gauge and Finished Size
Gauge has not been established for this pattern. The finished size is approximately 5–6 inches, but the final dimensions can vary depending on yarn, hook size, tension, stuffing, and individual crochet technique.
Step-by-Step Crochet Instructions
Step 1: The Body
The body and head are worked as one continuous piece in charcoal or black yarn.
Round 1
6 sc in MR (6)
Round 2
6 inc (12)
Round 3
(sc, inc) × 6 (18)
Round 4
(sc 2, inc) × 6 (24)
Round 5
(sc 3, inc) × 6 (30)
Round 6
30 sc (30)
Round 7
30 sc (30)
Round 8
30 sc (30)
Round 9
30 sc (30)
Round 10
30 sc (30)
Round 11
(sc 4, inc) × 6 (36)
Round 12
36 sc (36)
Round 13
36 sc (36)
Round 14
36 sc (36)
Round 15
(sc 4, dec) × 6 (30)
Round 16
(sc 3, dec) × 6 (24)
Round 17
24 sc (24)
Round 18
24 sc (24)
Round 19
24 sc (24)
Round 20
(sc 2, dec) × 6 (18)
Round 21
18 sc (18)
Round 22
(sc, dec) × 6 (12)
Round 23
6 dec (6)
Finish according to the approved pattern instructions and close the remaining opening securely.
Step 2: The Face Patch
Using white or cream yarn, create the circular face patch.
Round 1
6 sc in MR (6)
Round 2
6 inc (12)
Round 3
(sc, inc) × 6 (18)
Fasten off, leaving a sewing tail for attachment.
Step 3: The Belly Patch
Using white or cream yarn, create the belly patch.
Round 1
6 sc in MR (6)
Round 2
6 inc (12)
Round 3
(sc, inc) × 6 (18)
Round 4
(sc 2, inc) × 6 (24)
Round 5
24 sc (24)
Fasten off and leave a sewing tail.
Step 4: The Wings — Make 2
Using charcoal or black yarn, make two matching wings.
Round 1
6 sc in MR (6)
Round 2
(sc, inc) × 3 (9)
Round 3
9 sc (9)
Round 4
(sc 2, inc) × 3 (12)
Round 5
12 sc (12)
Round 6
(sc 2, dec) × 3 (9)
Round 7
9 sc (9)
Fasten off according to the approved pattern and prepare both wings for assembly.
Step 5: The Beak
Using orange yarn, create the beak.
Round 1
4 sc in MR (4)
Round 2
4 inc (8)
Round 3
(sc, dec) × 3 (6)
Round 4
(sc, dec) × 2 (4)
Fasten off and leave a sewing tail for attachment.
Step 6: The Feet — Make 2
Using orange yarn, create two matching feet with the approved oval construction.
Work the chain-based starting construction and subsequent rounds exactly as established in the pattern.
The finished feet should remain symmetrical before they are attached to the lower portion of the penguin.
Fasten off and leave sewing tails for assembly.
Step 7: The Strawberry Cap
Using red yarn, crochet the strawberry cap.
Round 1
6 sc in MR (6)
Round 2
6 inc (12)
Round 3
(sc, inc) × 6 (18)
Round 4
(sc 2, inc) × 6 (24)
Round 5
24 sc (24)
Round 6
24 sc (24)
Round 7
24 sc (24)
Fasten off as directed and prepare the cap for attachment.
Permanently Attach the Strawberry Cap
The strawberry cap is permanently attached to the penguin.
Position the finished cap over the top of the penguin and align it carefully before sewing. Use the yarn tail to secure the cap around the appropriate opening and attachment area.
Work discreet stitches around the cap so it remains securely attached as part of the finished character.
Do not treat the cap as a removable accessory.
Step 8: The Strawberry Calyx
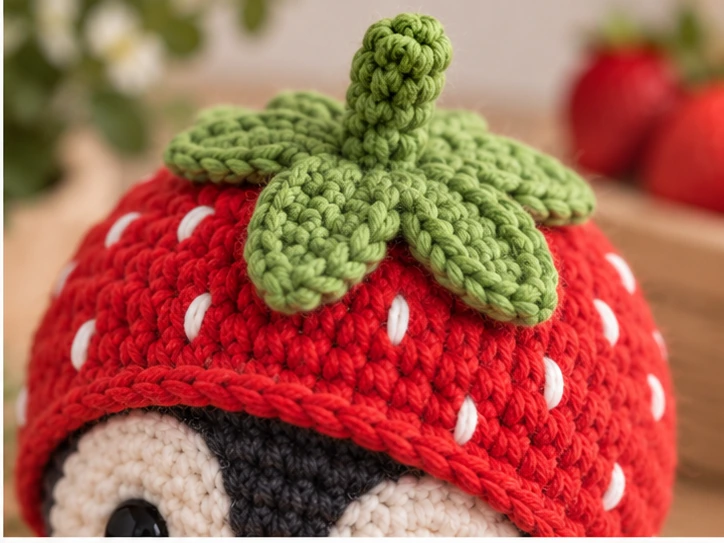
Using green yarn, create the five-point strawberry calyx.
Shape the five points according to the approved construction and fasten off with a sewing tail.
The calyx sits on top of the permanently attached red strawberry cap.
Facial Details
Embroidered Eyes
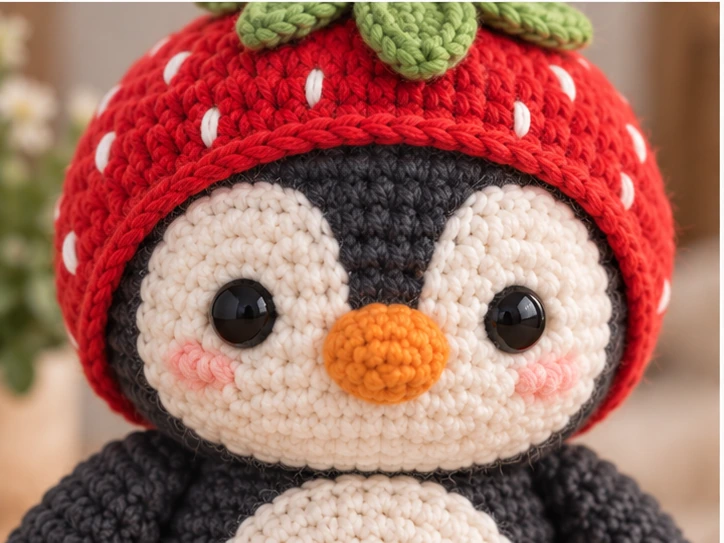
The penguin uses embroidered black eyes.
For consistent placement, use the front center of the body as your reference point and follow the established placement from the pattern.
The approved facial placement uses the face area as the visual reference rather than relying on an unsupported physical measurement.
Attach the Face Patch
Position the white or cream face patch centrally on the front of the head.
Check the placement from the front before sewing it permanently into place.
Attach the Beak
Position the orange beak centrally on the face patch beneath the eyes.
Secure it with the remaining yarn tail.
Assembly
Step 1: Prepare the Finished Pieces
Lay out:
- the completed body and head
- face patch
- belly patch
- two wings
- two feet
- beak
- strawberry cap
- green calyx
Check the paired pieces for symmetry before sewing.
Step 2: Attach the Face Patch
Place the face patch on the front of the head.
Check that it is centered, then sew it securely around its edge.
Step 3: Add the Facial Details
Embroider the black eyes according to the established placement.
Attach the orange beak centrally below the eyes.
Step 4: Attach the Belly Patch
Center the belly patch on the lower front of the body and sew it securely into place.
Step 5: Attach the Wings
Position one wing on each side of the body.
Compare both sides carefully before completing the sewing.
Step 6: Attach the Feet
Place the two orange feet beneath the lower body.
Check their position from the front so the penguin remains balanced visually.
Secure both feet with their sewing tails.
Step 7: Permanently Attach the Strawberry Cap
Position the red strawberry cap over the top of the penguin.
Make sure it is centered before sewing.
Secure the cap permanently around its attachment area.
The completed cap is part of the finished penguin construction.
Step 8: Attach the Strawberry Calyx
Place the green five-point calyx at the top of the strawberry cap.
Secure it firmly with the remaining yarn tail.
Finishing
Weave in all remaining yarn ends neatly.
Check that:
- the face patch is centered
- the eyes are aligned
- the beak is positioned correctly
- the belly patch is centered
- the wings are reasonably symmetrical
- the feet are balanced
- the strawberry cap is securely and permanently attached
- the calyx is centered
- stuffing is not visible through the stitches
Give the finished penguin a gentle final shaping with your hands.
Helpful Tips for Beginners
Use a Stitch Marker
A stitch marker makes it easier to identify the beginning of continuous rounds.
Count Frequently
Do not wait until the end of the project to discover a missed increase or decrease.
Stuff in Small Amounts
Adding small amounts of fiberfill gives you better control over the final shape.
Check Placement Before Sewing
Pin or hold components in position before permanently sewing them.
Compare Both Sides
For paired wings and feet, compare the pieces before attachment to maintain visual symmetry.
Common Mistakes and Easy Solutions
My Stitch Count Is Wrong
Return to the last round where your count was correct and check the increase or decrease sequence.
The Stuffing Is Showing
The stitches may be too loose or the piece may be overstuffed. Adjust the tension and redistribute the stuffing.
The Face Looks Off-Center
Before sewing the patch permanently, view the penguin directly from the front and adjust the position.
The Wings Look Uneven
Place both wings side by side and compare their shape and size before attachment.
The Strawberry Cap Looks Crooked
Check the cap from the front, back, and sides before completing the permanent attachment. Adjust its position while it is still being sewn into place.
Pattern Customization Ideas
You can create different versions of the strawberry penguin without changing the validated crochet structure.
Change the Strawberry Shades
Try different shades of red while keeping the green calyx for the strawberry effect.
Change the Penguin Color
A charcoal or black body is specified for the original design, but different dark shades can create a different character appearance.
Experiment With the Belly Color
White and cream are both established color options for the light sections.
Create Different Expressions
Small changes to embroidered facial details can give the penguin a different personality while keeping the underlying construction unchanged.
Size and Color Suggestions
The finished penguin is approximately 5–6 inches, although actual size varies with yarn, hook, tension, stuffing, and technique.
The original palette uses:
- Charcoal/black for the penguin
- White/cream for the face and belly
- Red for the strawberry cap
- Green for the calyx
- Orange for the beak and feet
Care
Because the finished piece contains embroidered details and sewn components, handle it gently.
For general care:
- Keep it clean and dry.
- Avoid pulling on the embroidered facial details.
- Check sewn components periodically.
- Store it away from excessive moisture.
- Follow the care recommendations appropriate for the yarn used.
The finished project has not been physically tested for washing or long-term wear, so no specific washing method is guaranteed.
Frequently Asked Questions
How big is the finished crochet strawberry penguin?
The finished penguin is approximately 5–6 inches tall. Actual size can vary according to yarn, hook, tension, stuffing, and individual technique.
What yarn weight should I use?
The pattern uses medium/worsted-weight (#4) yarn.
What crochet hook size is required?
Use a 3.5 mm crochet hook.
What colors do I need?
You will need charcoal or black, white or cream, red, green, and orange yarn.
What is the strawberry cap made from?
The strawberry cap is crocheted with red yarn and finished with a green five-point calyx.
Is the strawberry cap removable?
No. The strawberry cap is permanently attached to the penguin as part of the finished construction.
How are the eyes made?
The eyes are embroidered using black yarn or embroidery thread.
Does the penguin need stuffing?
Yes. Polyester fiberfill is used to give the main body its shape.
Has this crochet pattern been physically tested?
The pattern has been mathematically reviewed and constructionally checked, but it has not been physically crocheted and tested.
Can I change the colors?
Yes. Color changes can be used to create your own variation while keeping the original crochet construction unchanged.
Final Thoughts
This crochet strawberry penguin brings together a recognizable penguin silhouette and a playful strawberry theme in one character.
With its dark body, contrasting face and belly, orange details, embroidered eyes, and permanently attached strawberry cap topped with a green calyx, it makes a distinctive addition to an animal amigurumi collection.
Take your time with the stitch counts and assembly, especially when positioning the face, wings, feet, and strawberry cap. Careful placement will help the finished character maintain a balanced appearance.
Similar Crochet Projects
If you enjoy making animal amigurumi and themed crochet characters, explore more projects from Tiny Yarn Tales, including:
- Plush Crochet Duck Amigurumi Pattern
- Crochet Bunny & Strawberry Keychain Amigurumi
- Crochet Orange Amigurumi Pattern
- Baby Jellyfish Keychain Amigurumi Pattern
- Crochet Pumpkin Turtle Pattern
- Crochet animal amigurumi projects and character patterns